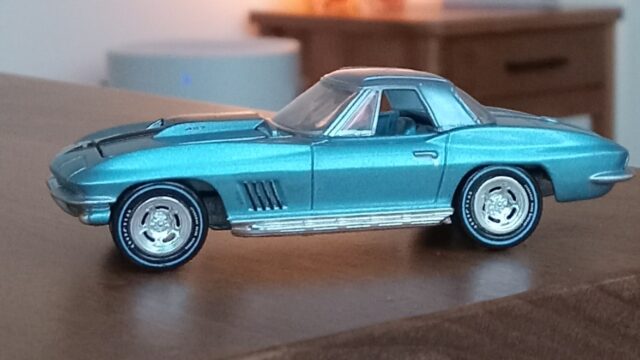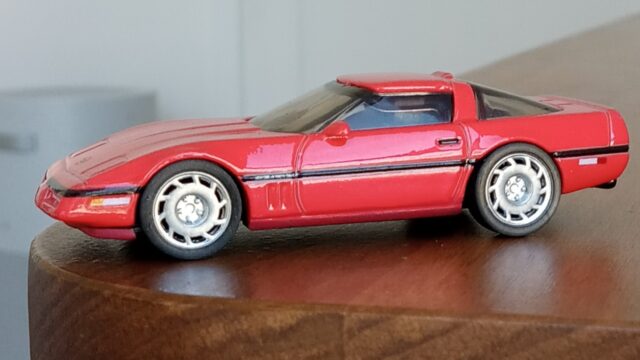
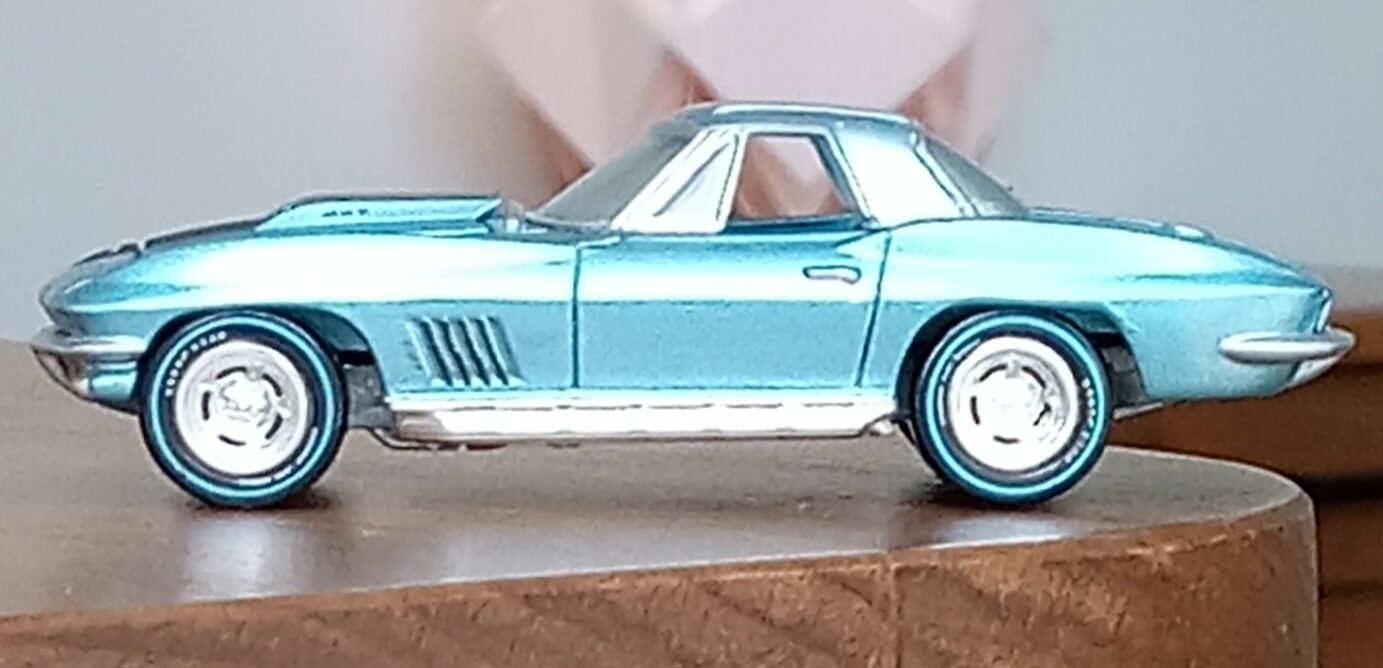
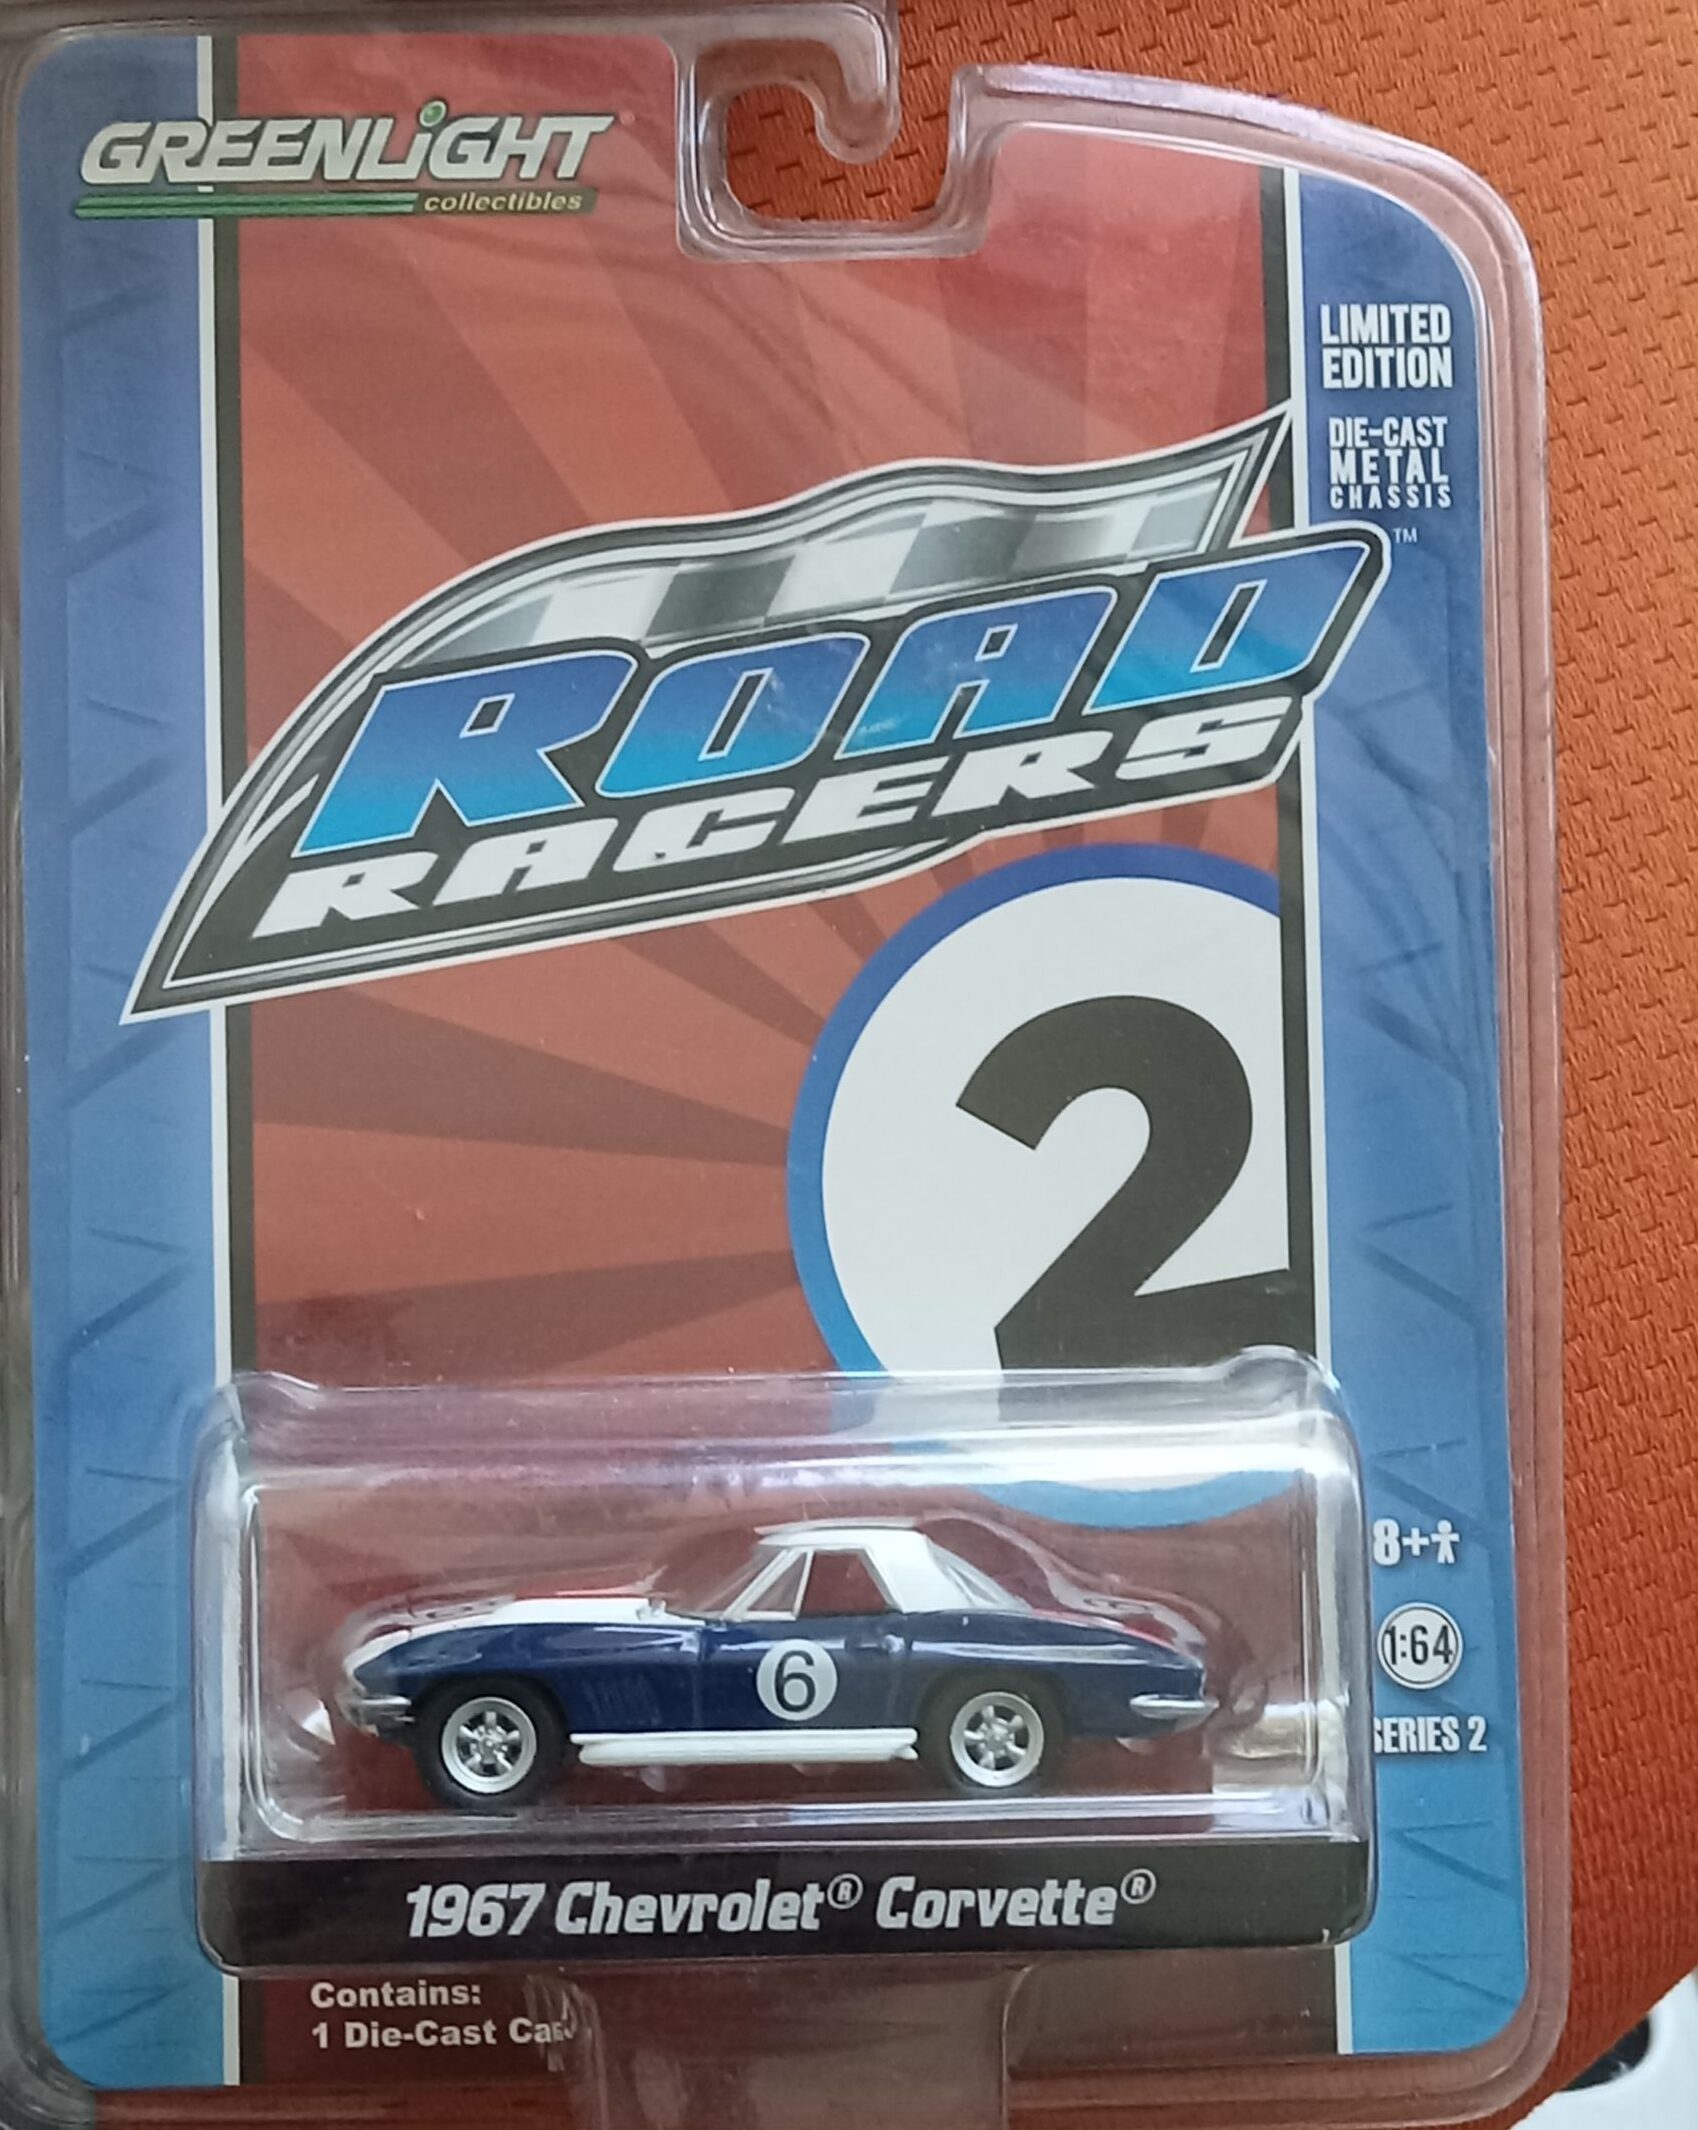
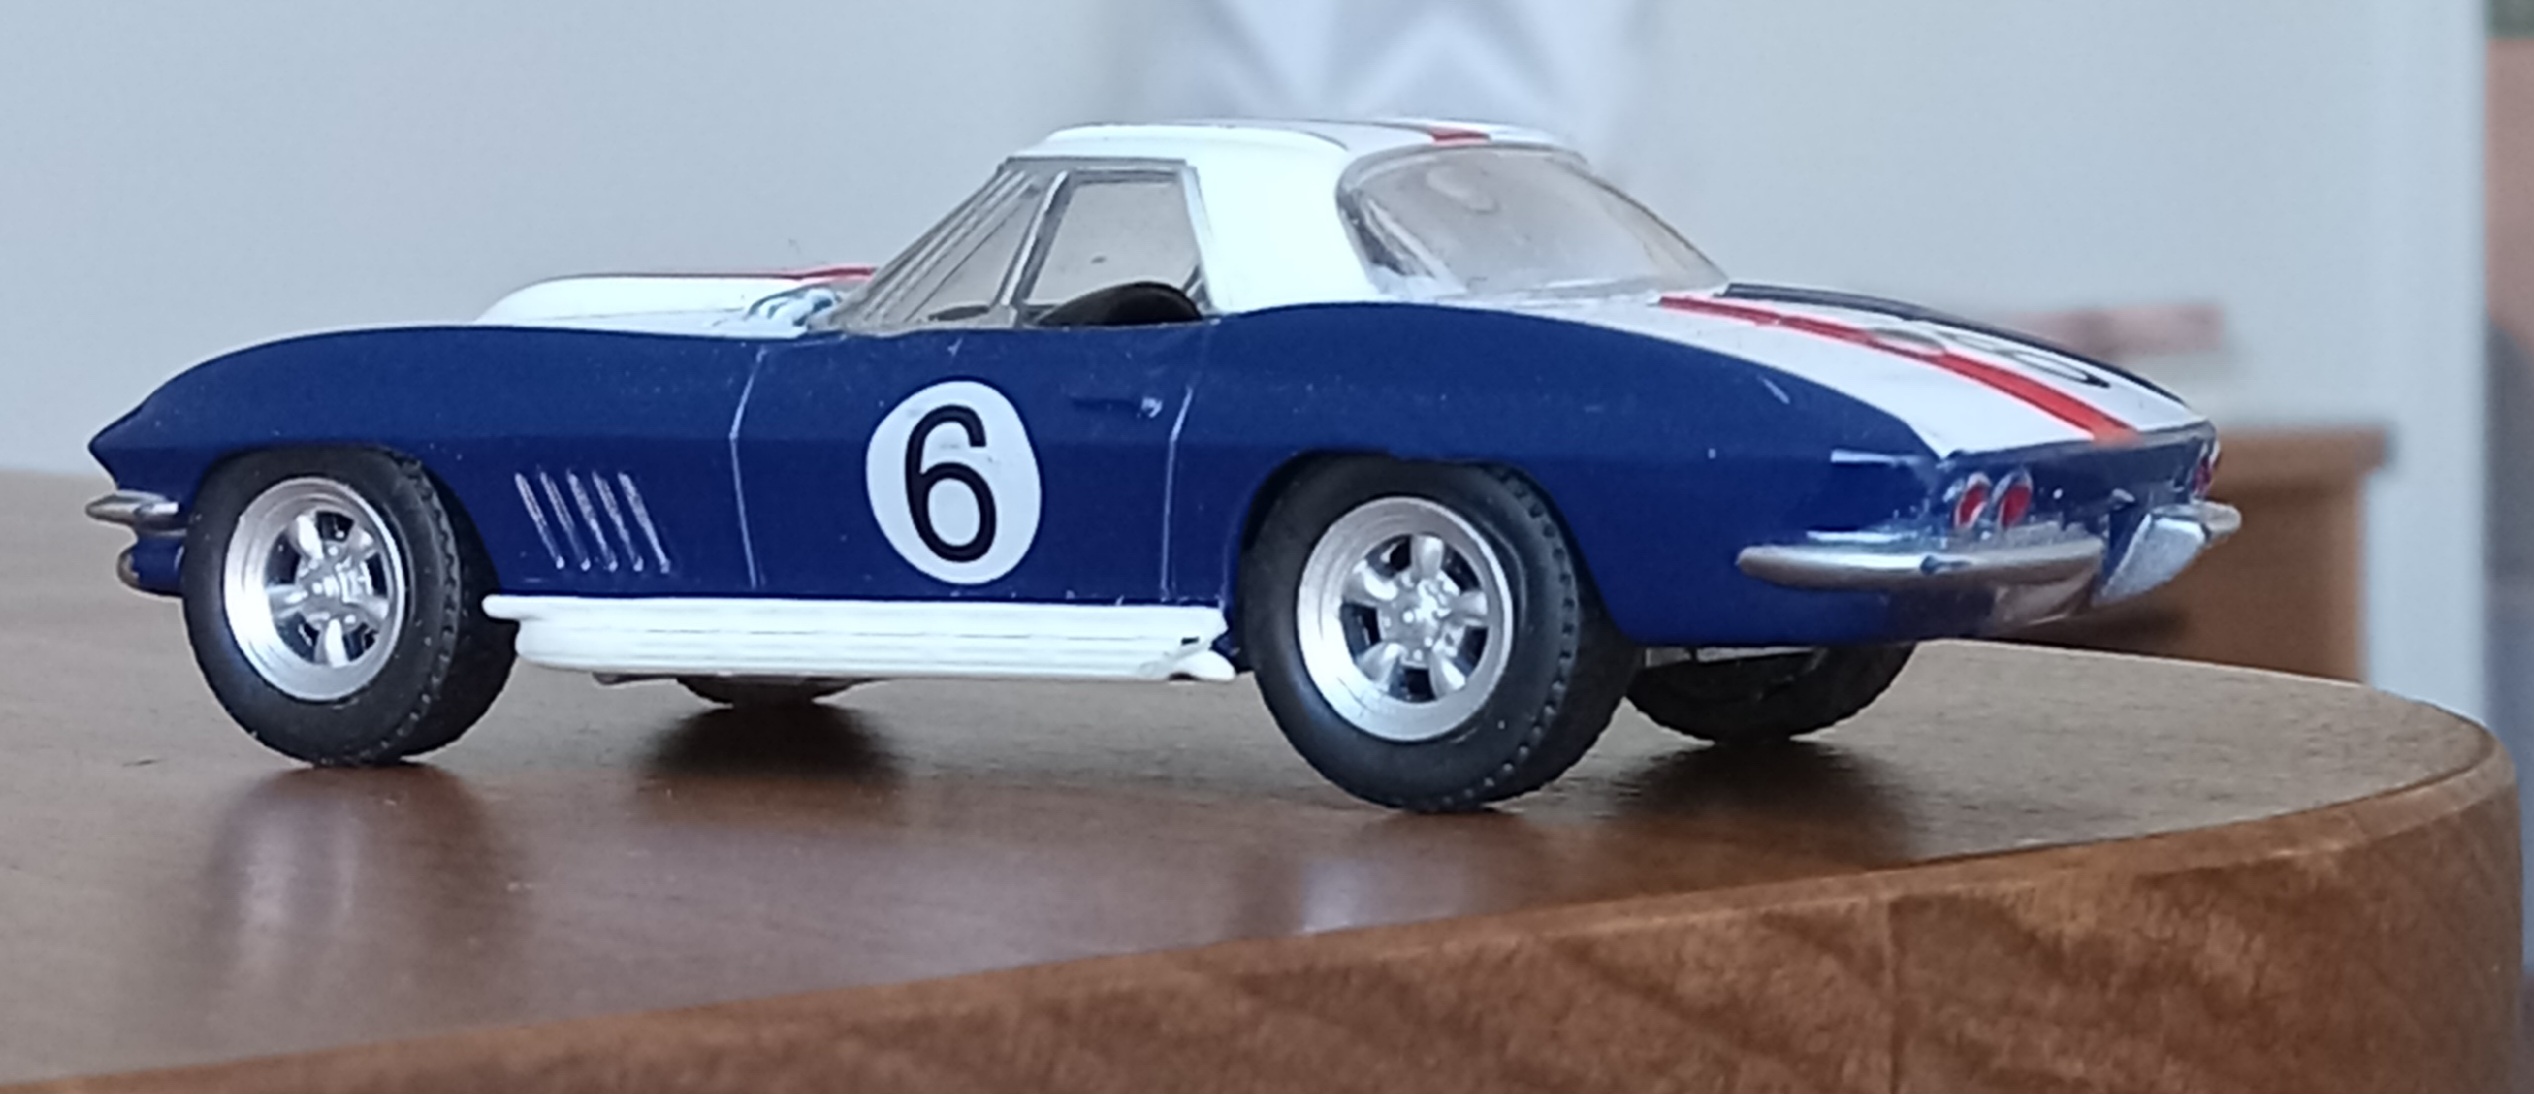
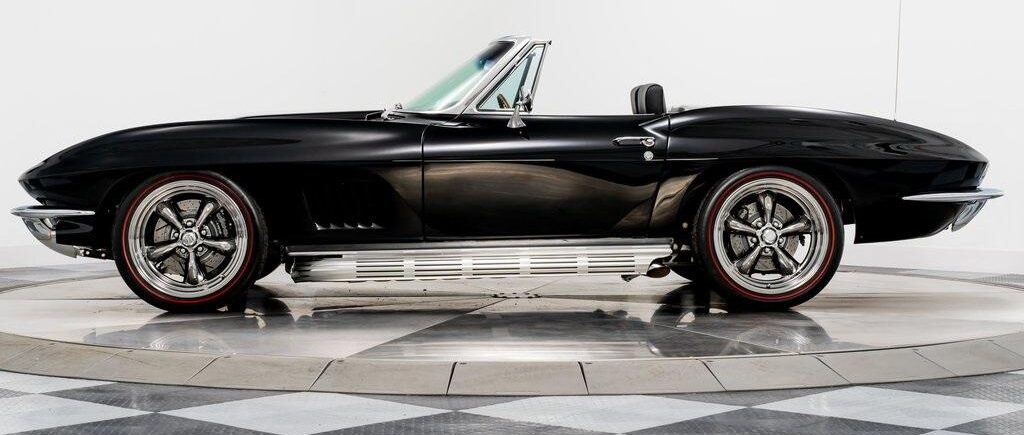
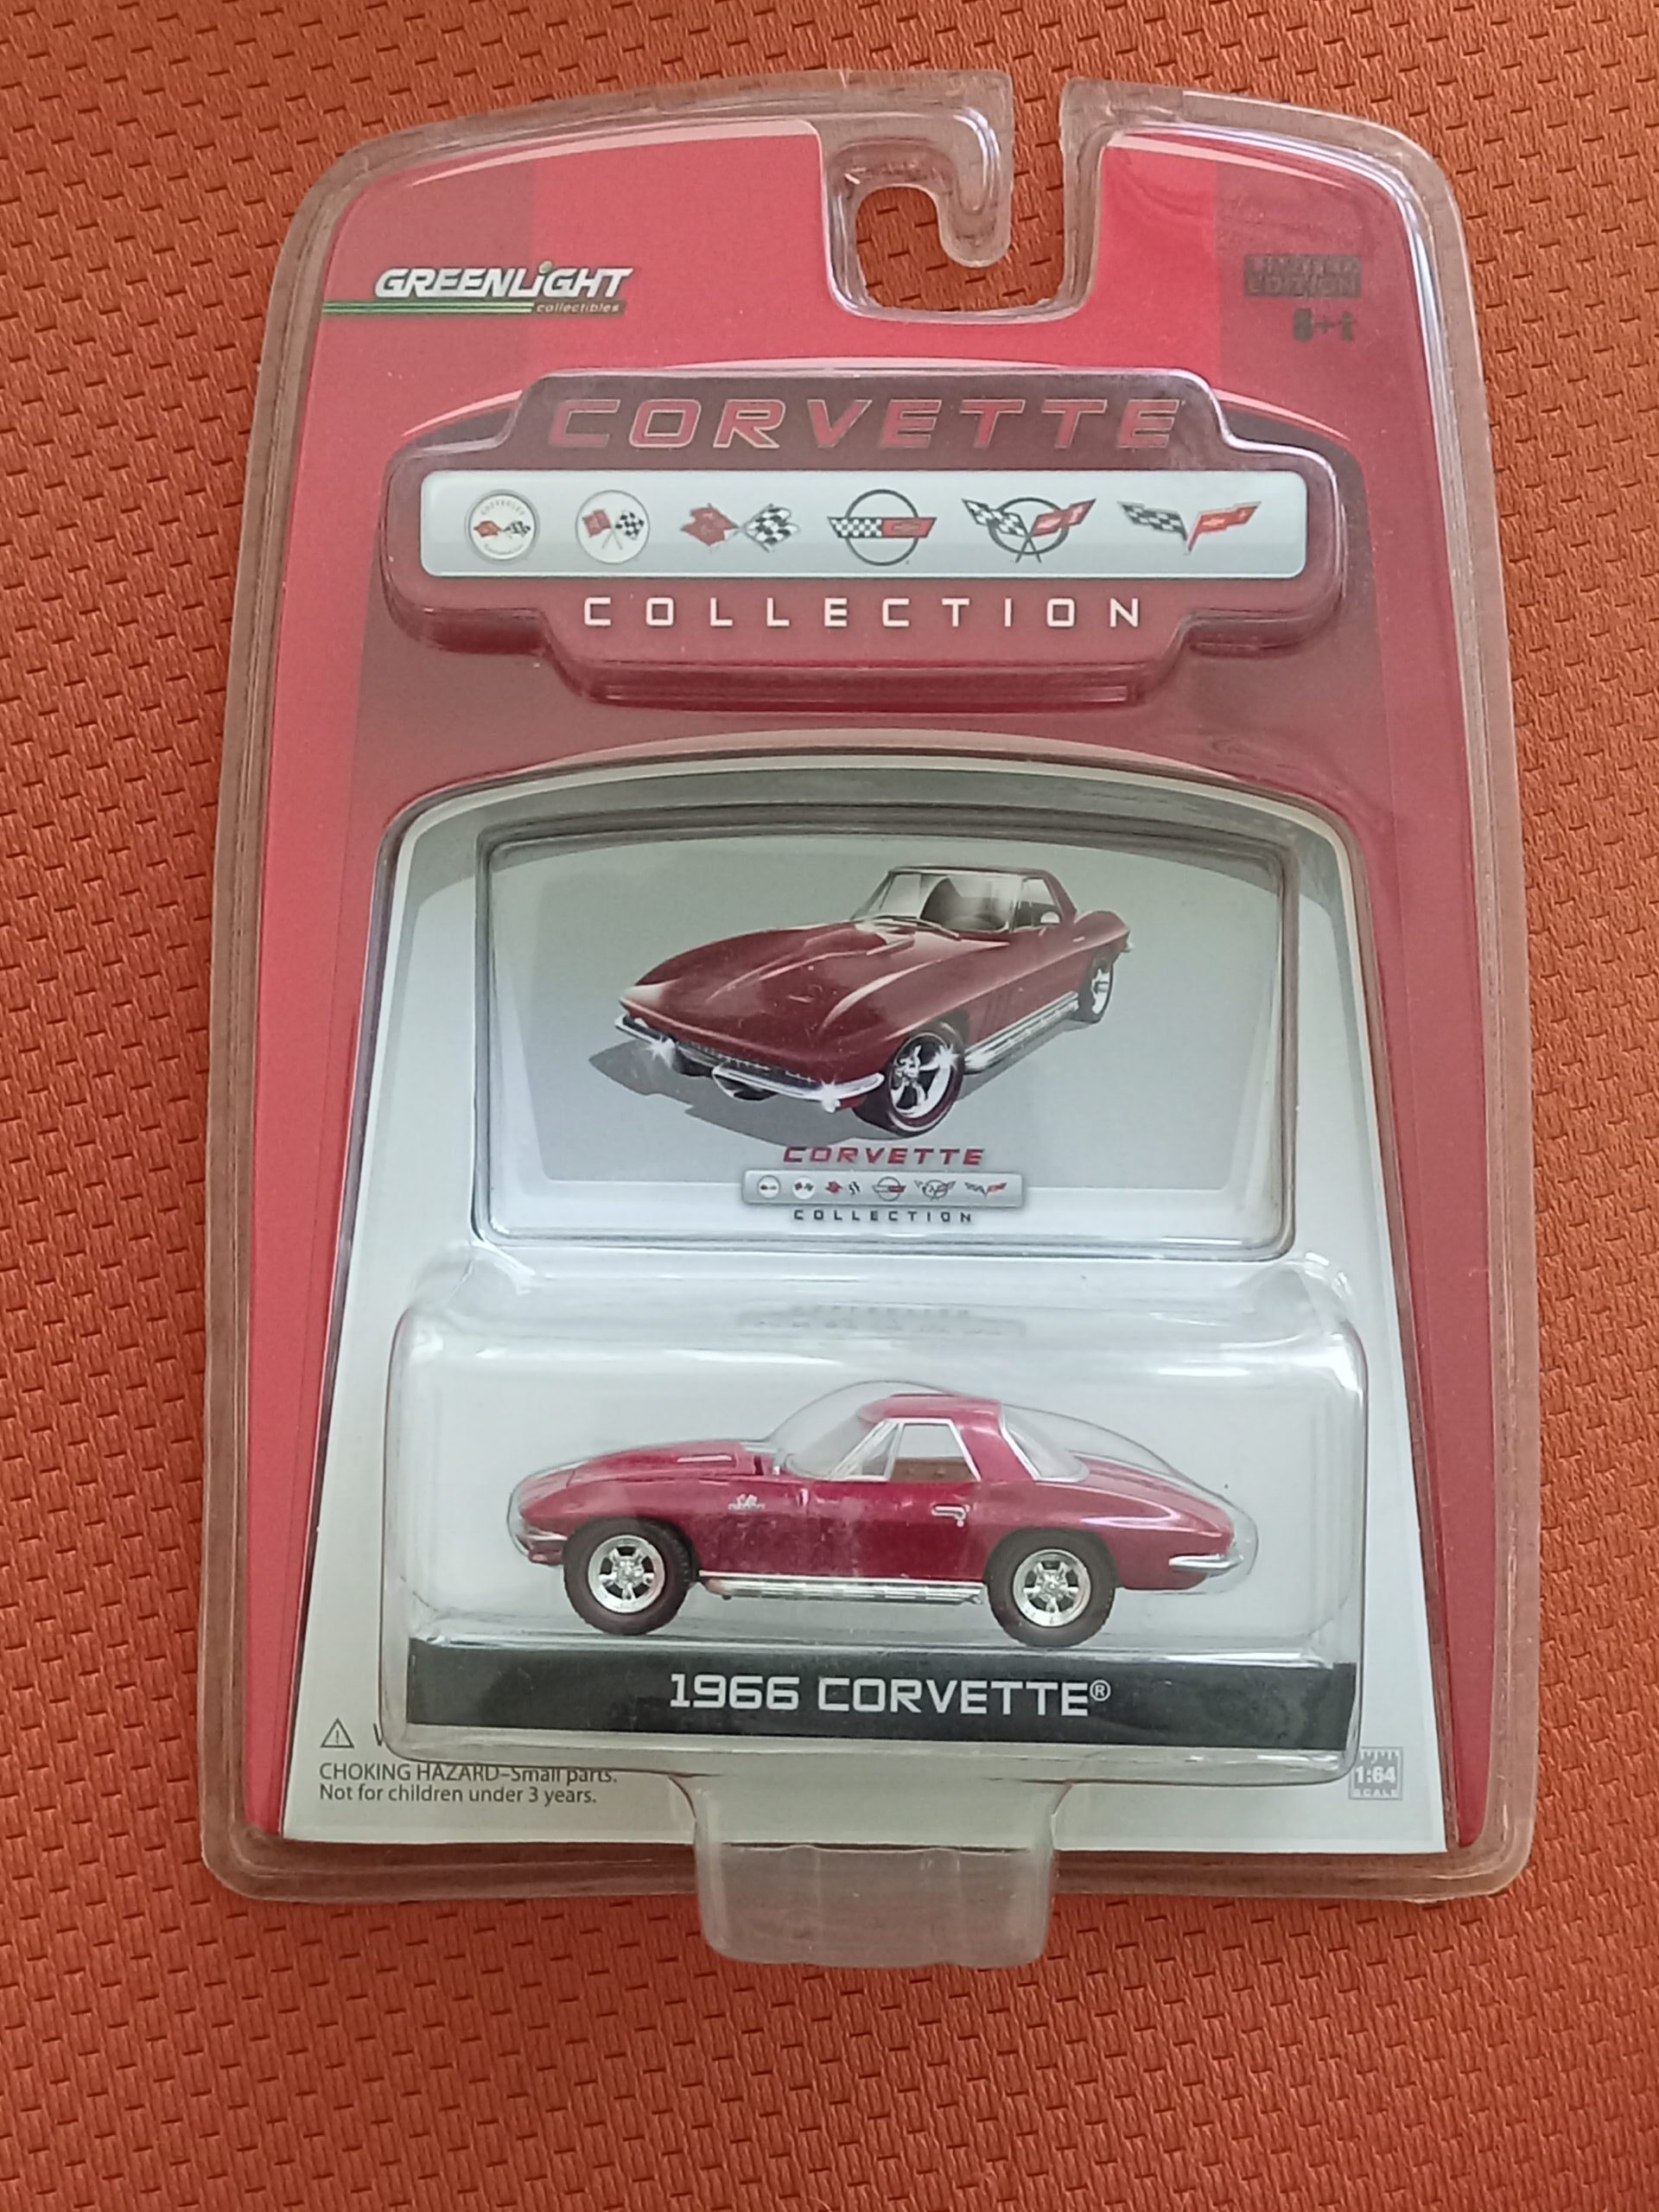
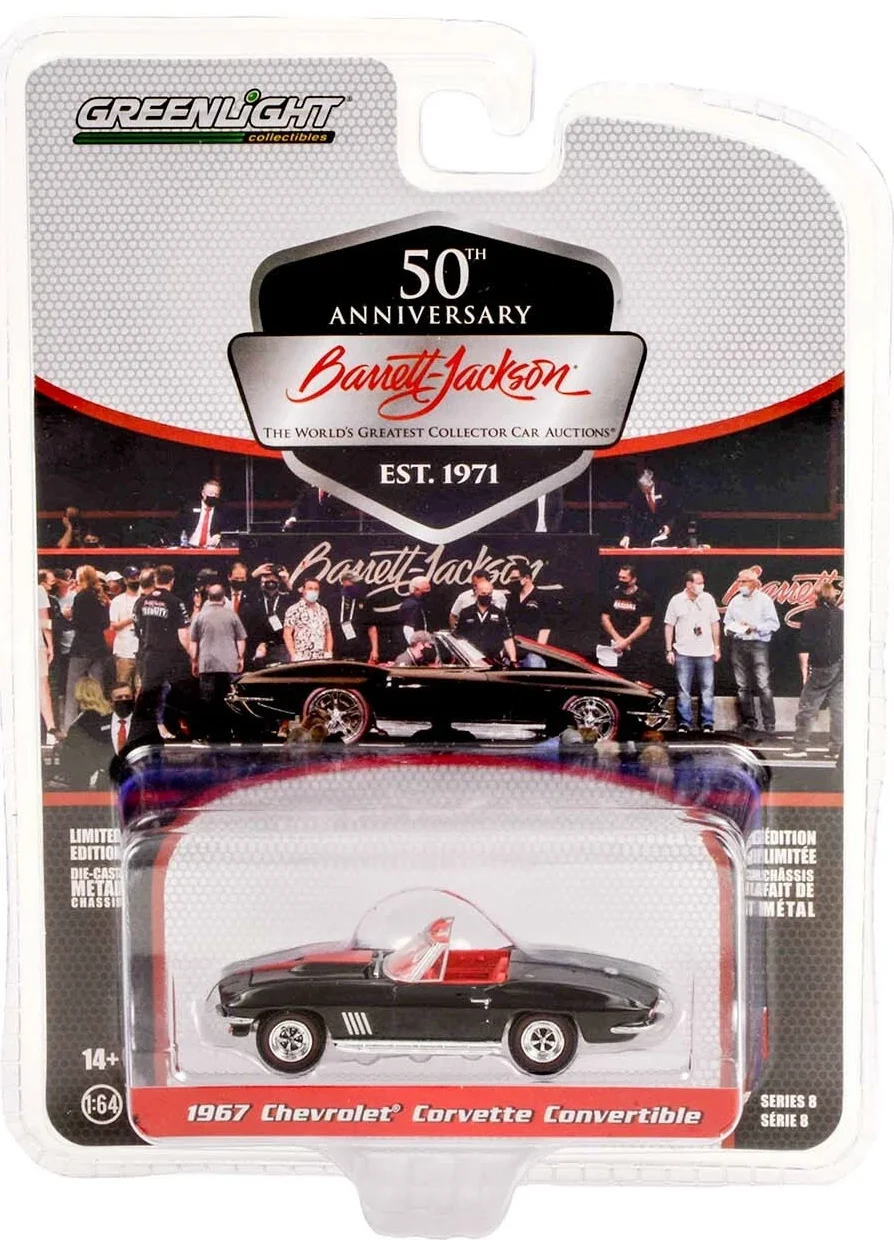
*第3回:グリーンライト社製、1/64 コルベット・スティングレー(コンバーチブル) C2、1967【タイヤ&ホイール交換、ハード・トップに追加工作】
立体改造プロジェクト第003回は、
『1967年型コルベットのロードスター、
ハードトップ付き』ですが、
この改造過程は、
とんでもなく難しいプロジェクトに
なってしまいました。泣/嬉
まず速攻での解決を目指し、(3月10日前後)
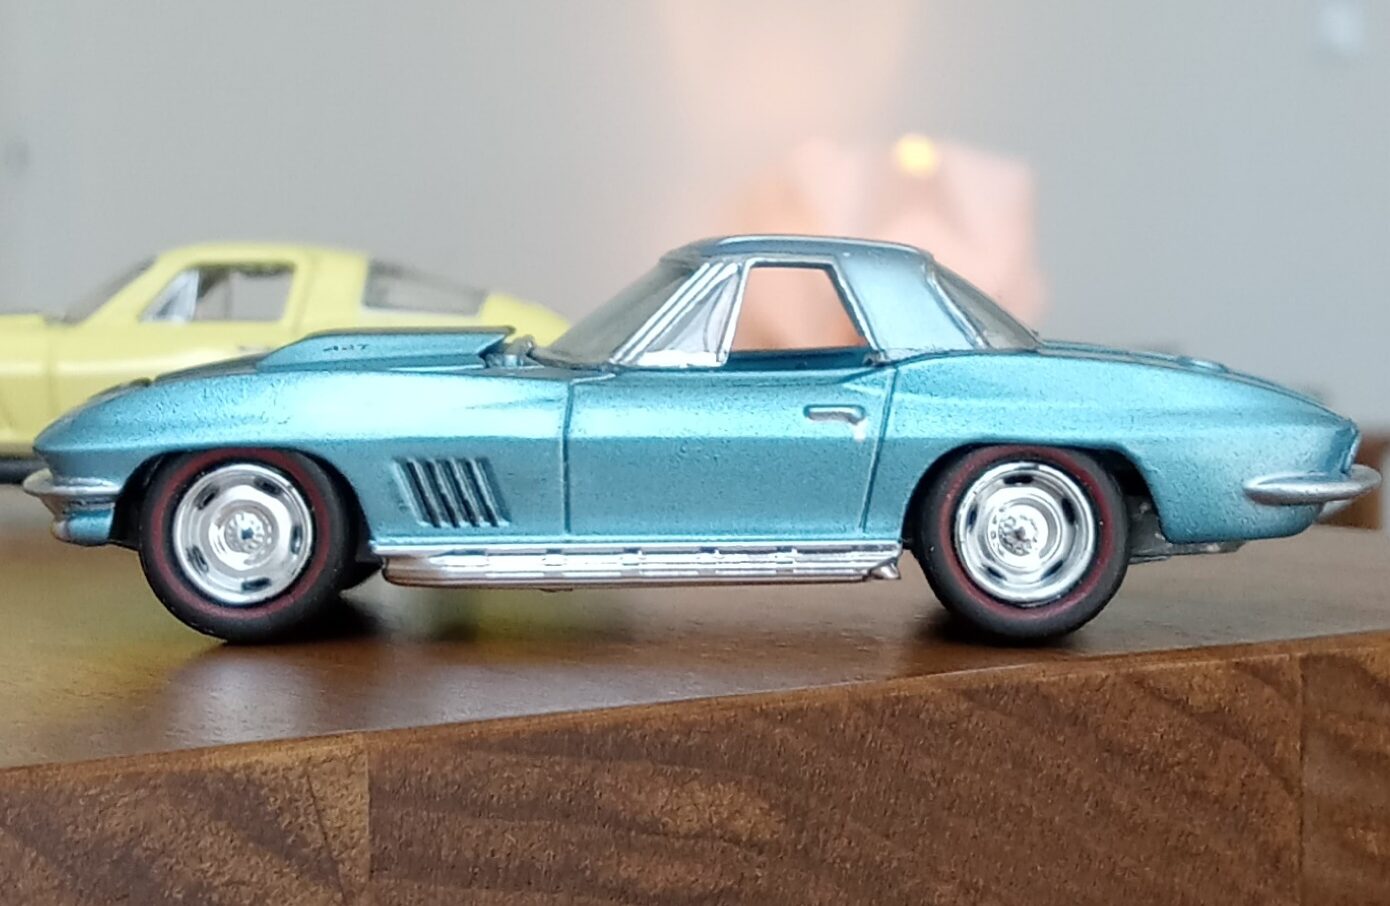
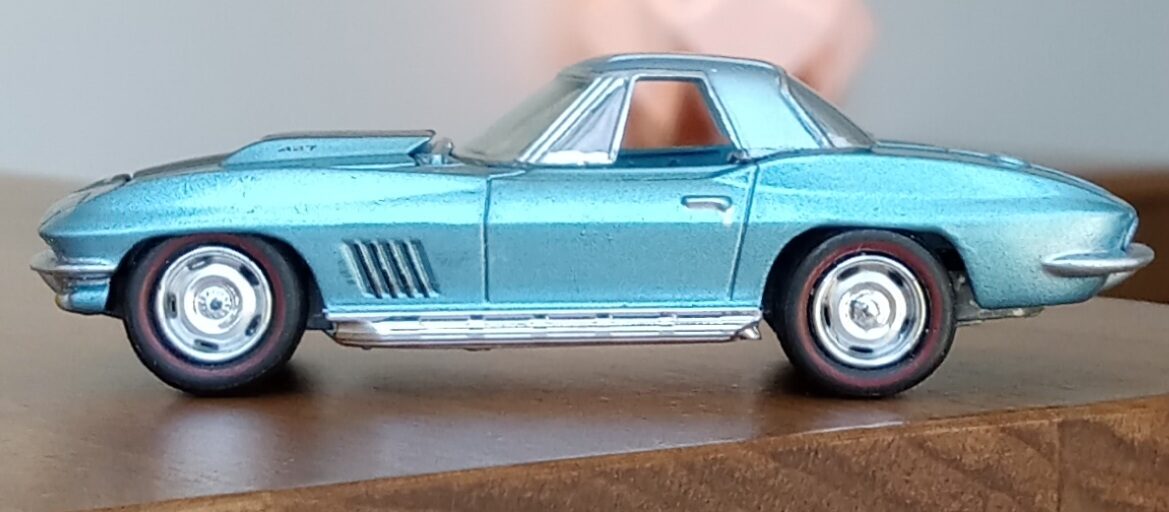
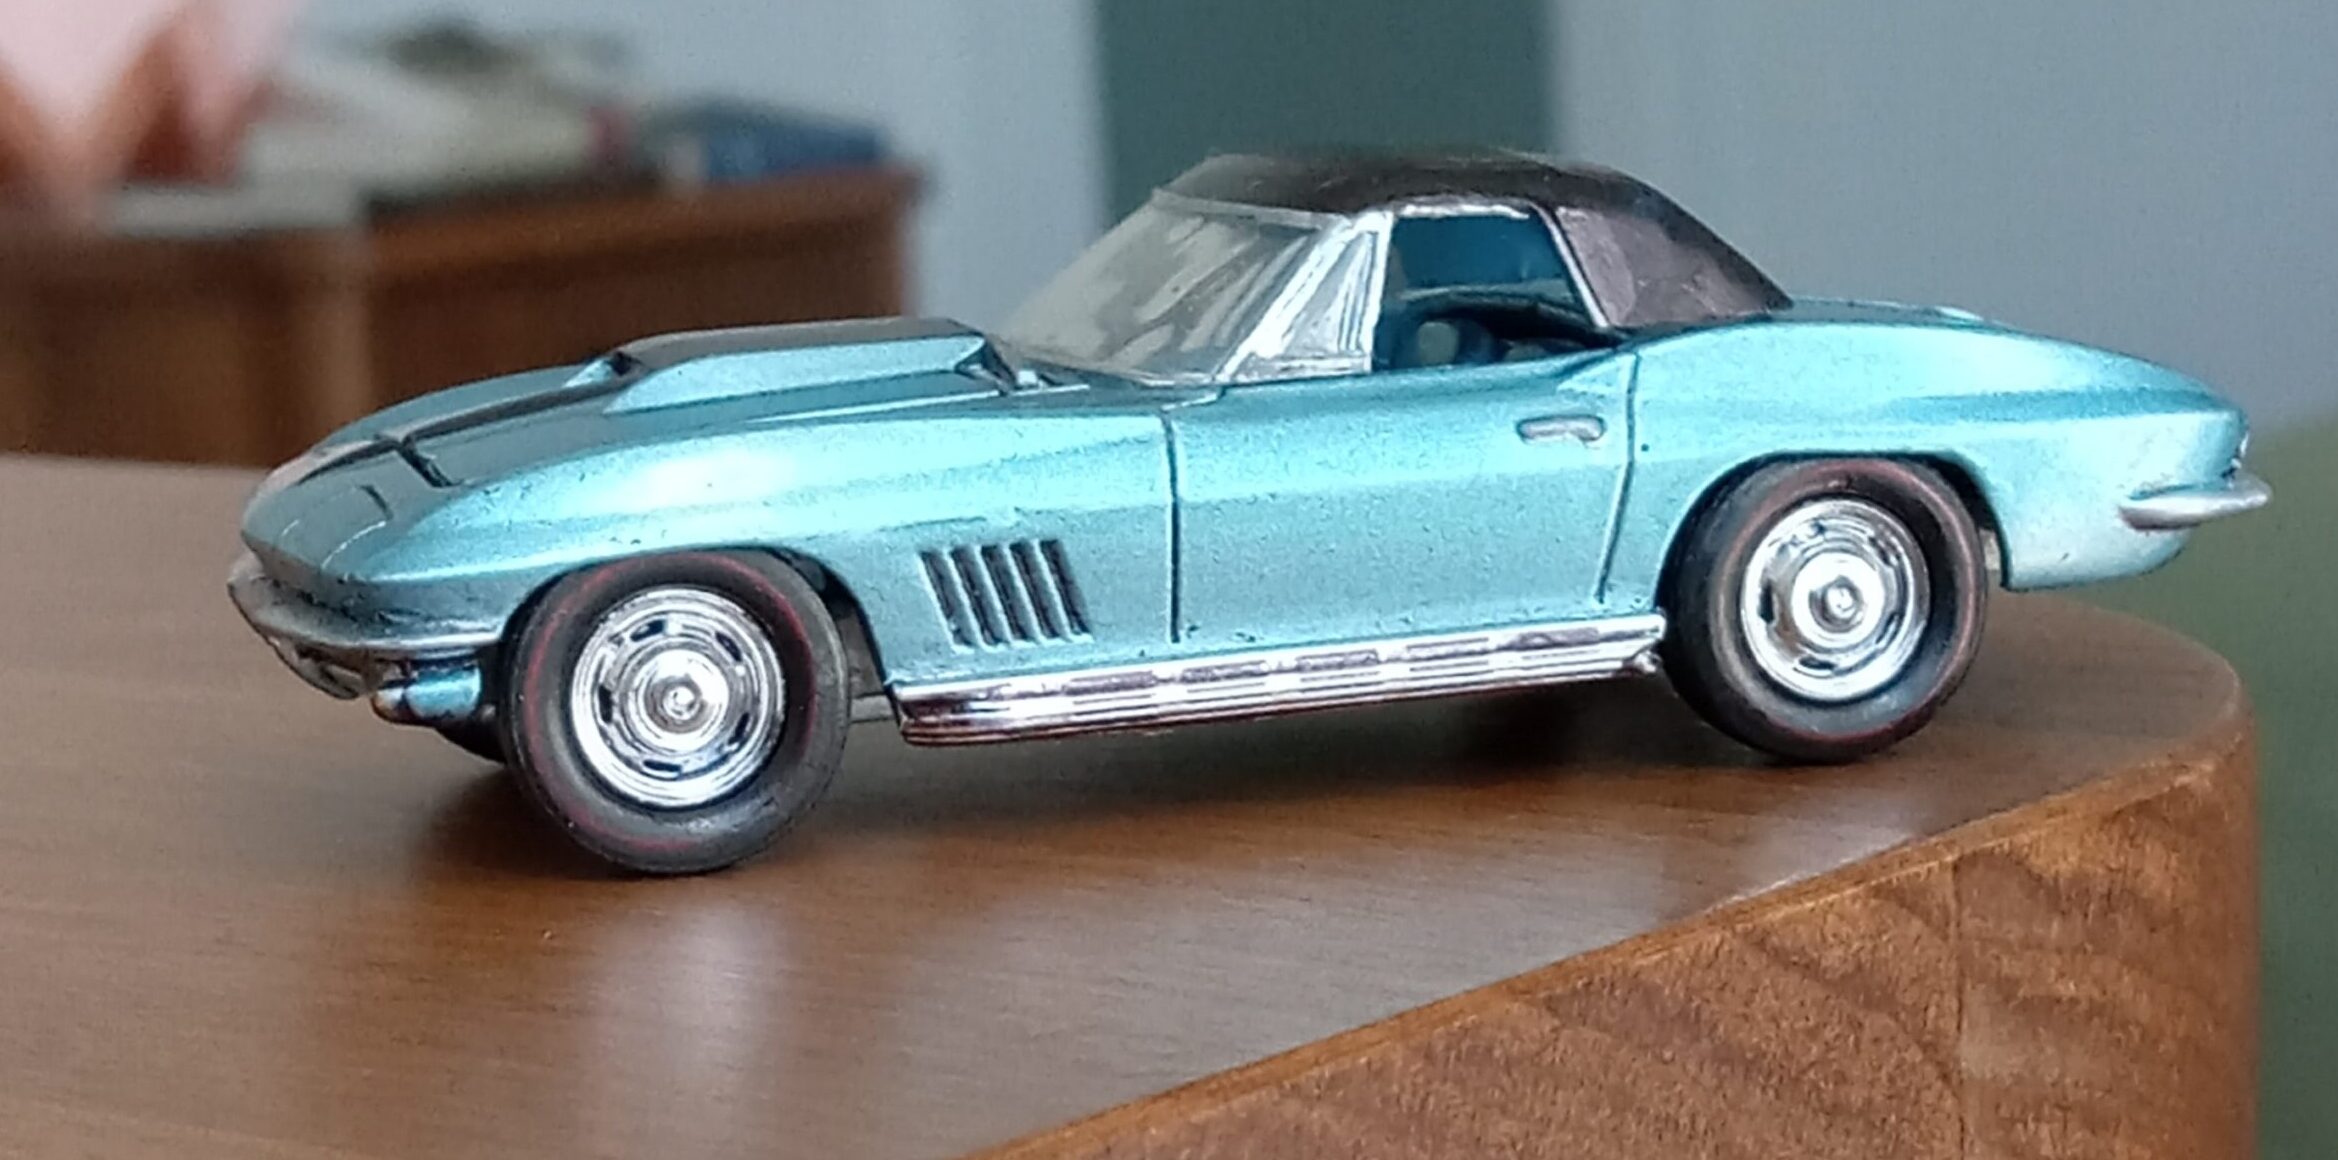
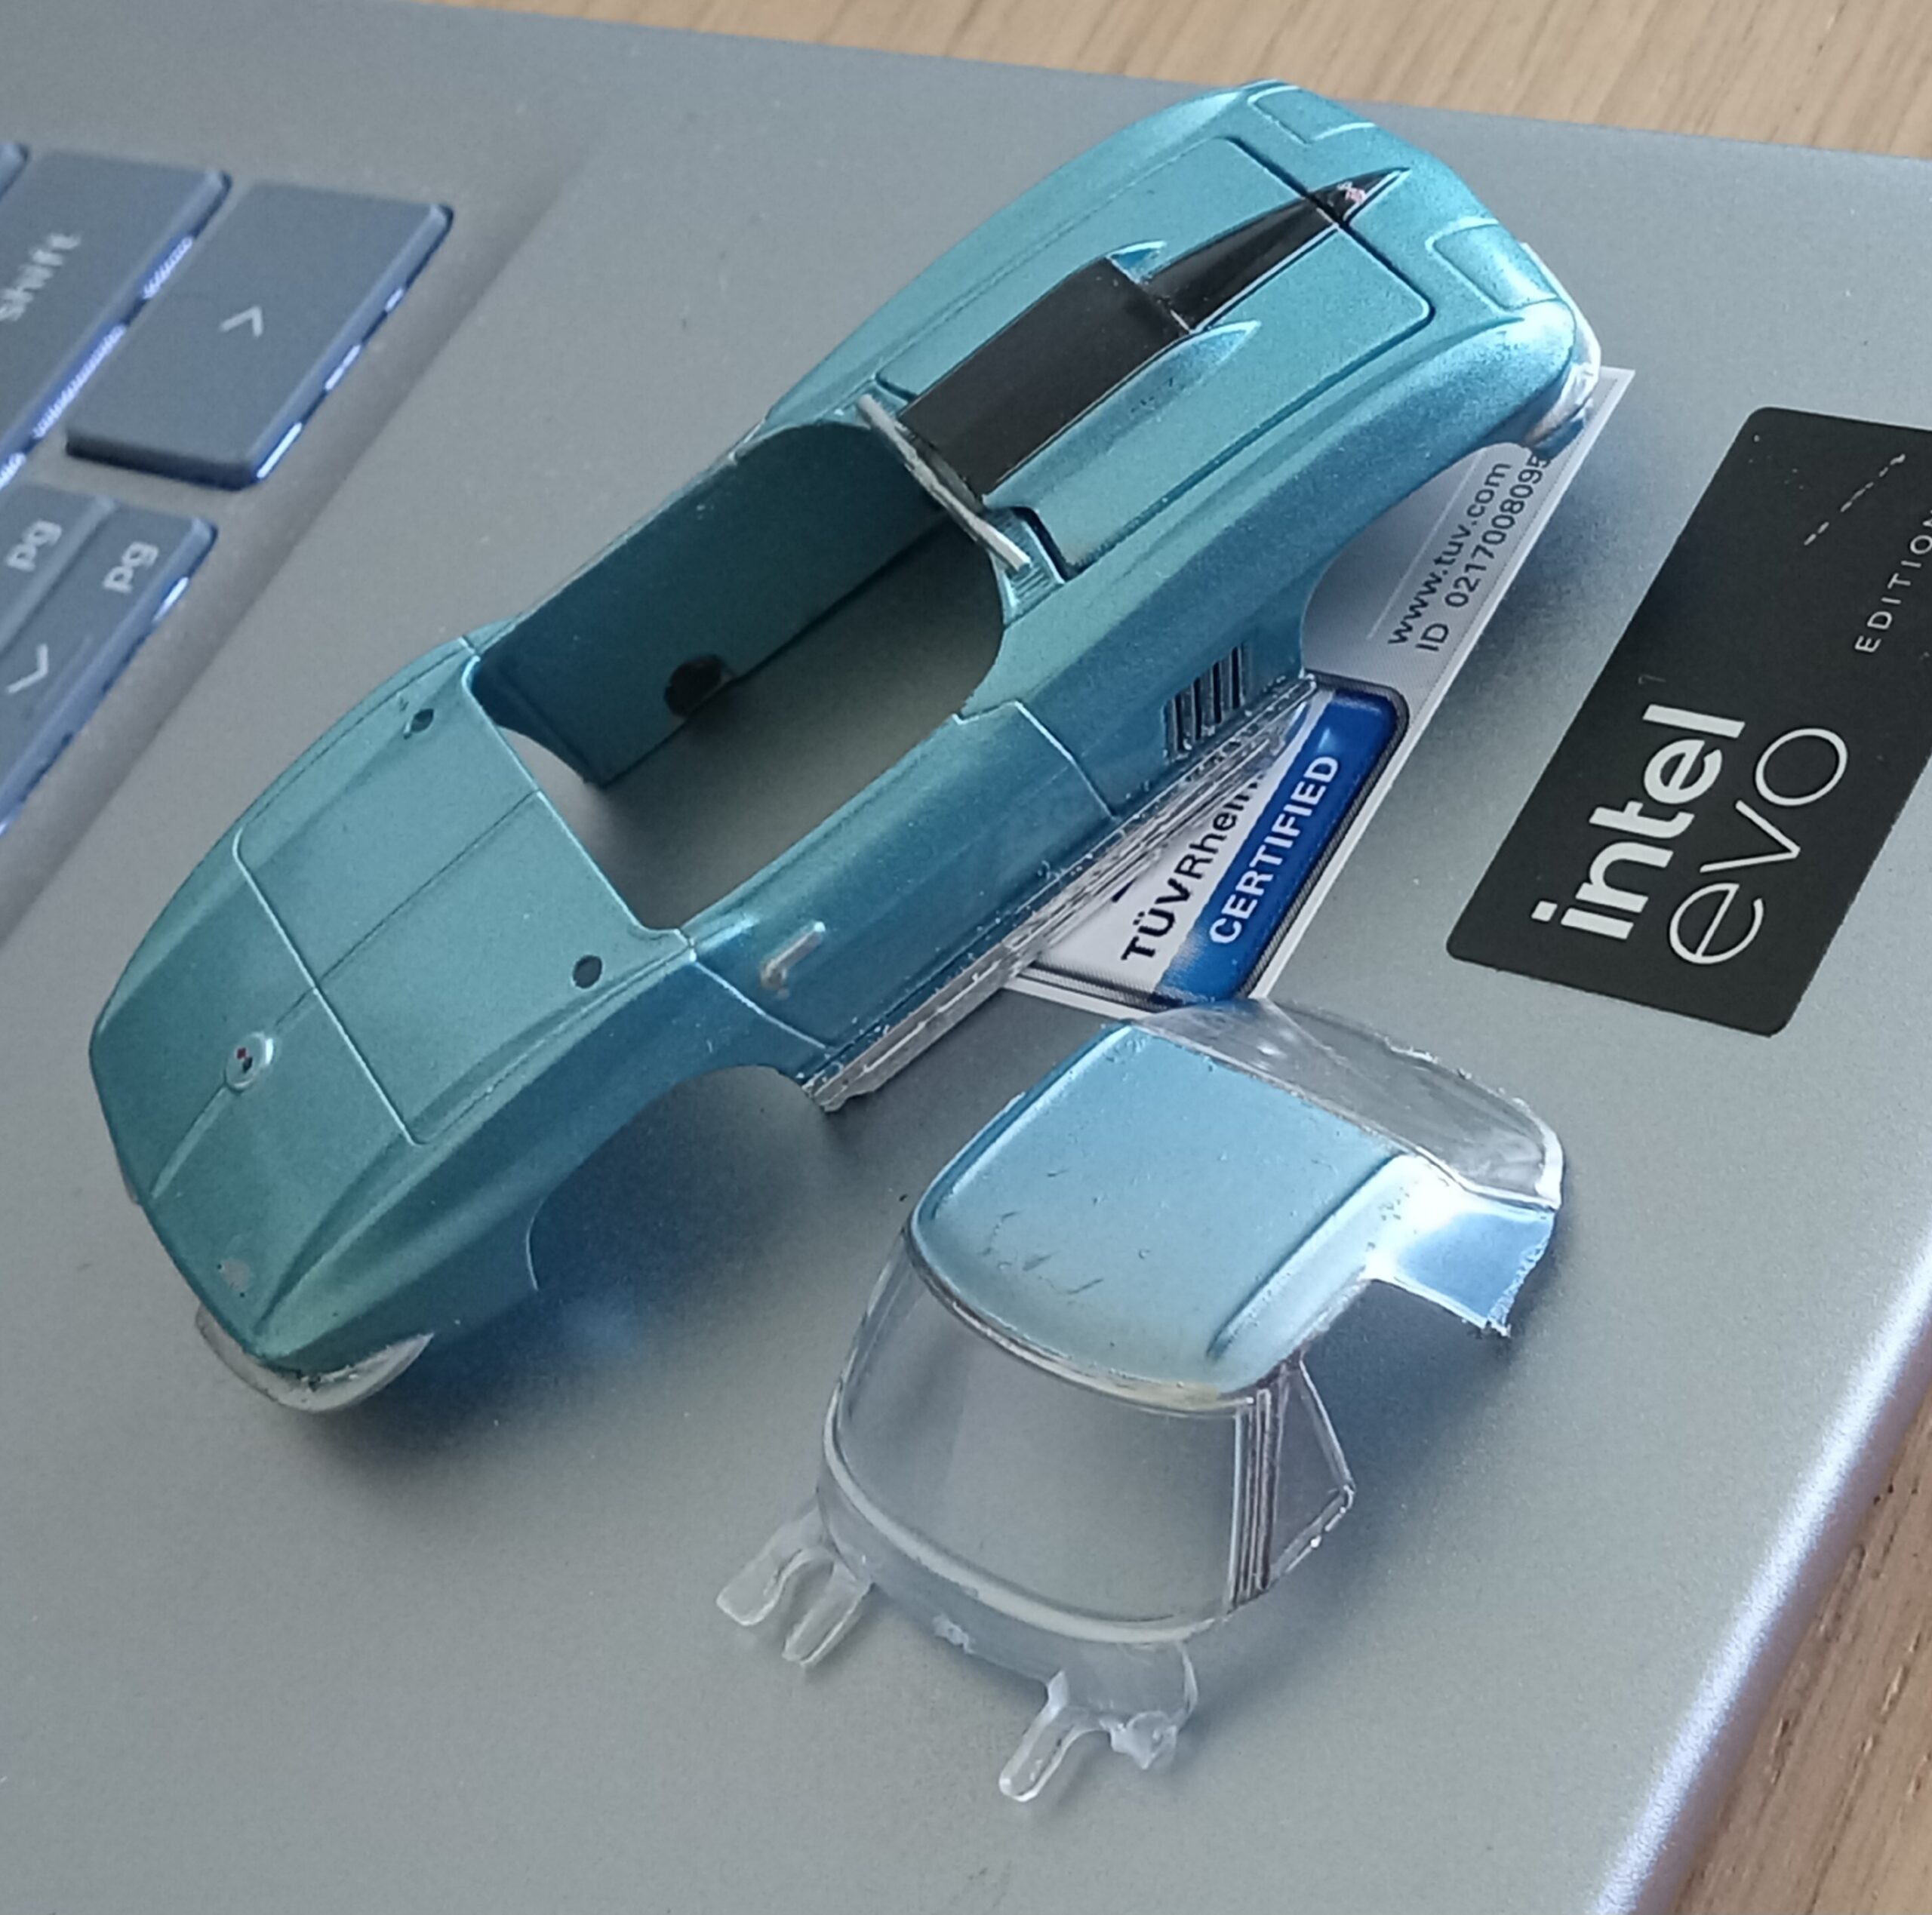
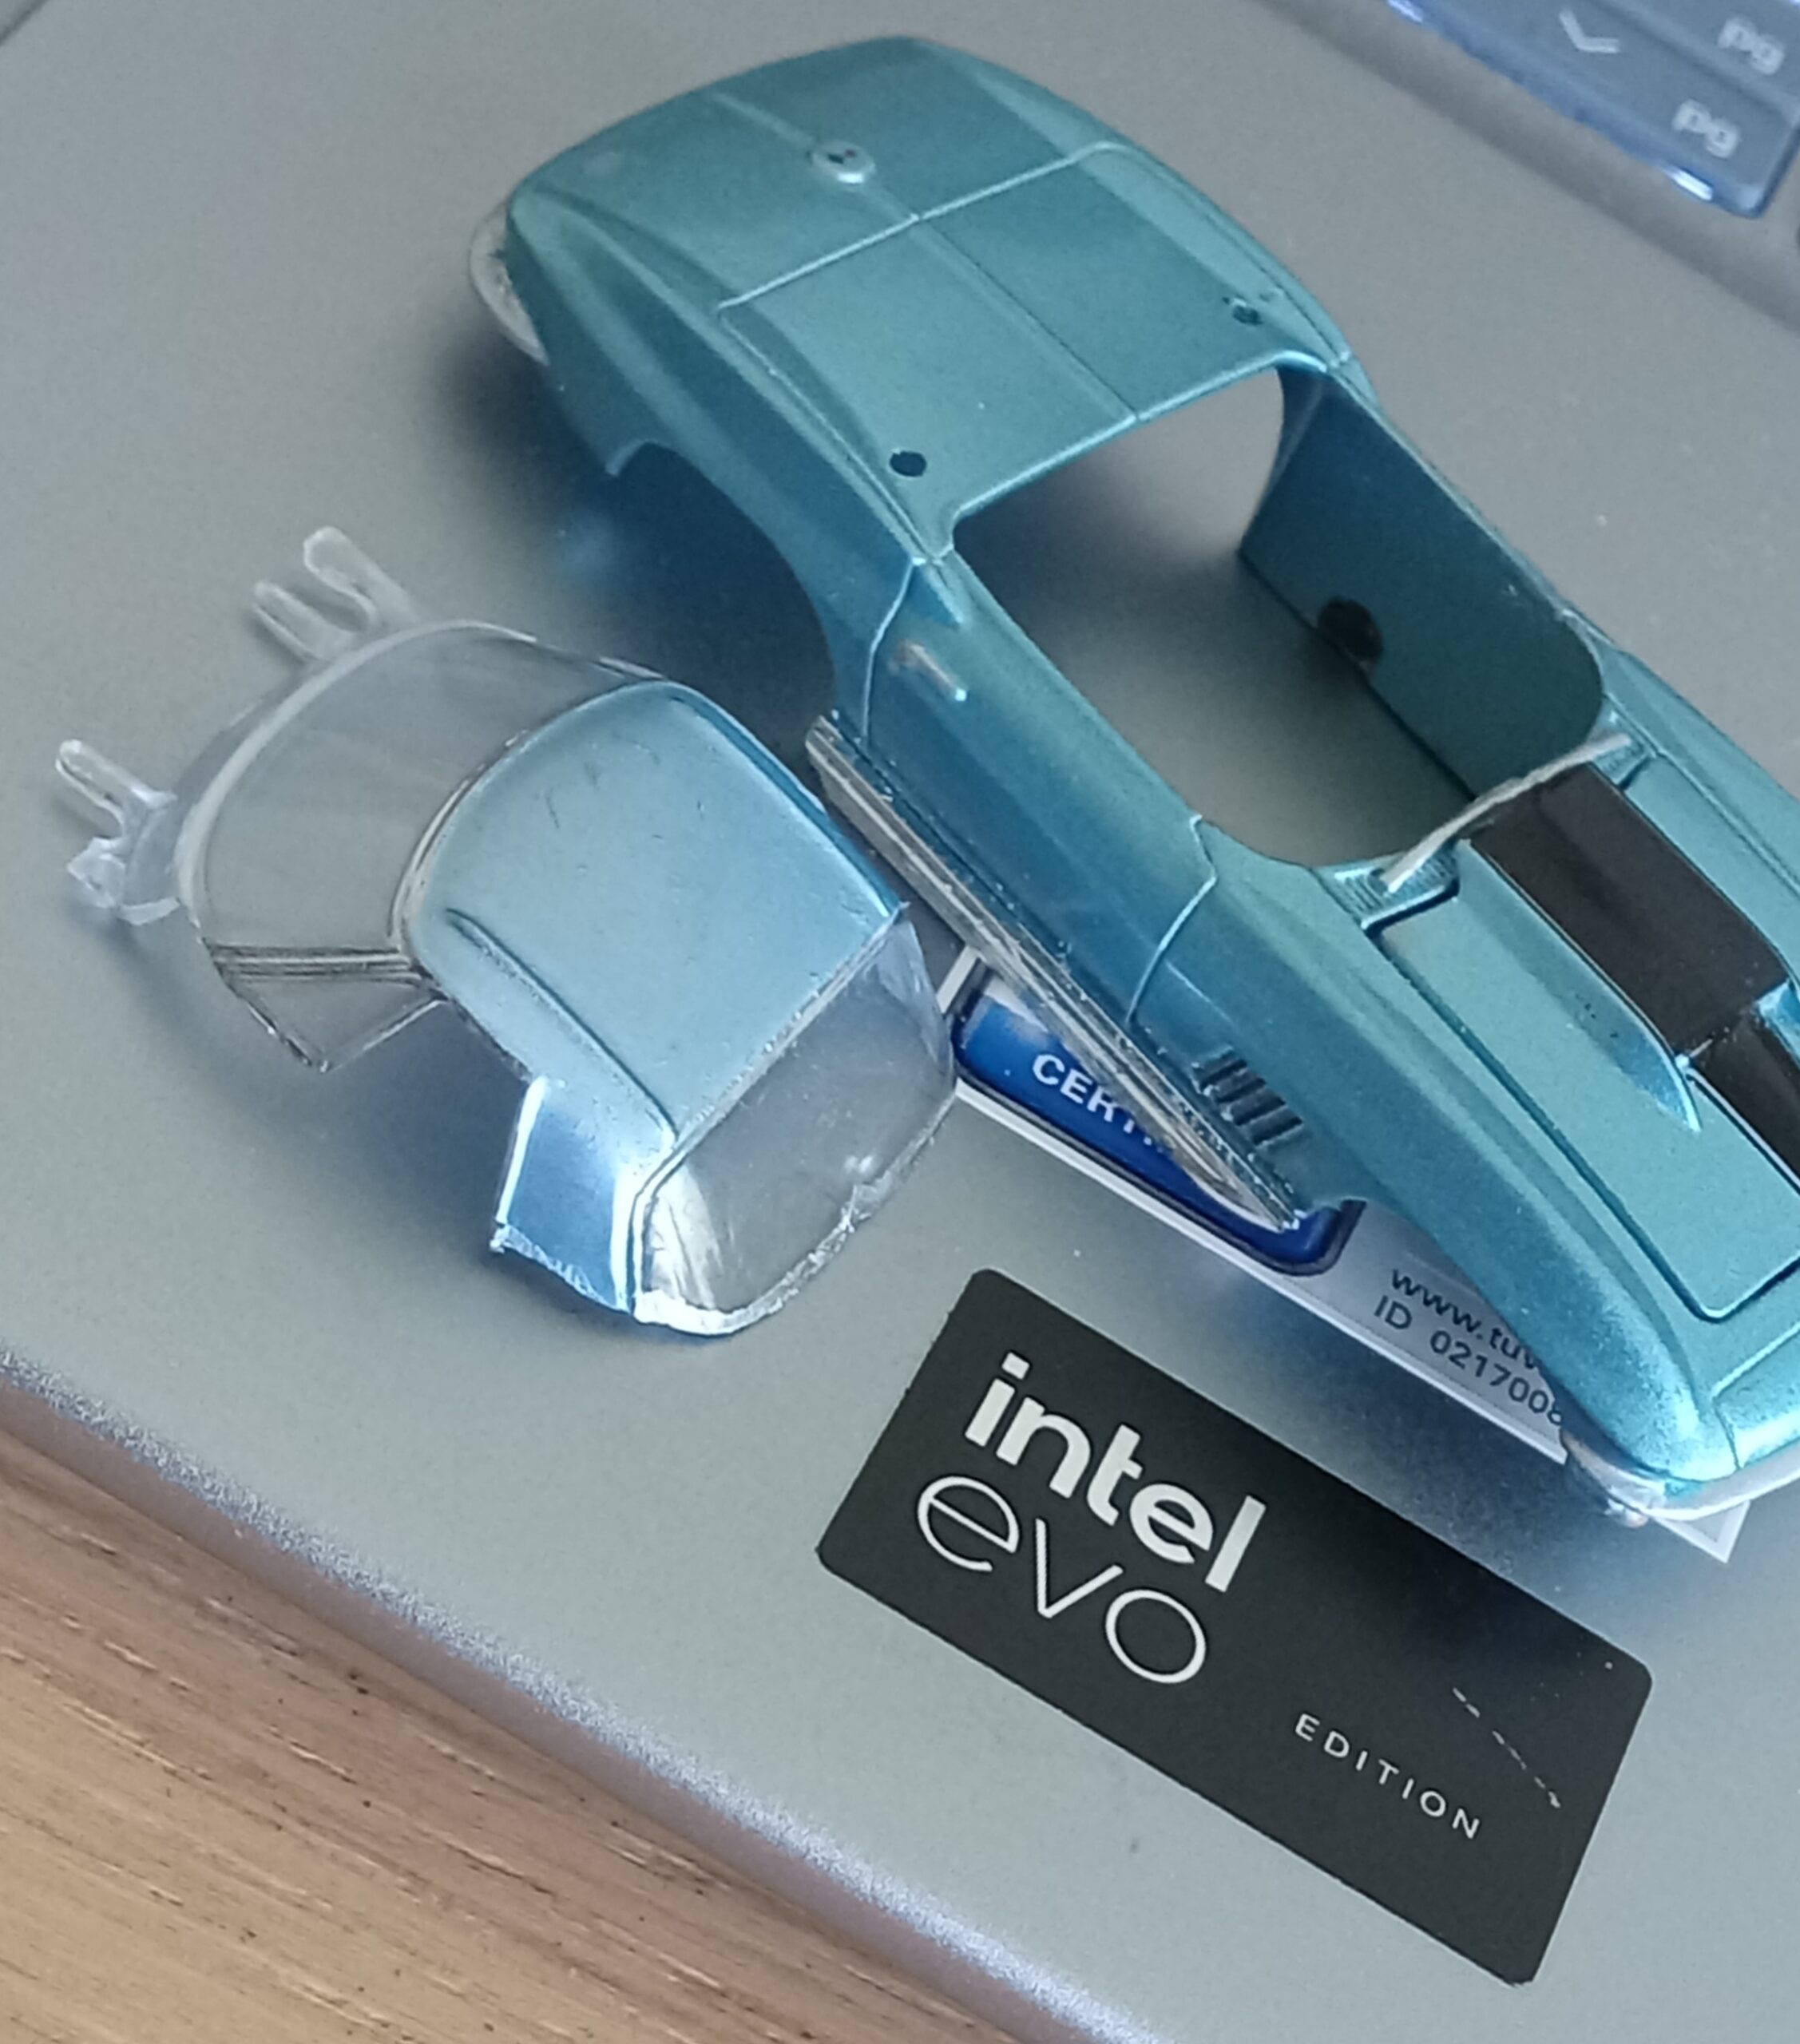
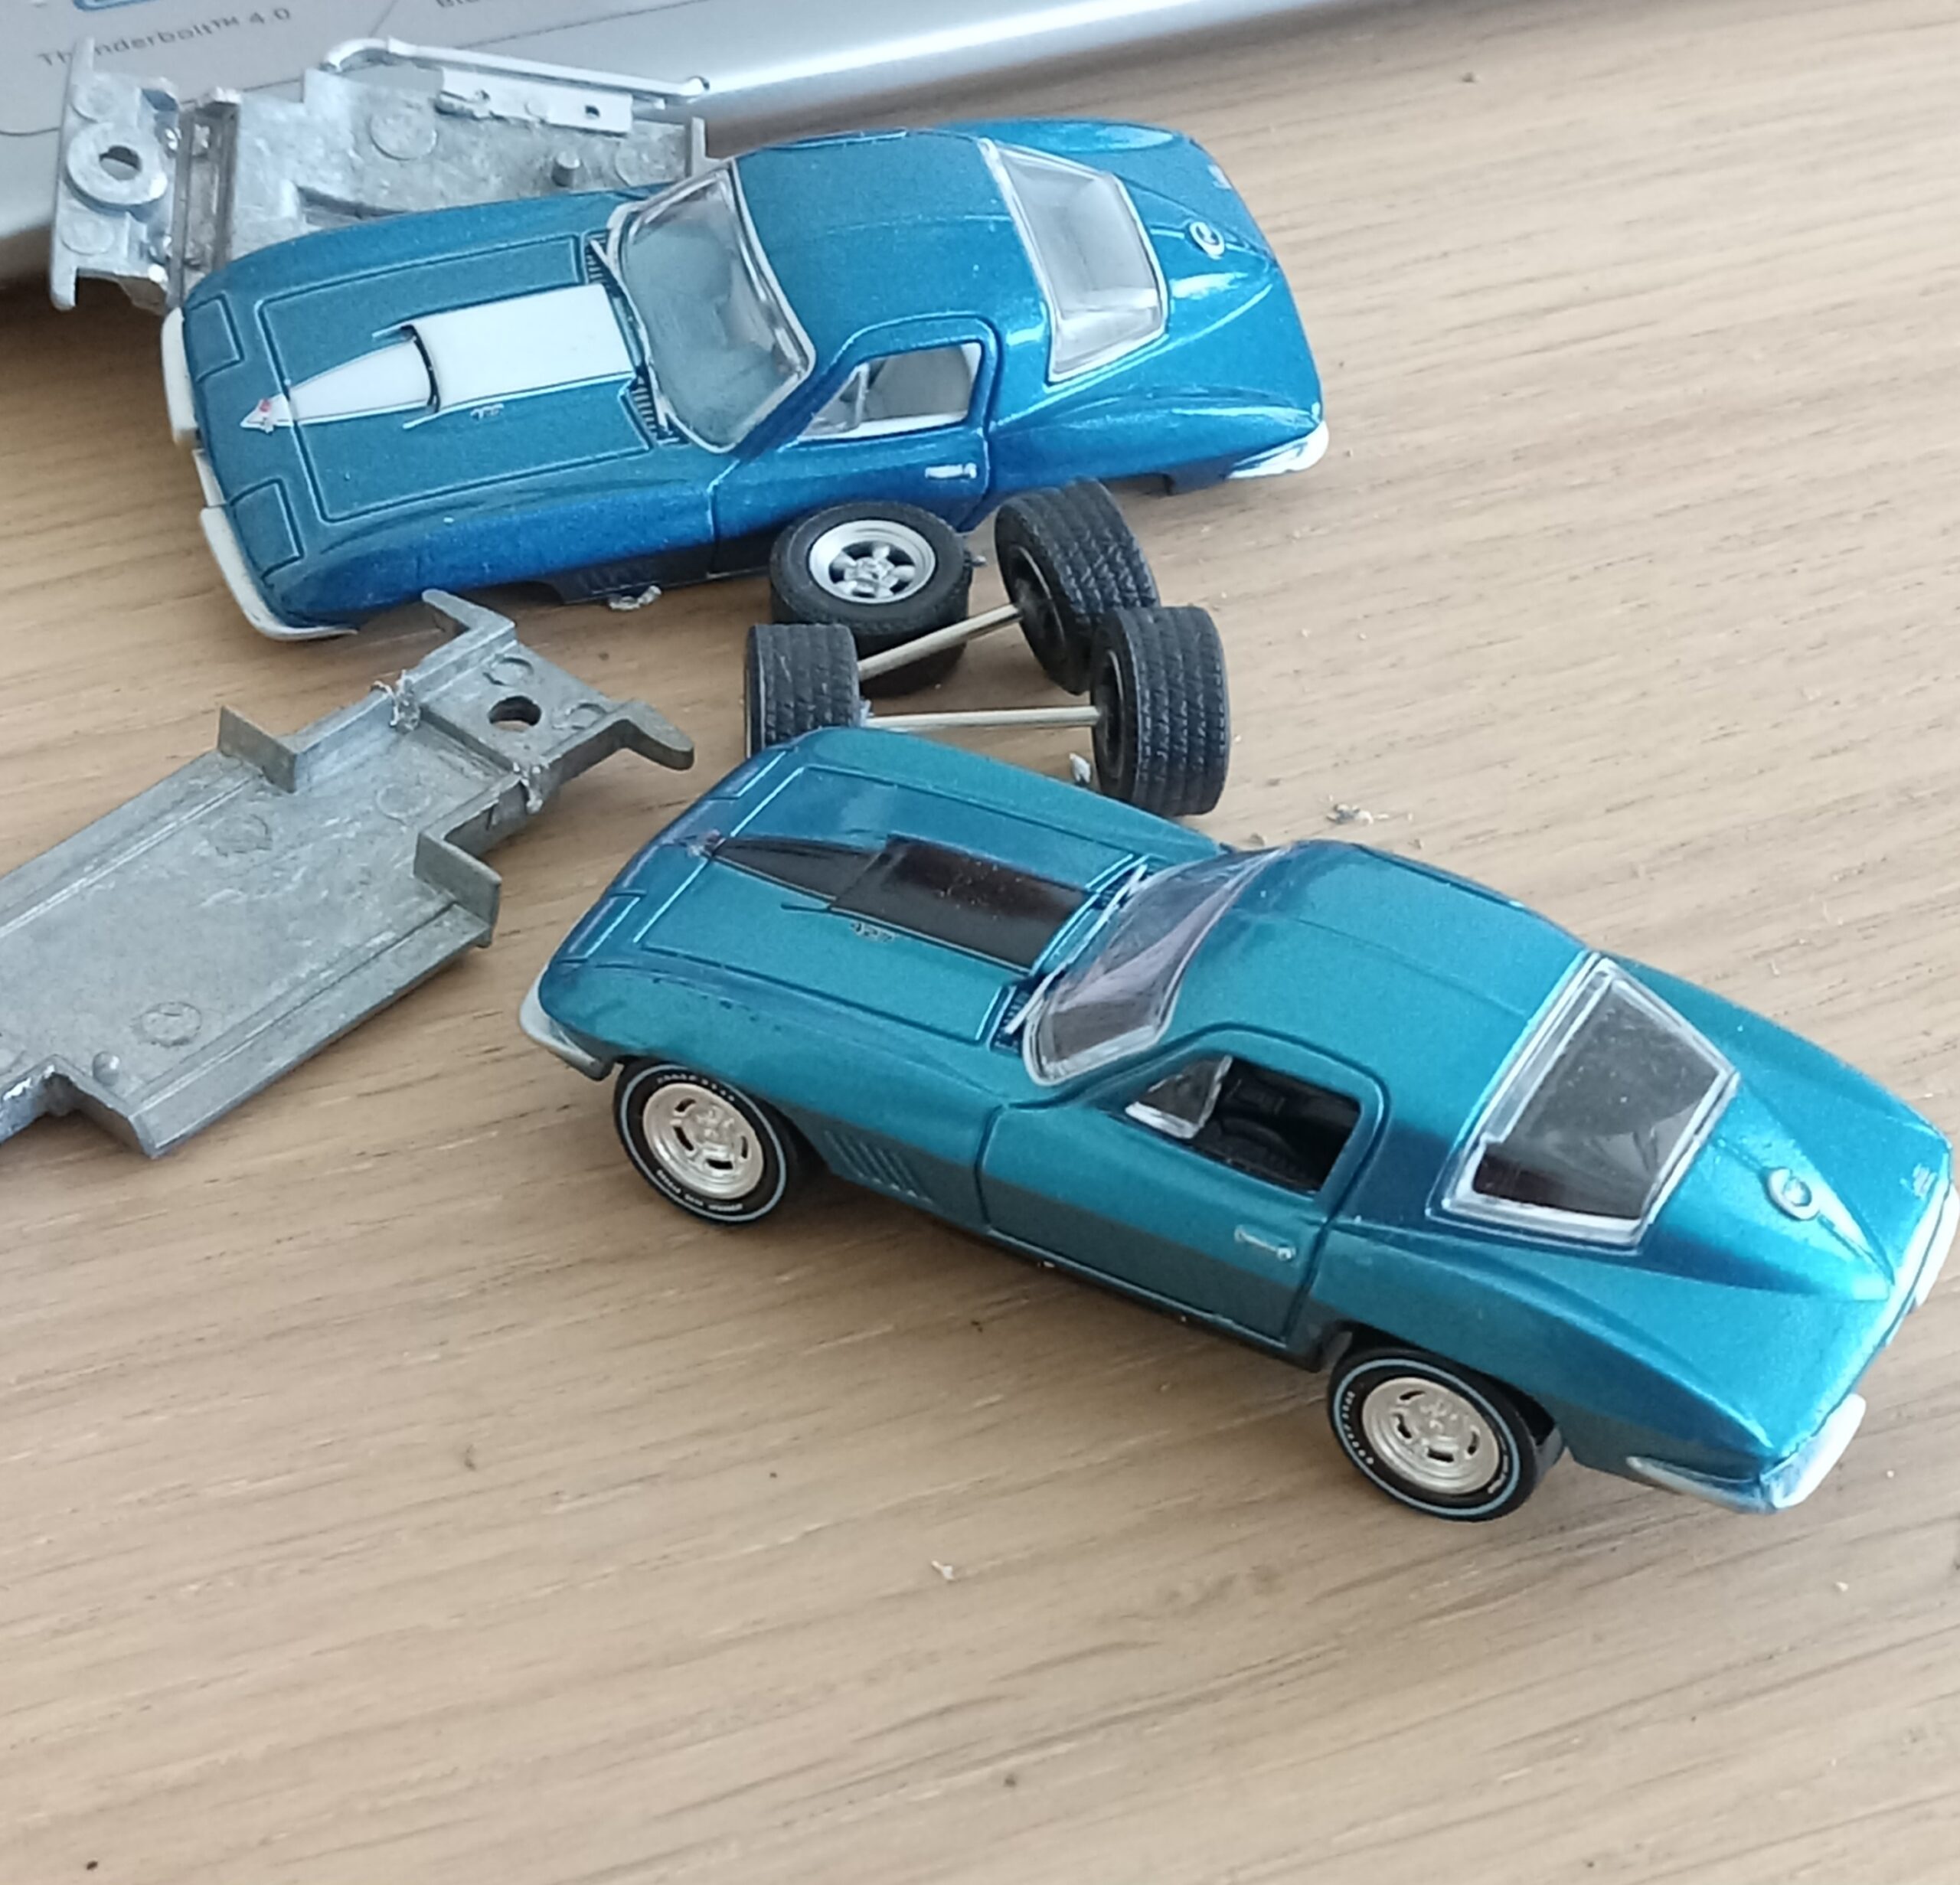
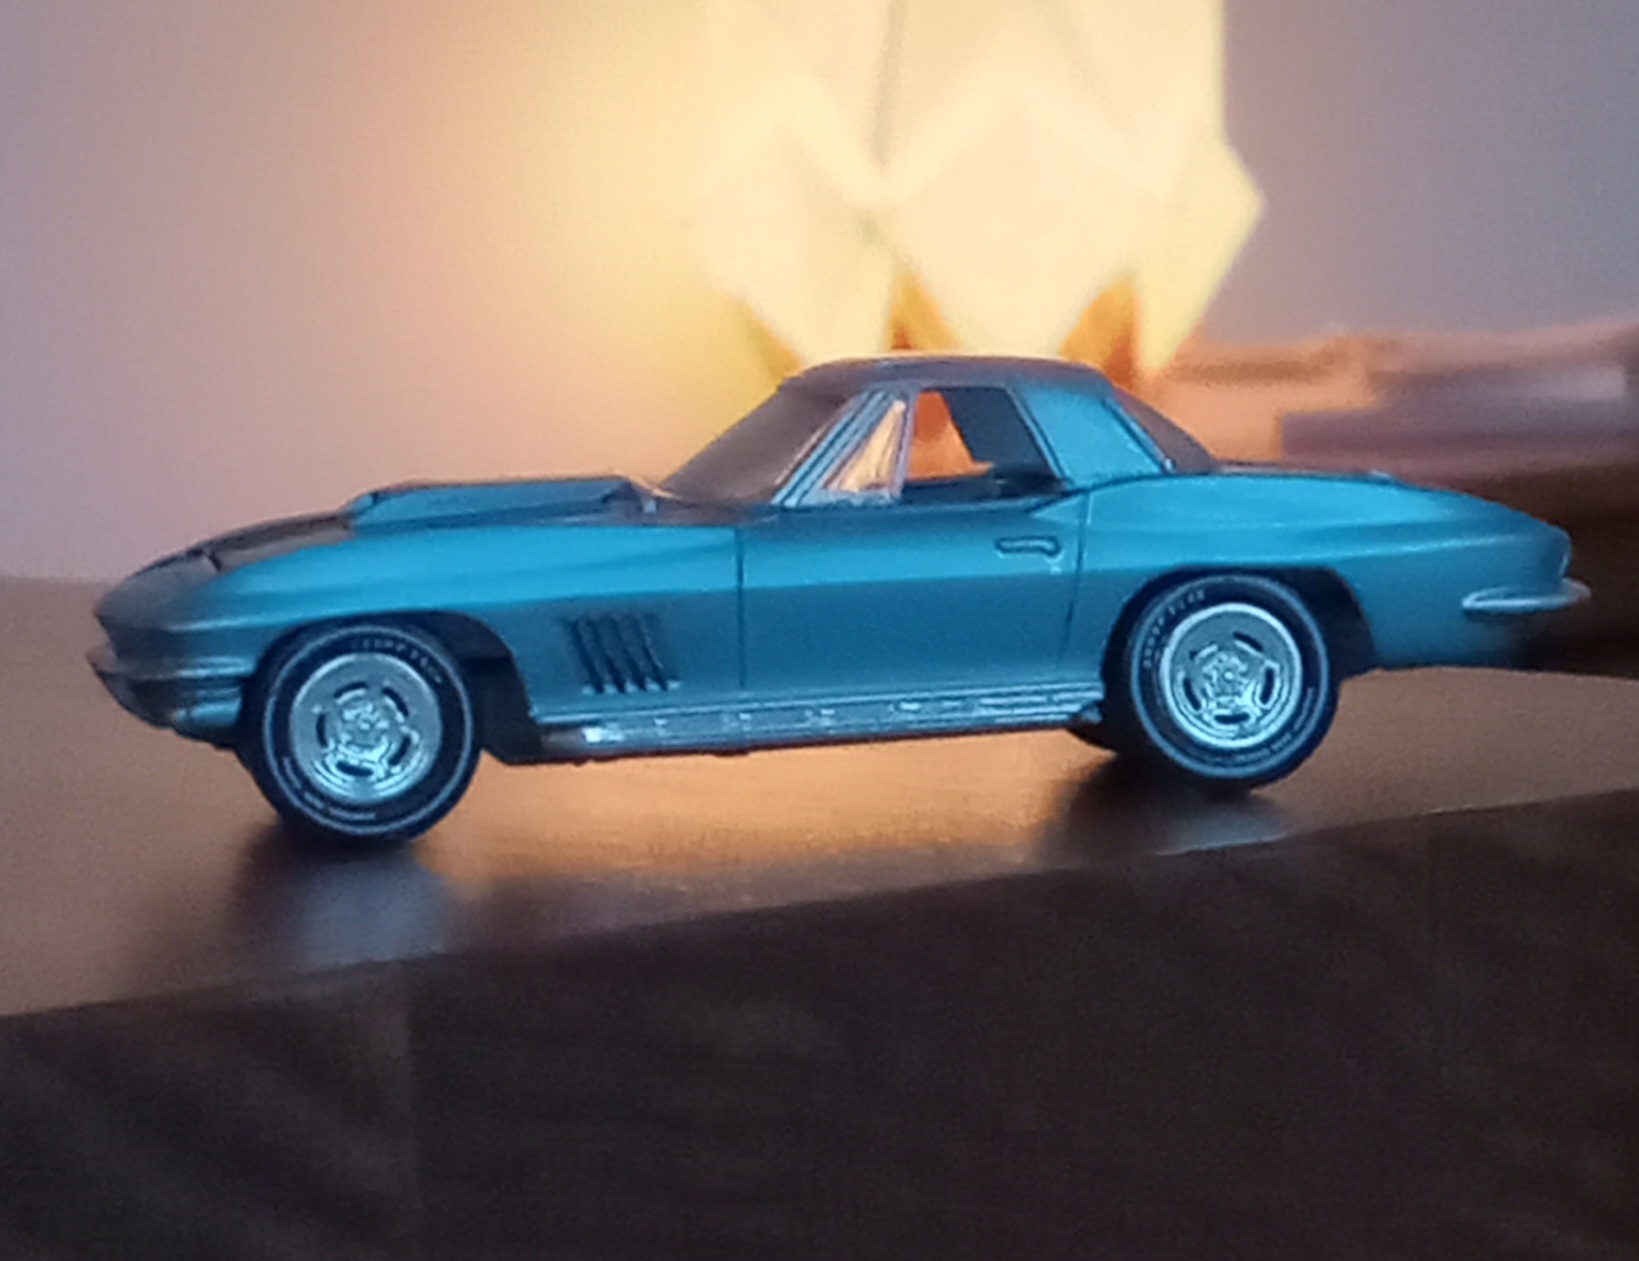
最新作、グレーンライト社のライトブルー・メタリックのロードスターを幌とタイヤホイールのスワップのみで、済まそうとしましたが、印象ががいまいち、、、、

結果として、5月13日現在、
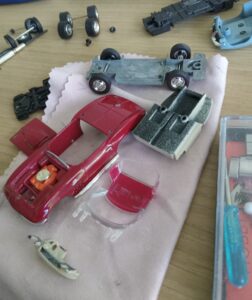
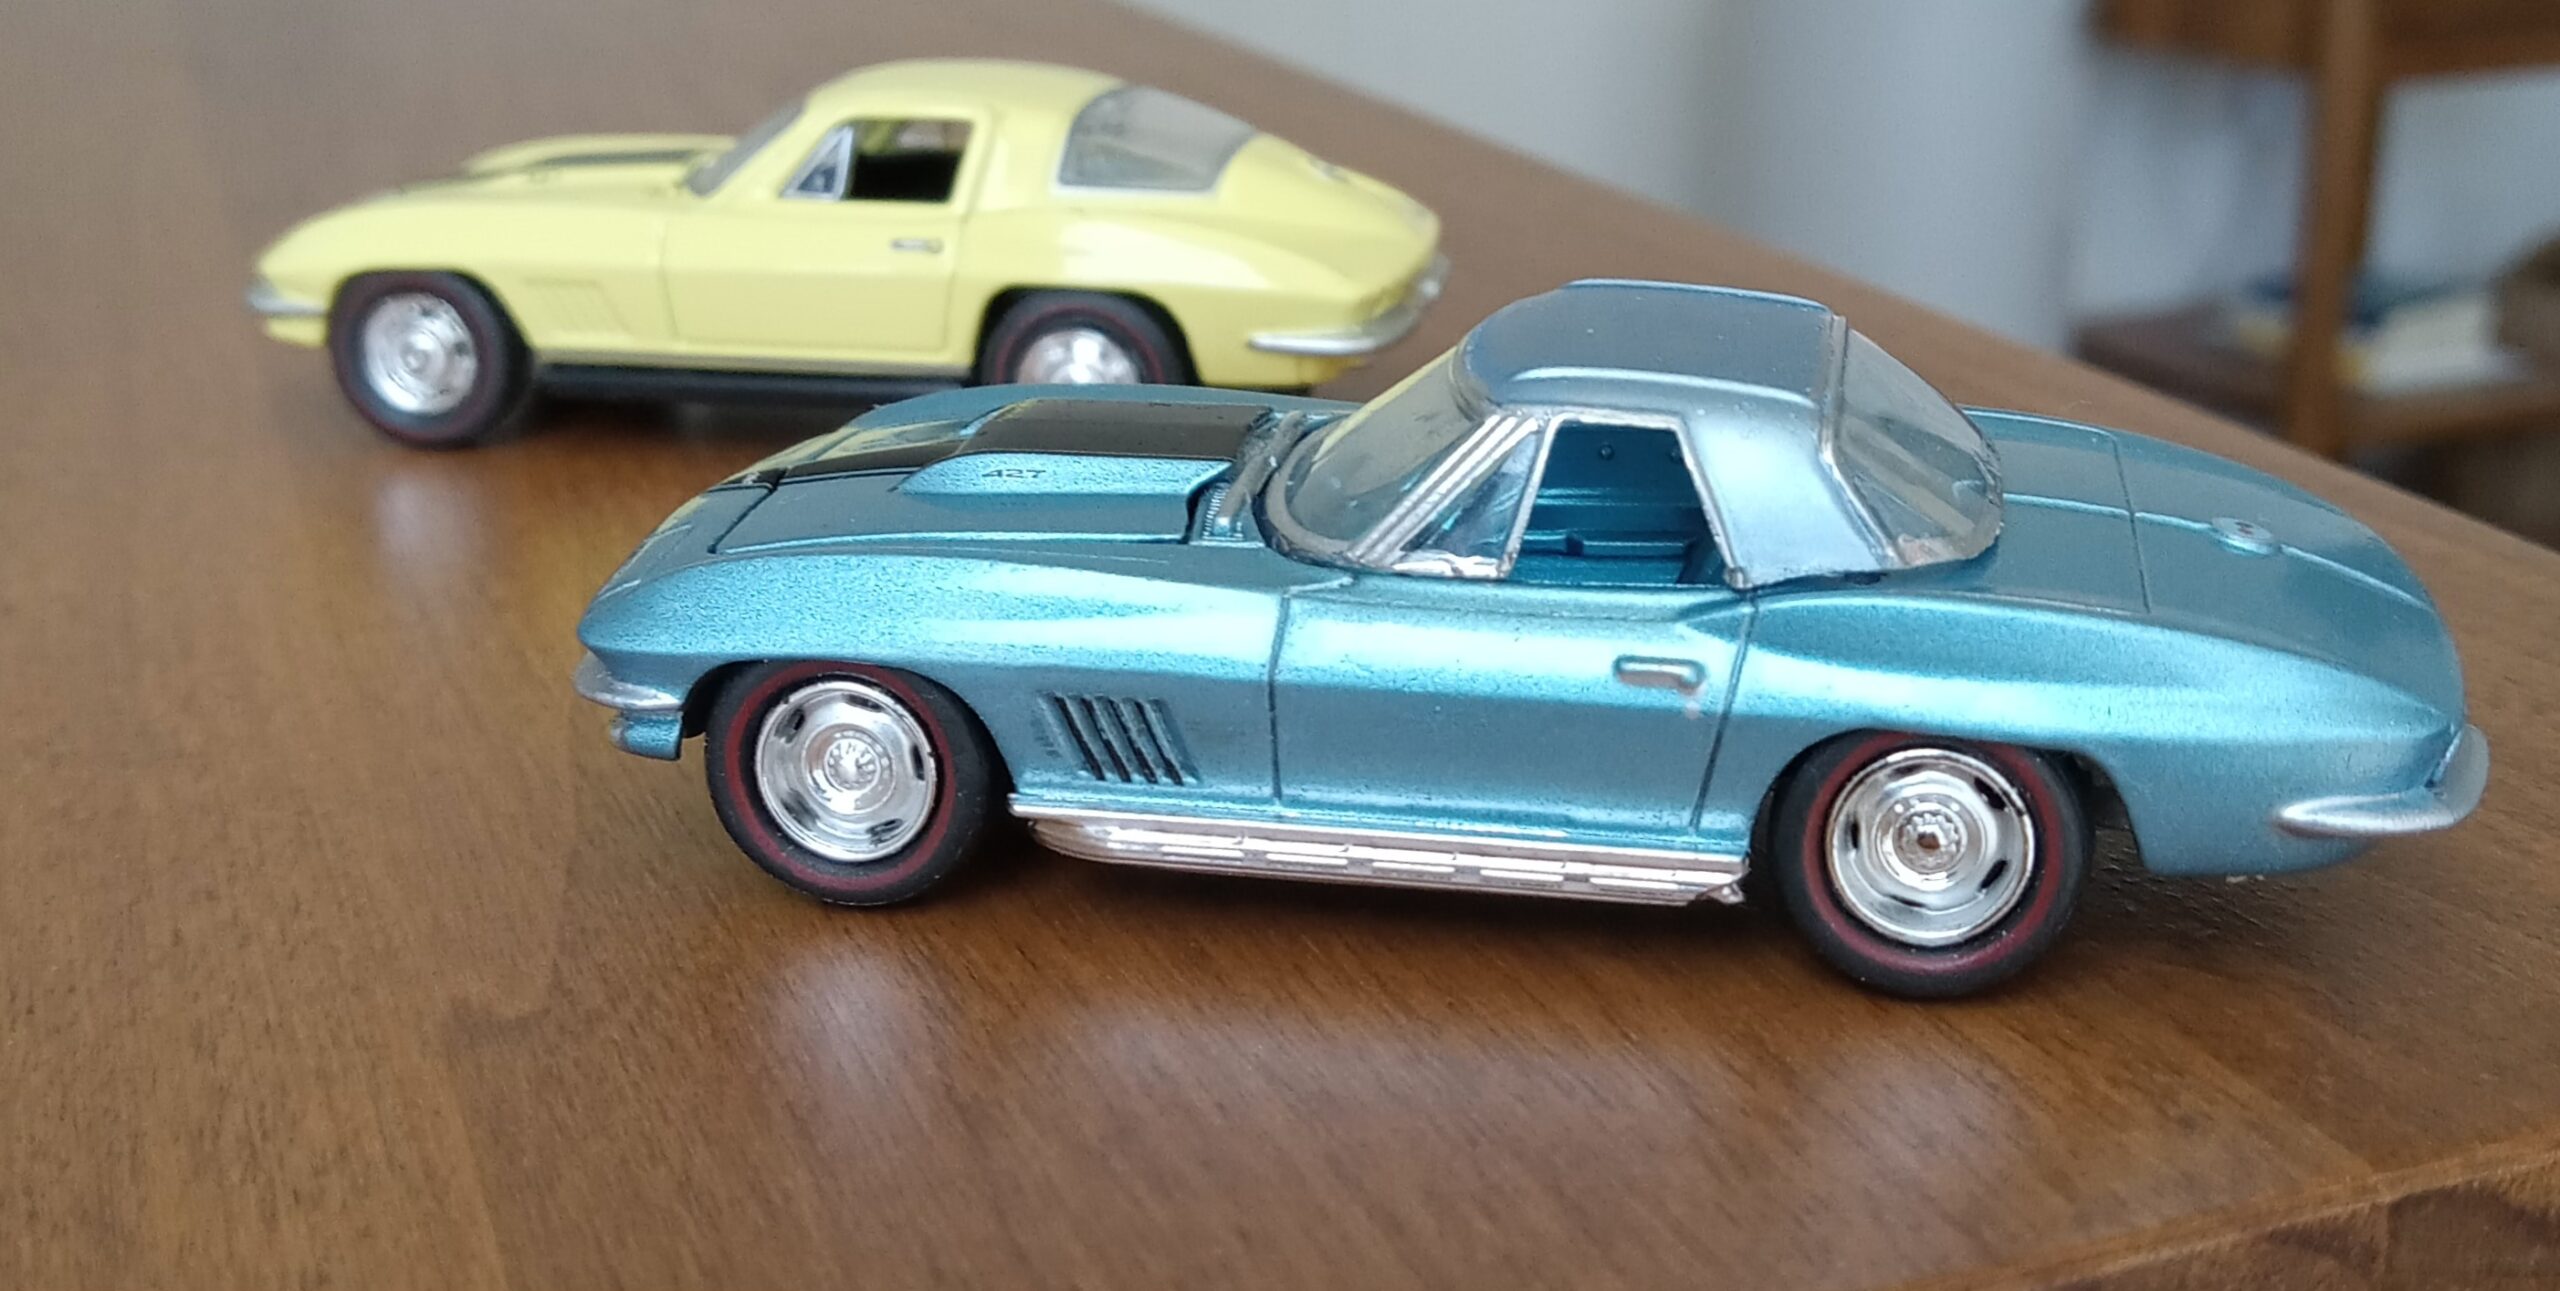
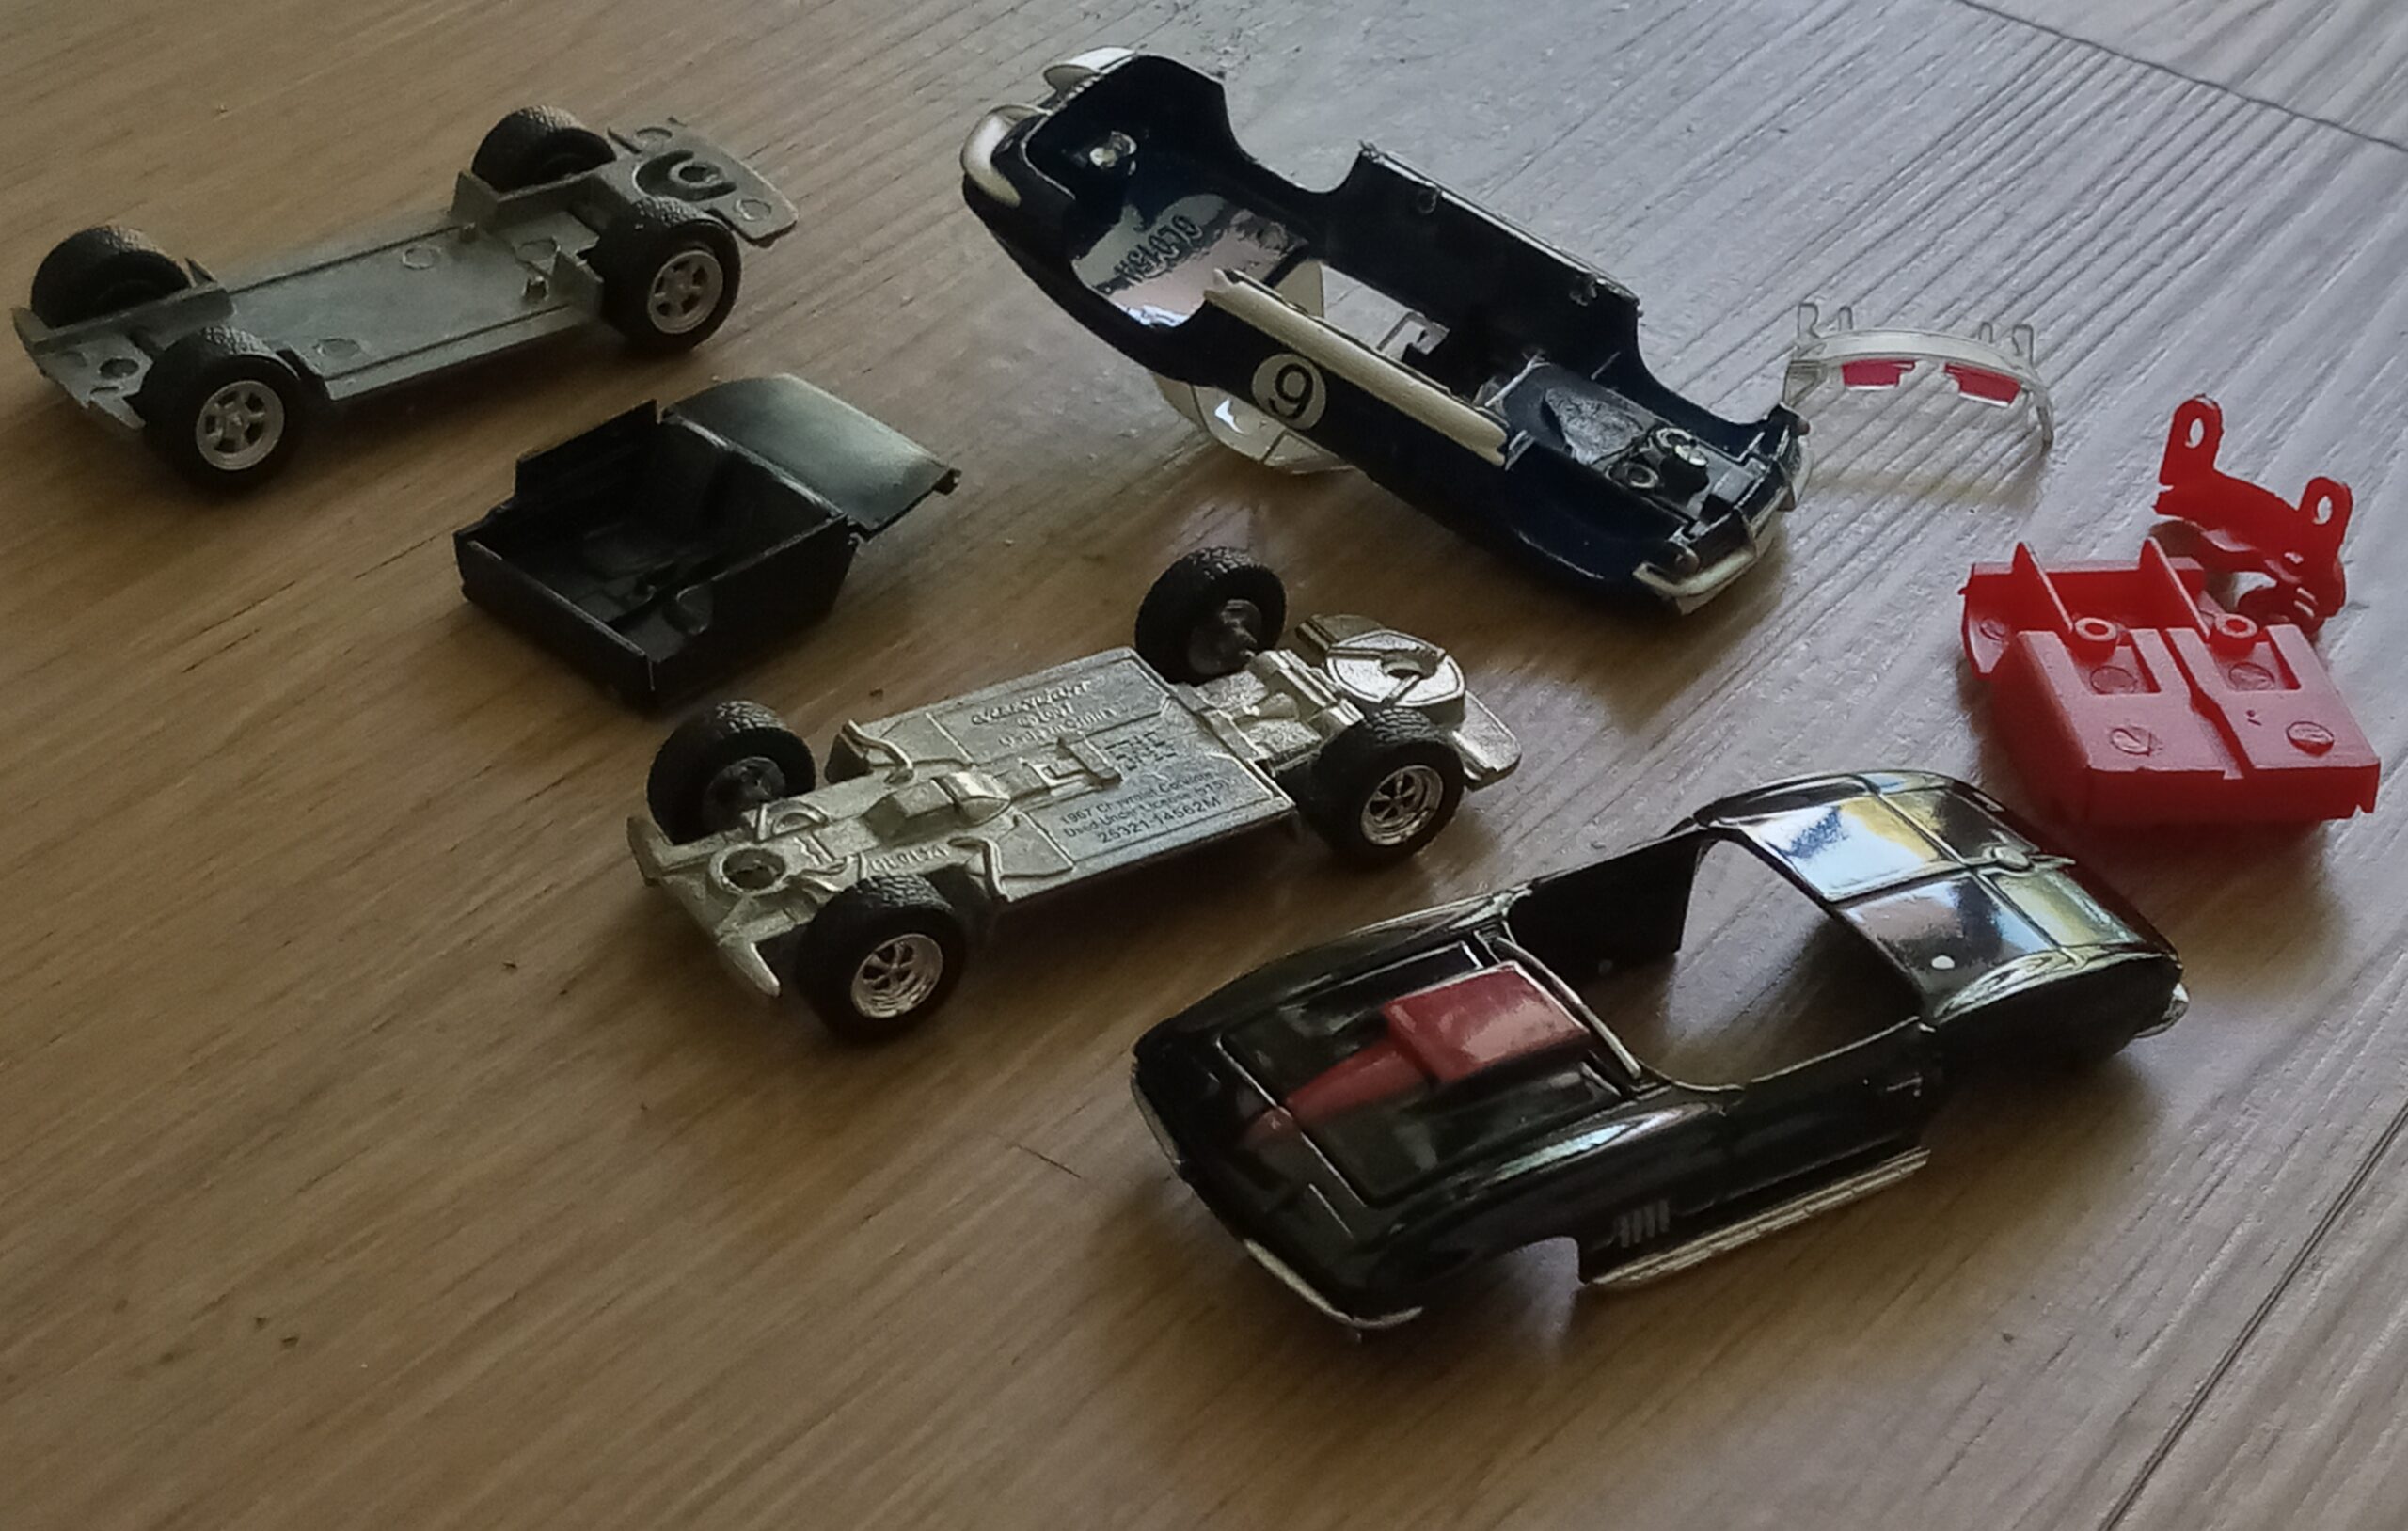
*各社から発売されている66年型、67年型のC2型コルベットを結集させ、
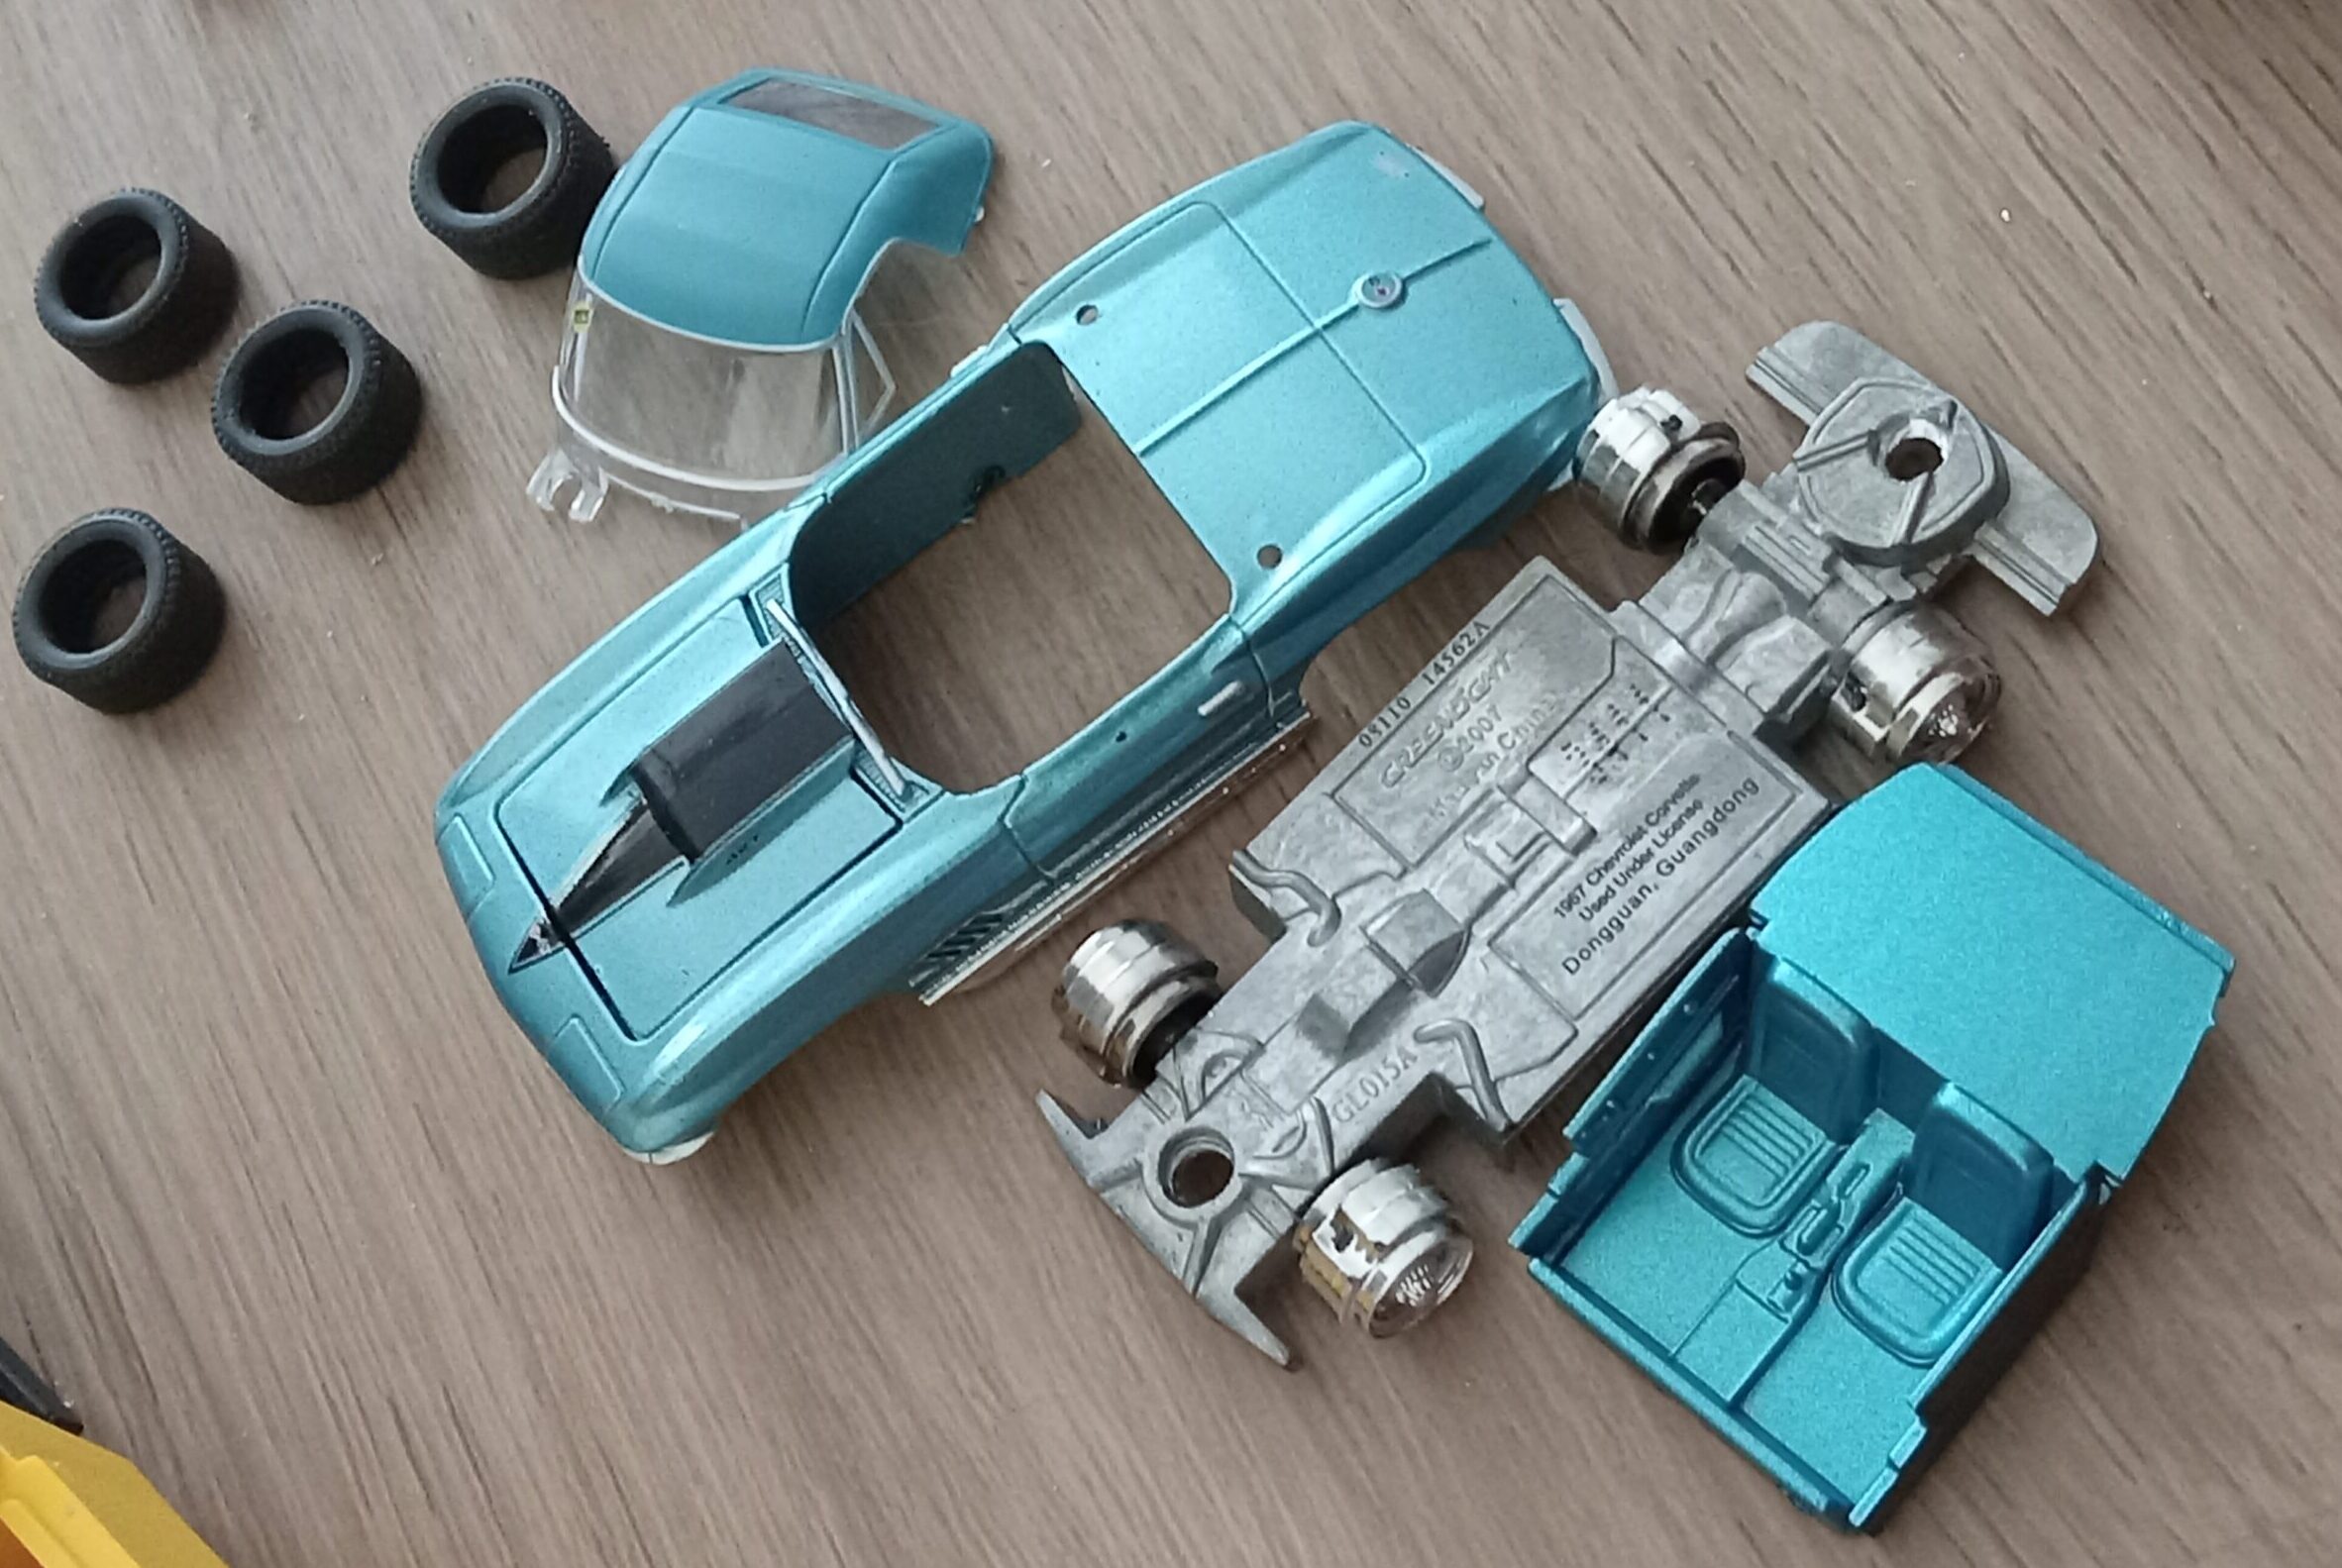
*そのボディー、シャーシ、タイヤ、ホイール、ハードトップ等のパーツをばらし、
*何通りもの組み合わせを試した結果、
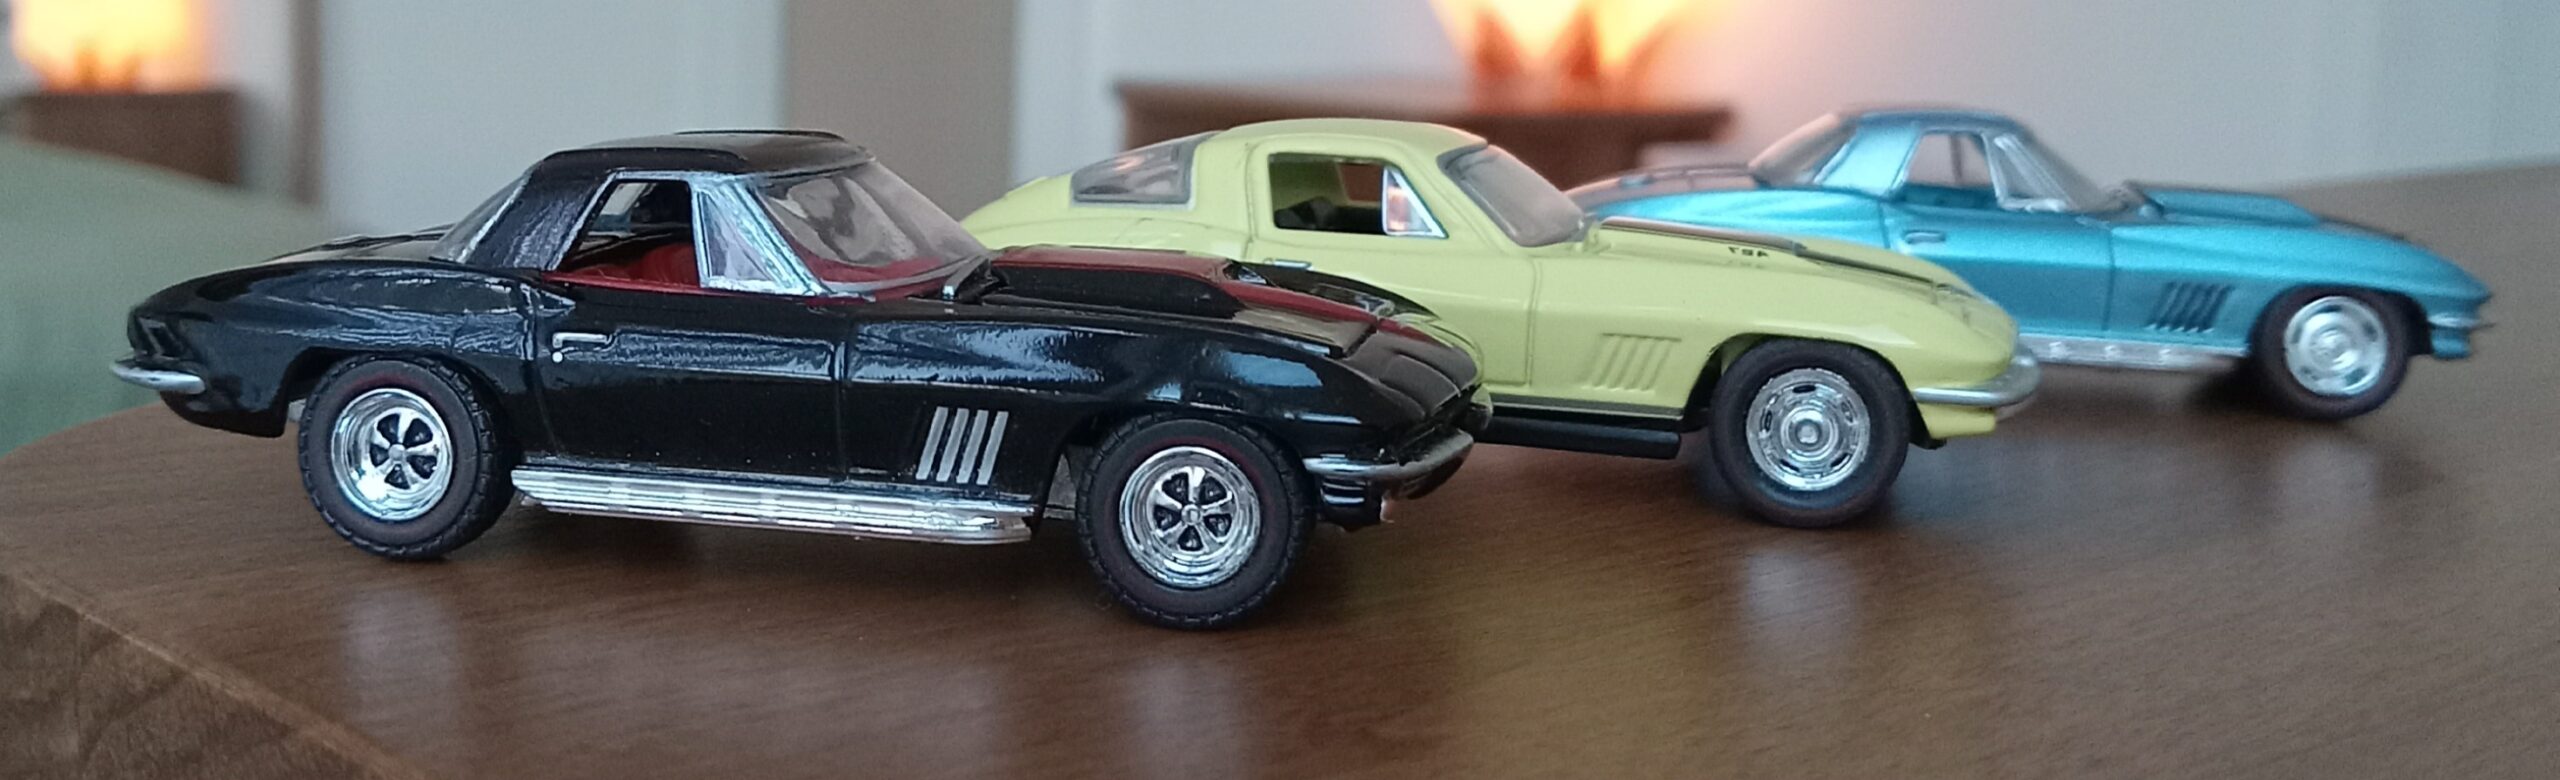
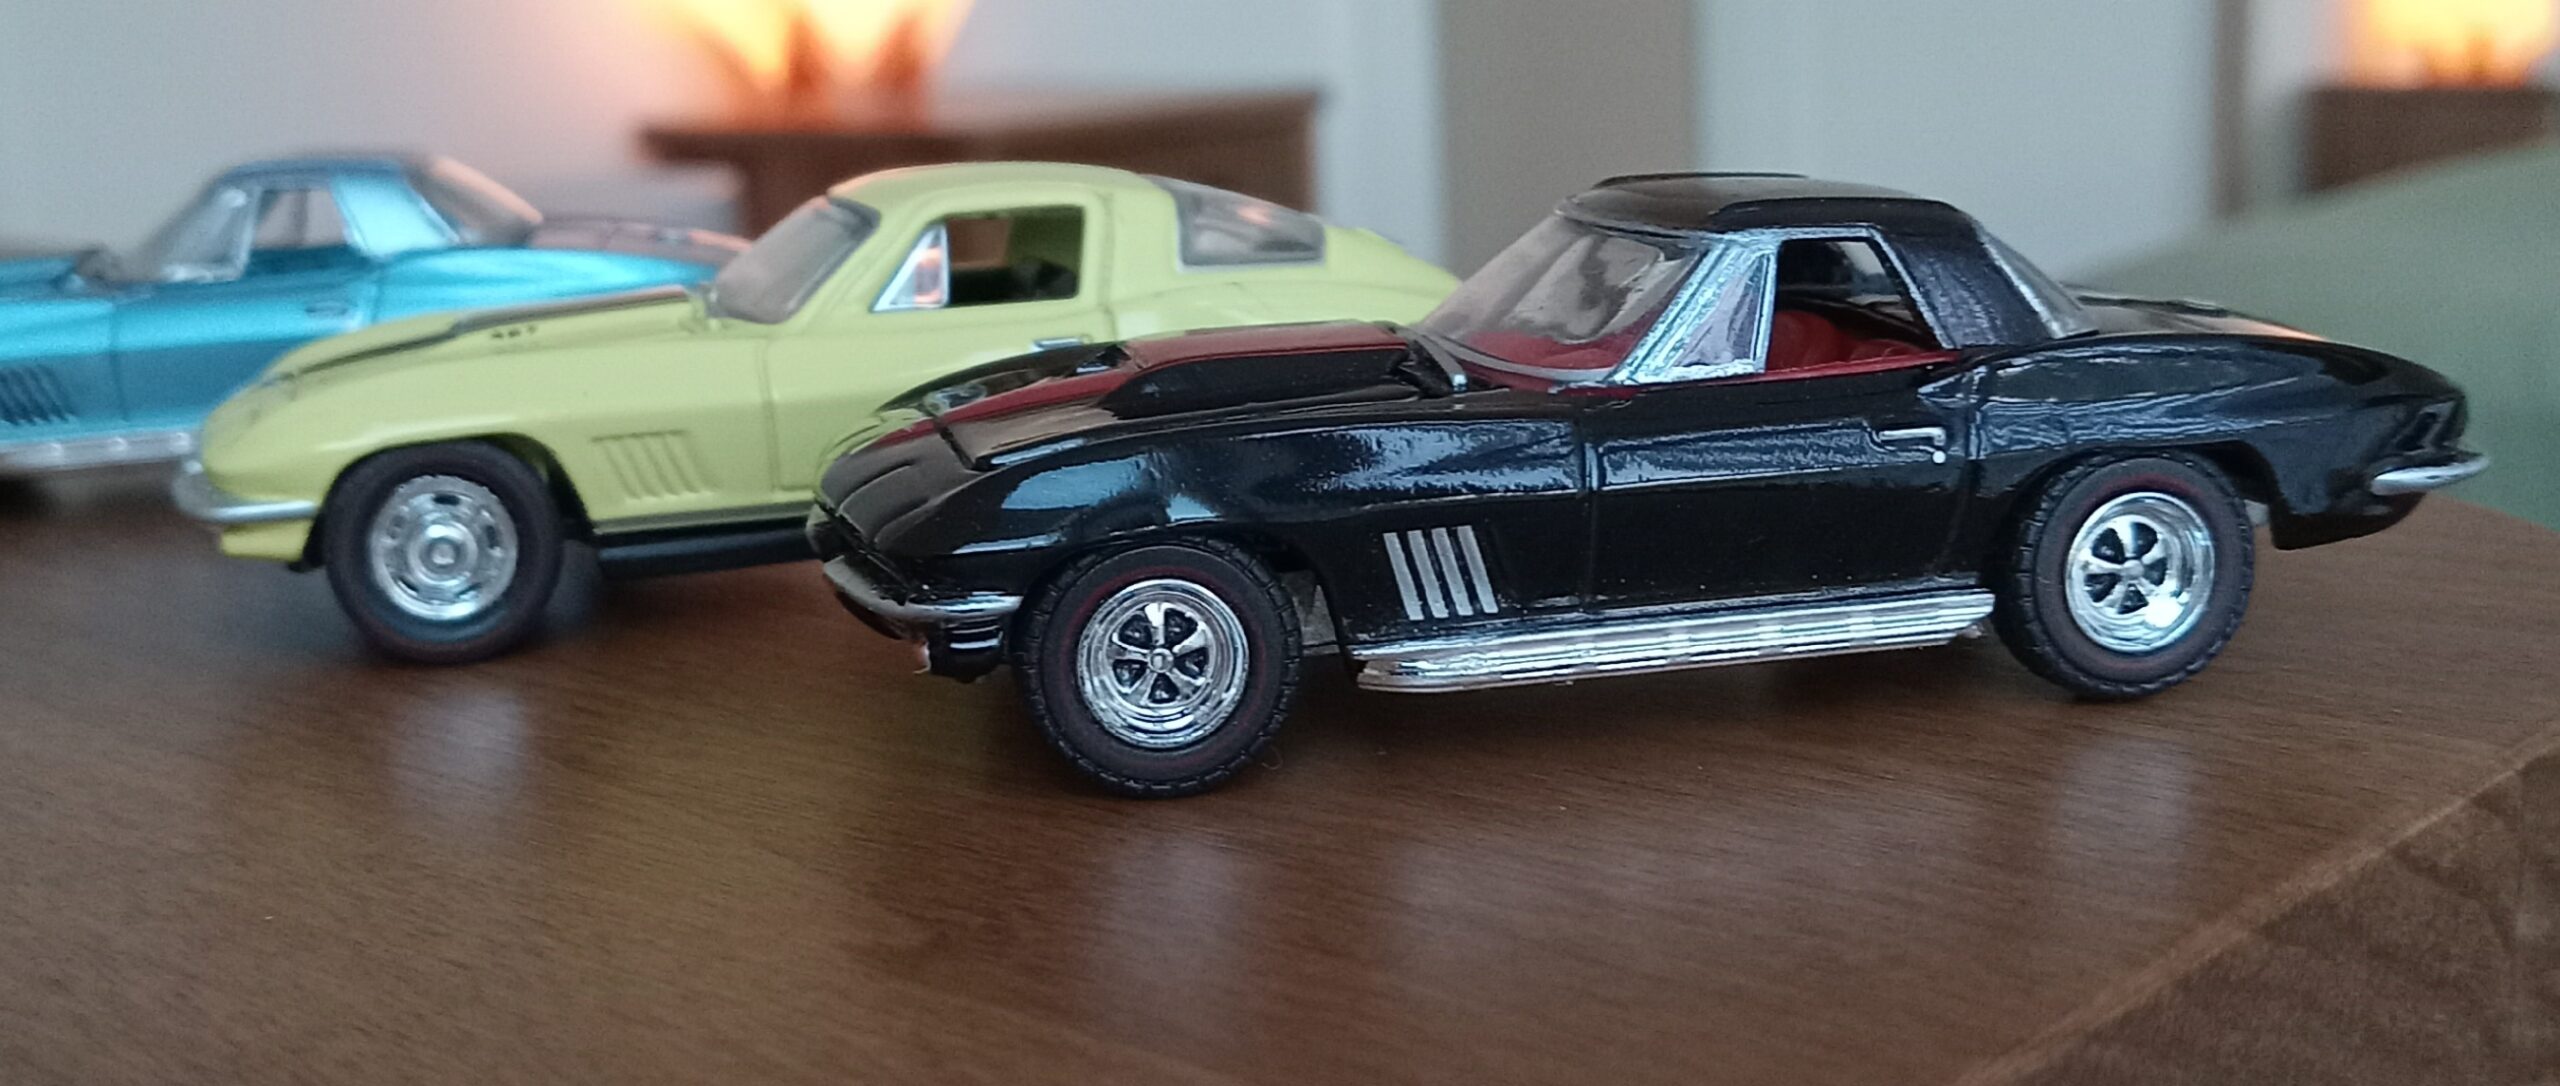
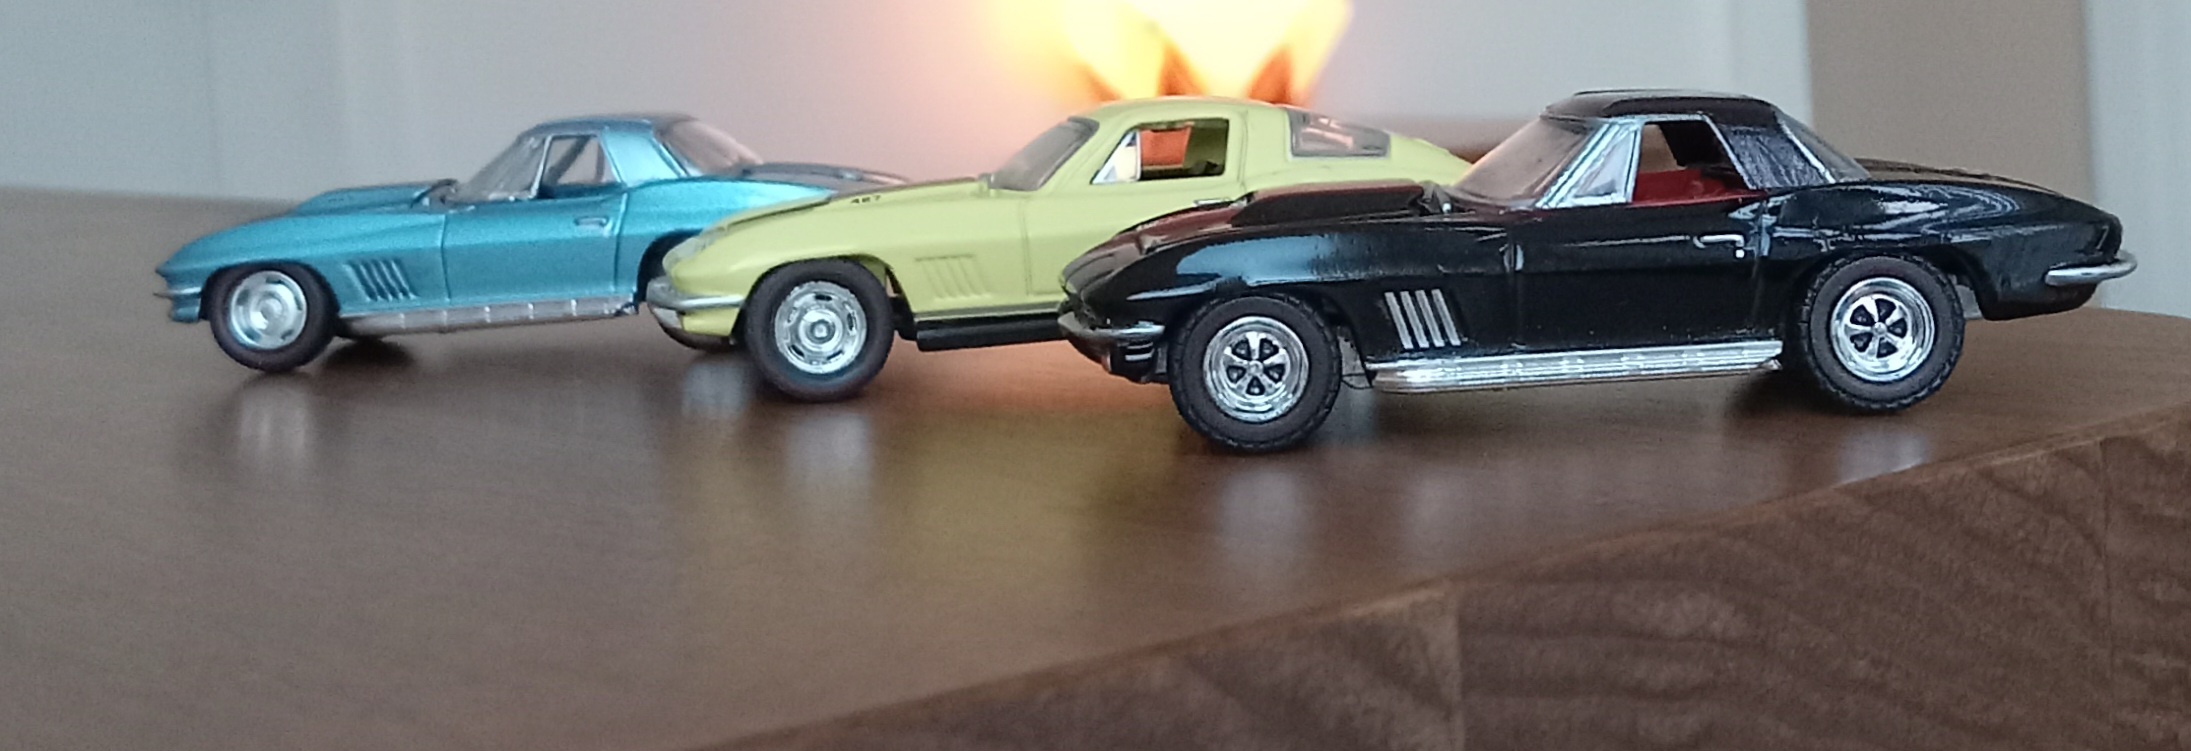
ーー>2つの完成形の’67スティングレー、ハードトップ付きを導き出しました。嬉
こんな感じで合計、
5バージョンのロードスターを製造しました。(笑)
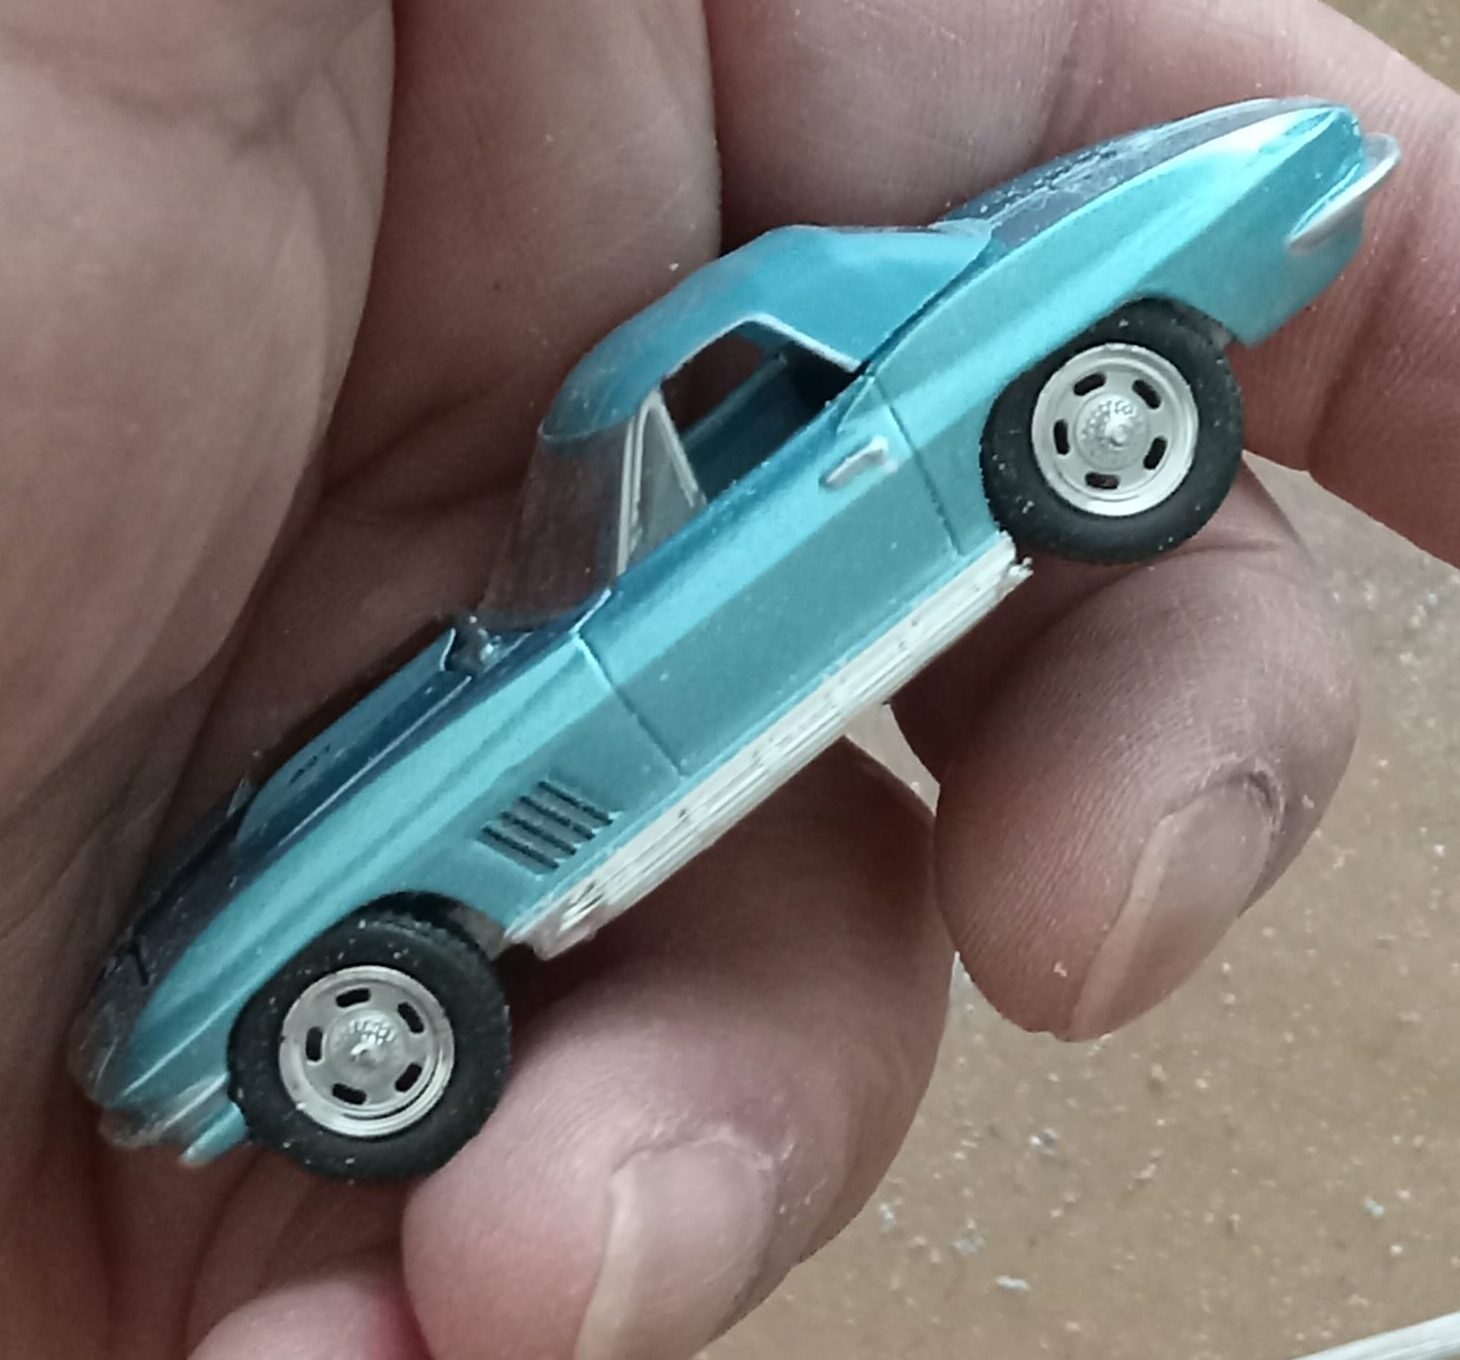
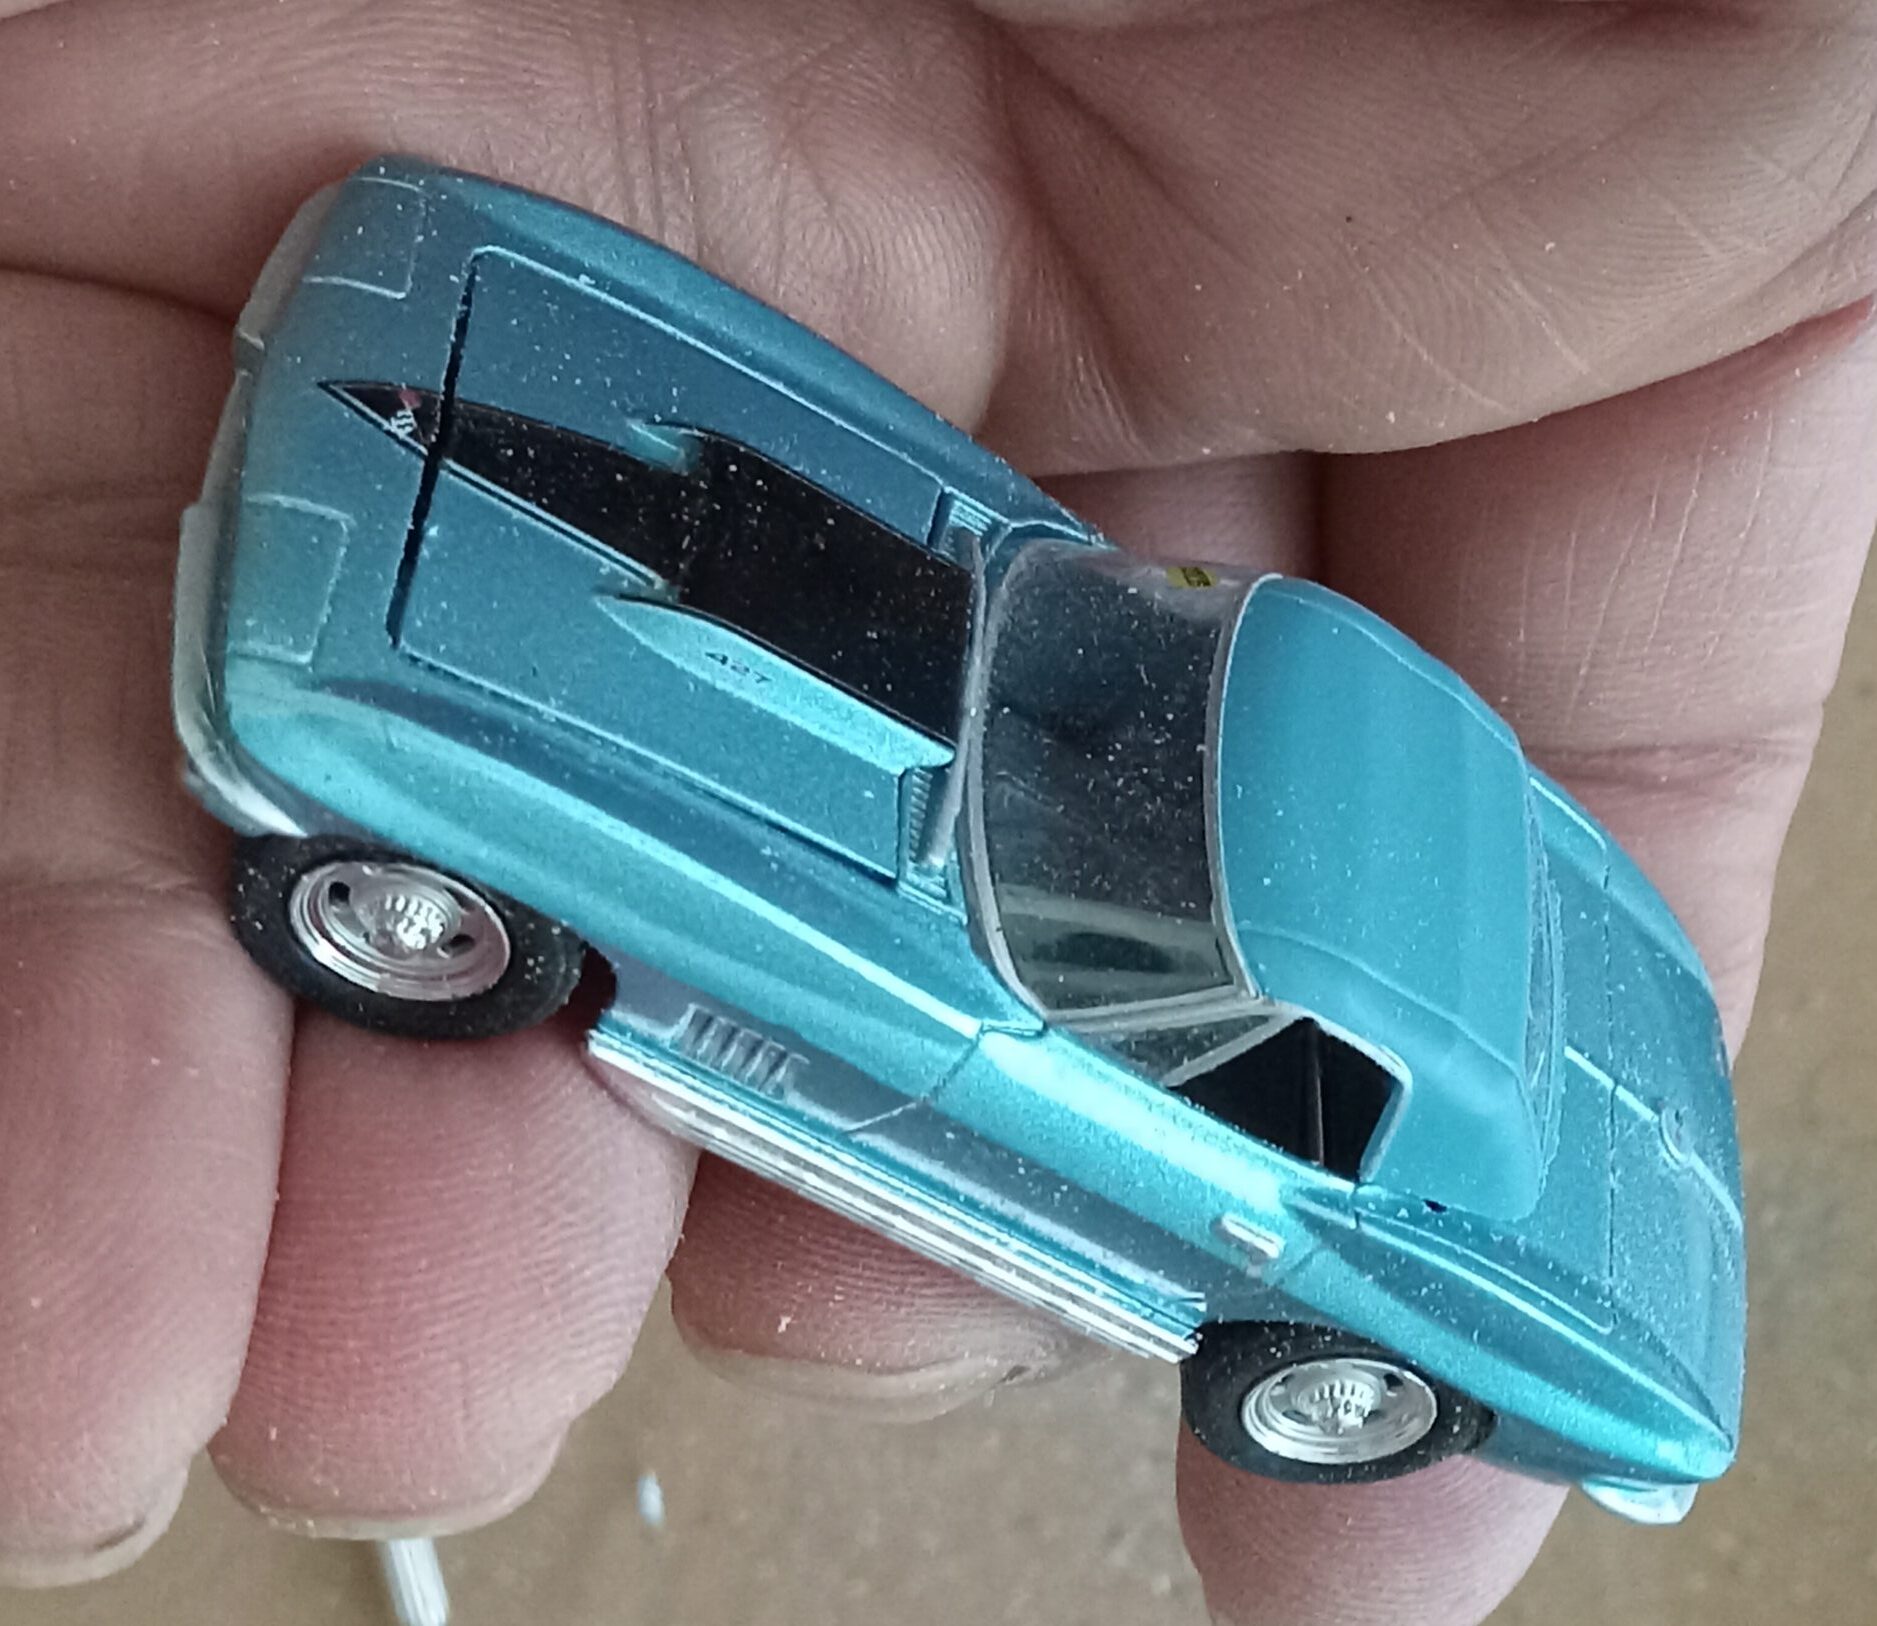
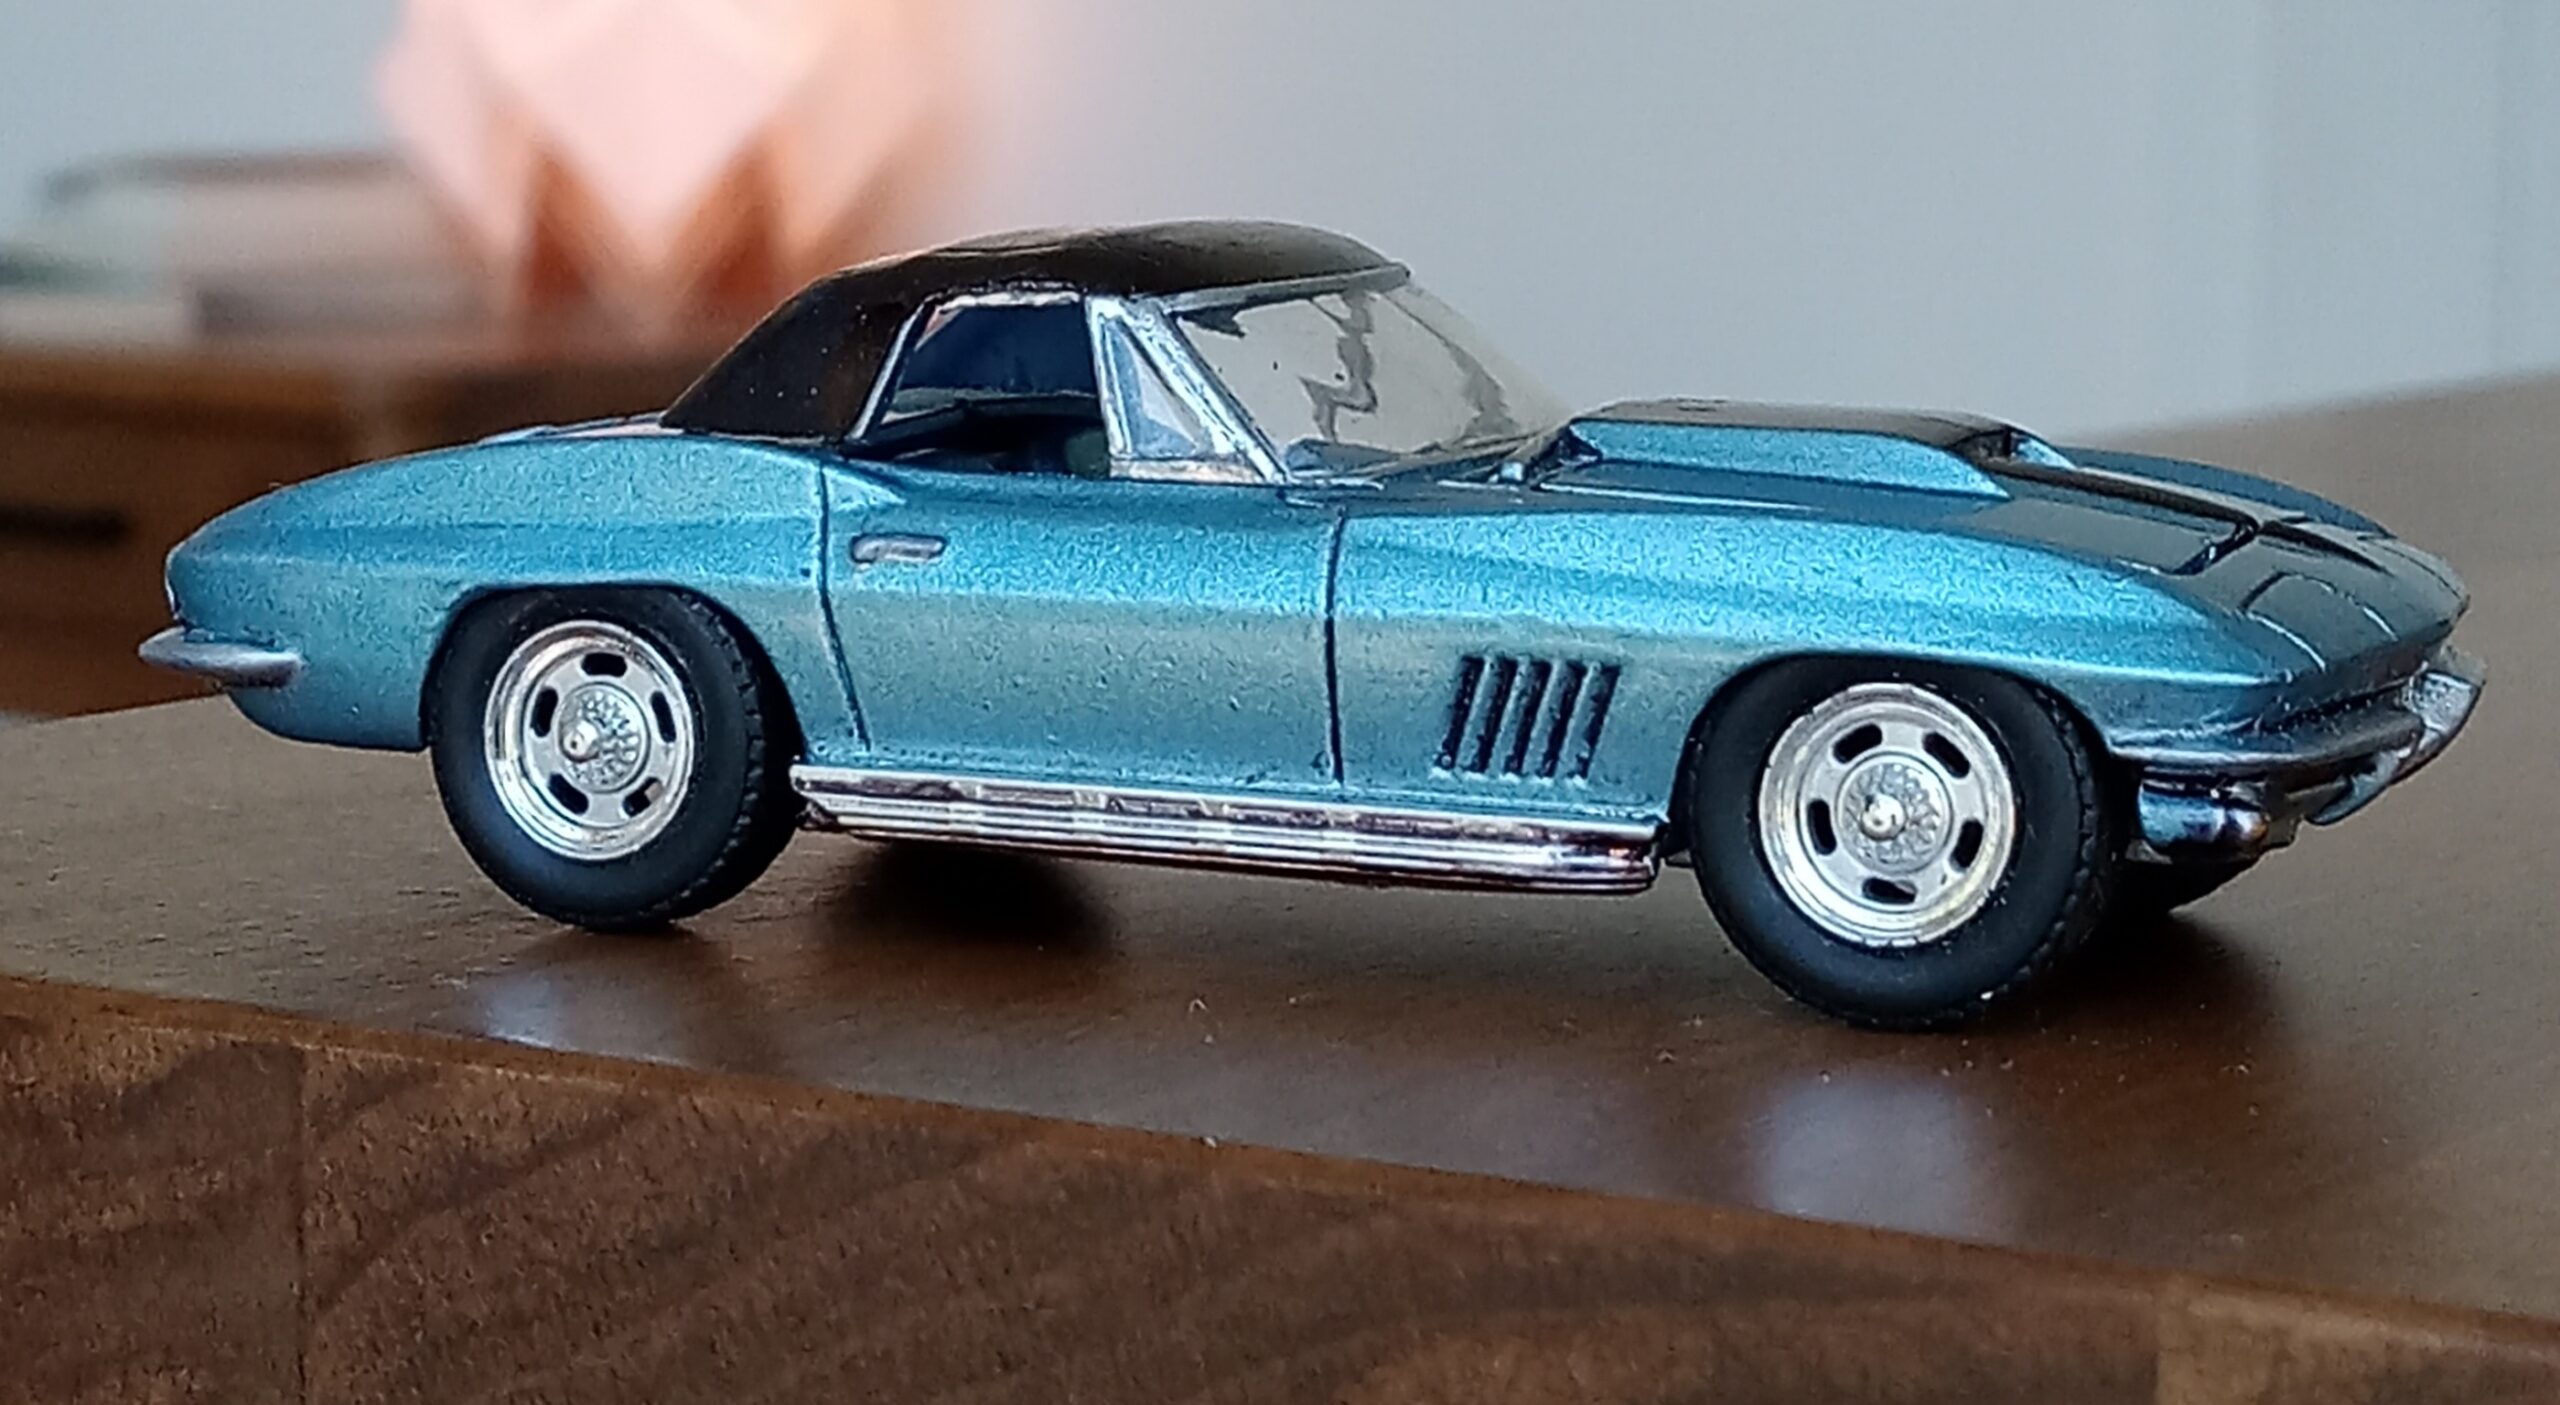
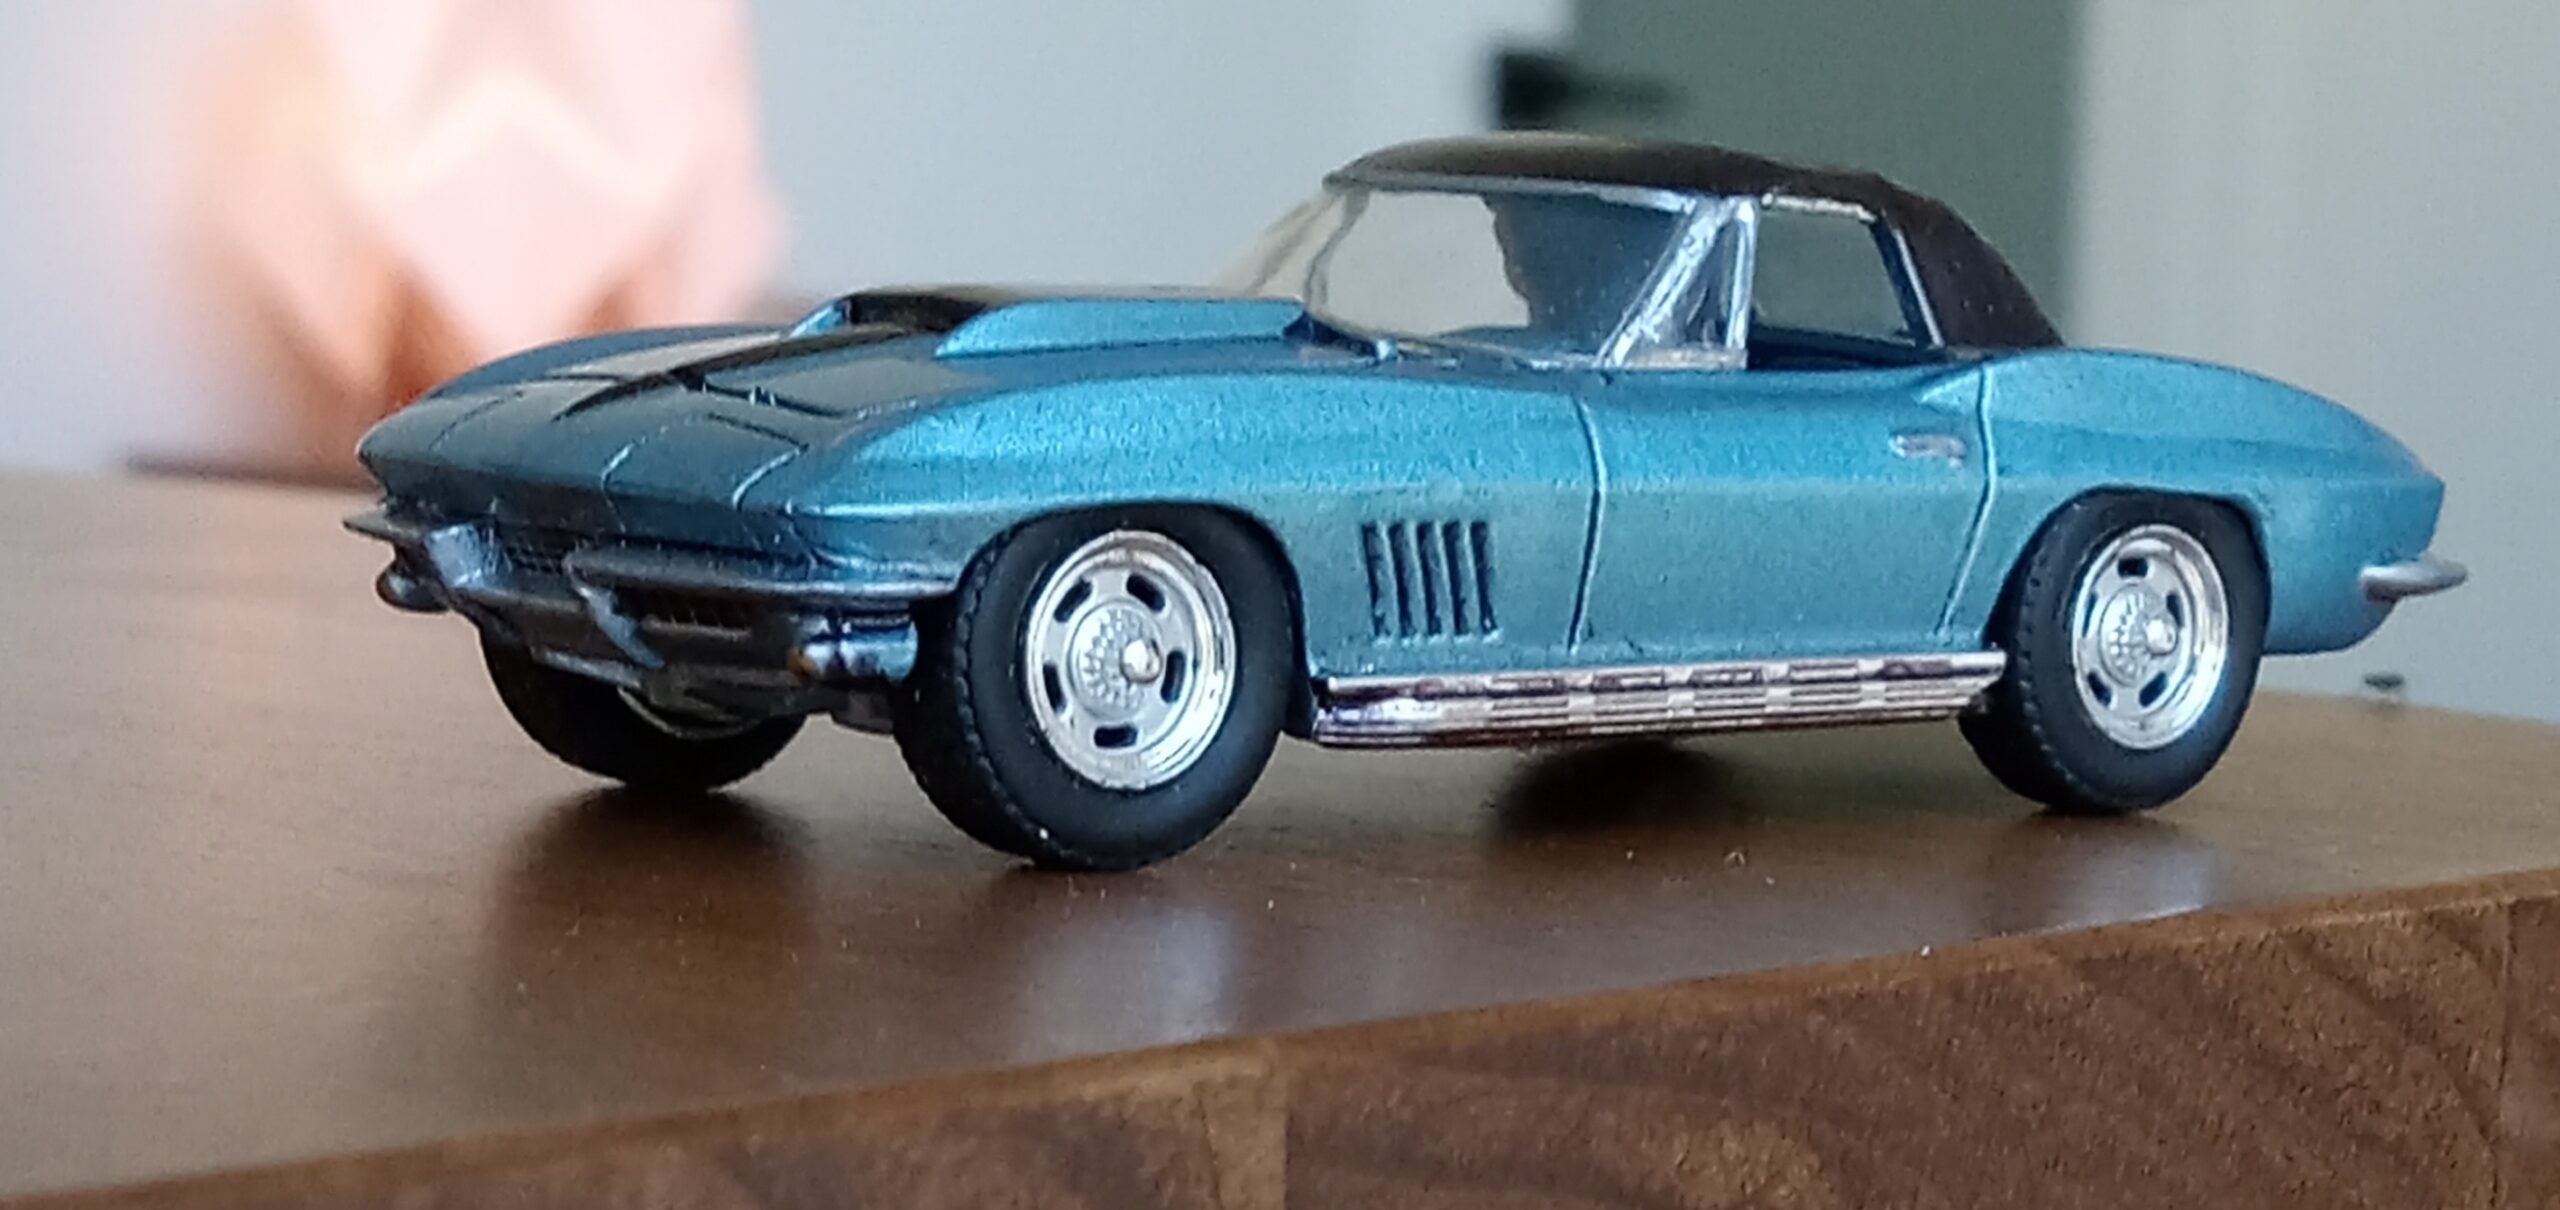
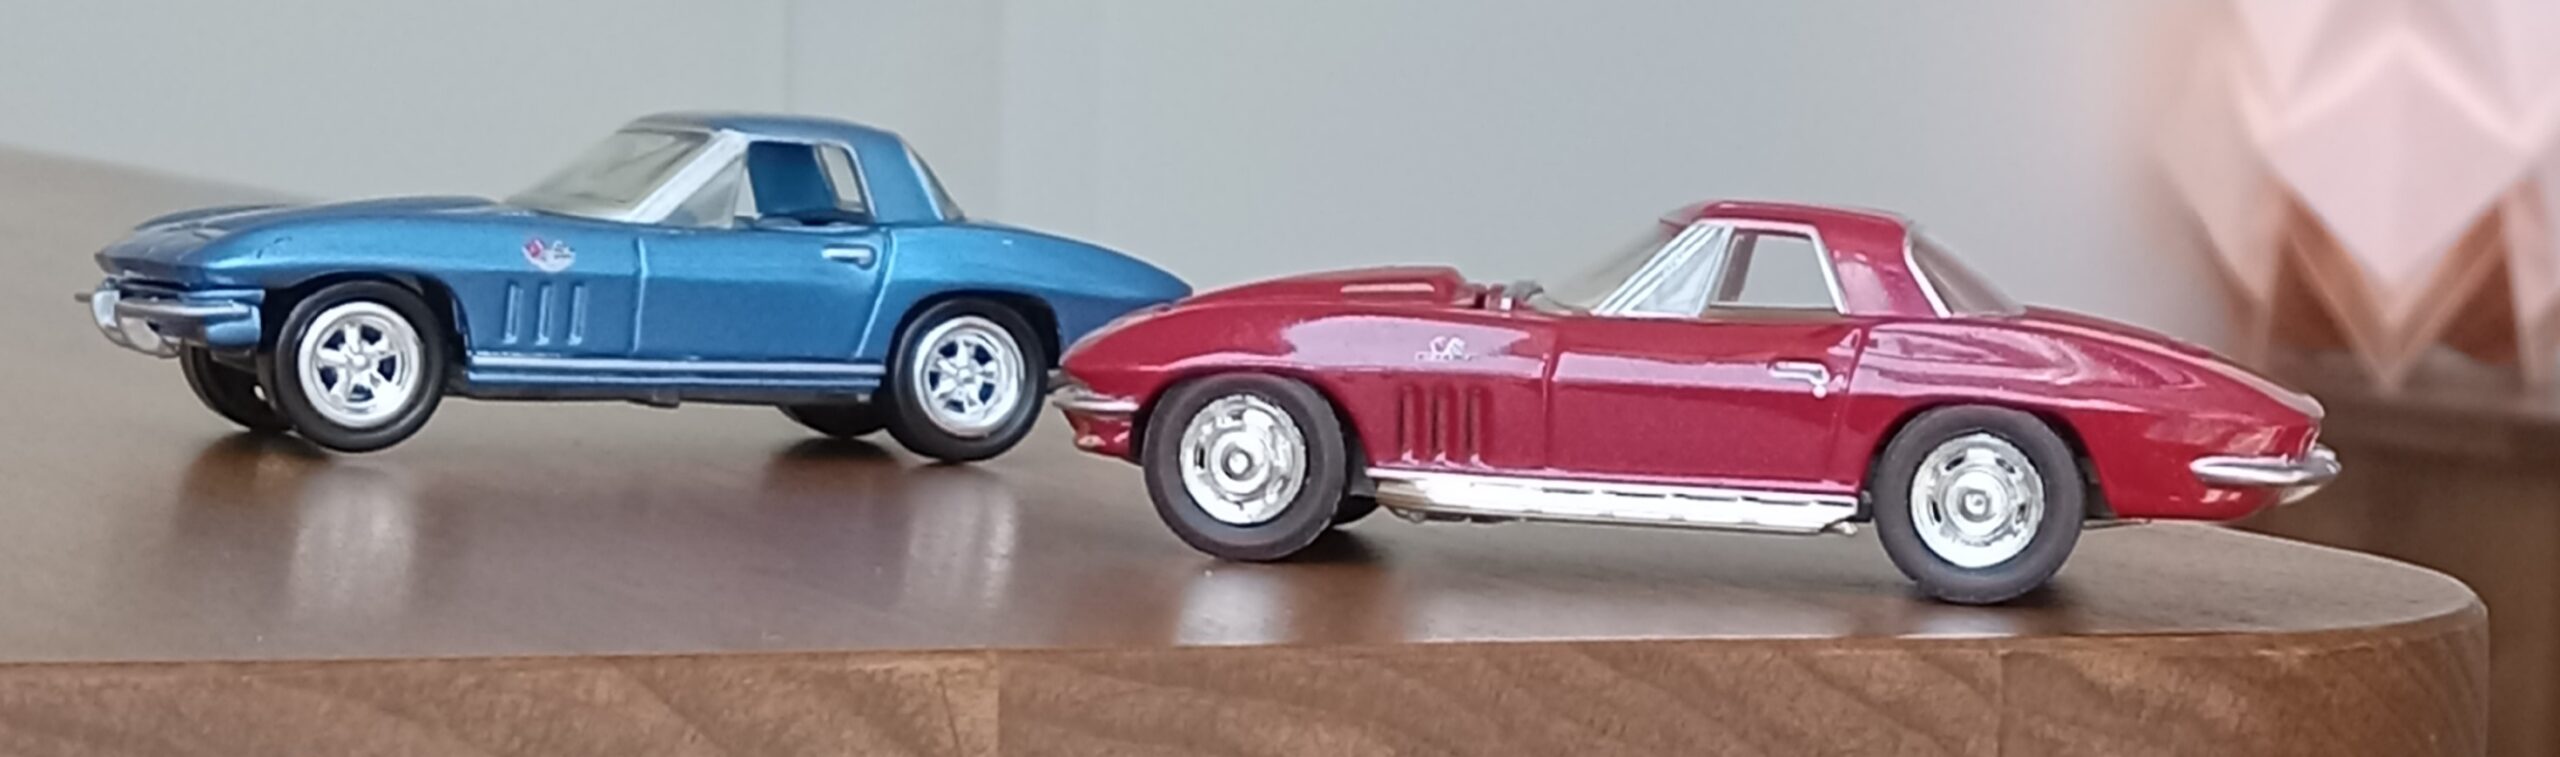
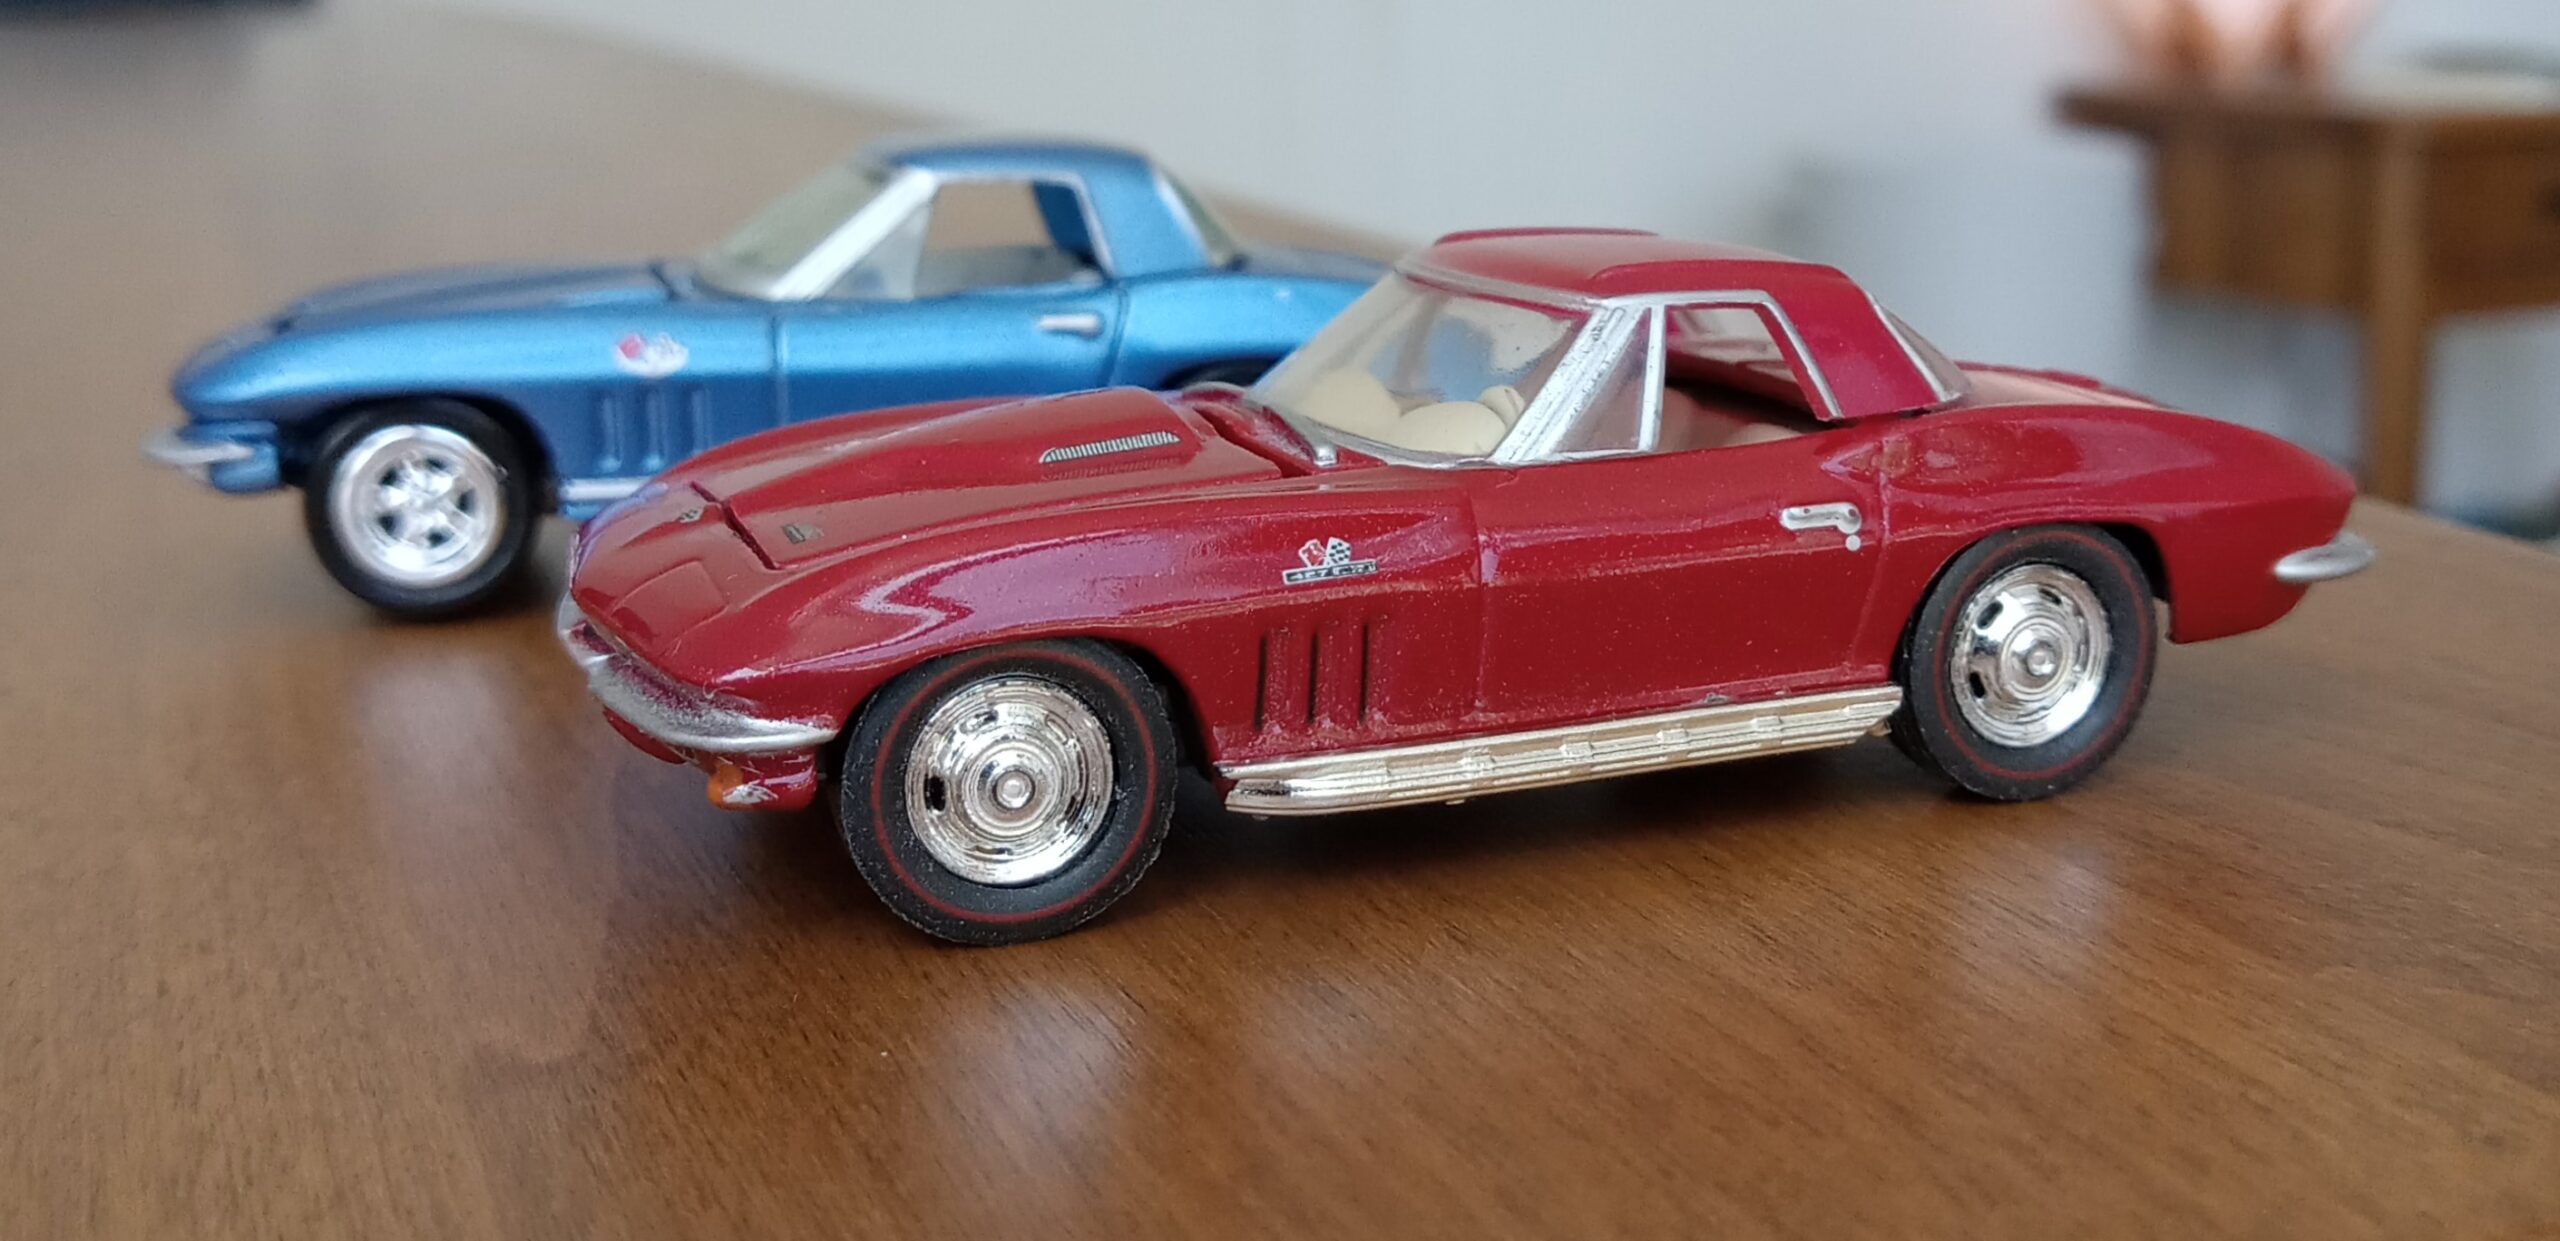
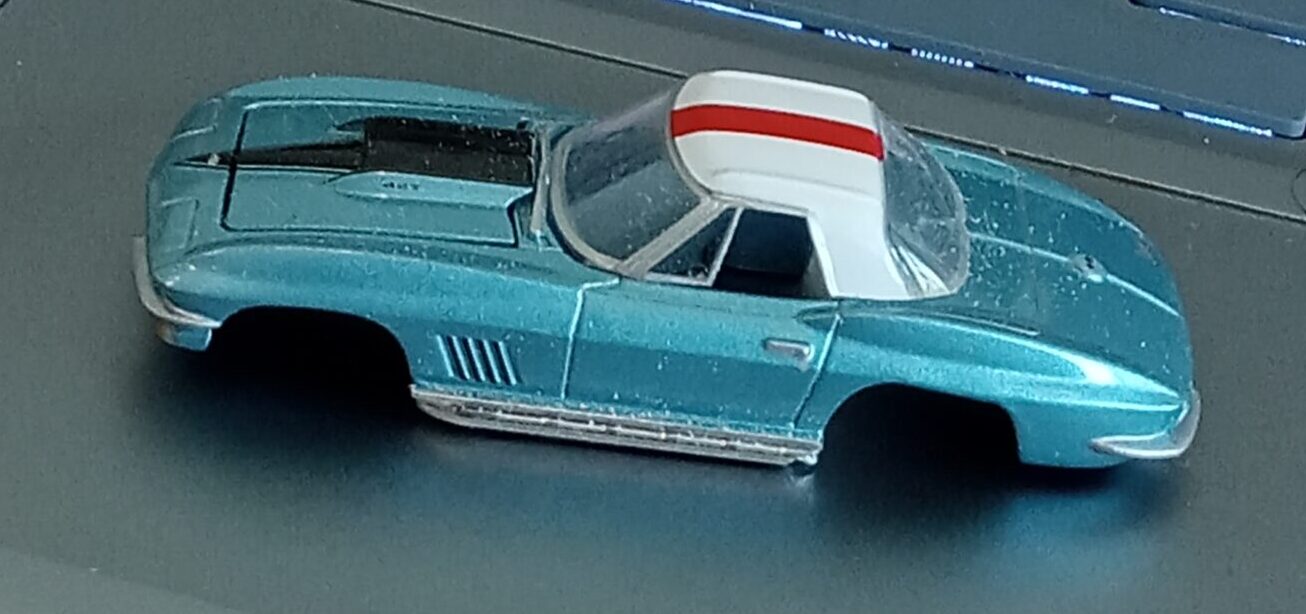
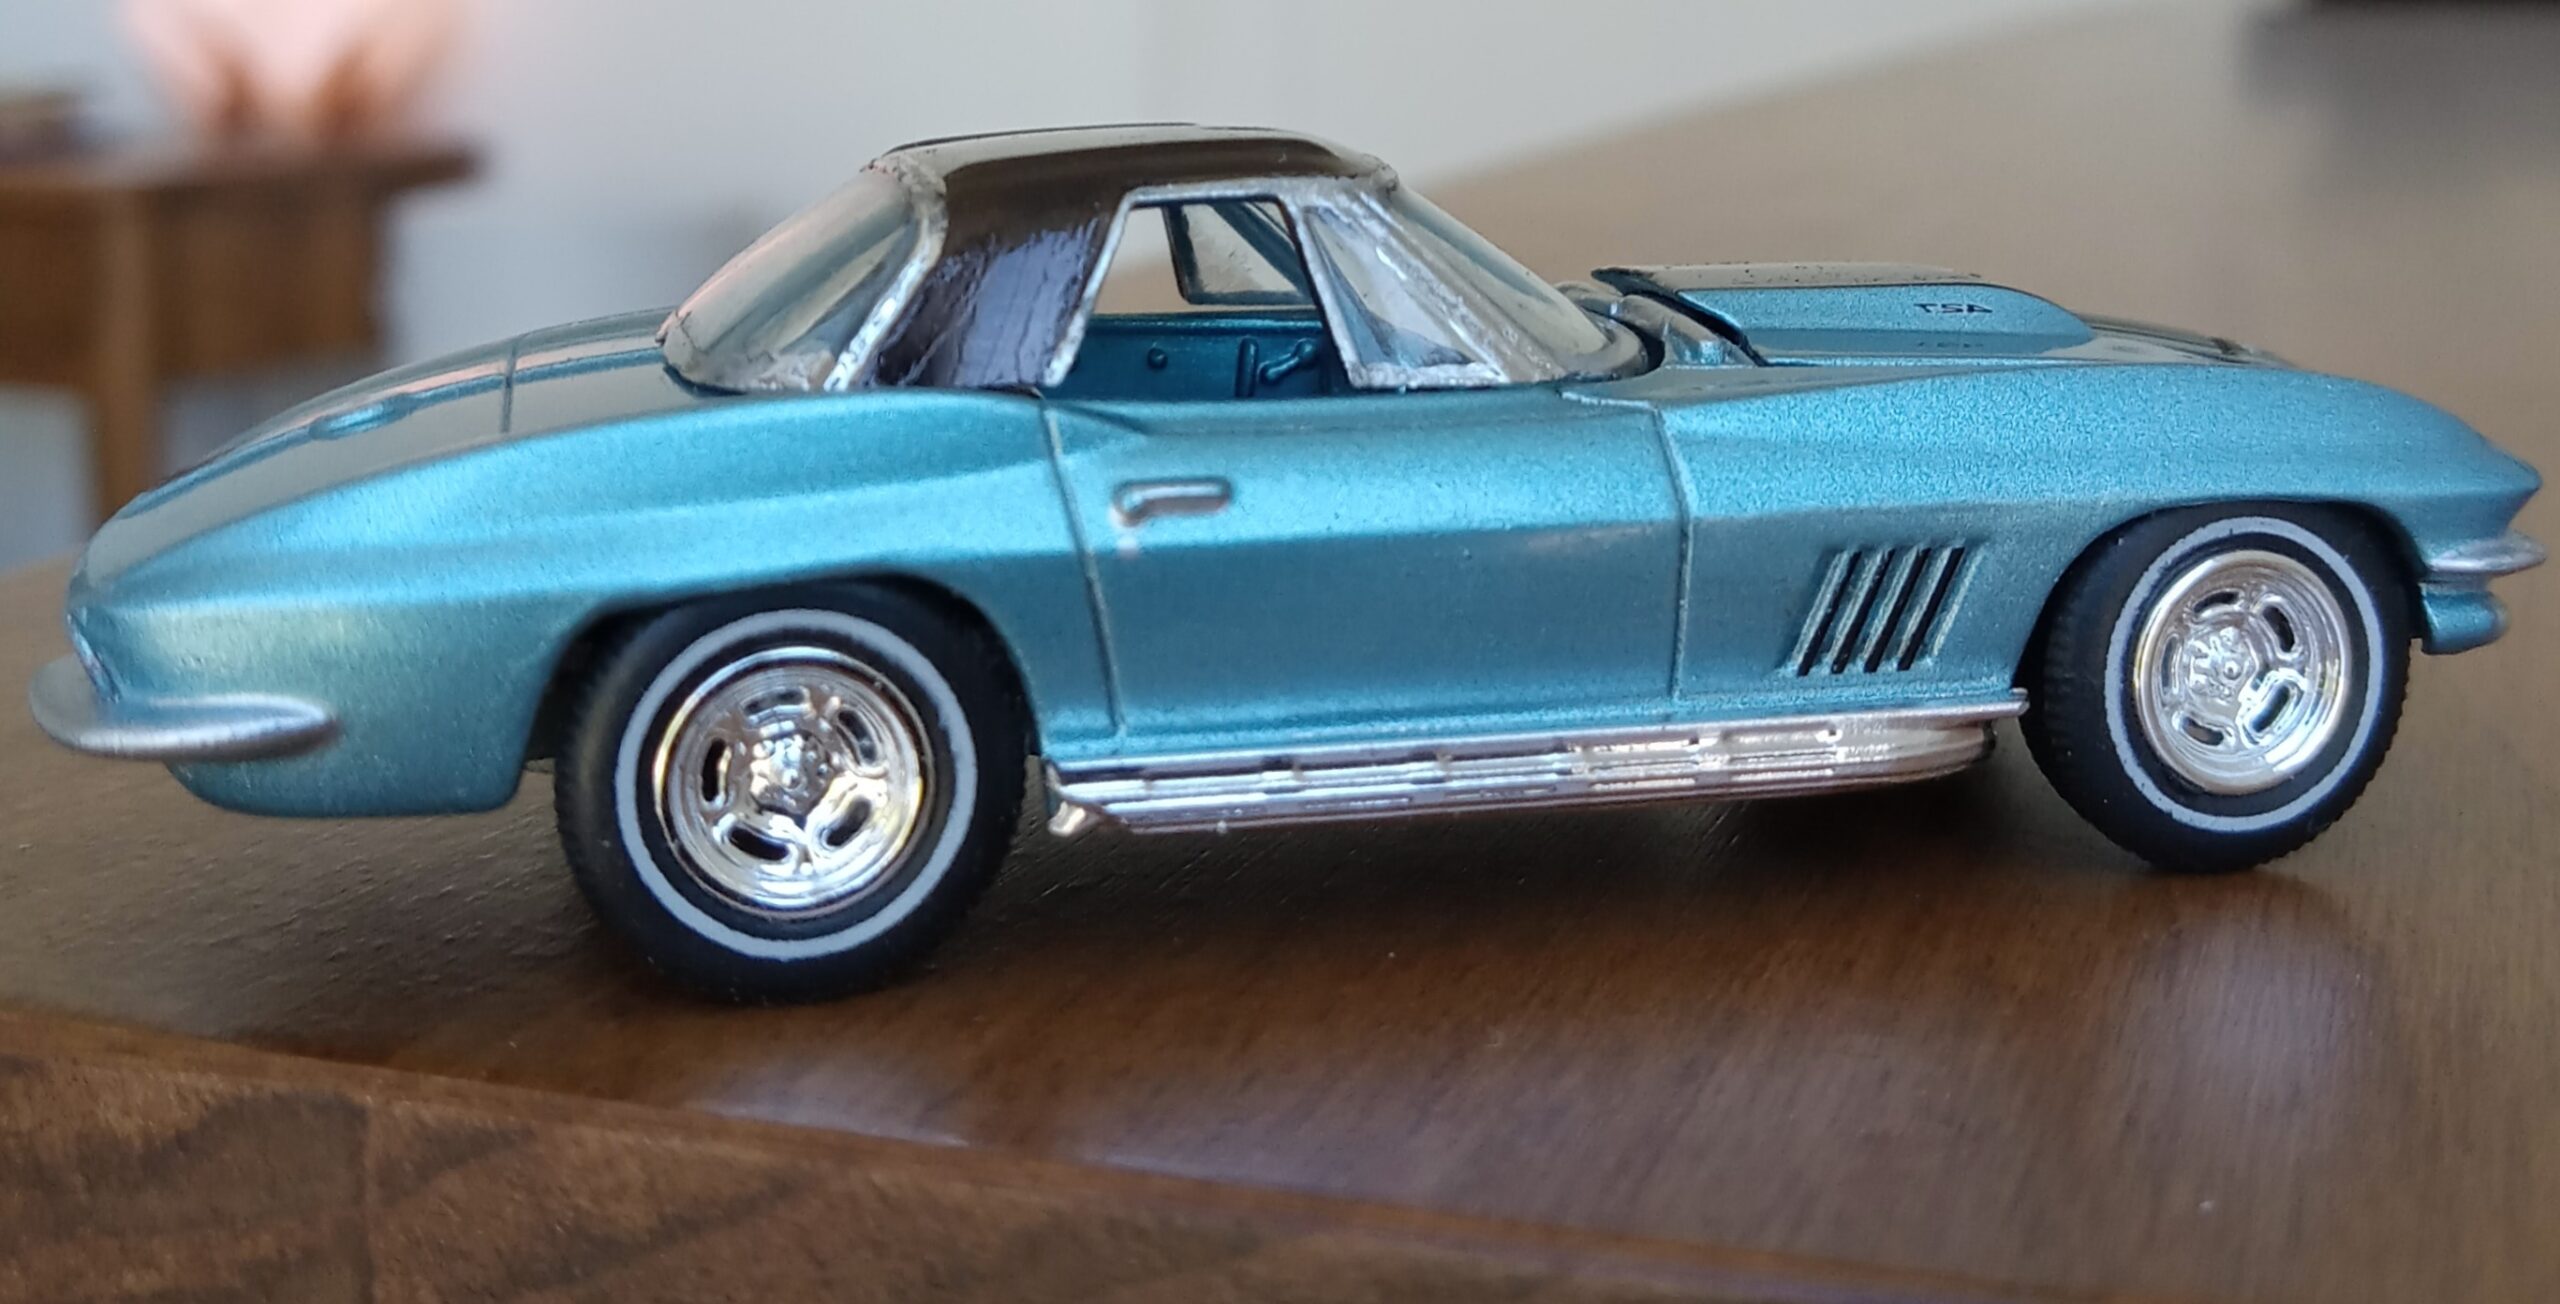
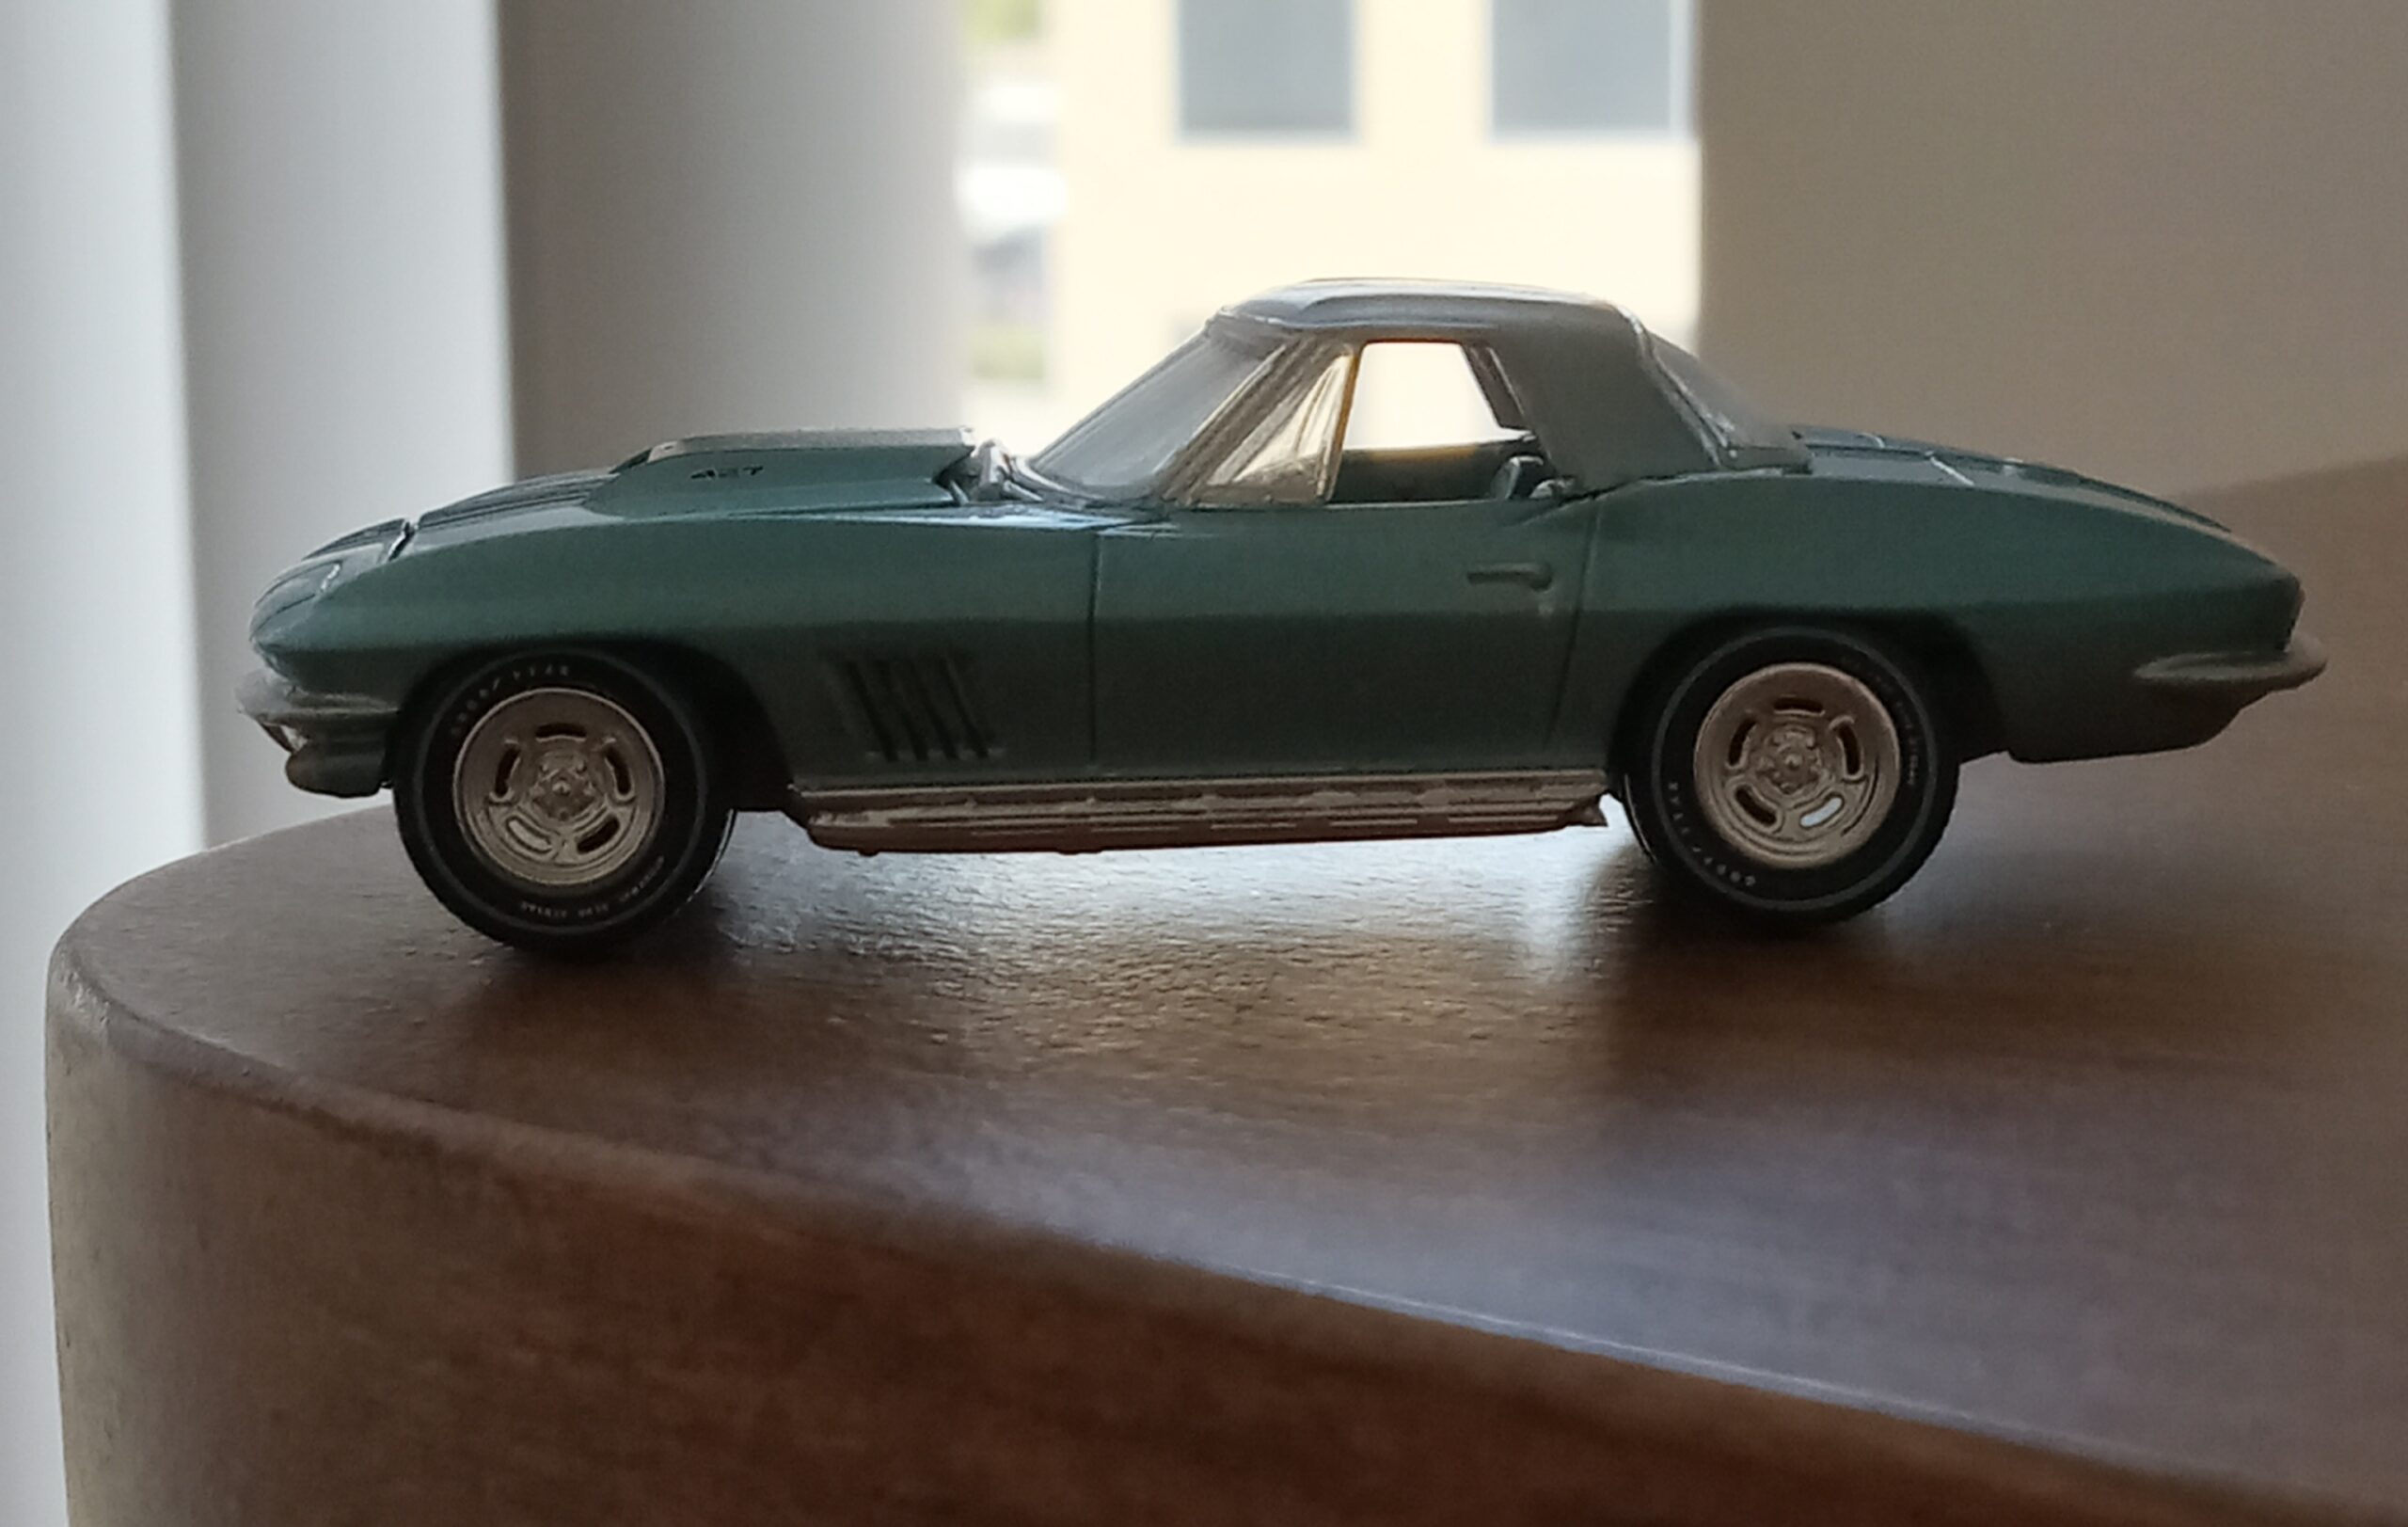
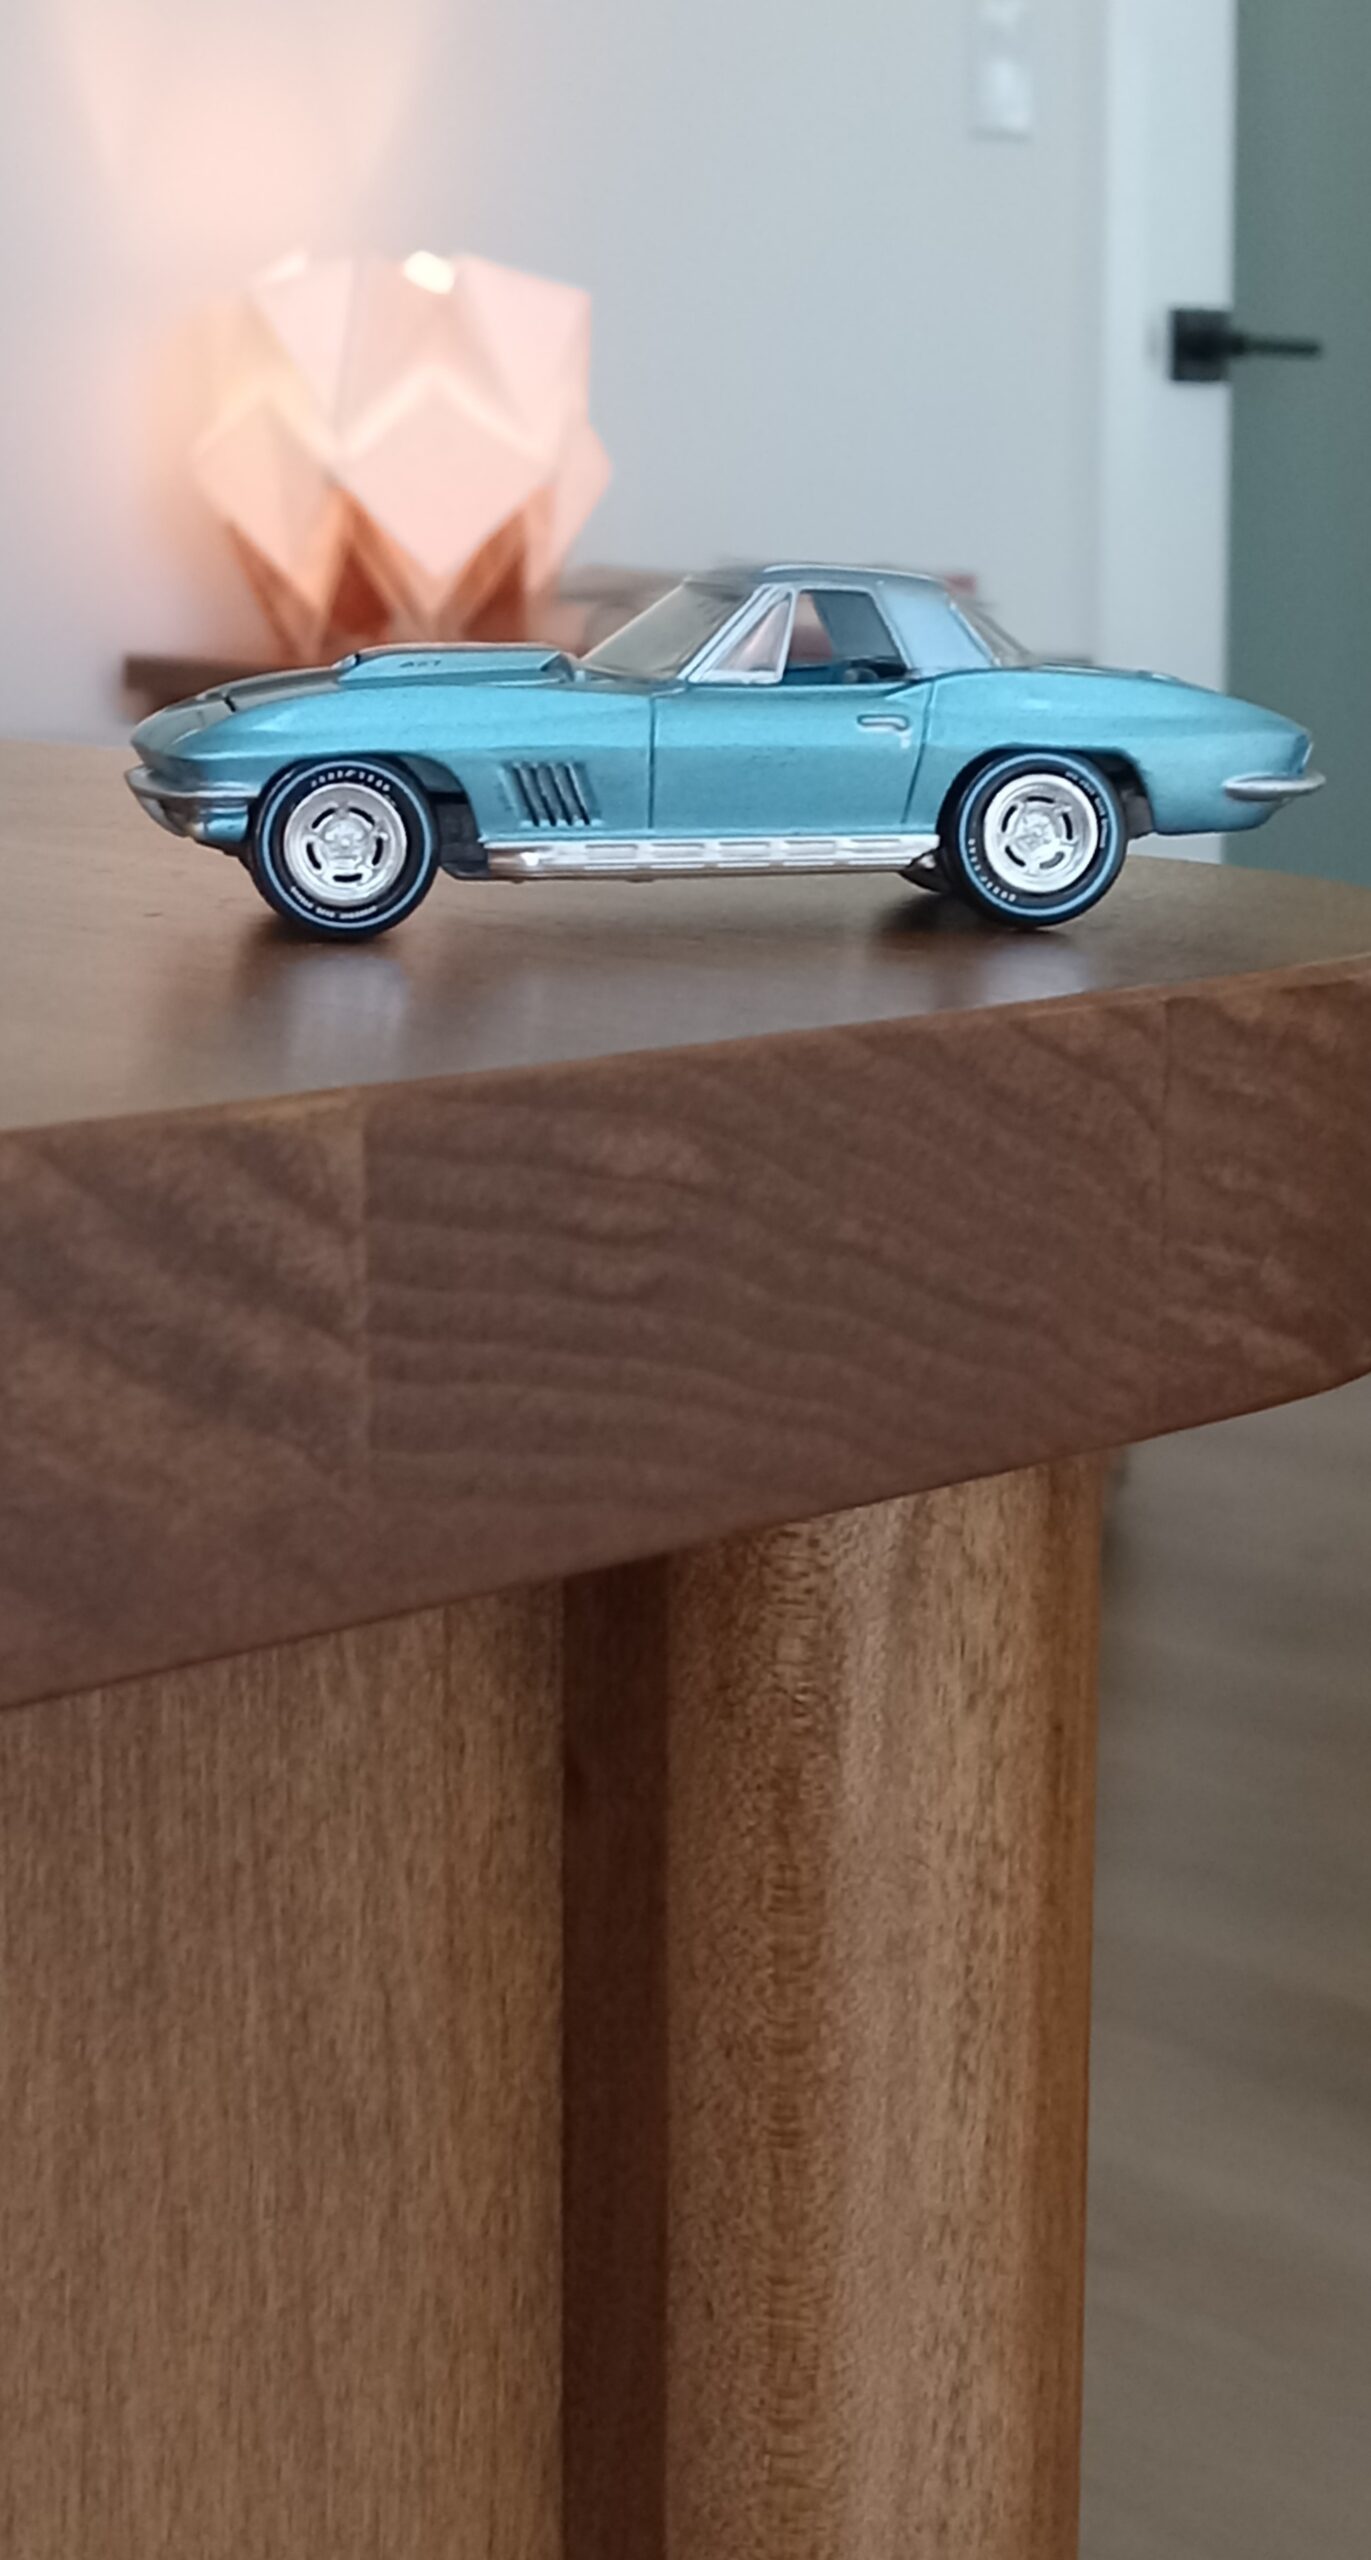
1:ライトブルー・メタリック、黒の幌付き版
(グリーンライトの’67青メタ・ボディー+M2社製青グレー’67のホイールとタイヤ移植)
ーーーーーーーー>若干、尻下がりに見えます
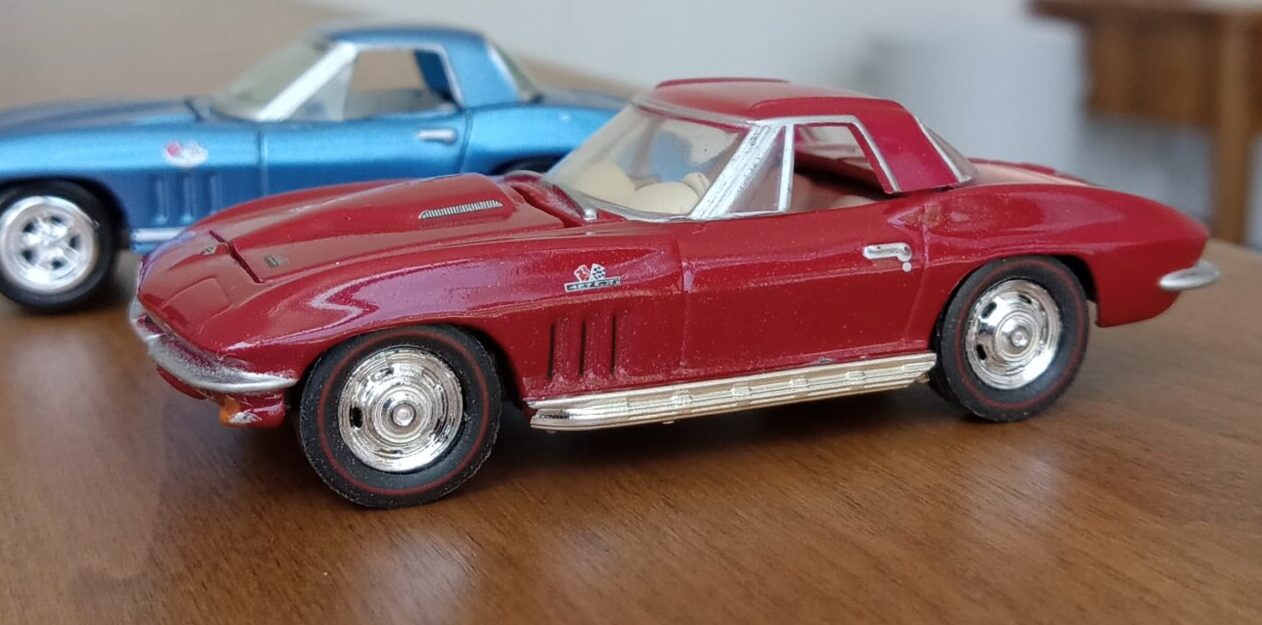
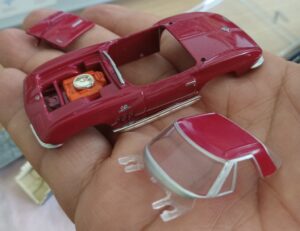
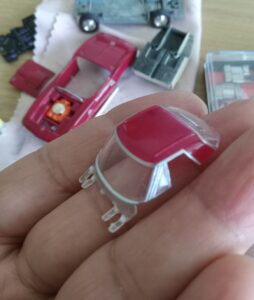
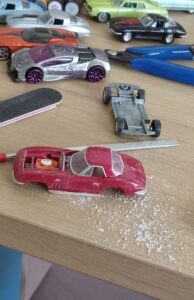
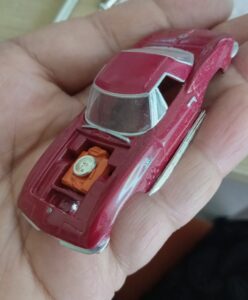
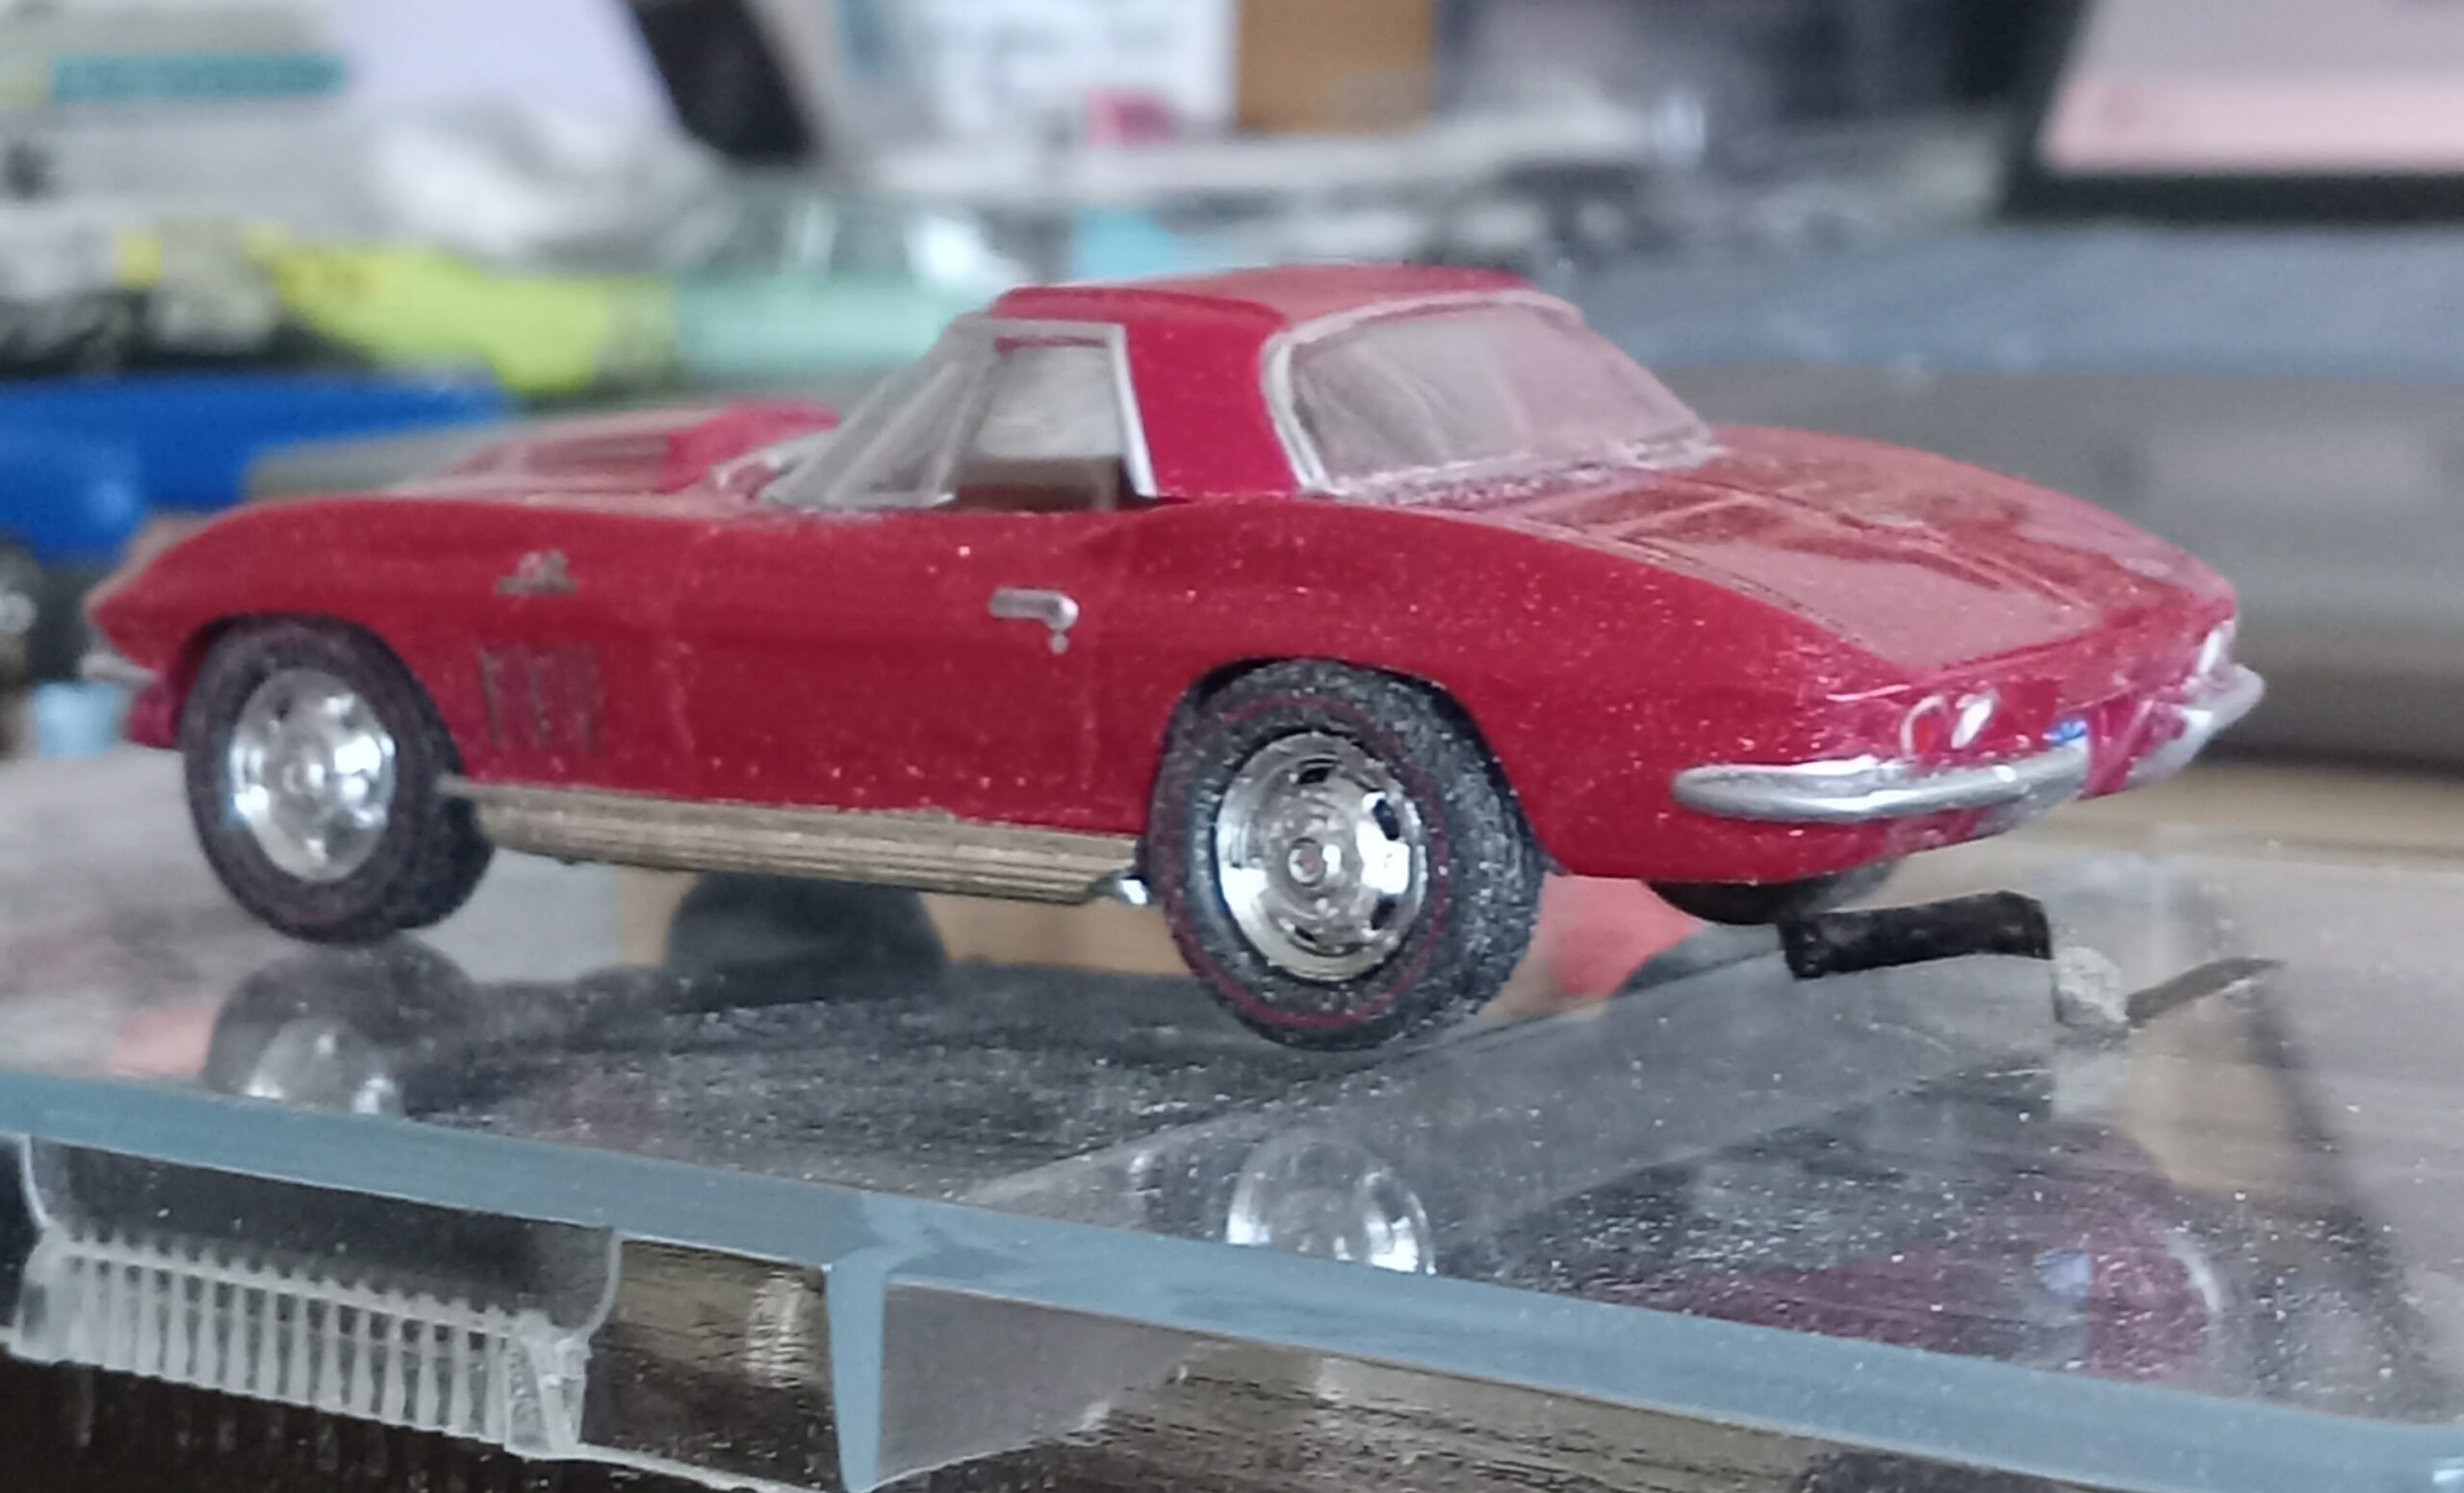
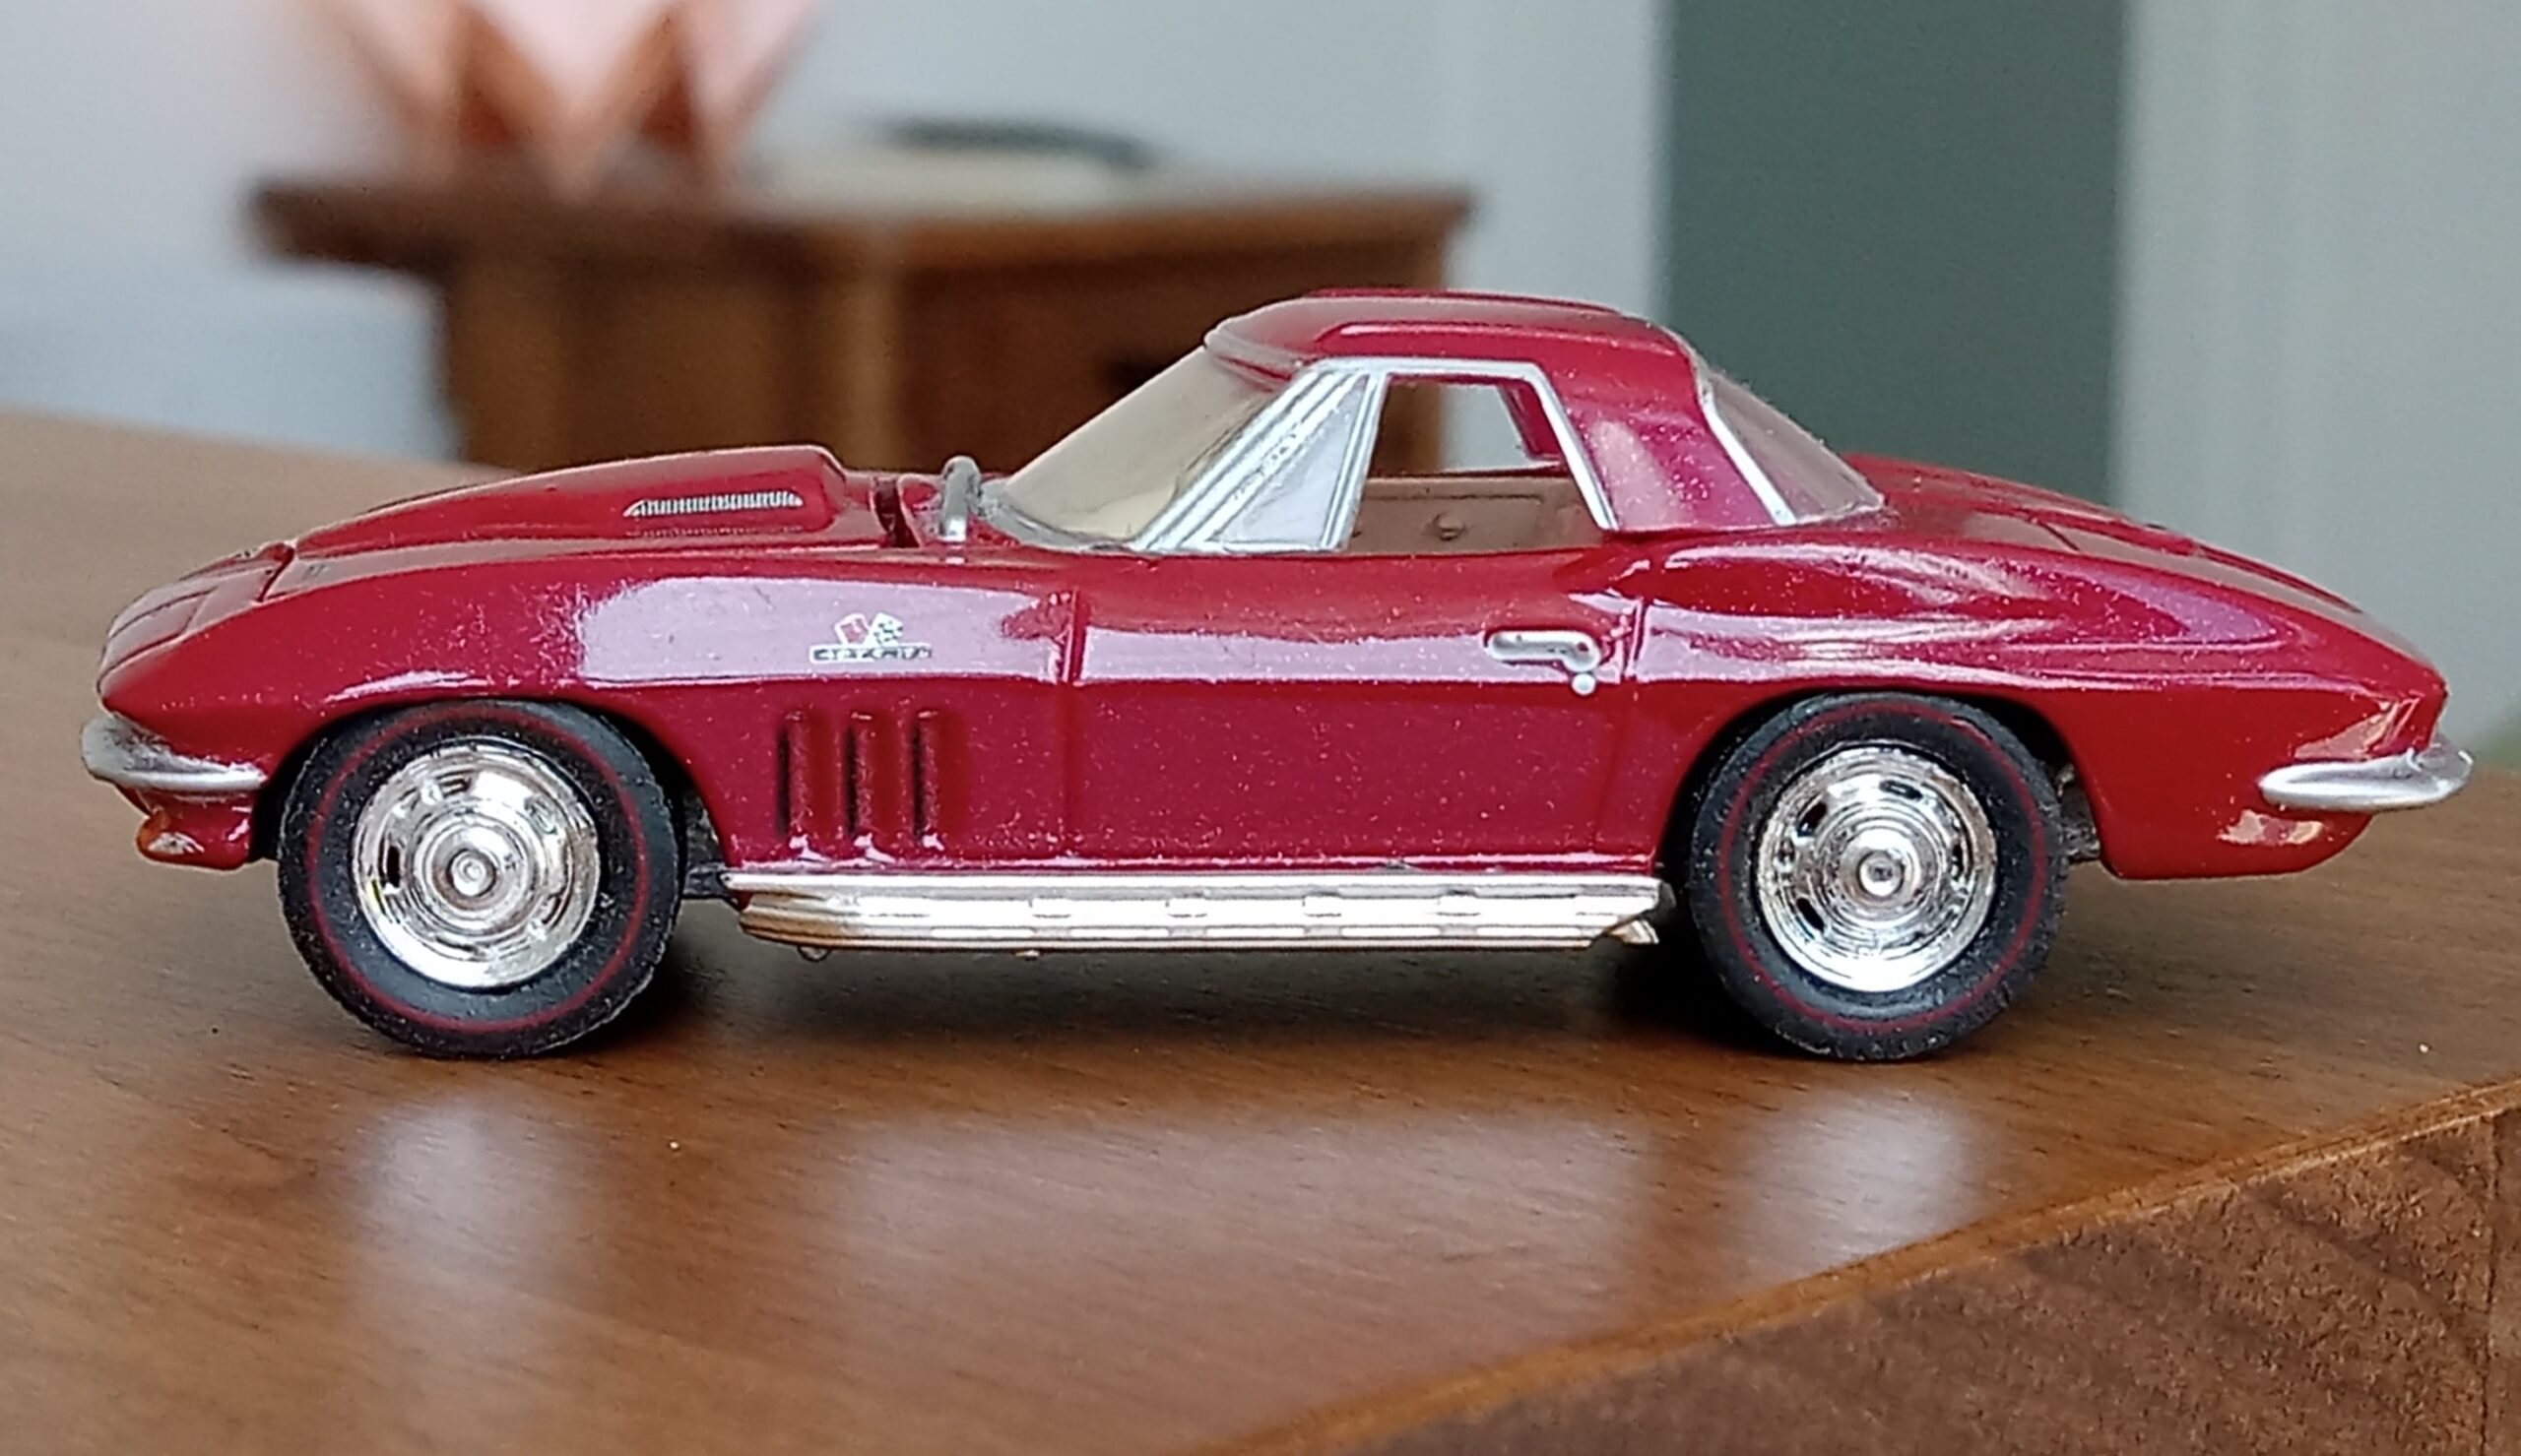
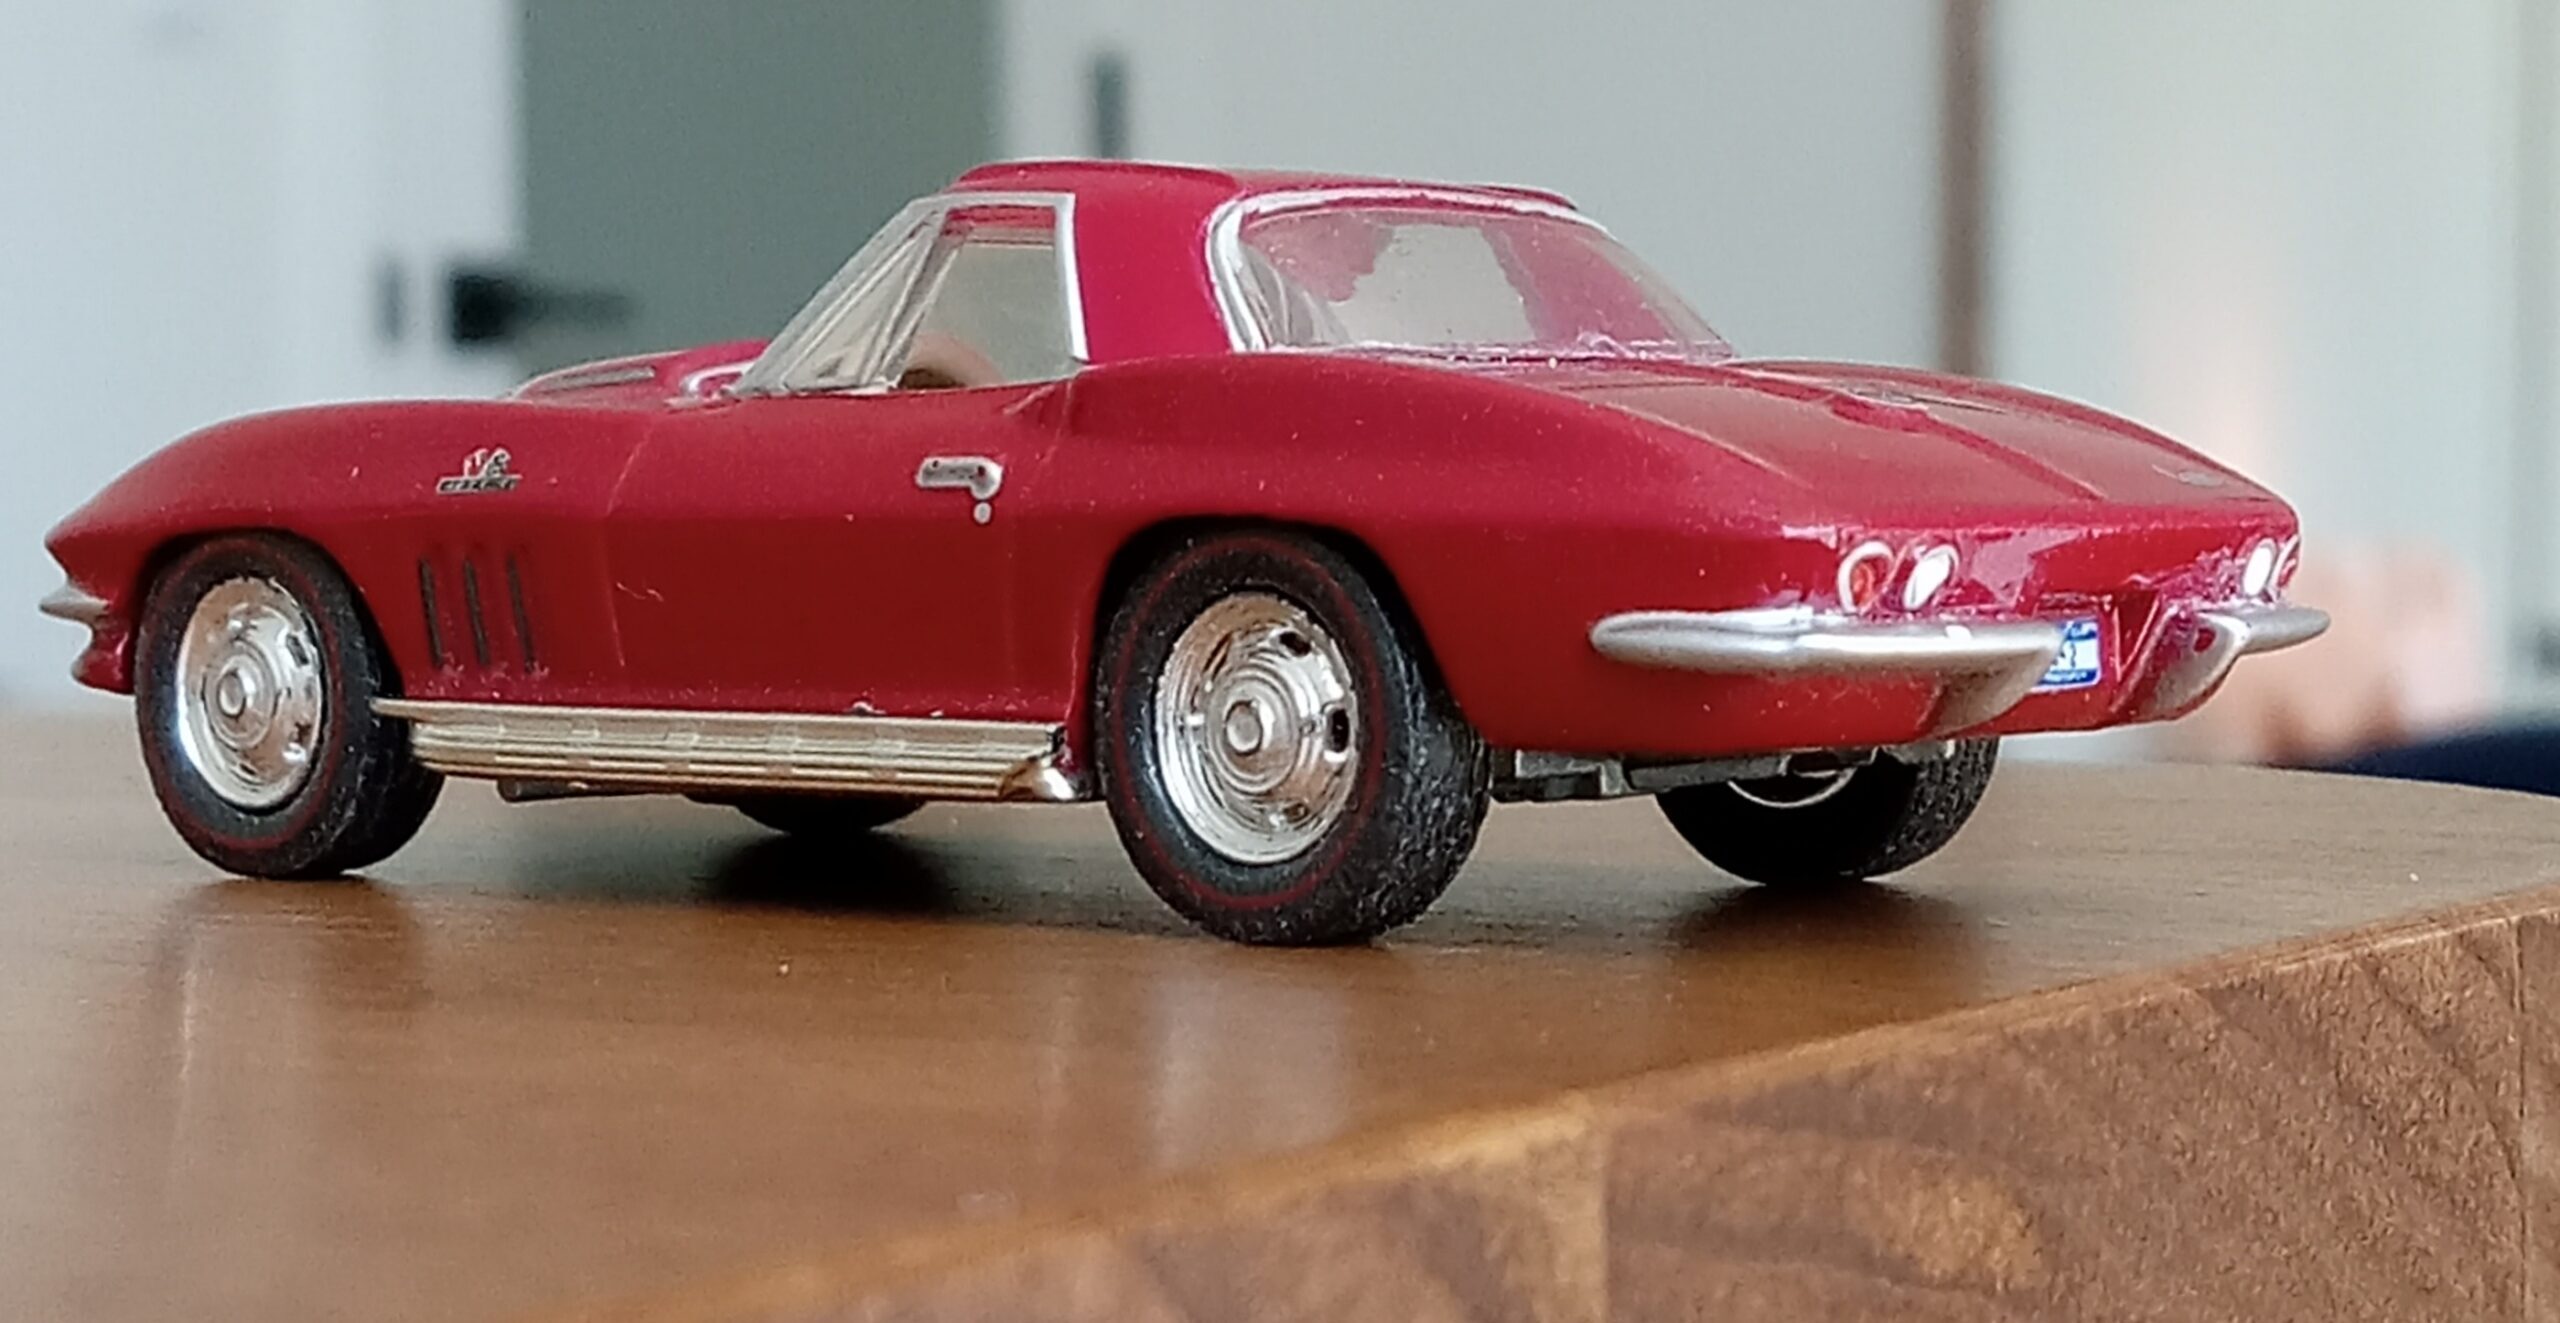
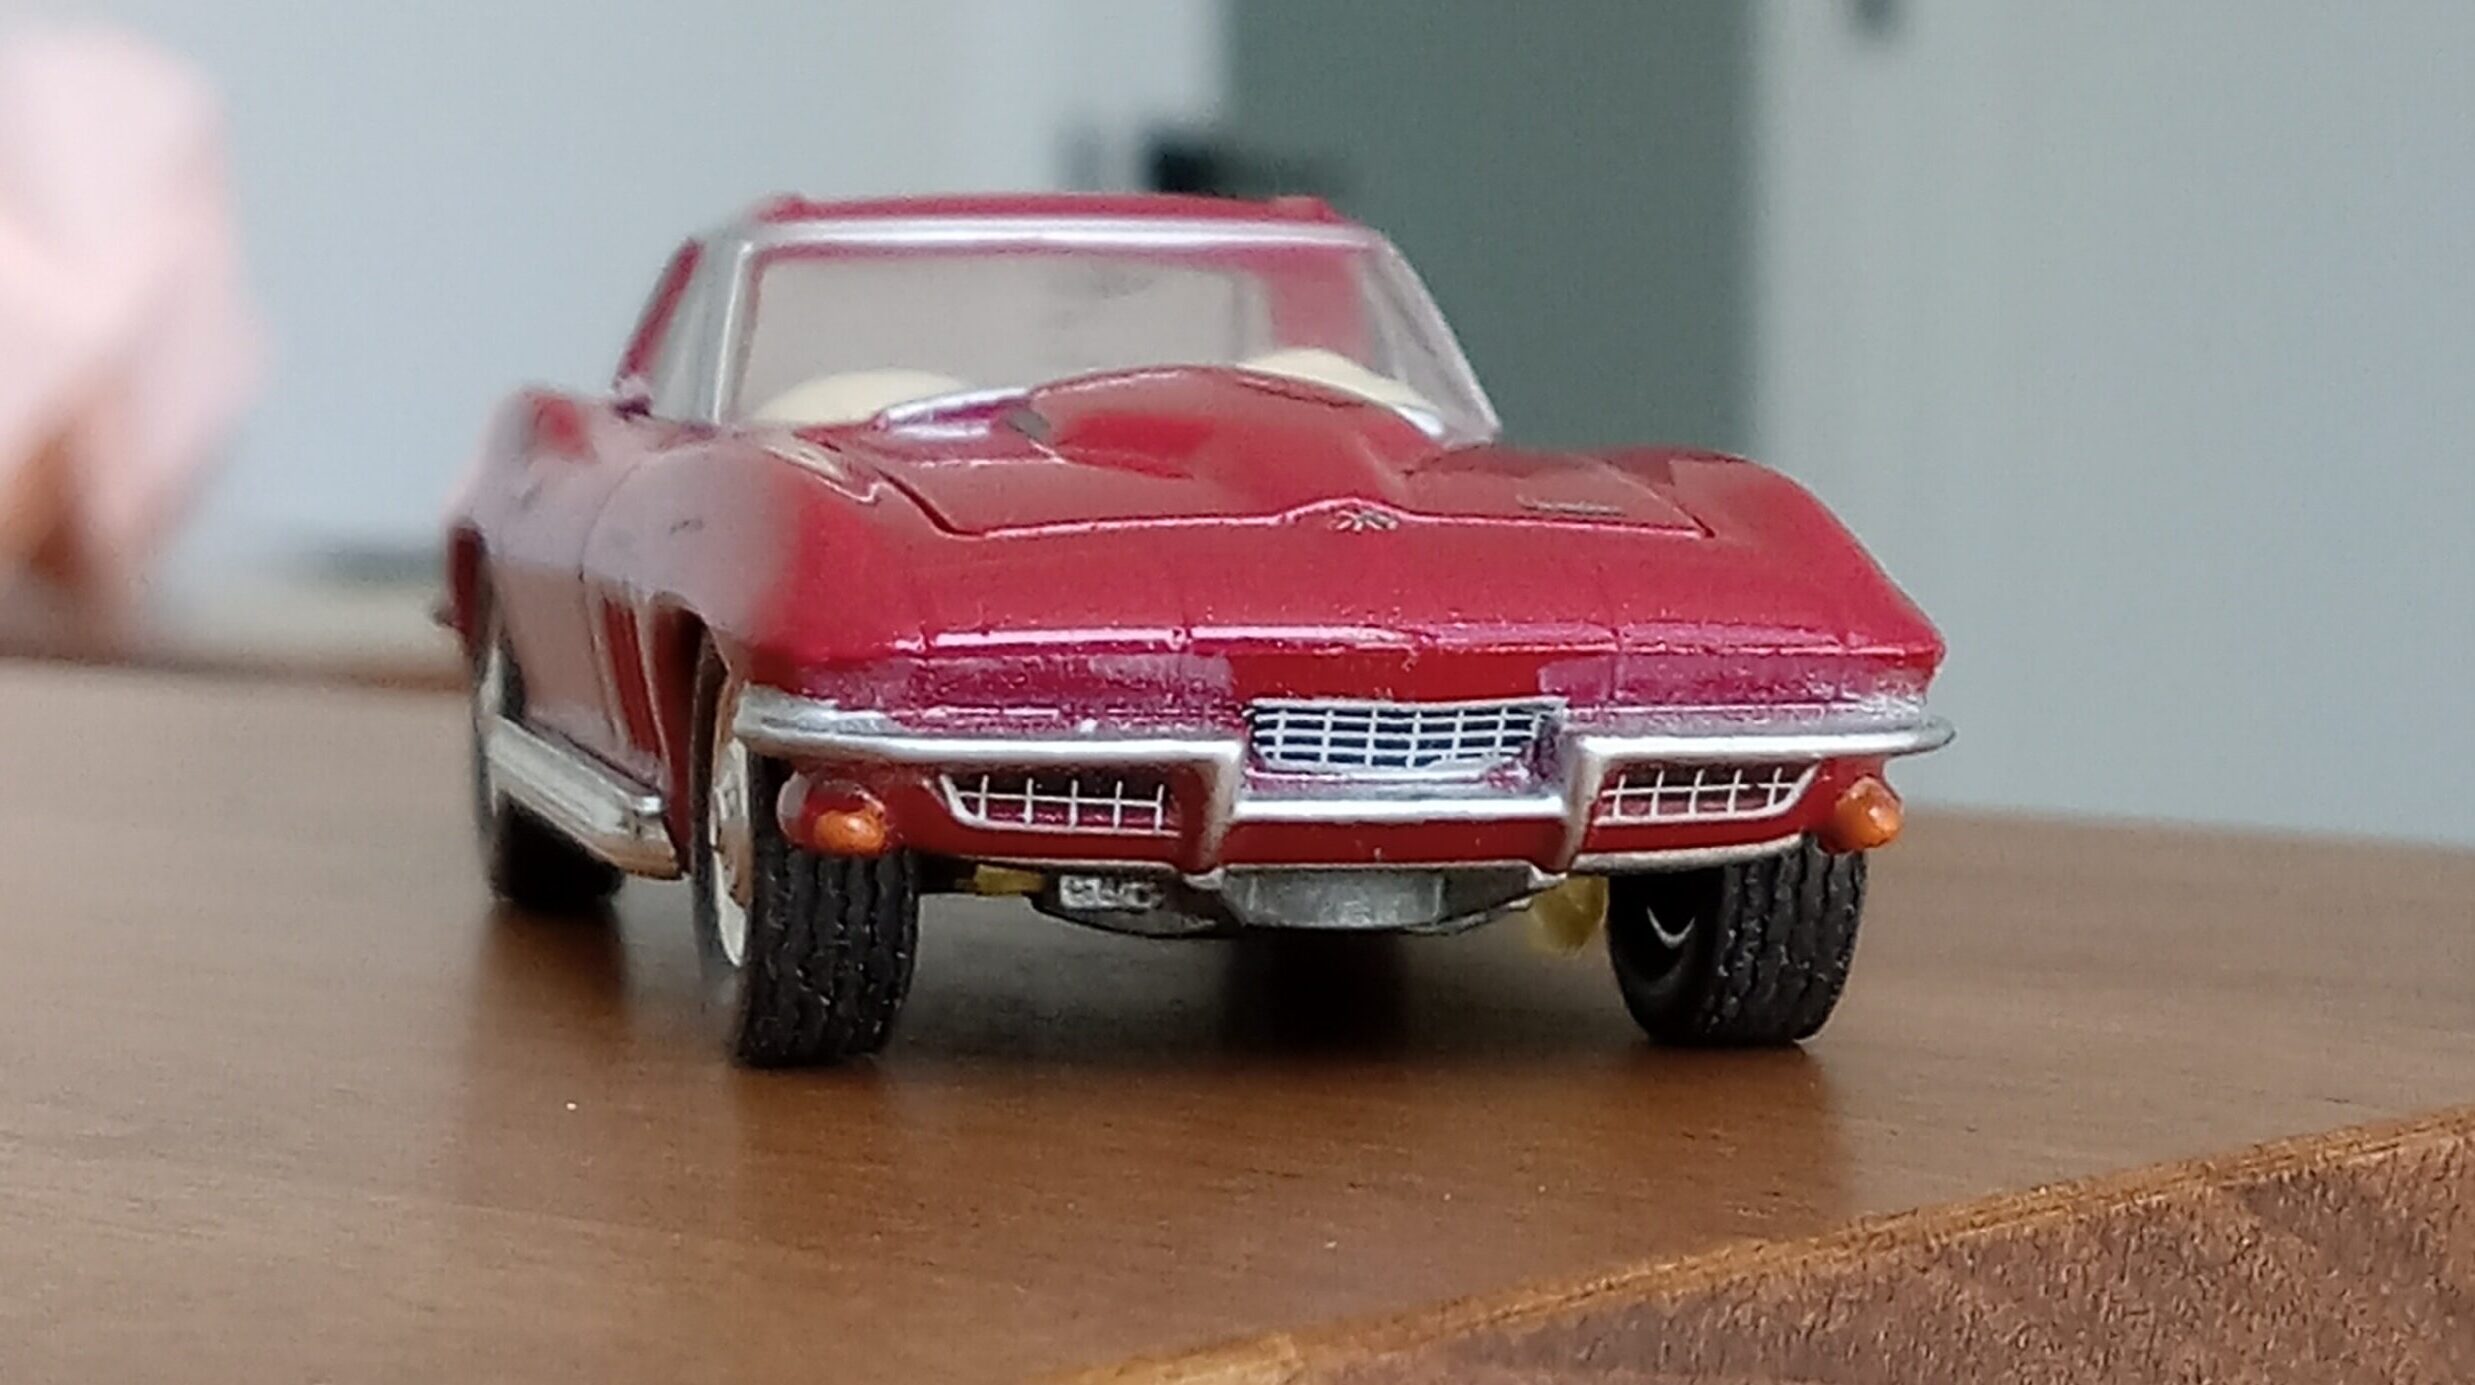
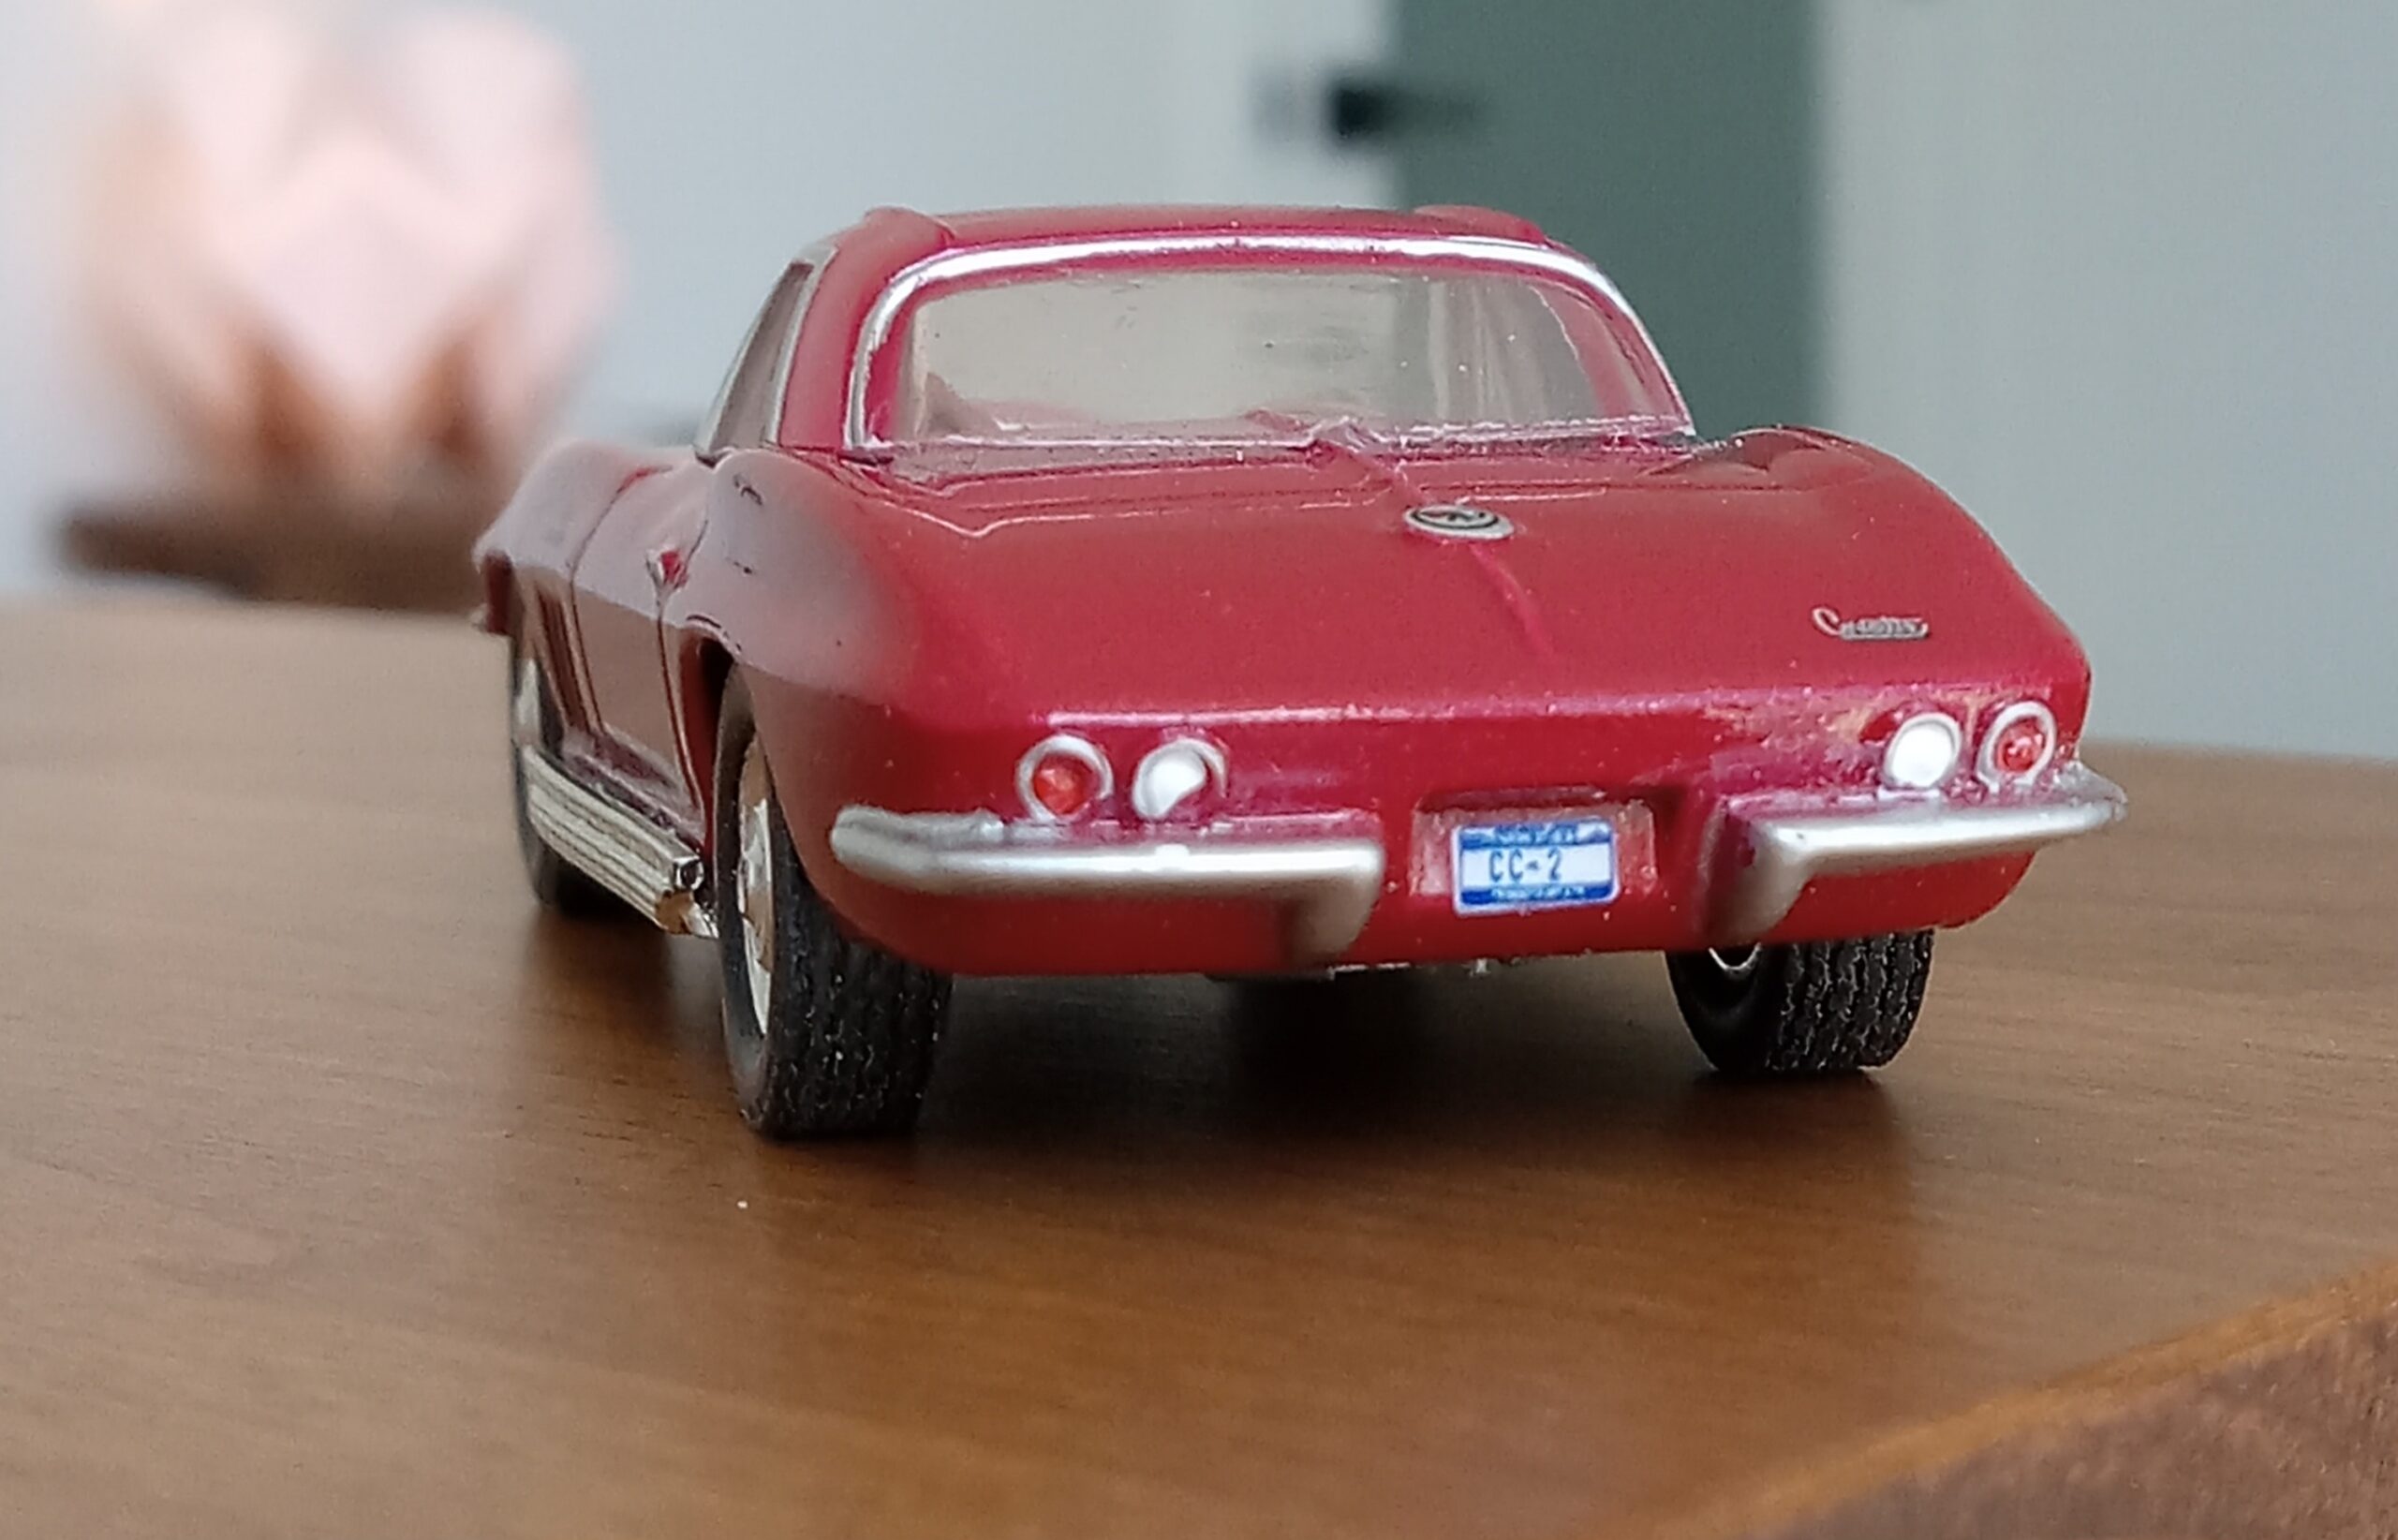
2:バーガンディー・メタリック、同色ハードトップ付き版
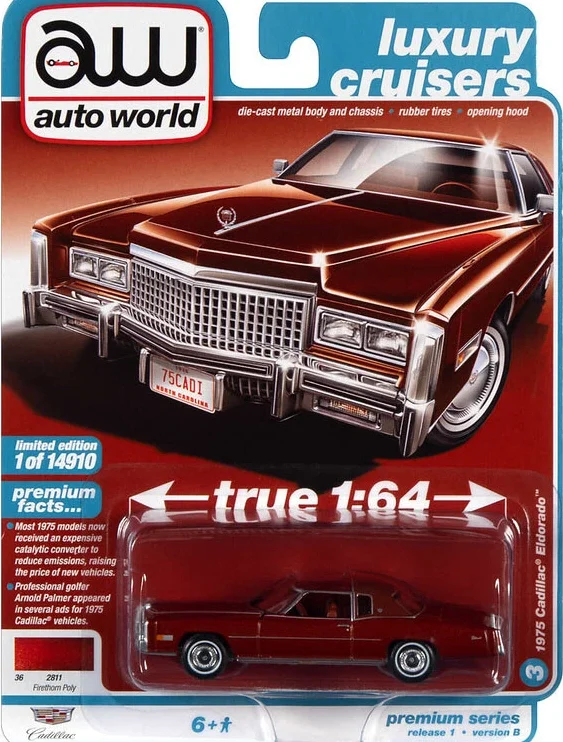
(グリーンライトの’66スティングレー、バーガンディー・ハードトップ付き+AUTOWORLD社製’67クーペのホイールとAUTOWORLD製’75キャデラック・エルドラドのホワイトレター・タイヤ)
ーーーーーーー>バーガンディーがコルベットにはパンチ不足?

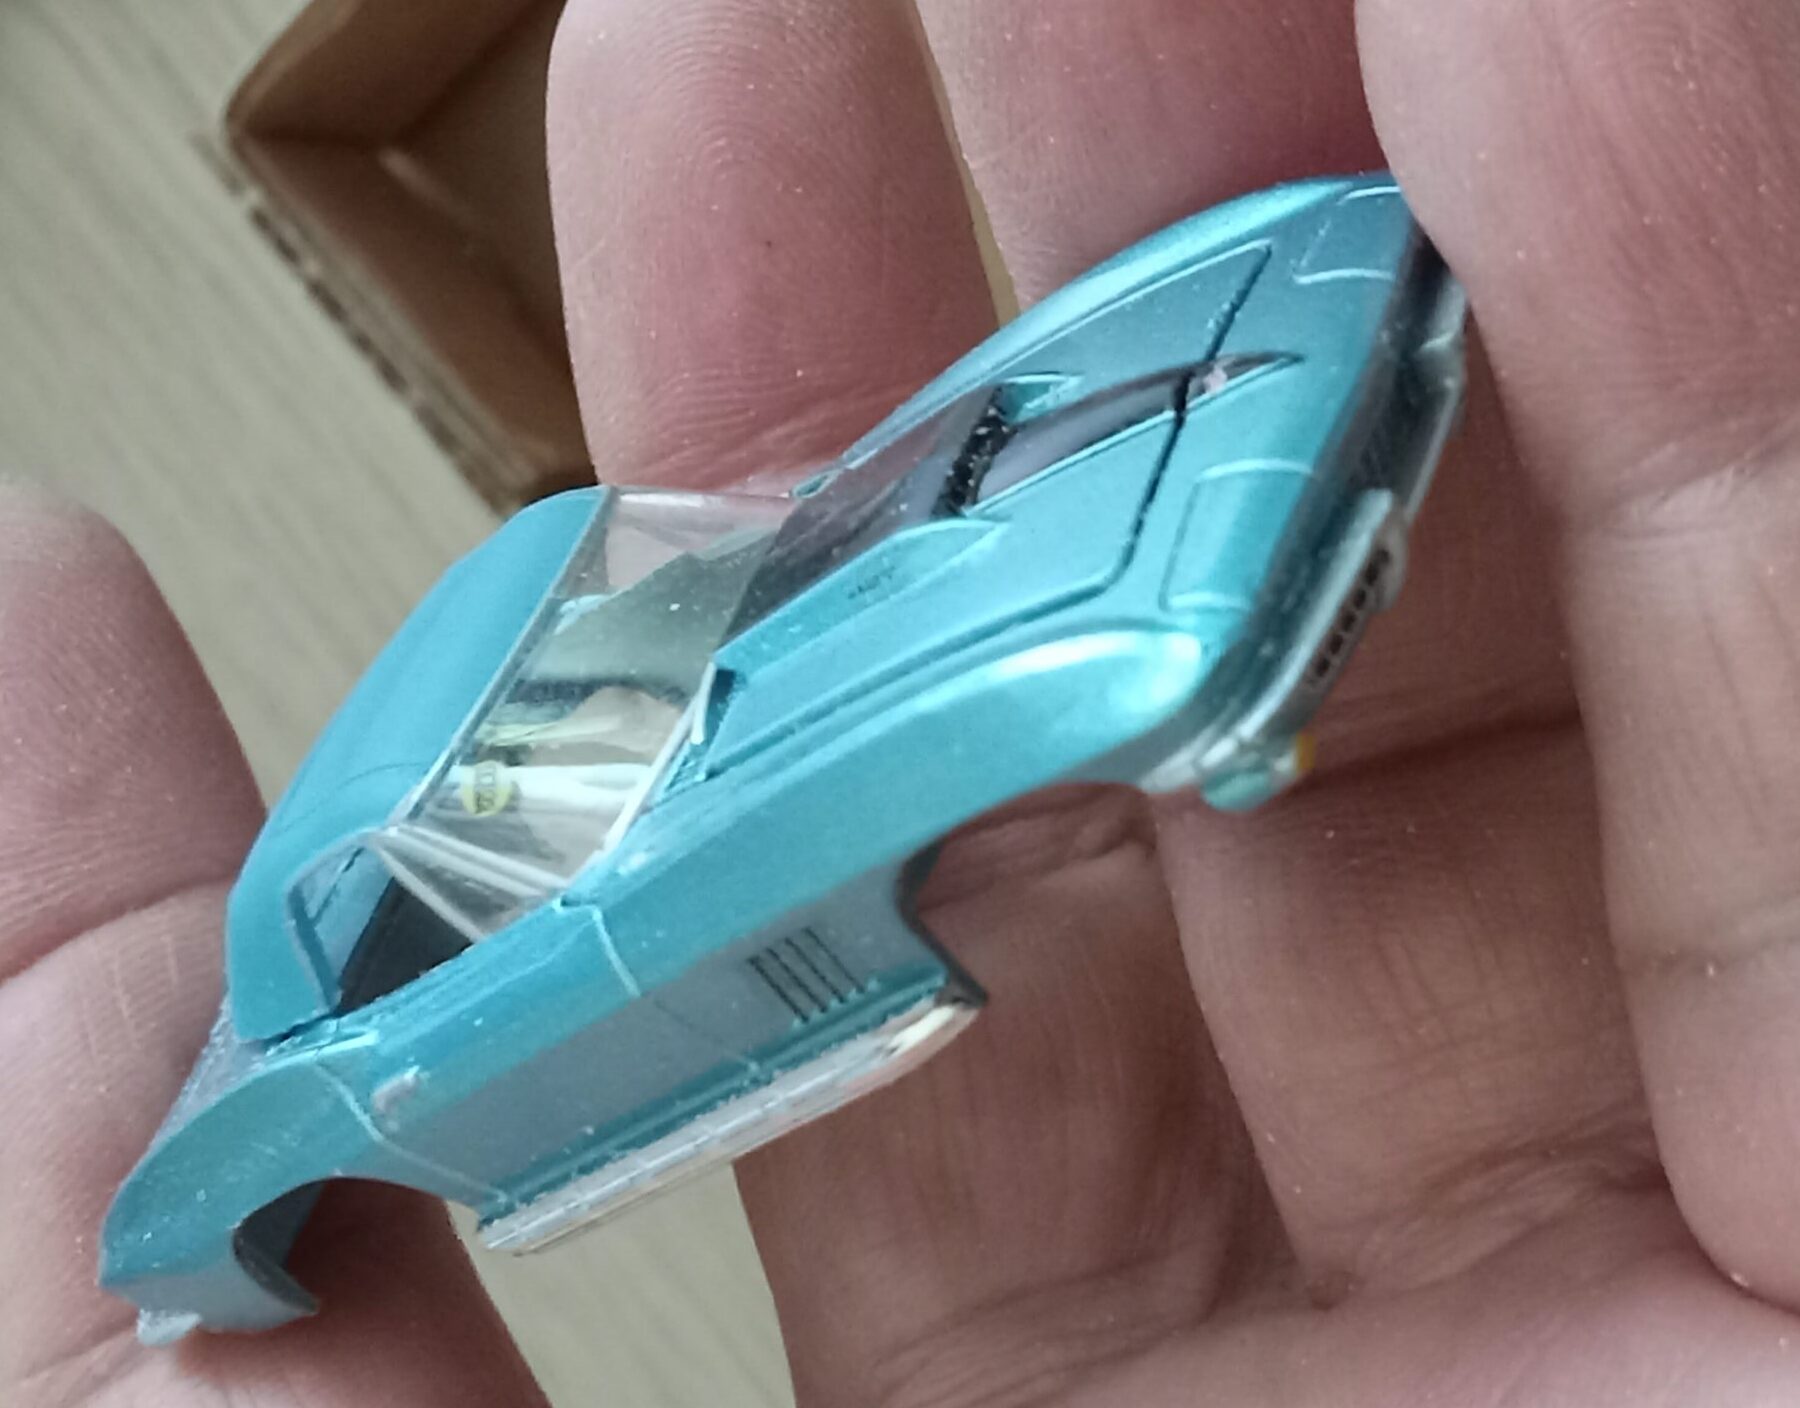
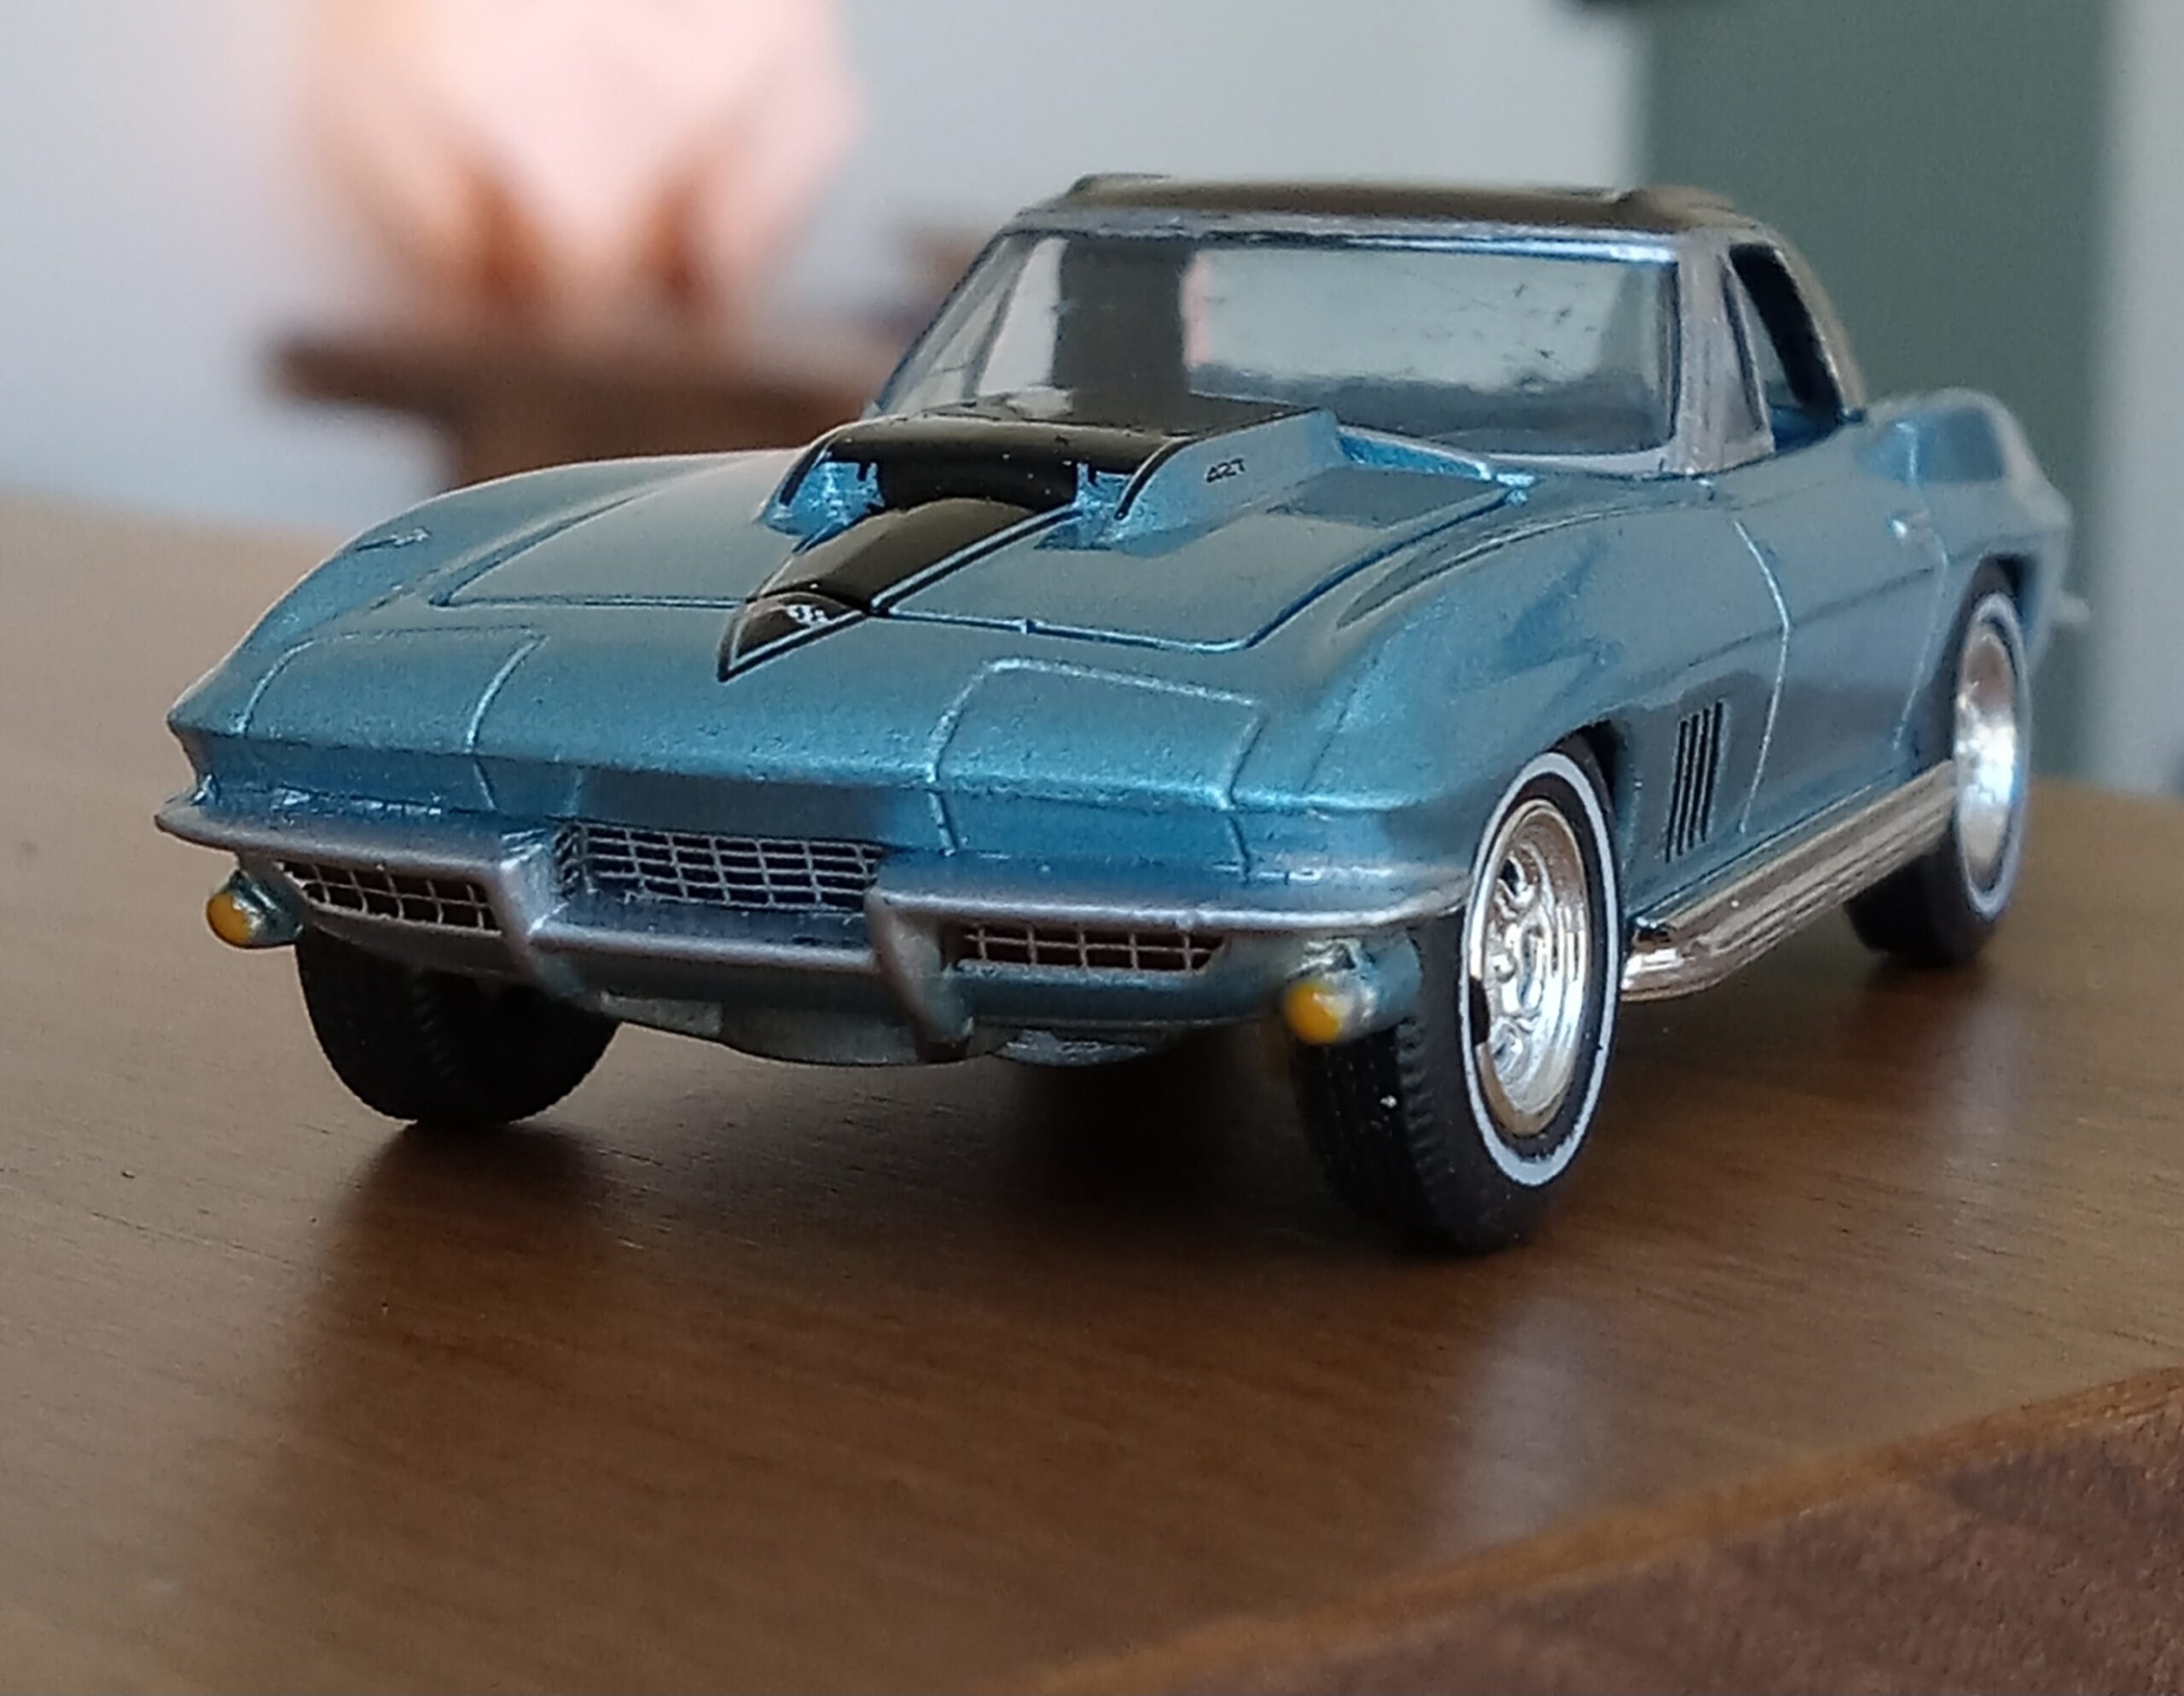
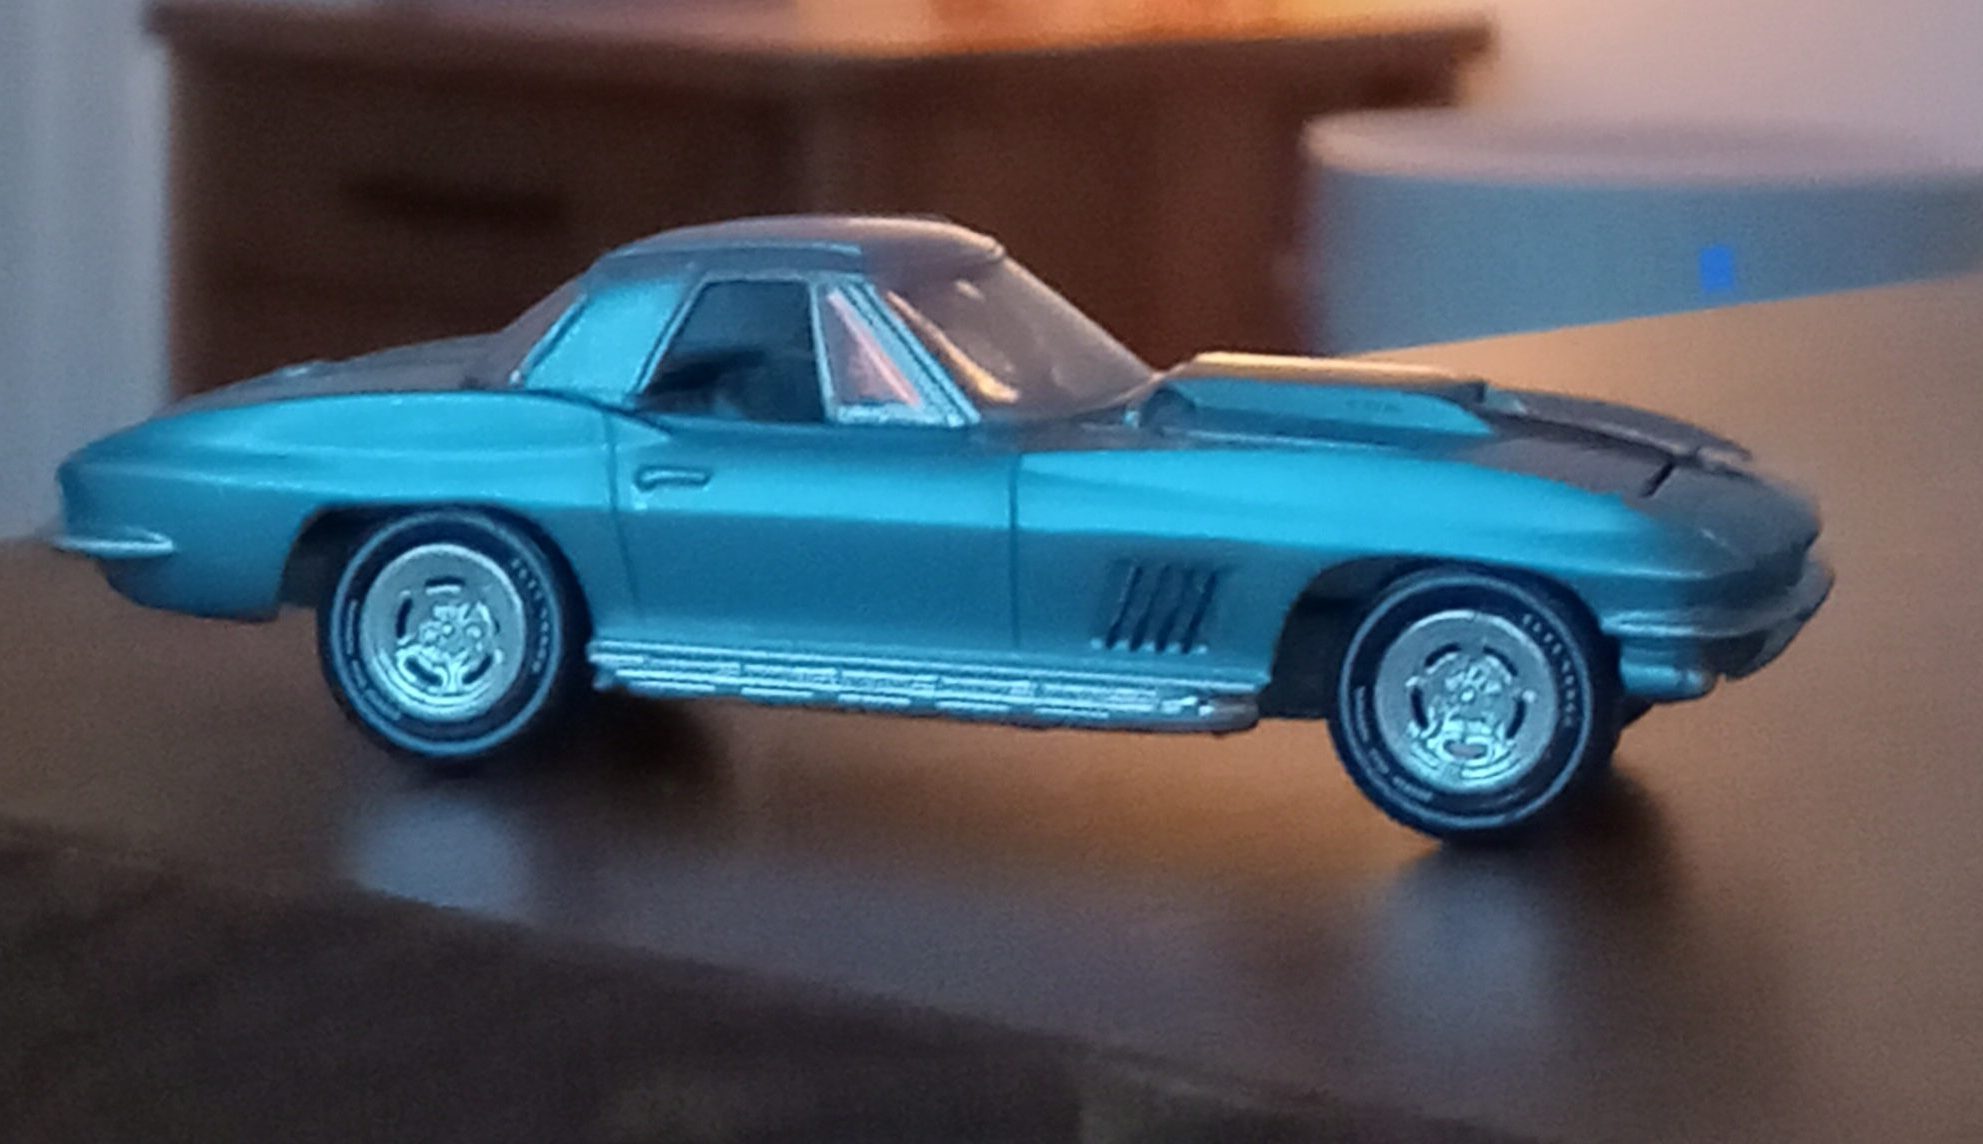
3:ライトブルー・メタリック、黒のハードトップ付き版
(同じく、グリーンライトの’67青メタ・ボディー+グリーンライトの’67レーシングバージョンのハードトップ+AUTOWORLD社製’67クーペのホイールとAUTOWORLD製’75キャデラック・エルドラドのホワイトレタータイヤ)
ーーーーーーーーーー>こちらも尻下がりなのと、色合いが今一、、、
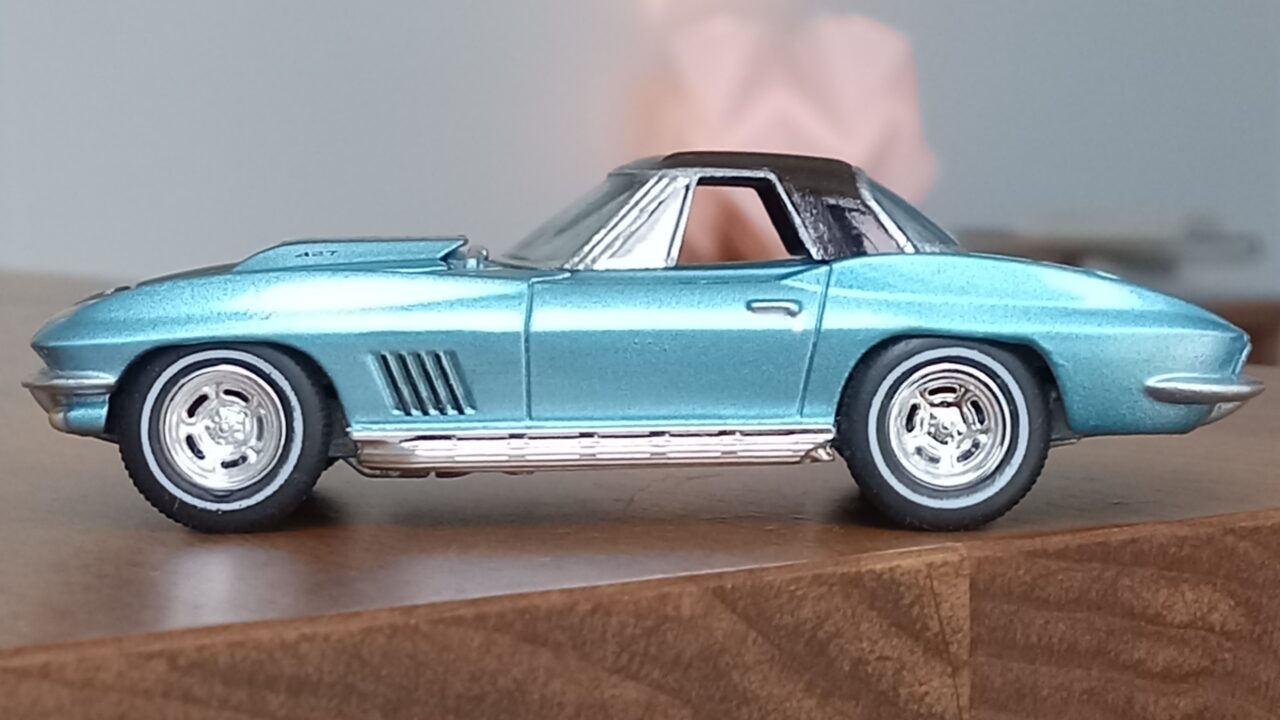
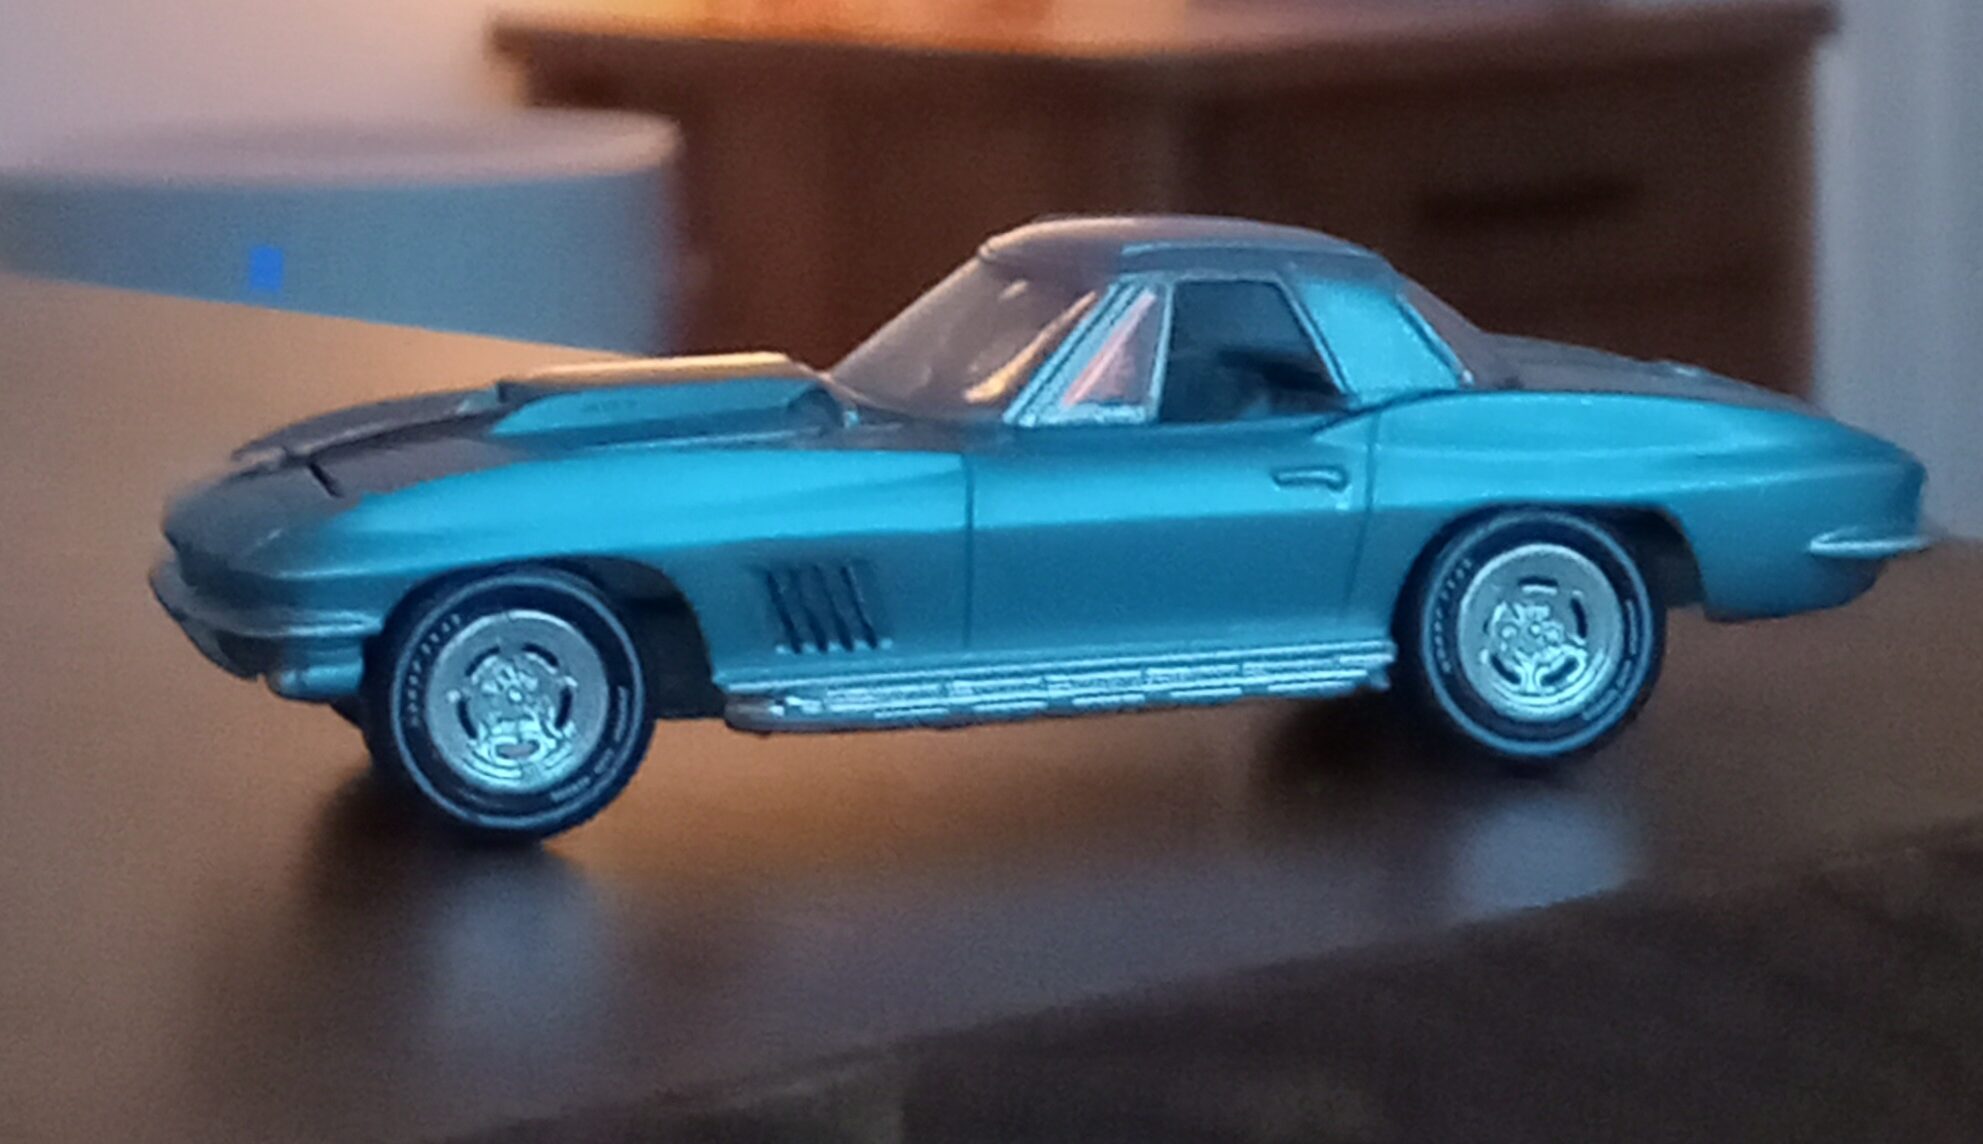
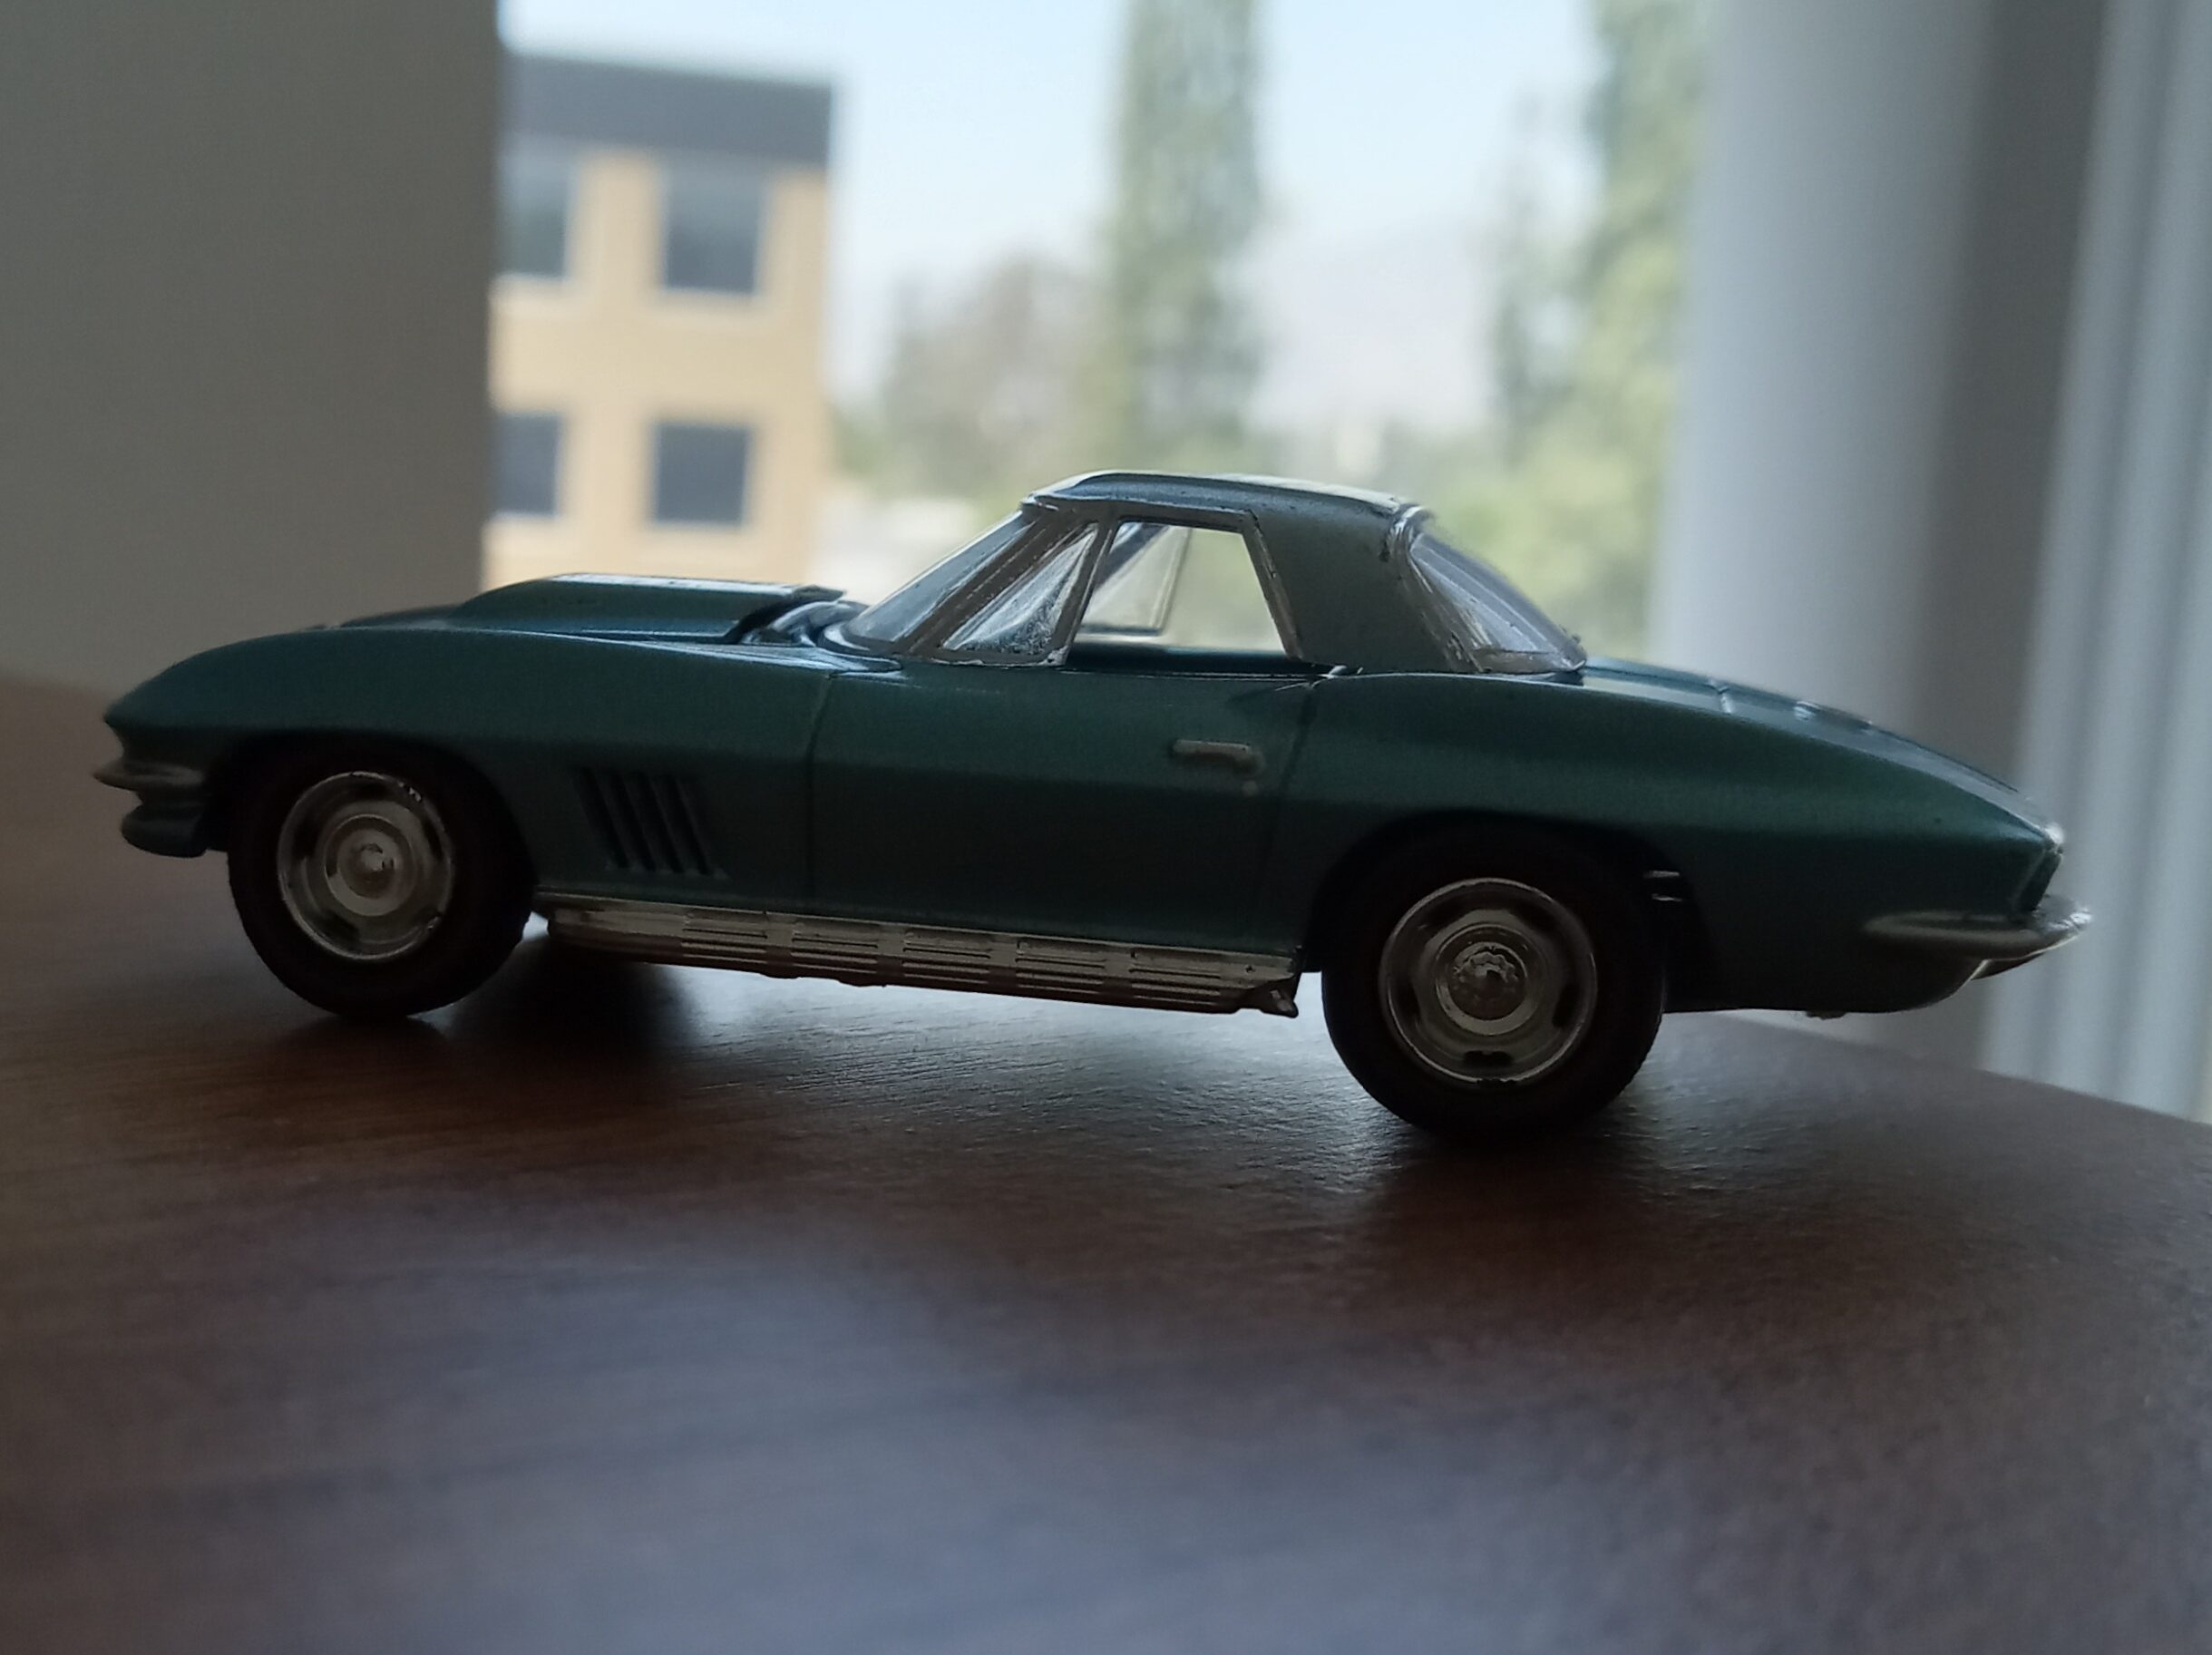
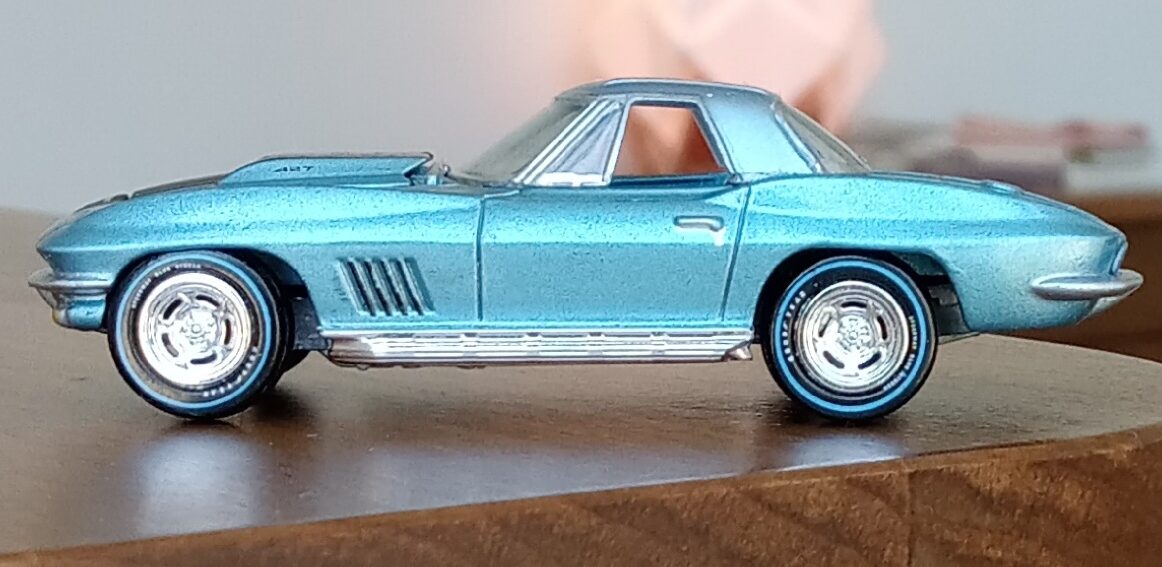
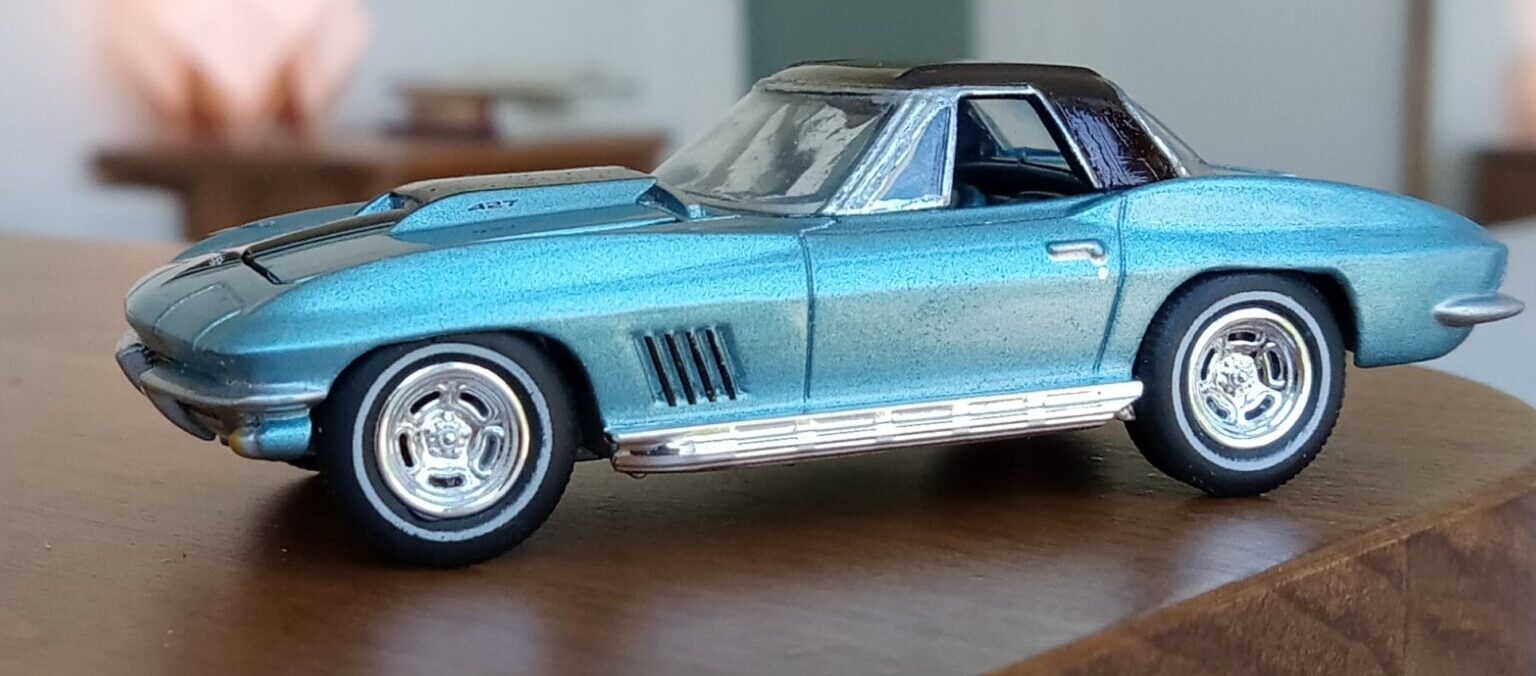
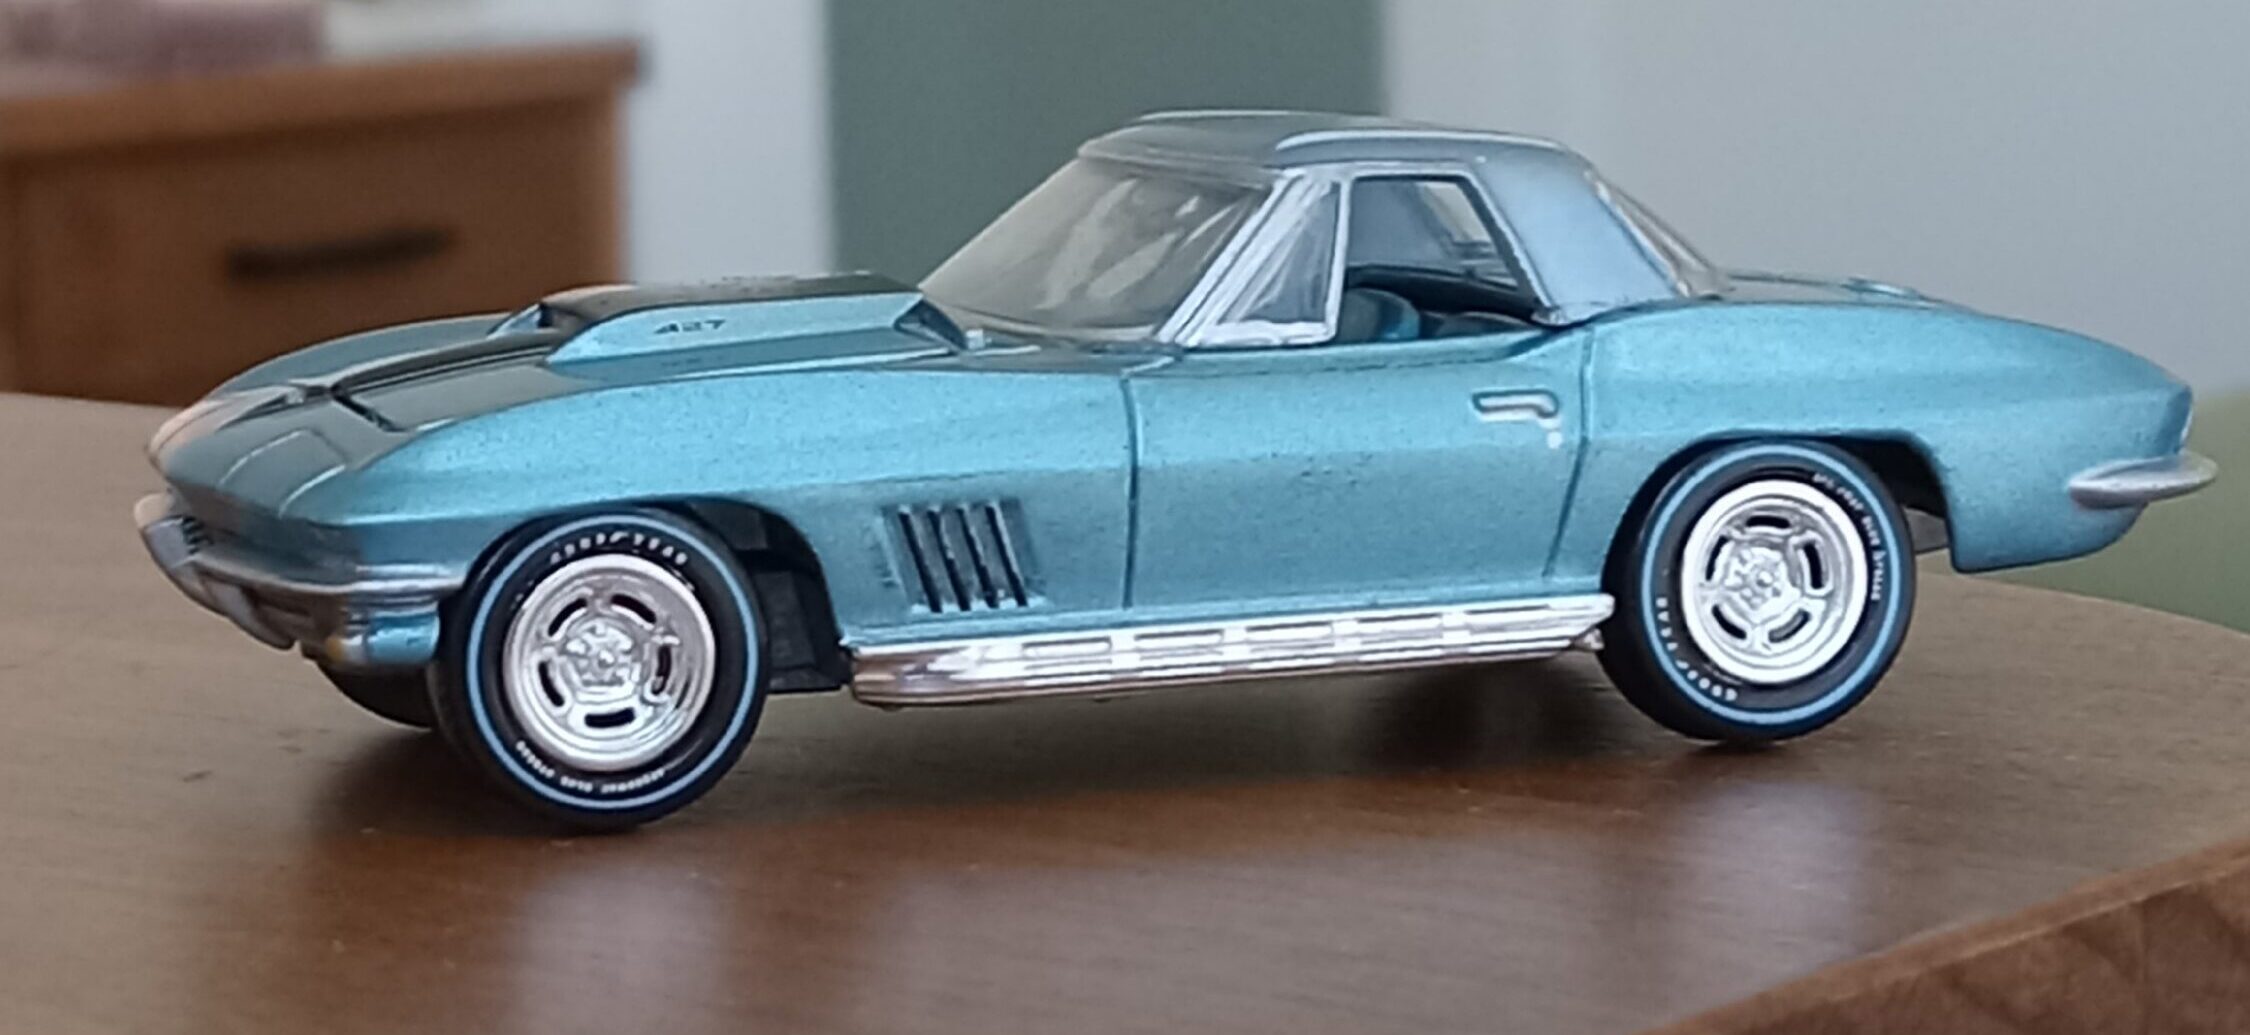
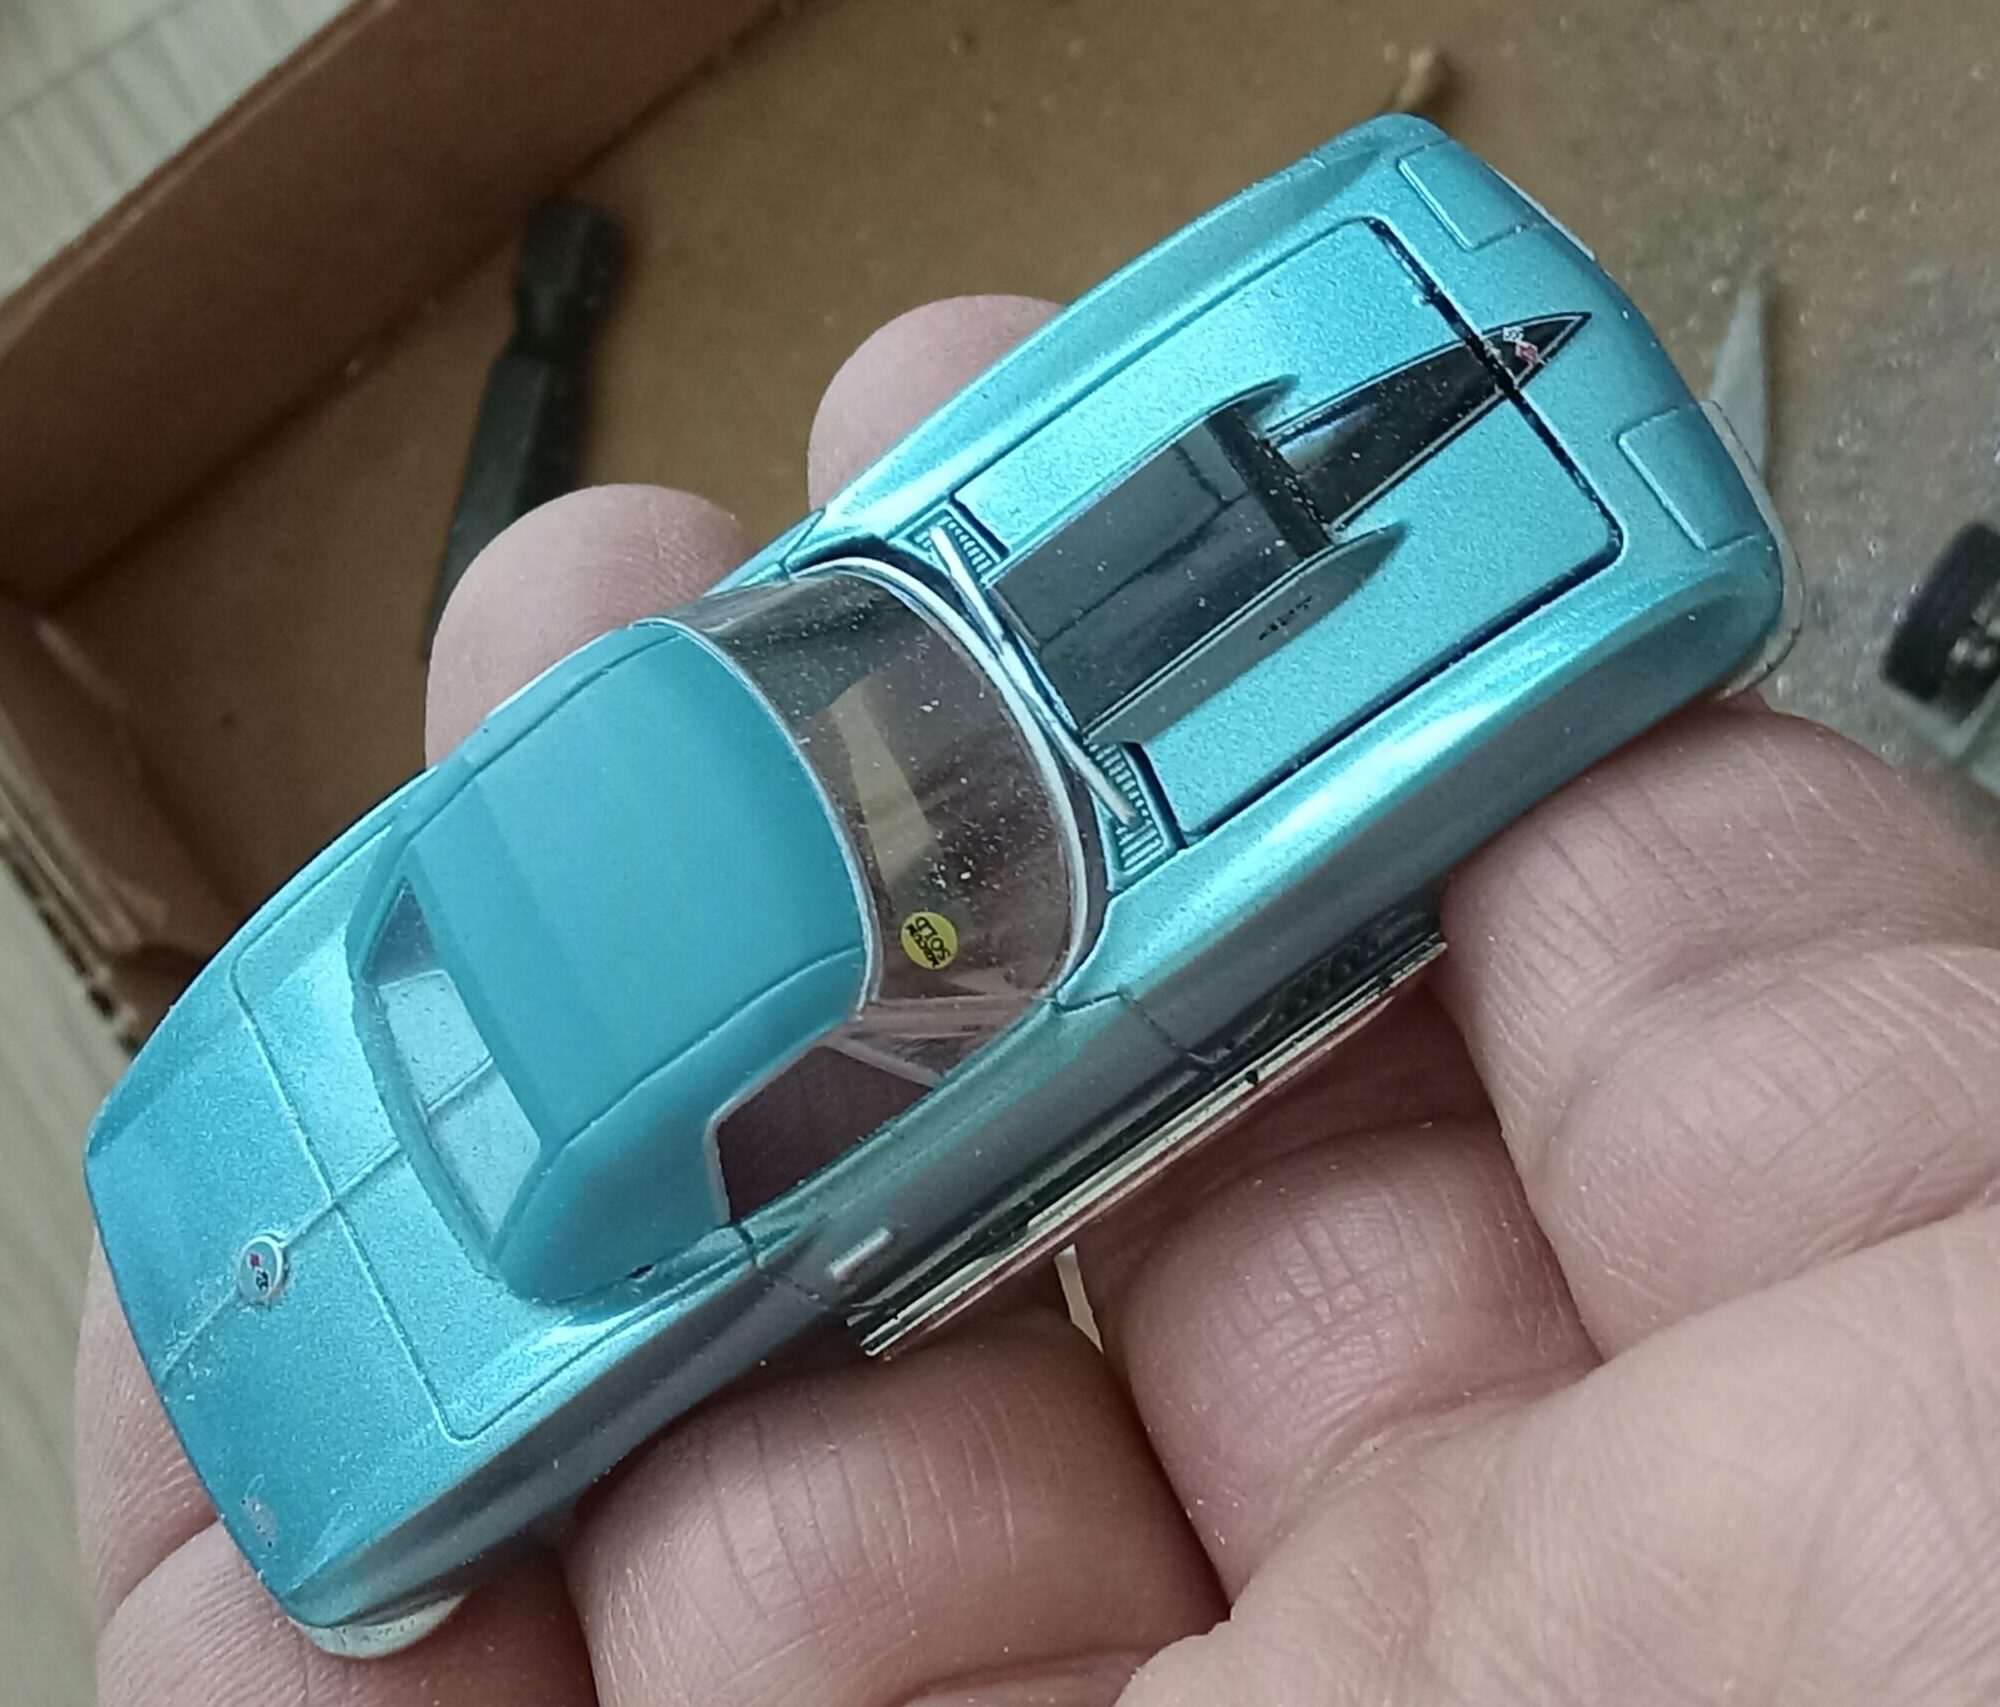
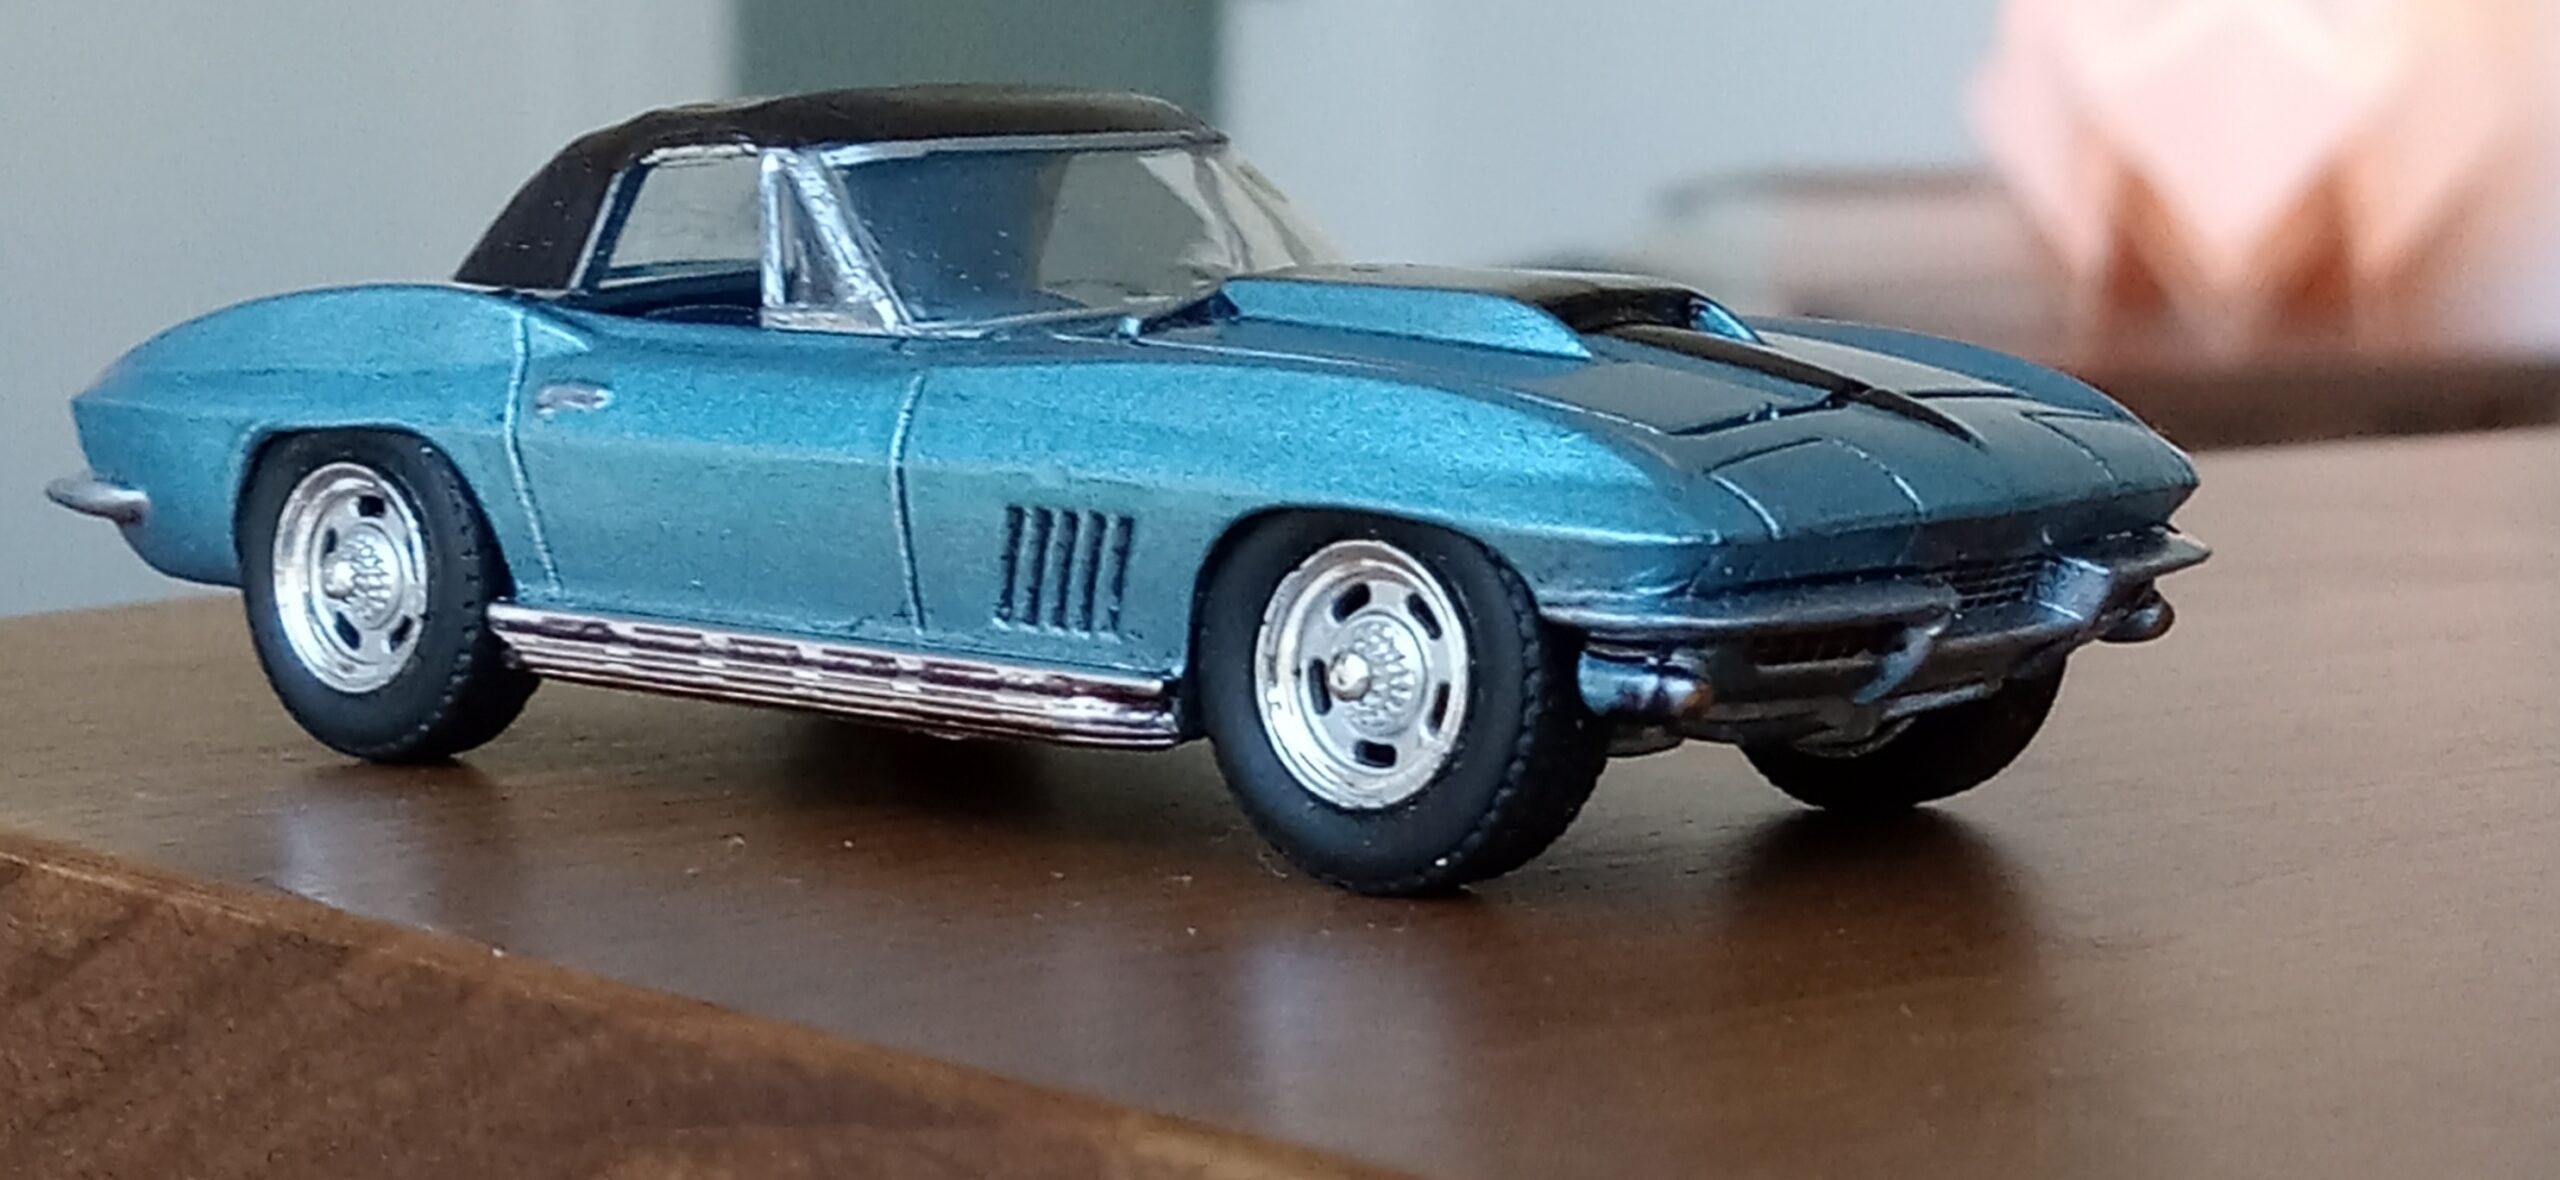
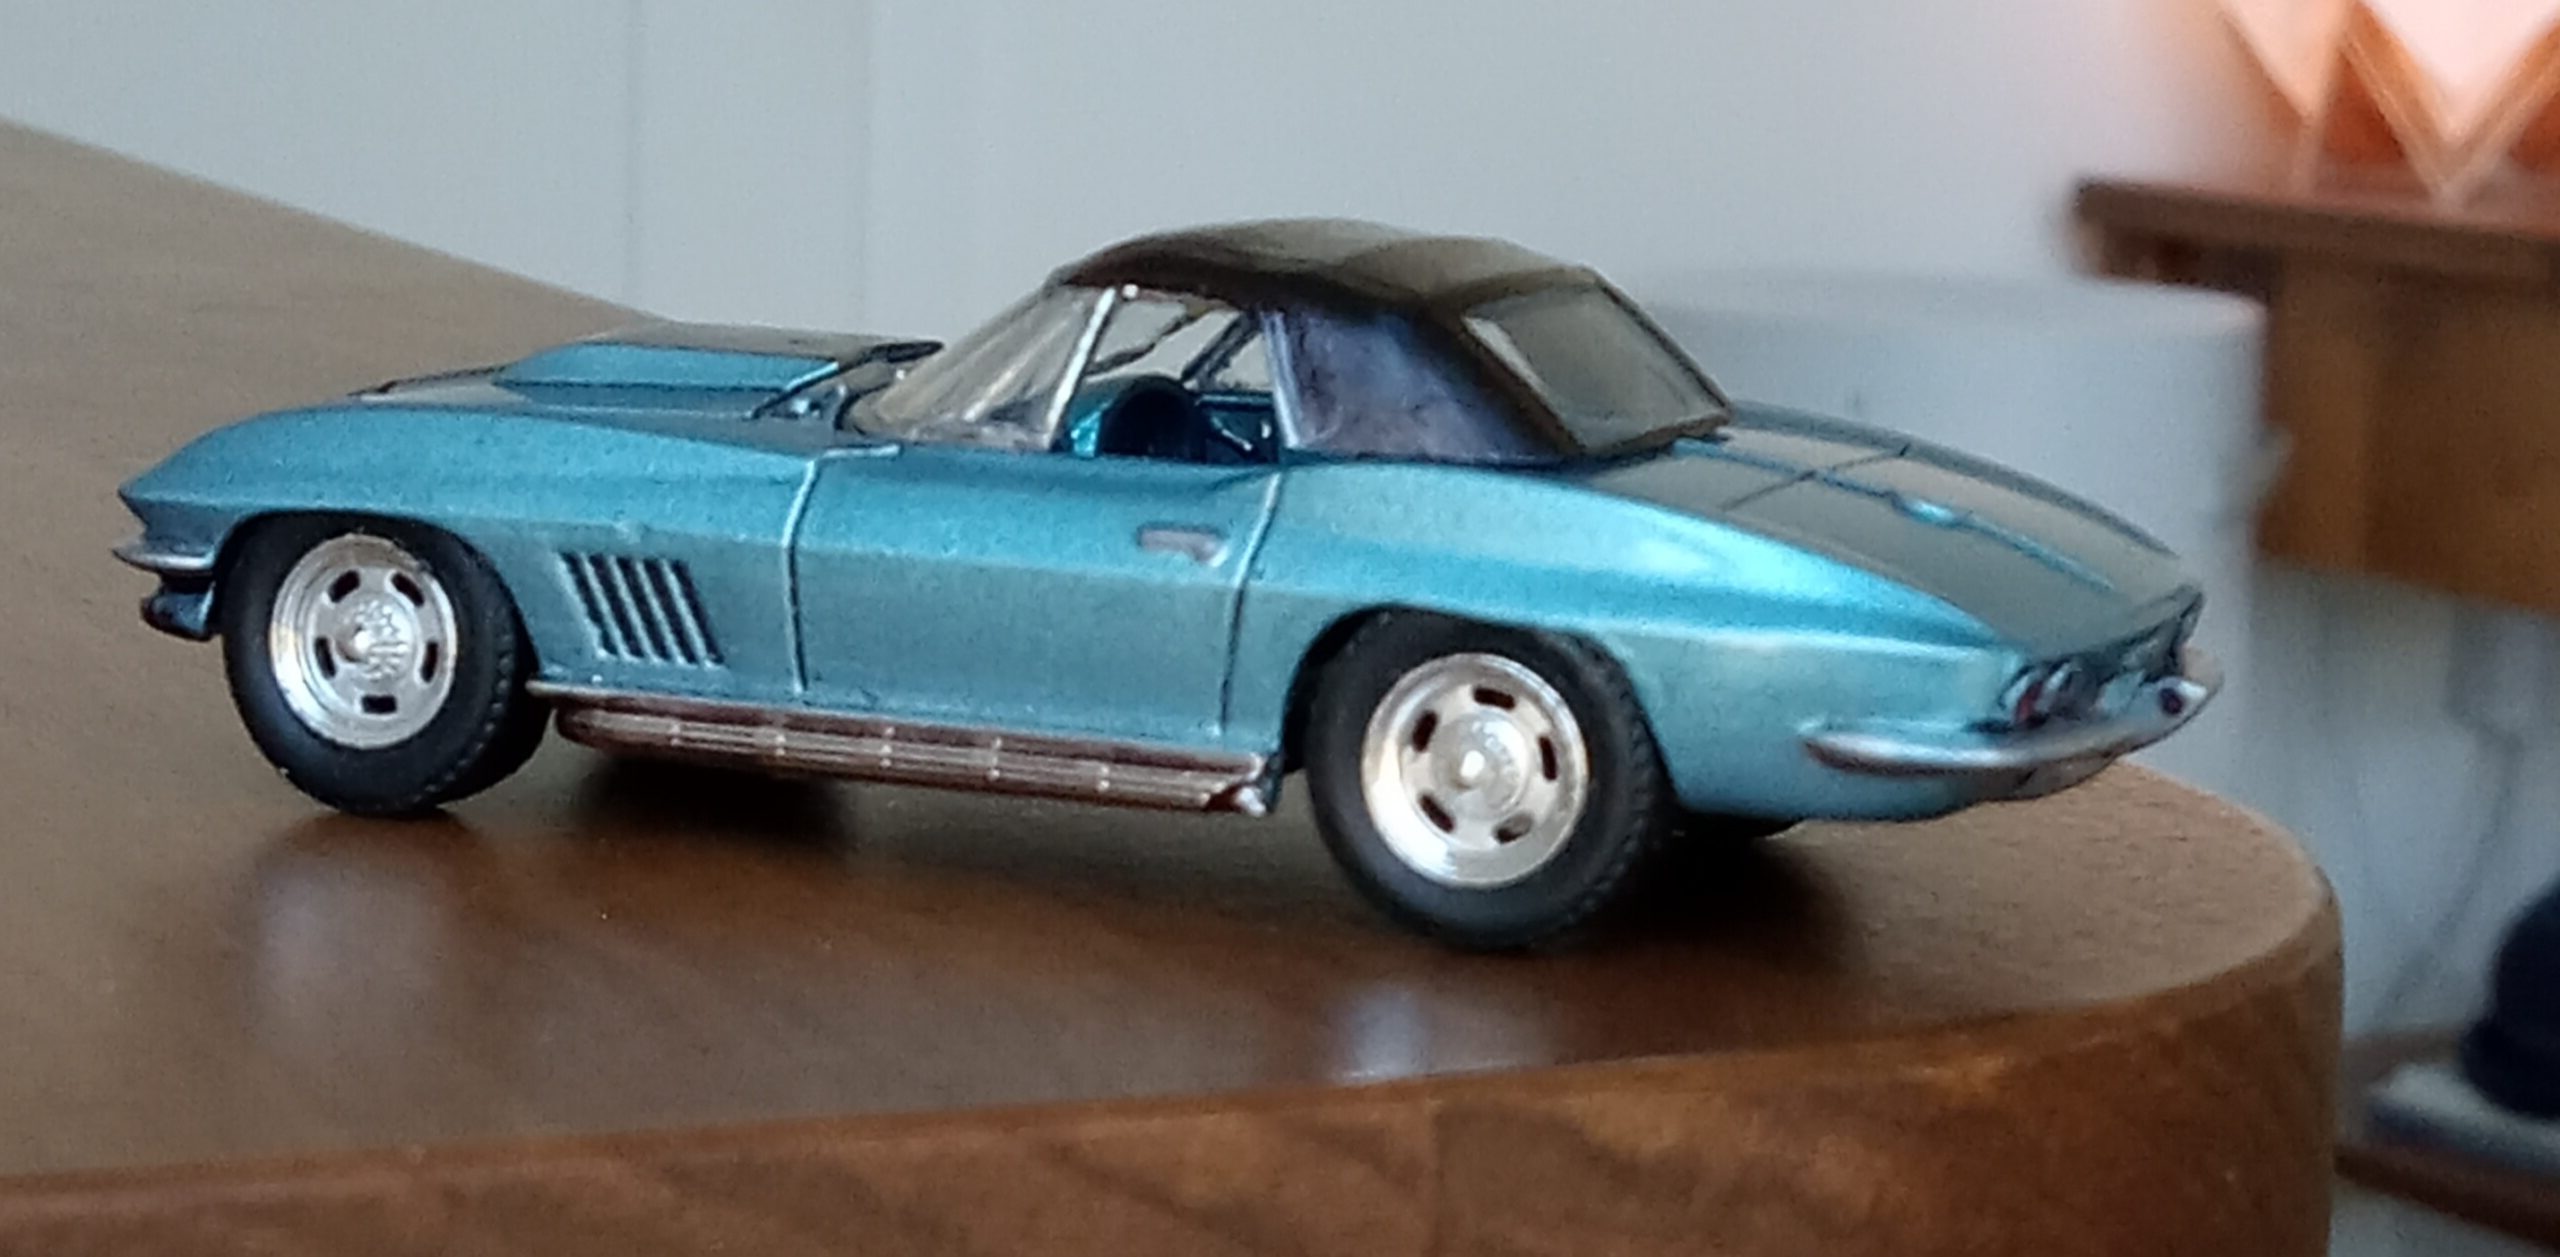
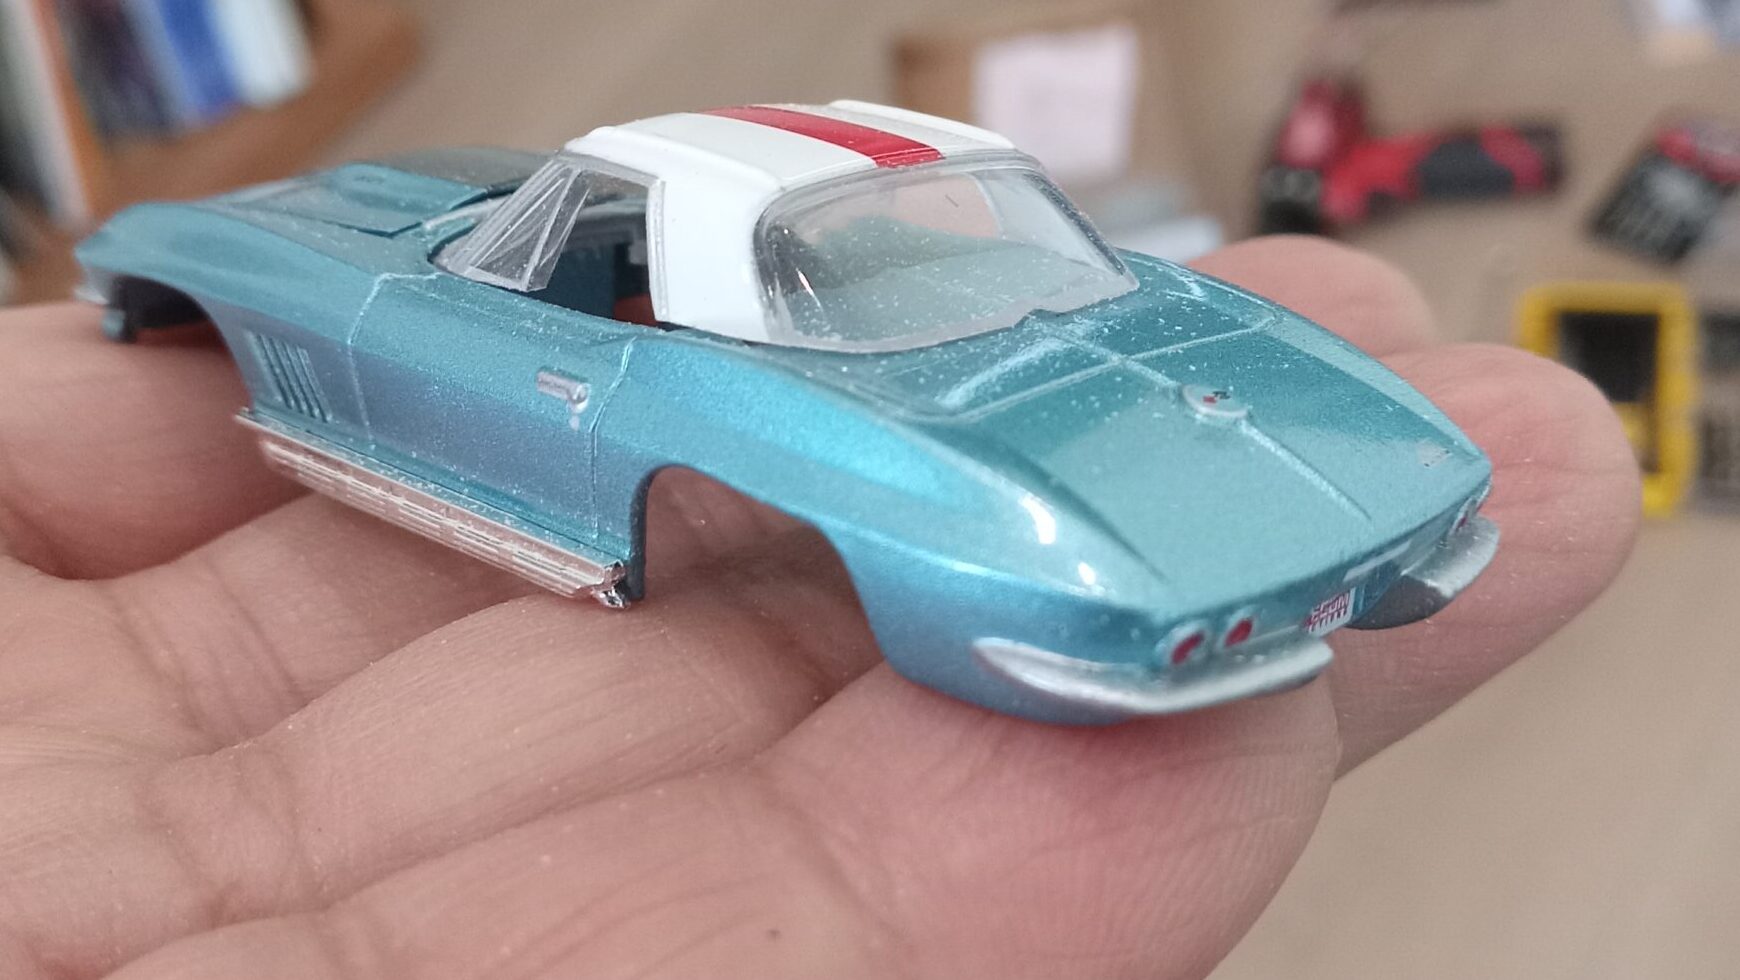
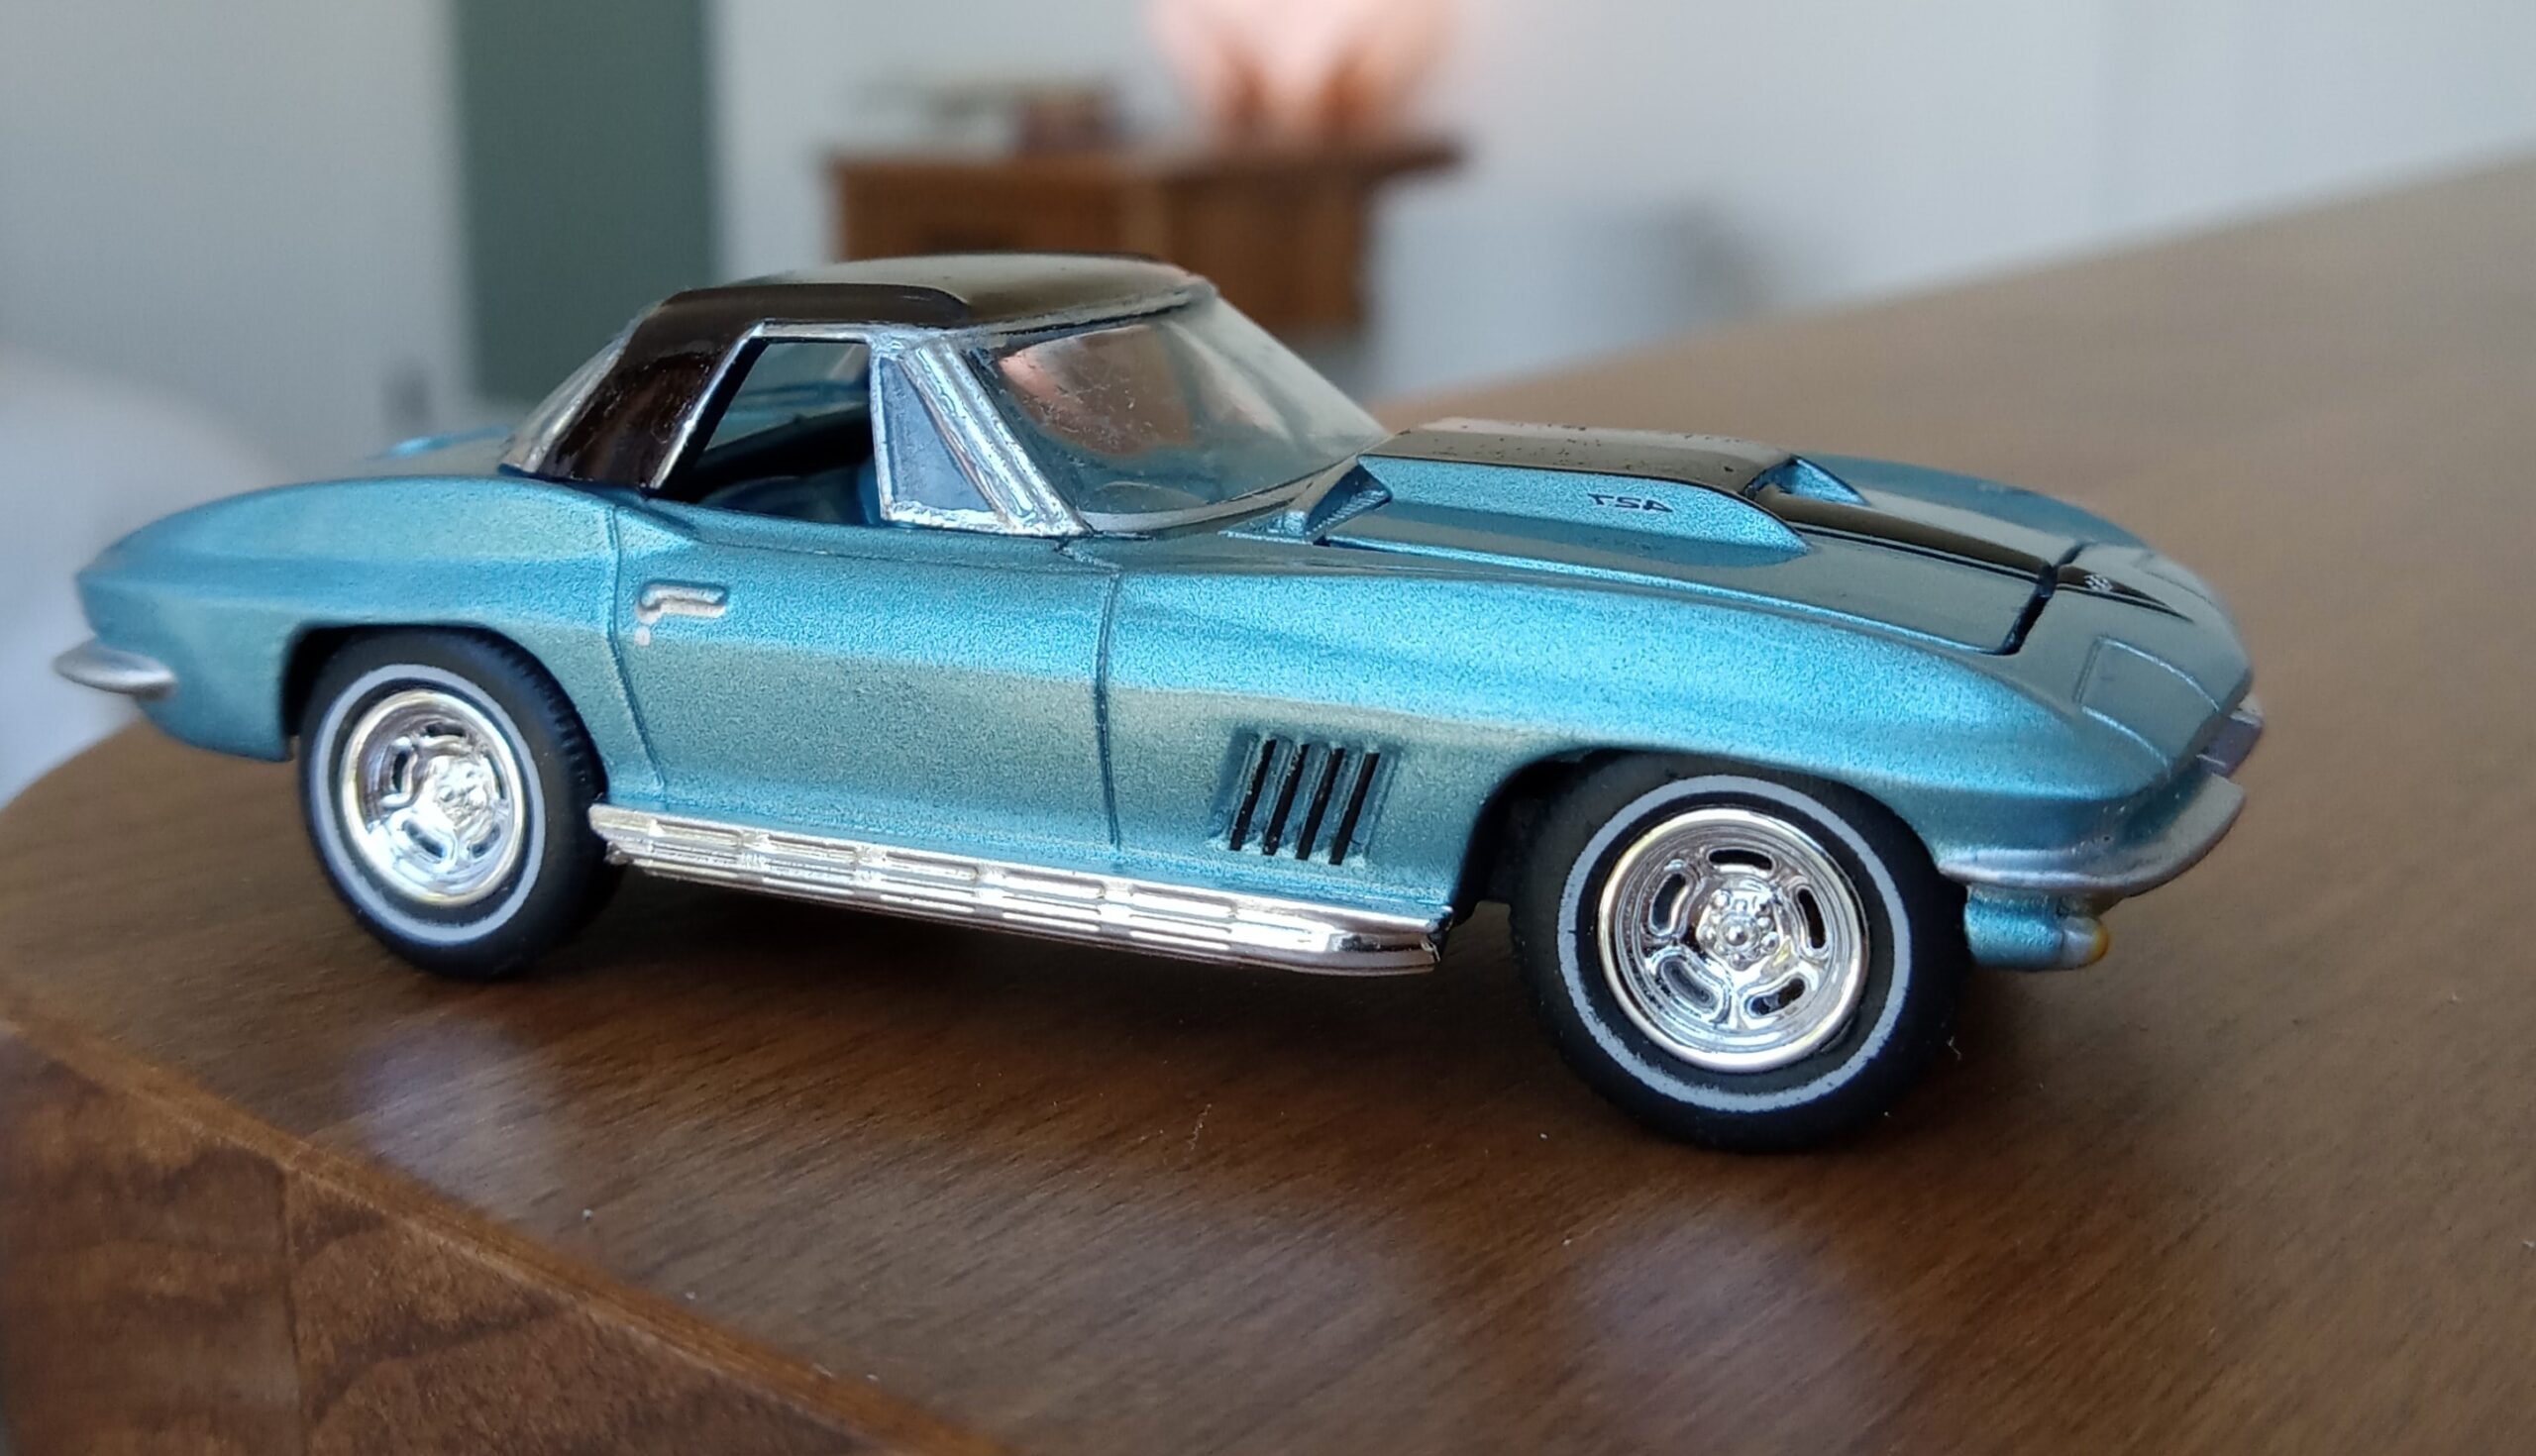
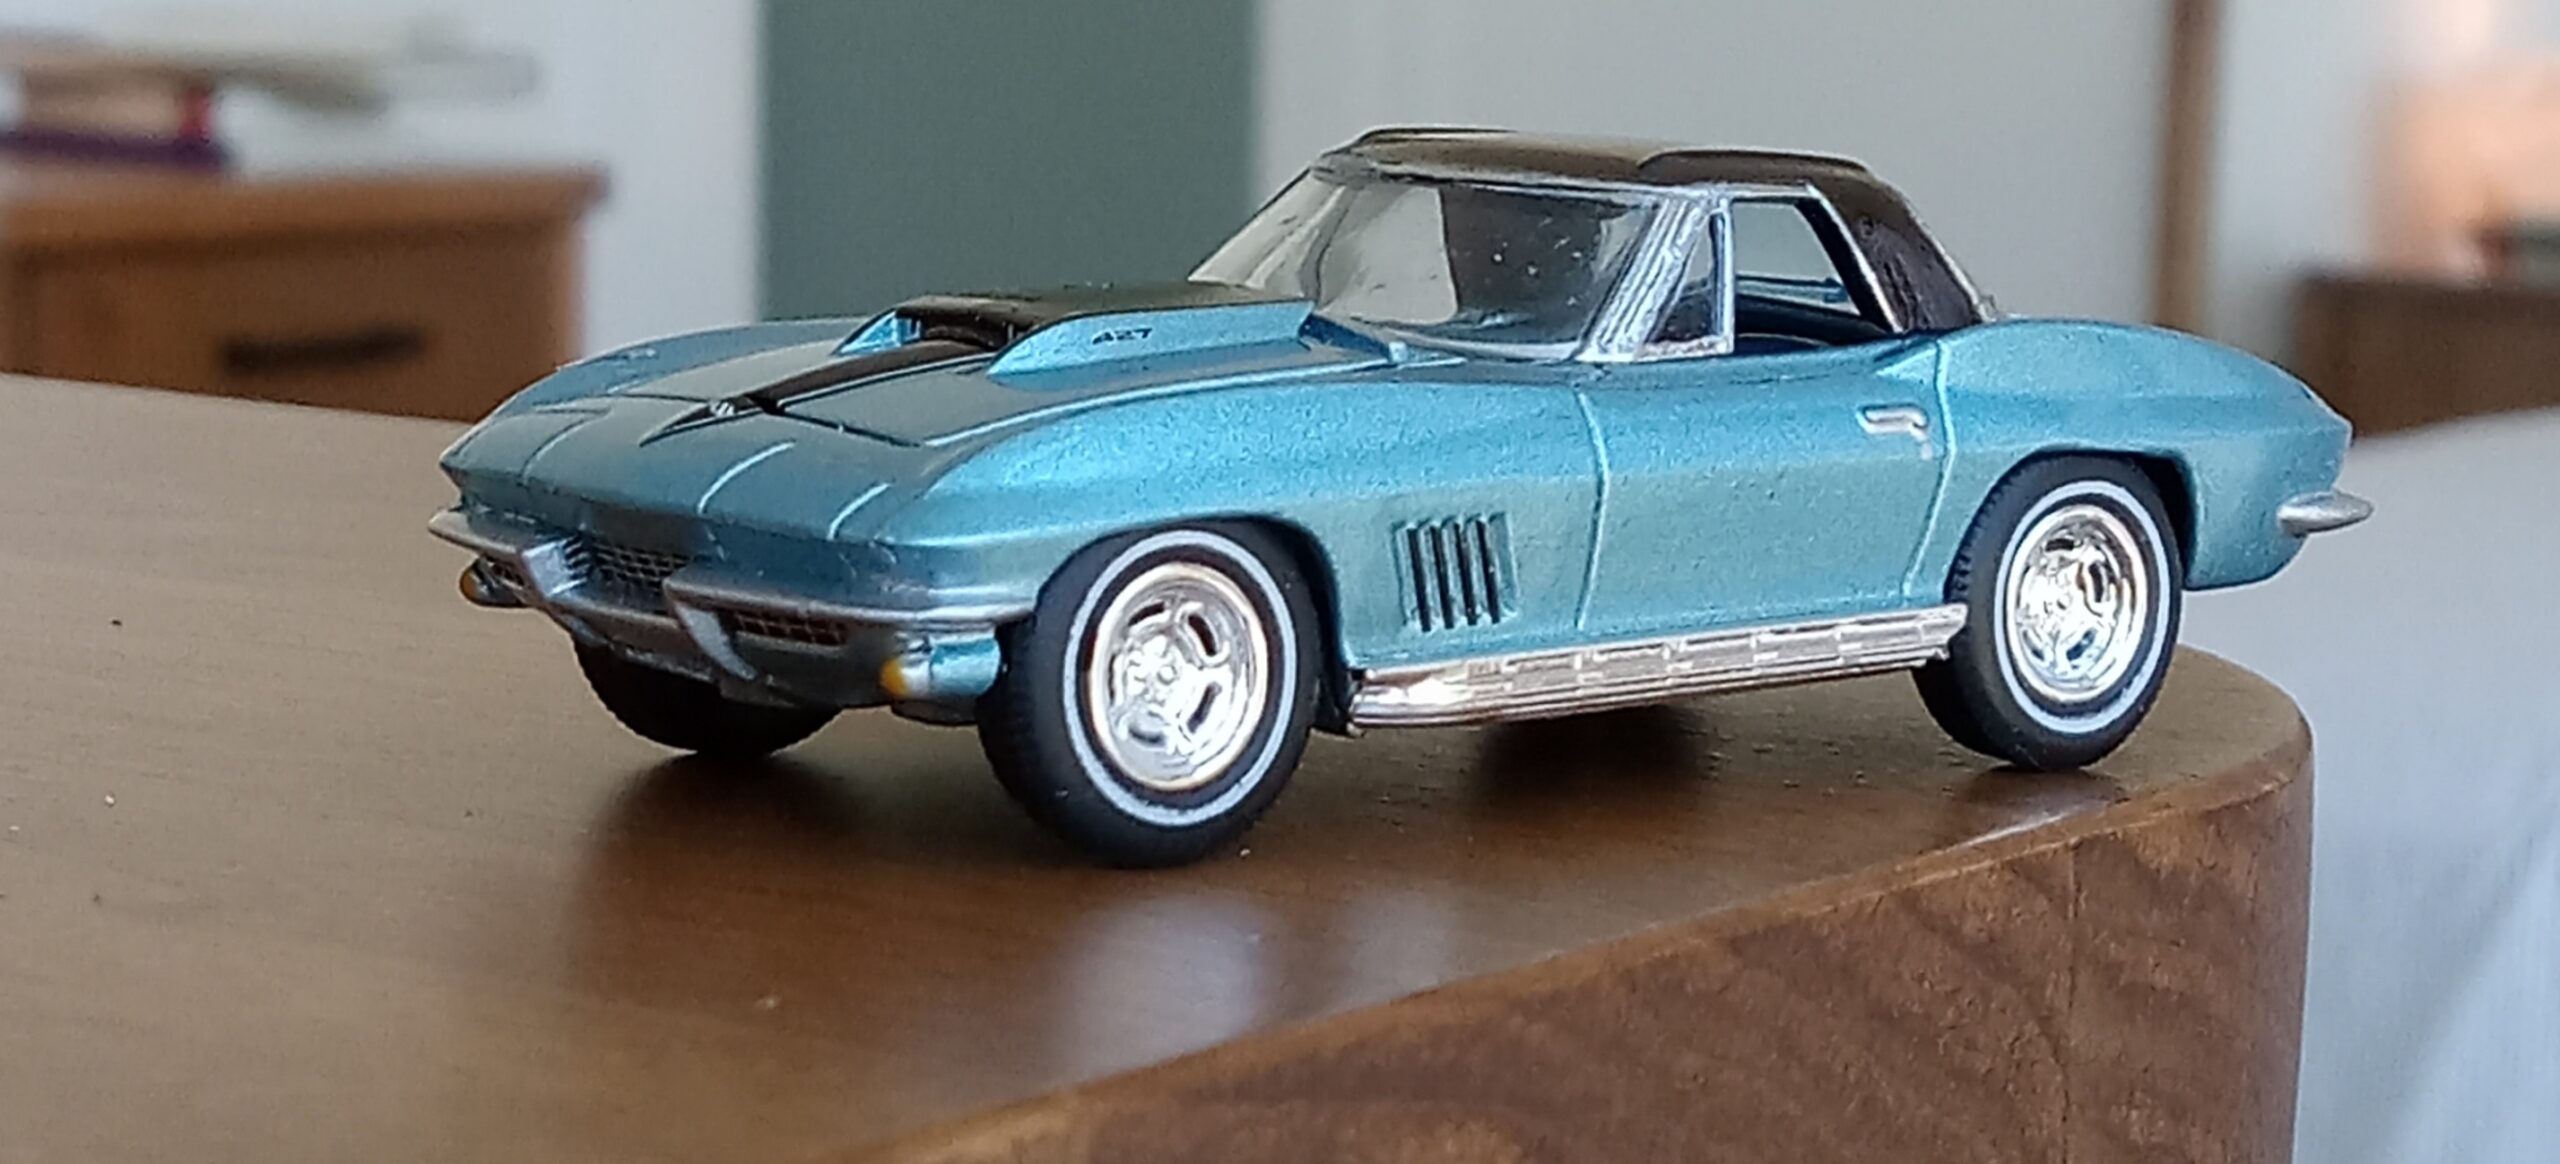
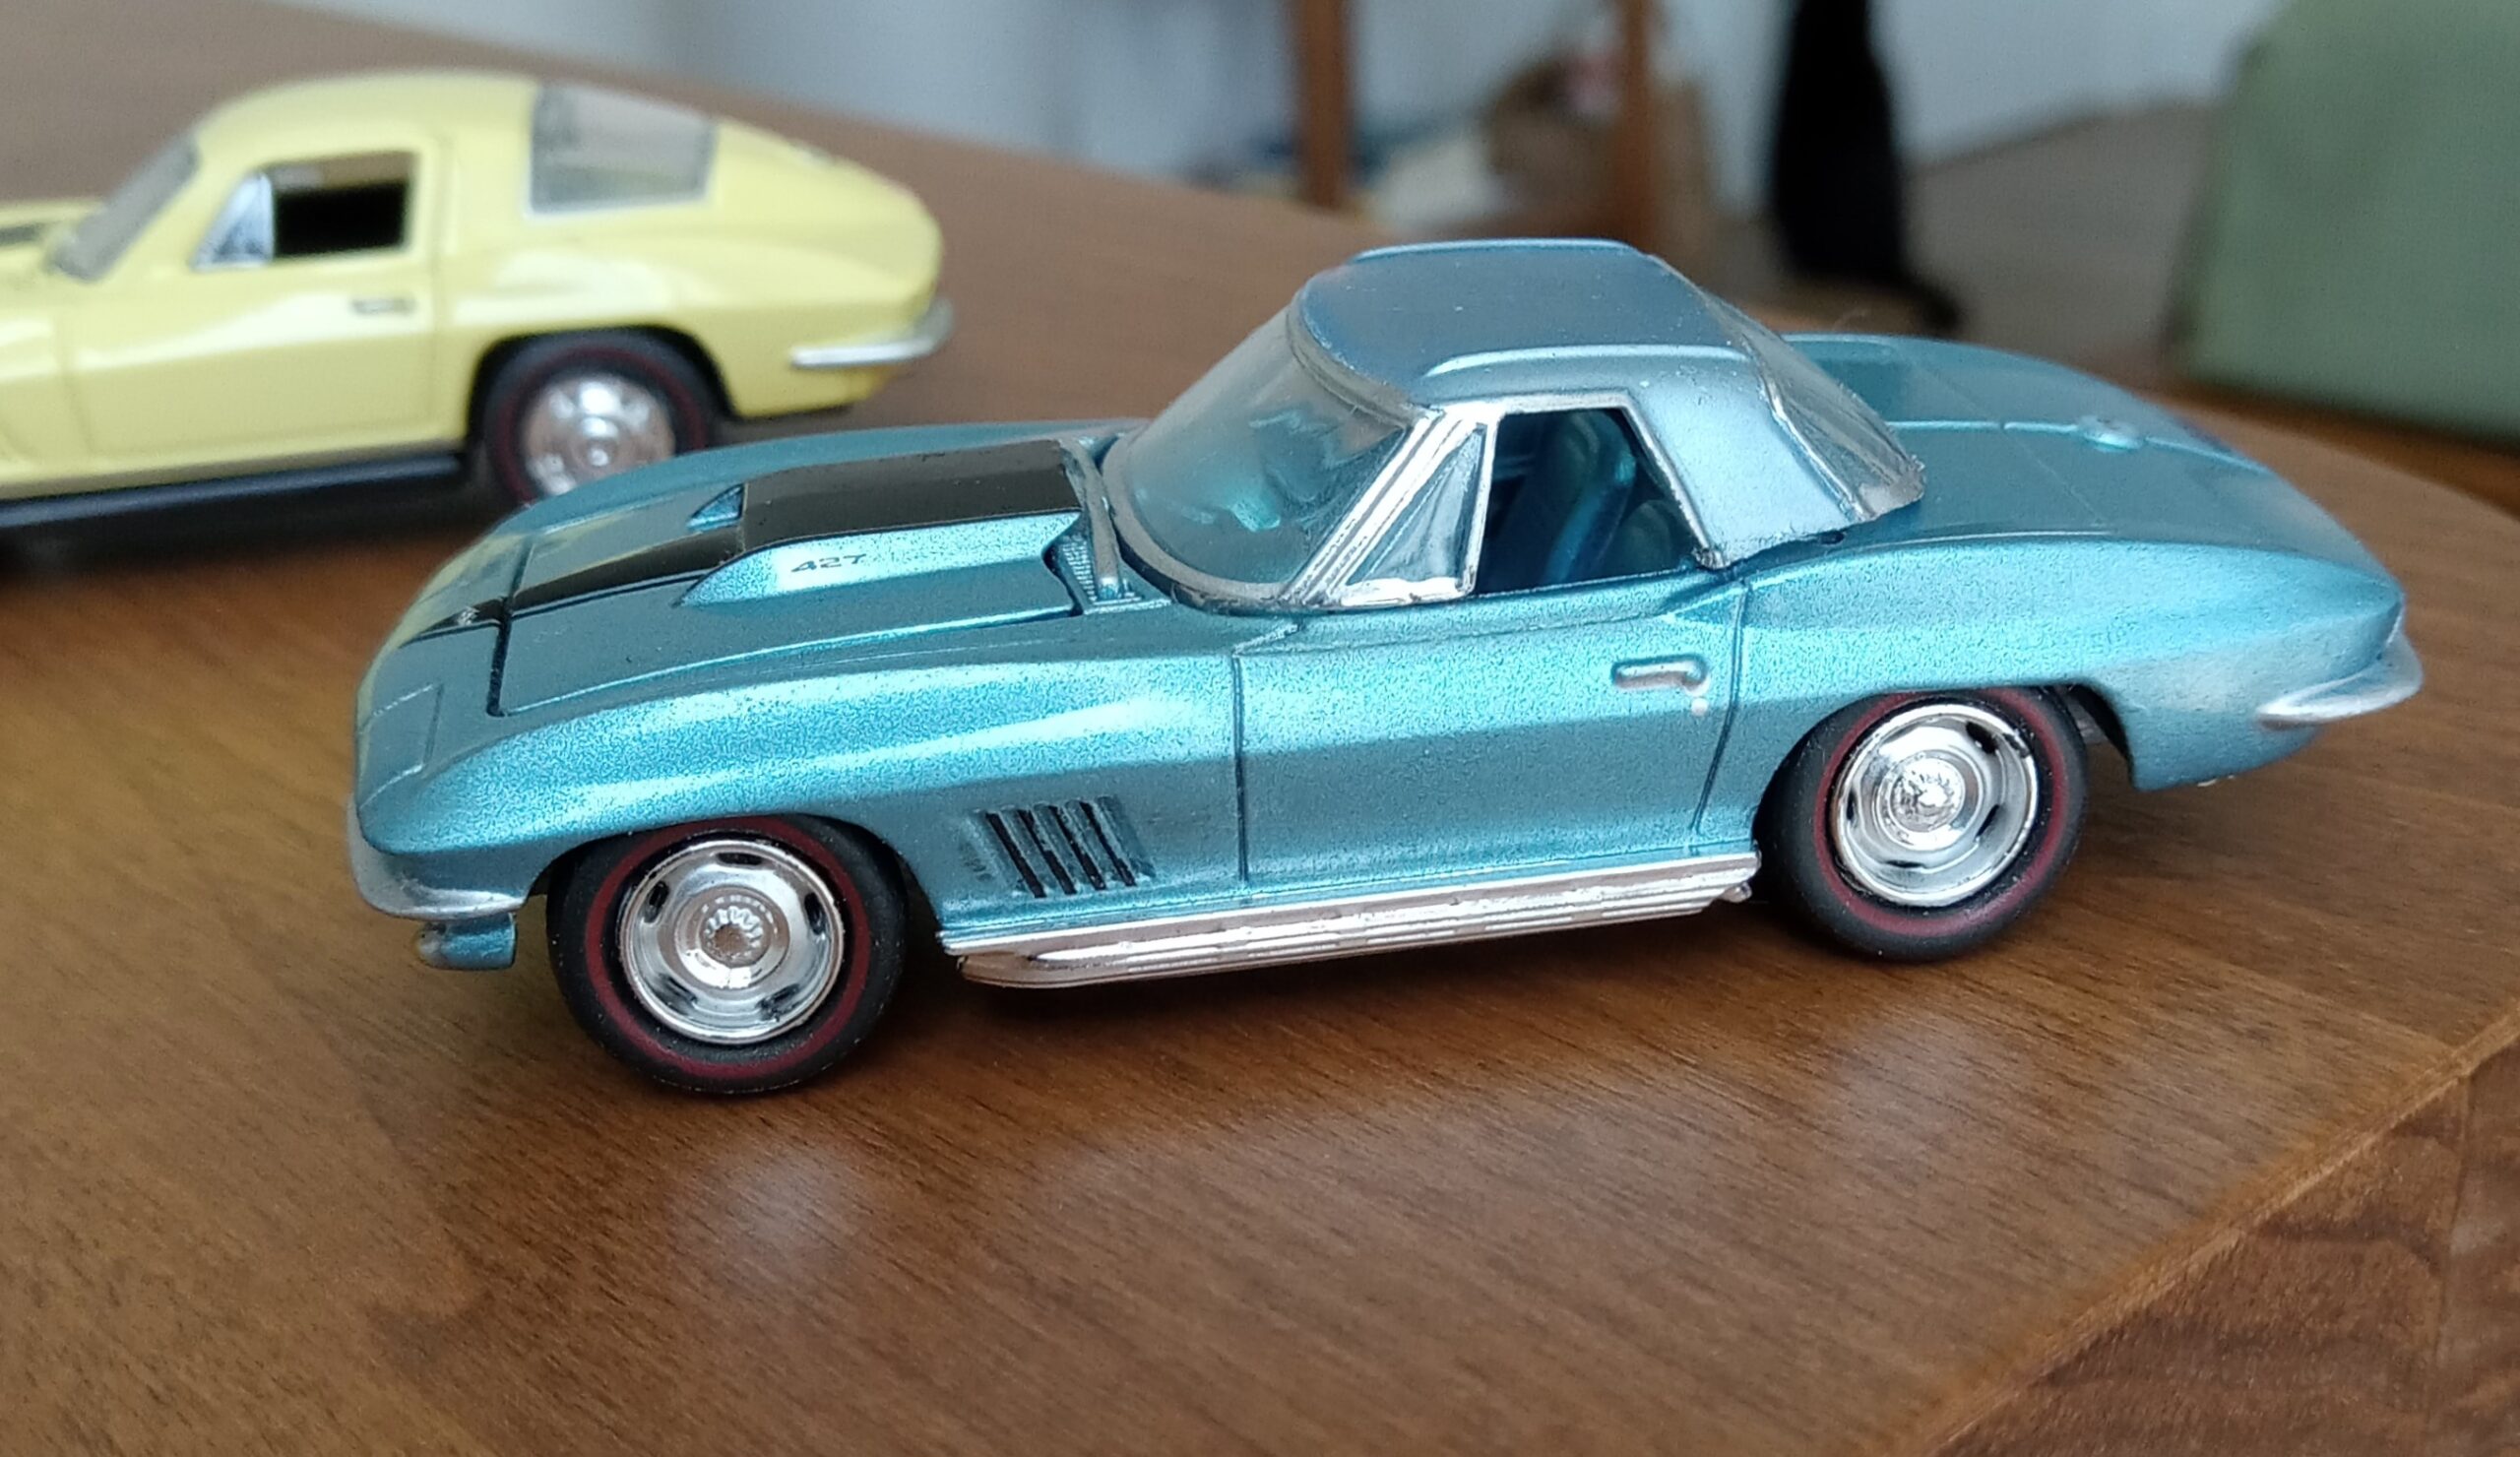
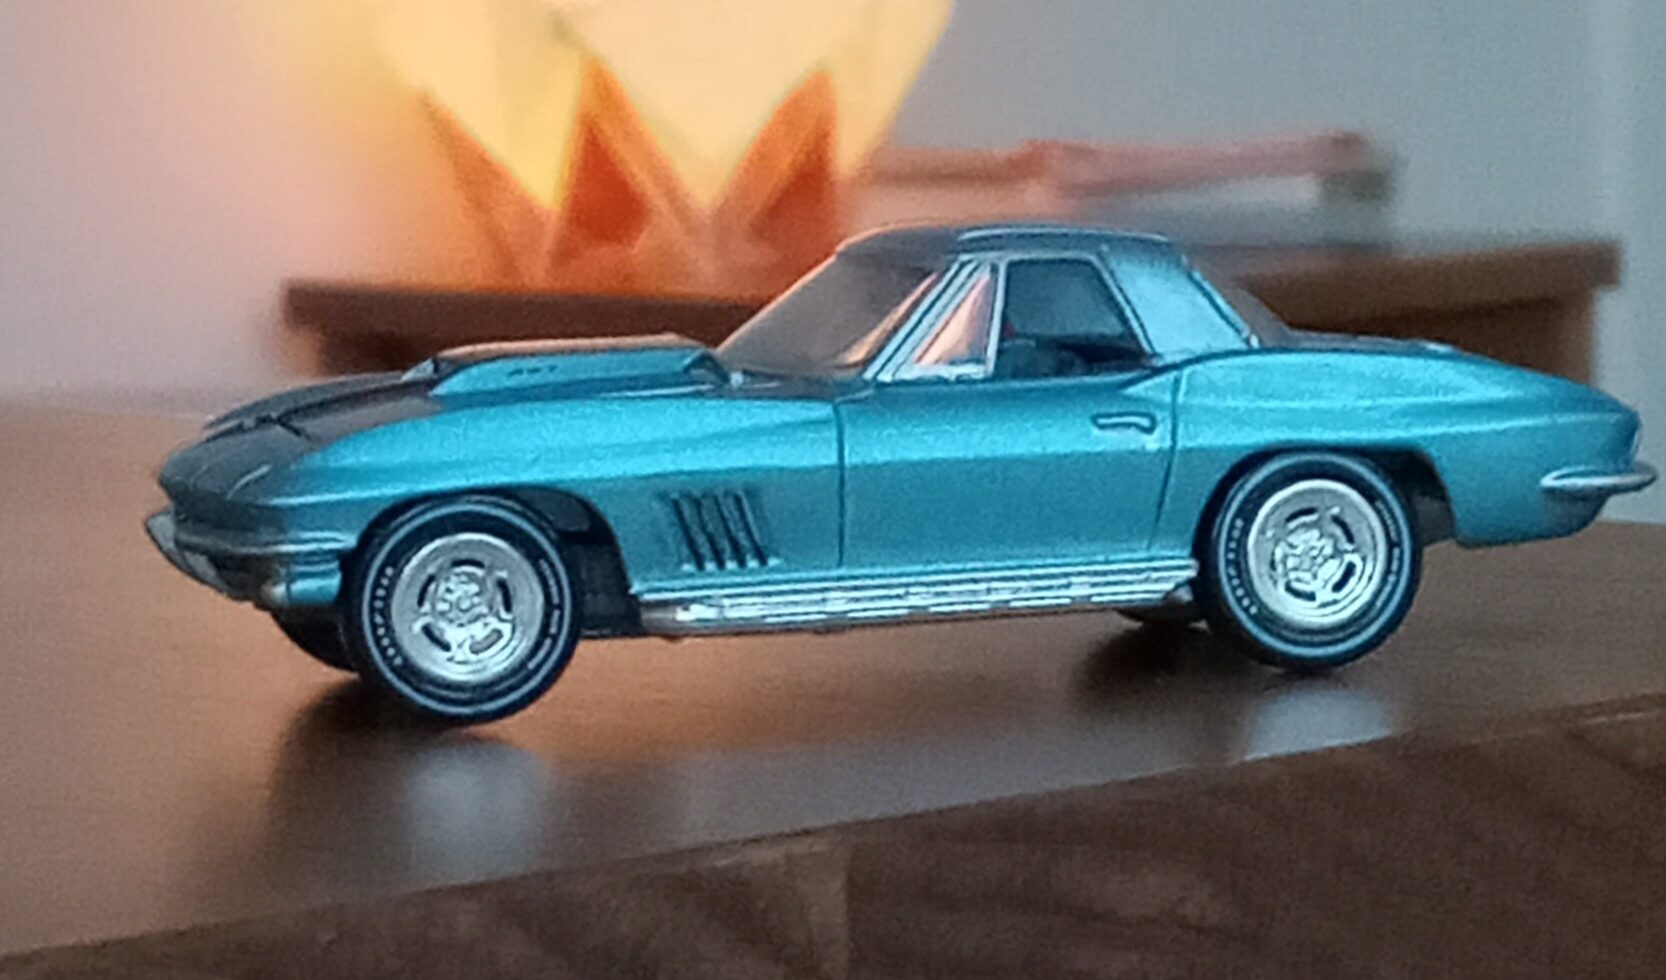
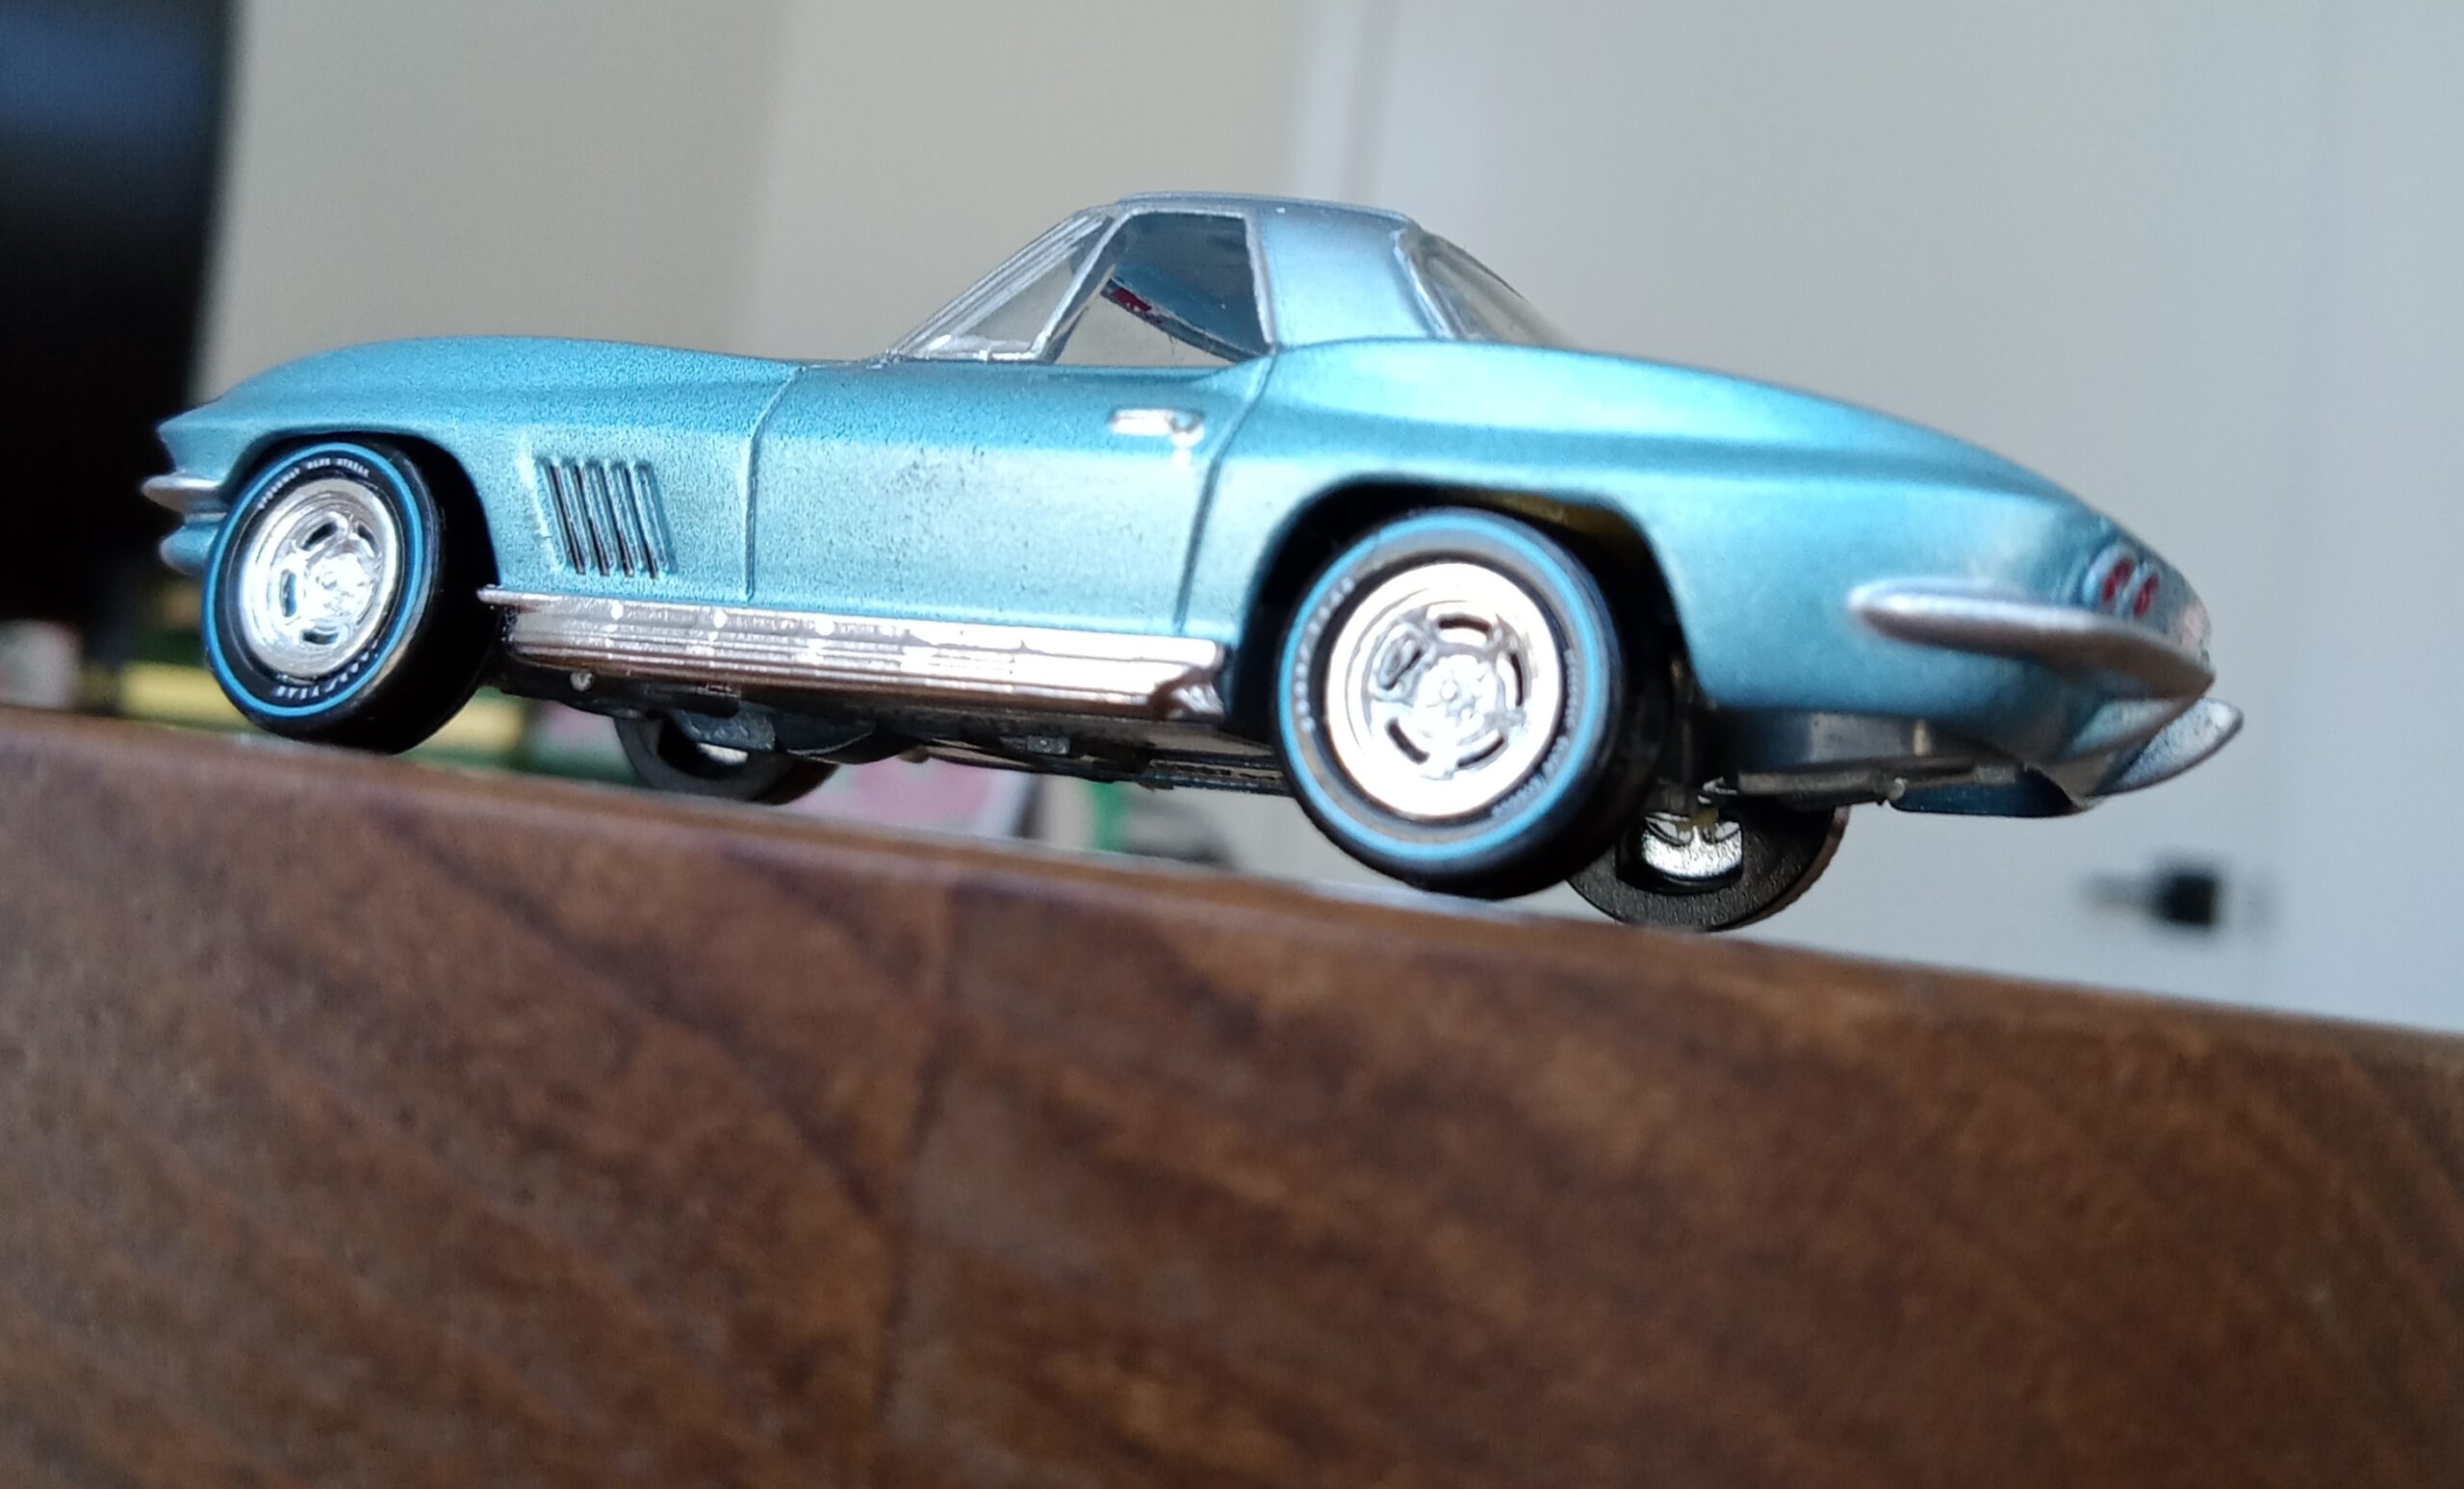
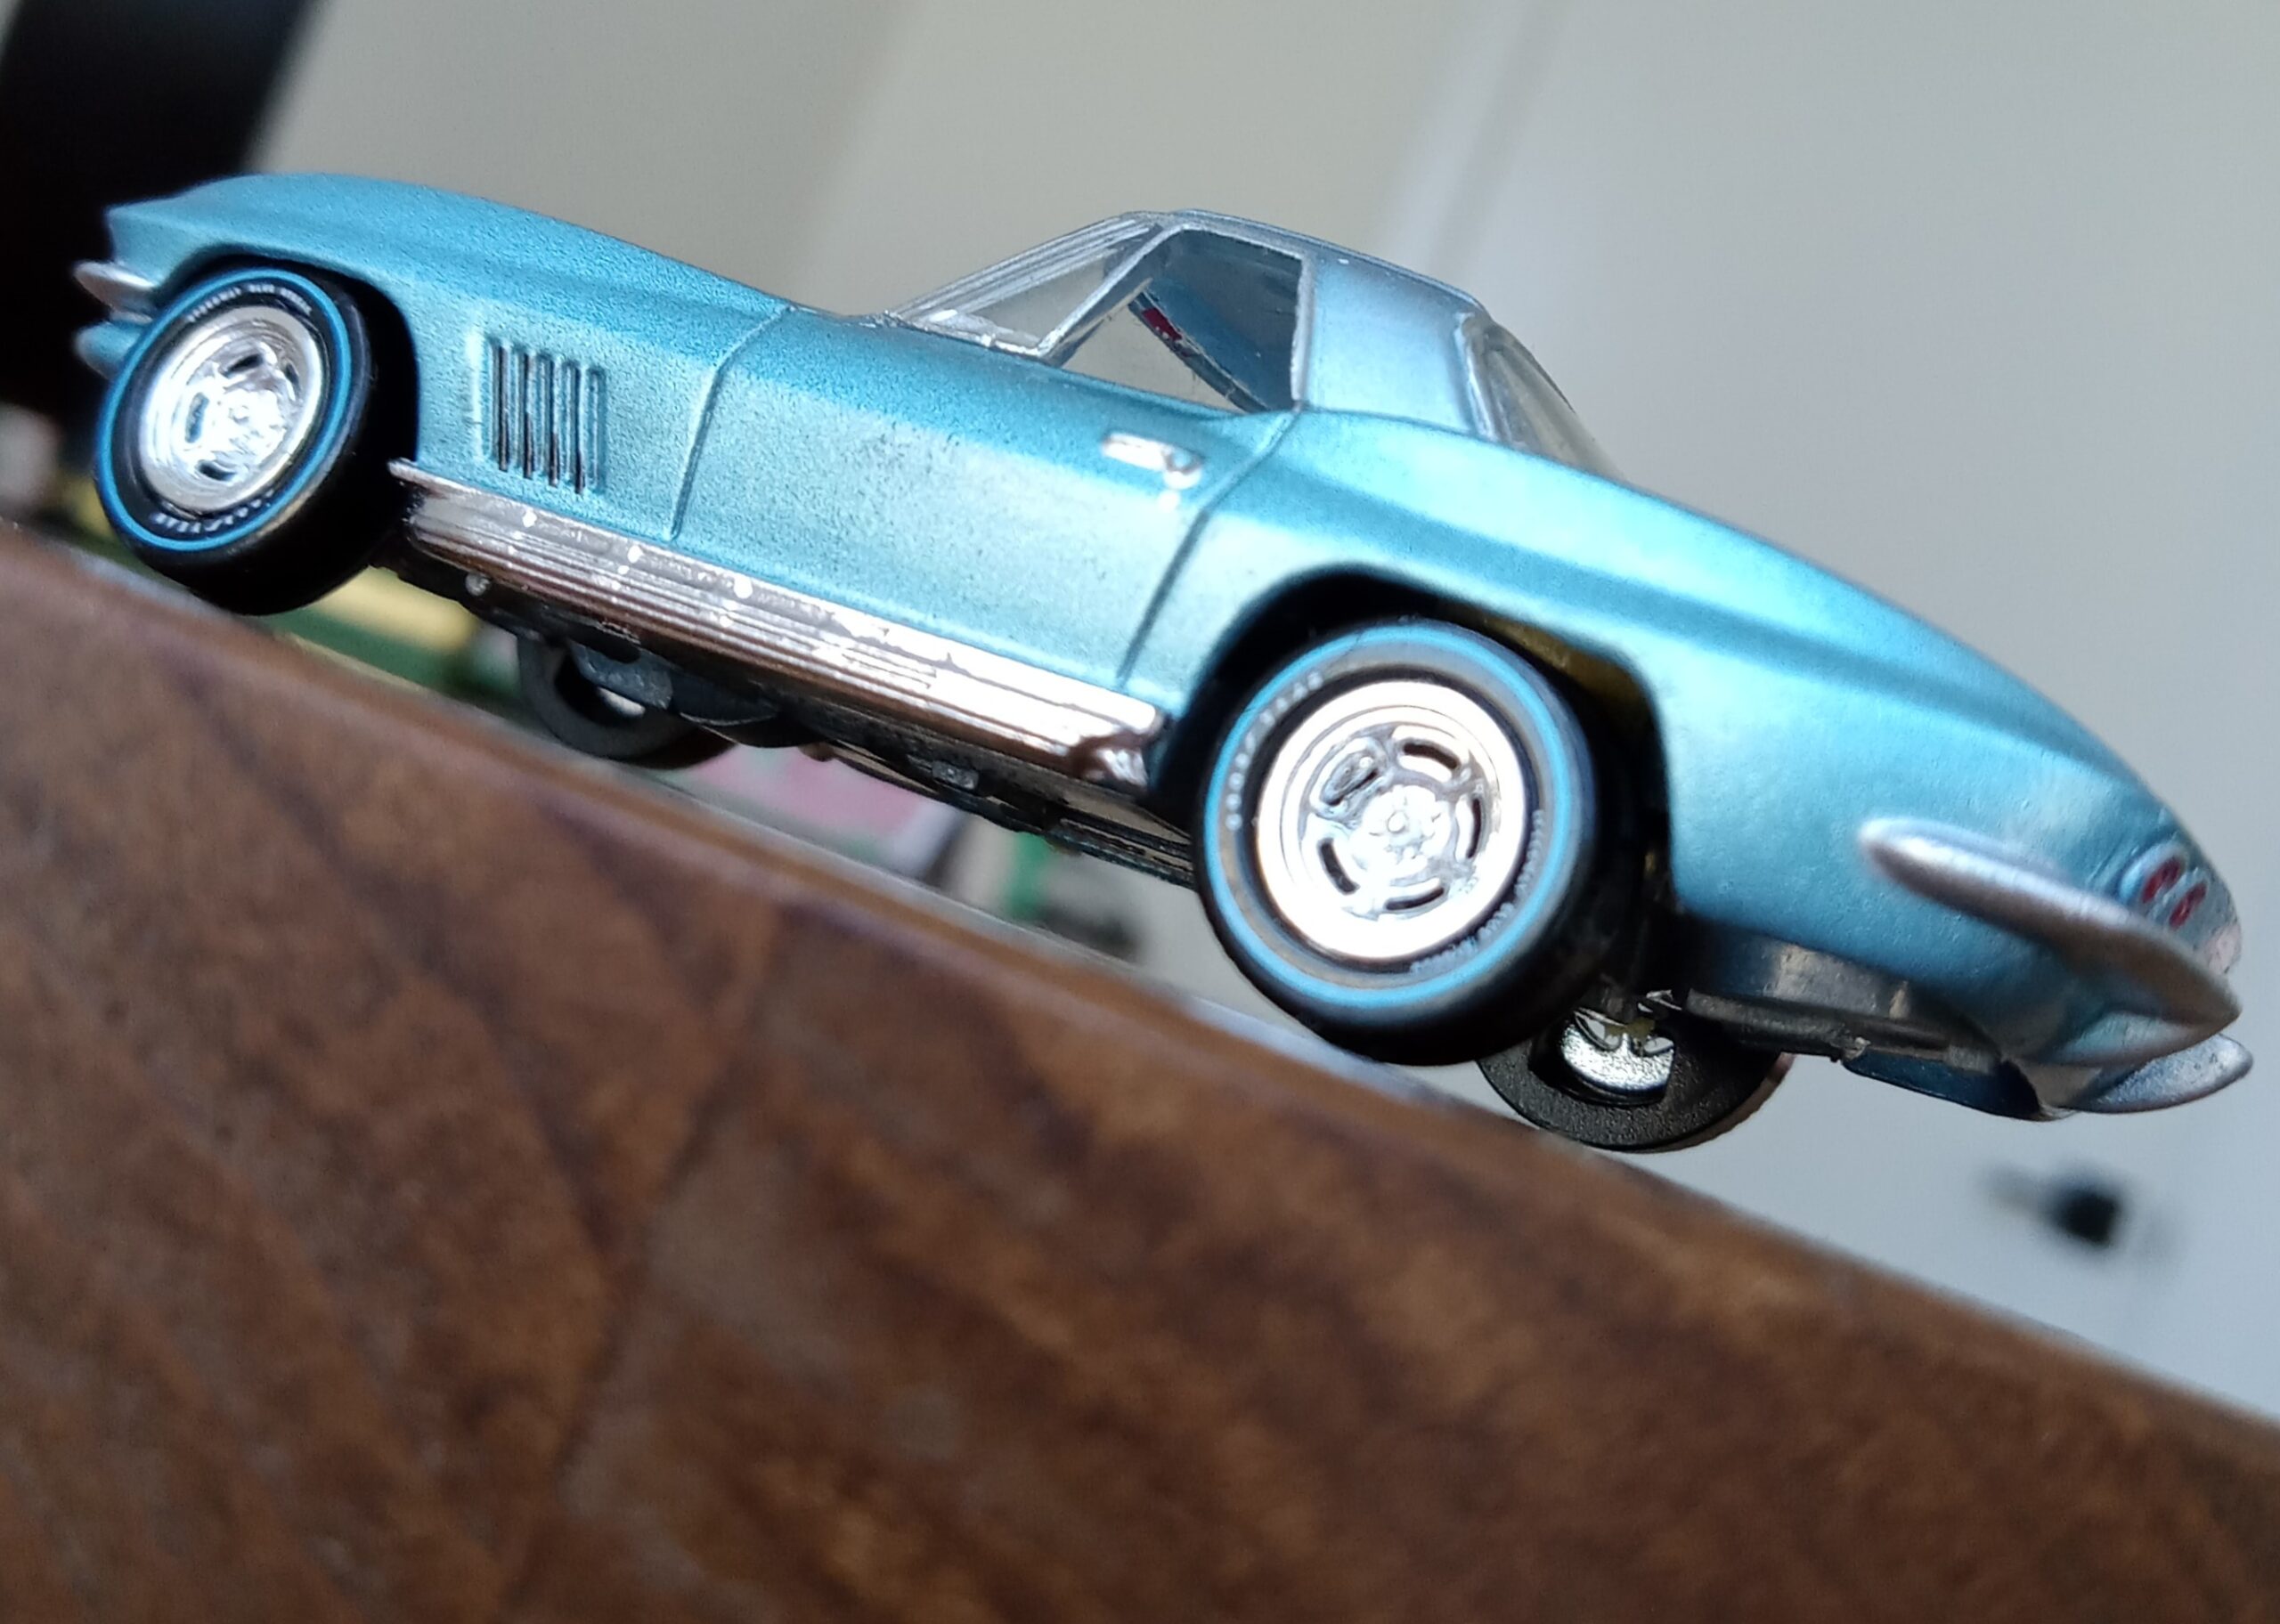
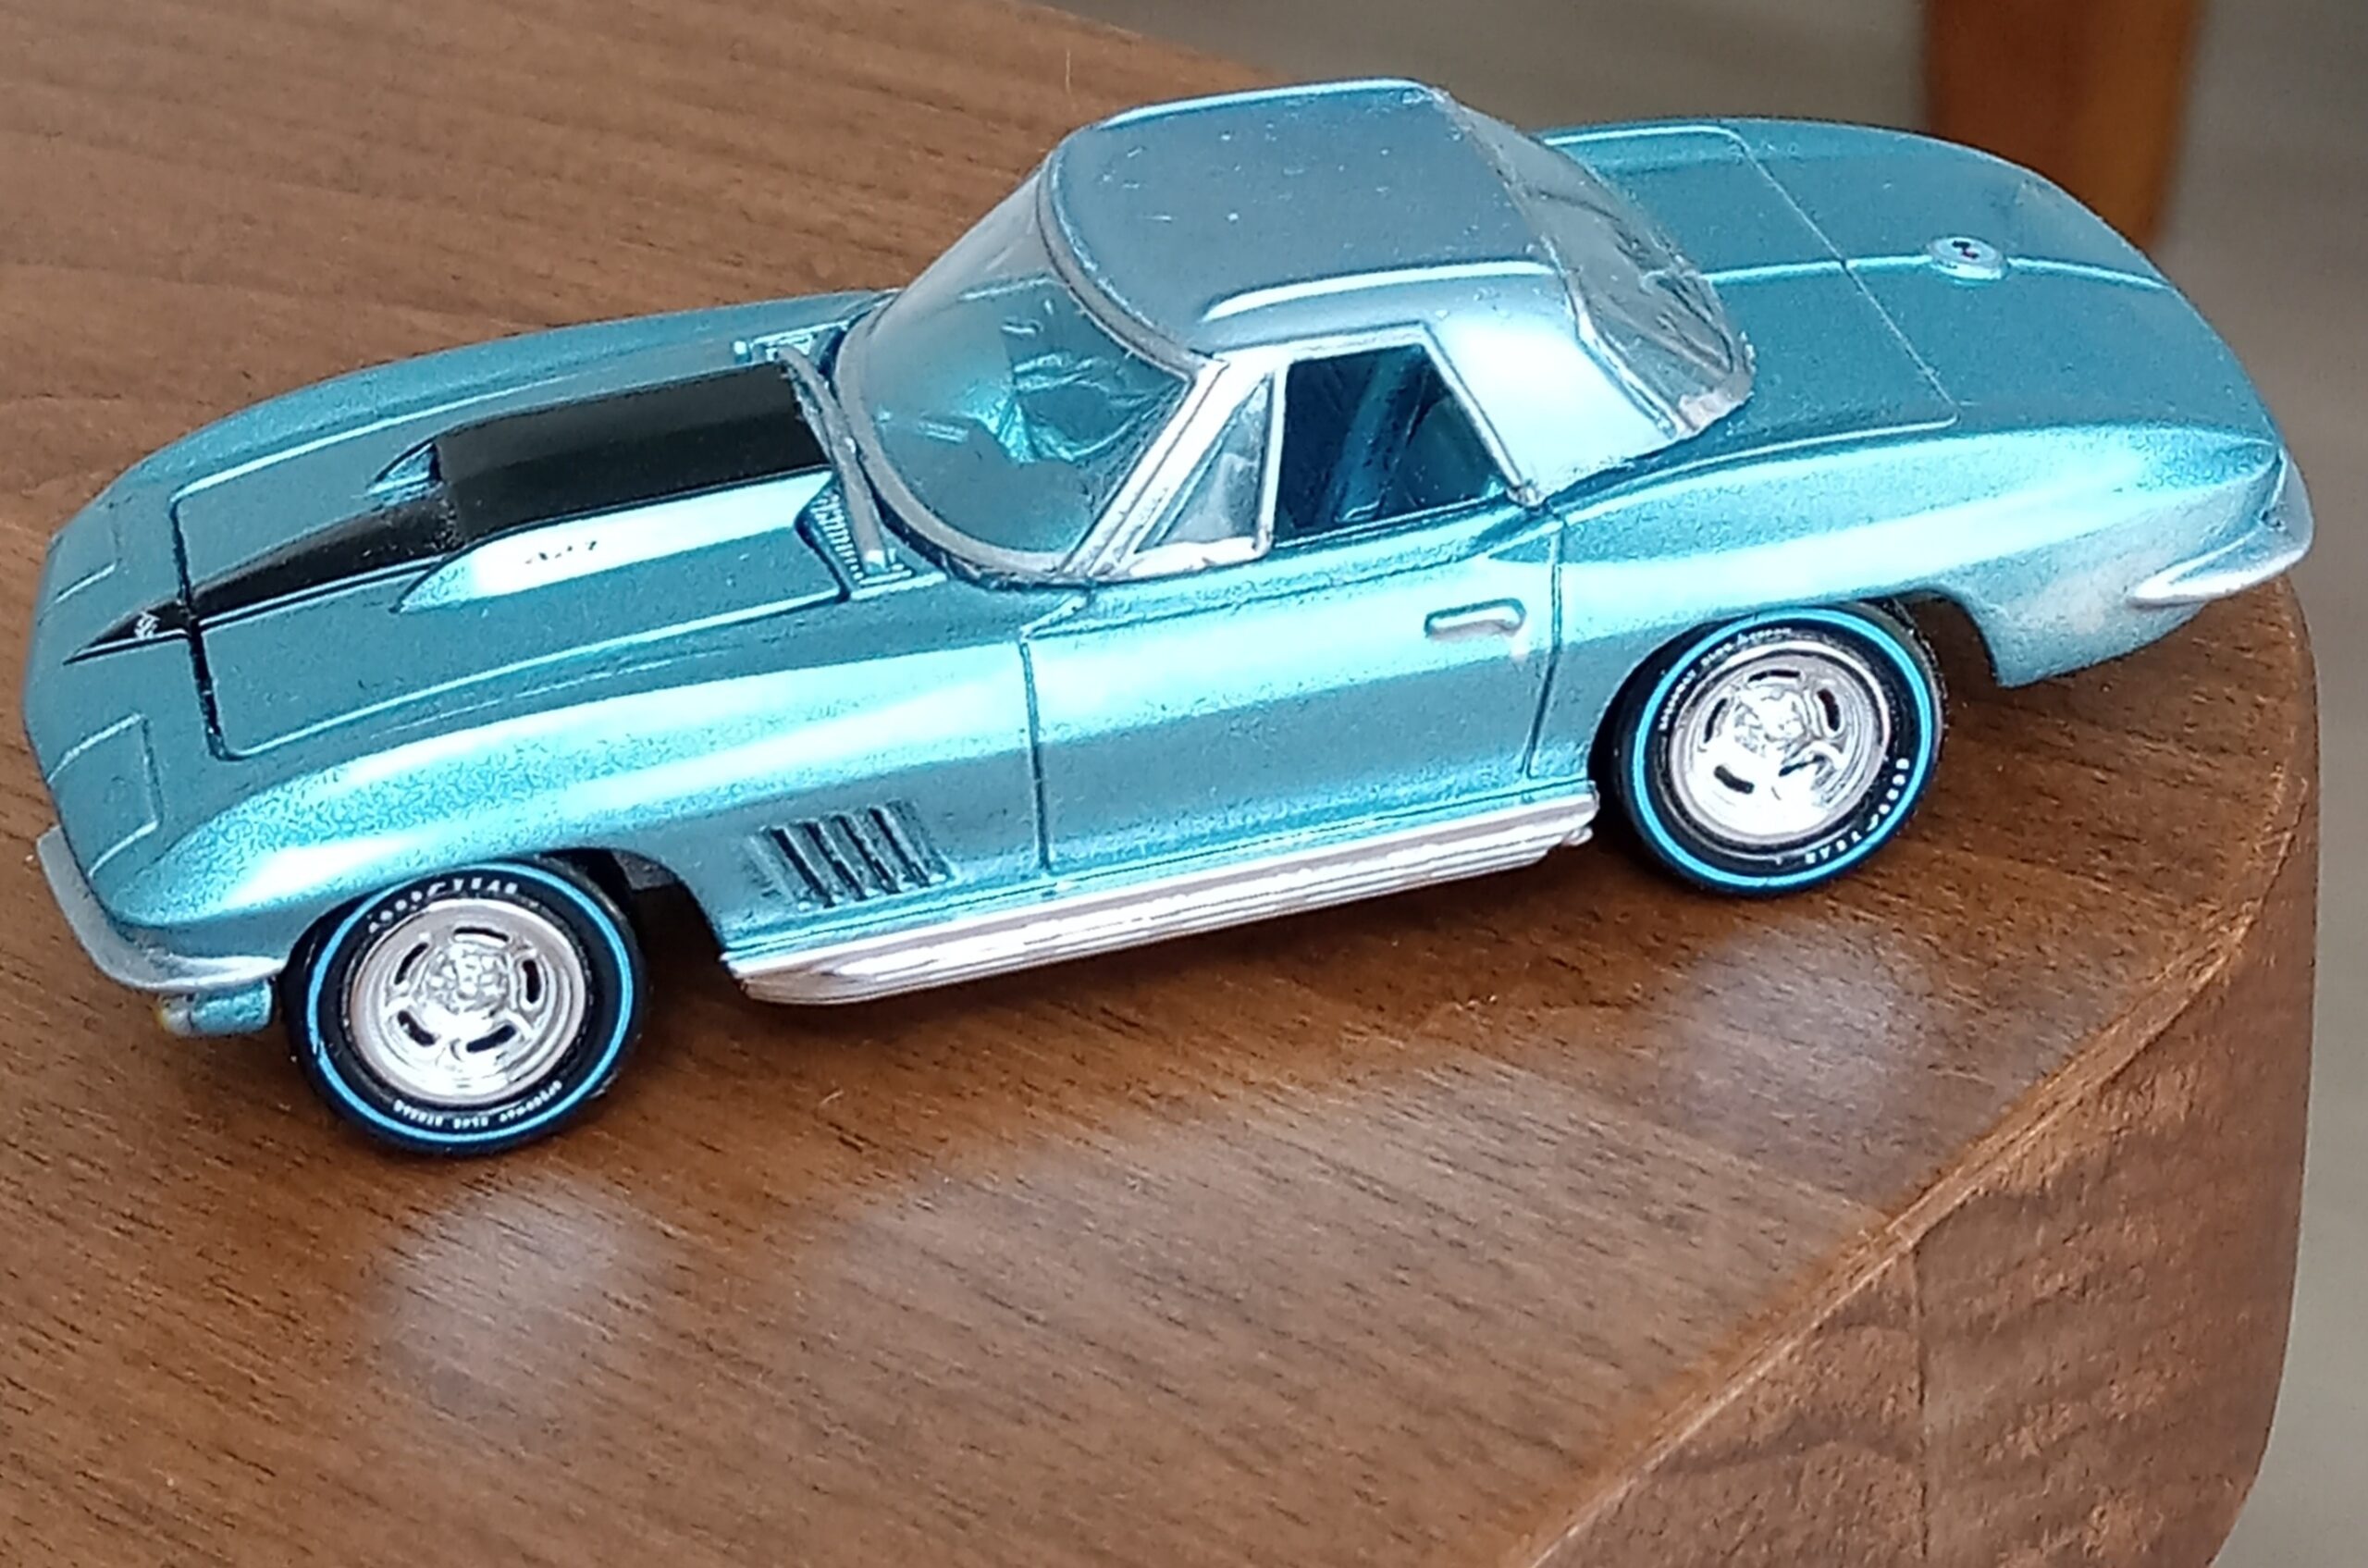
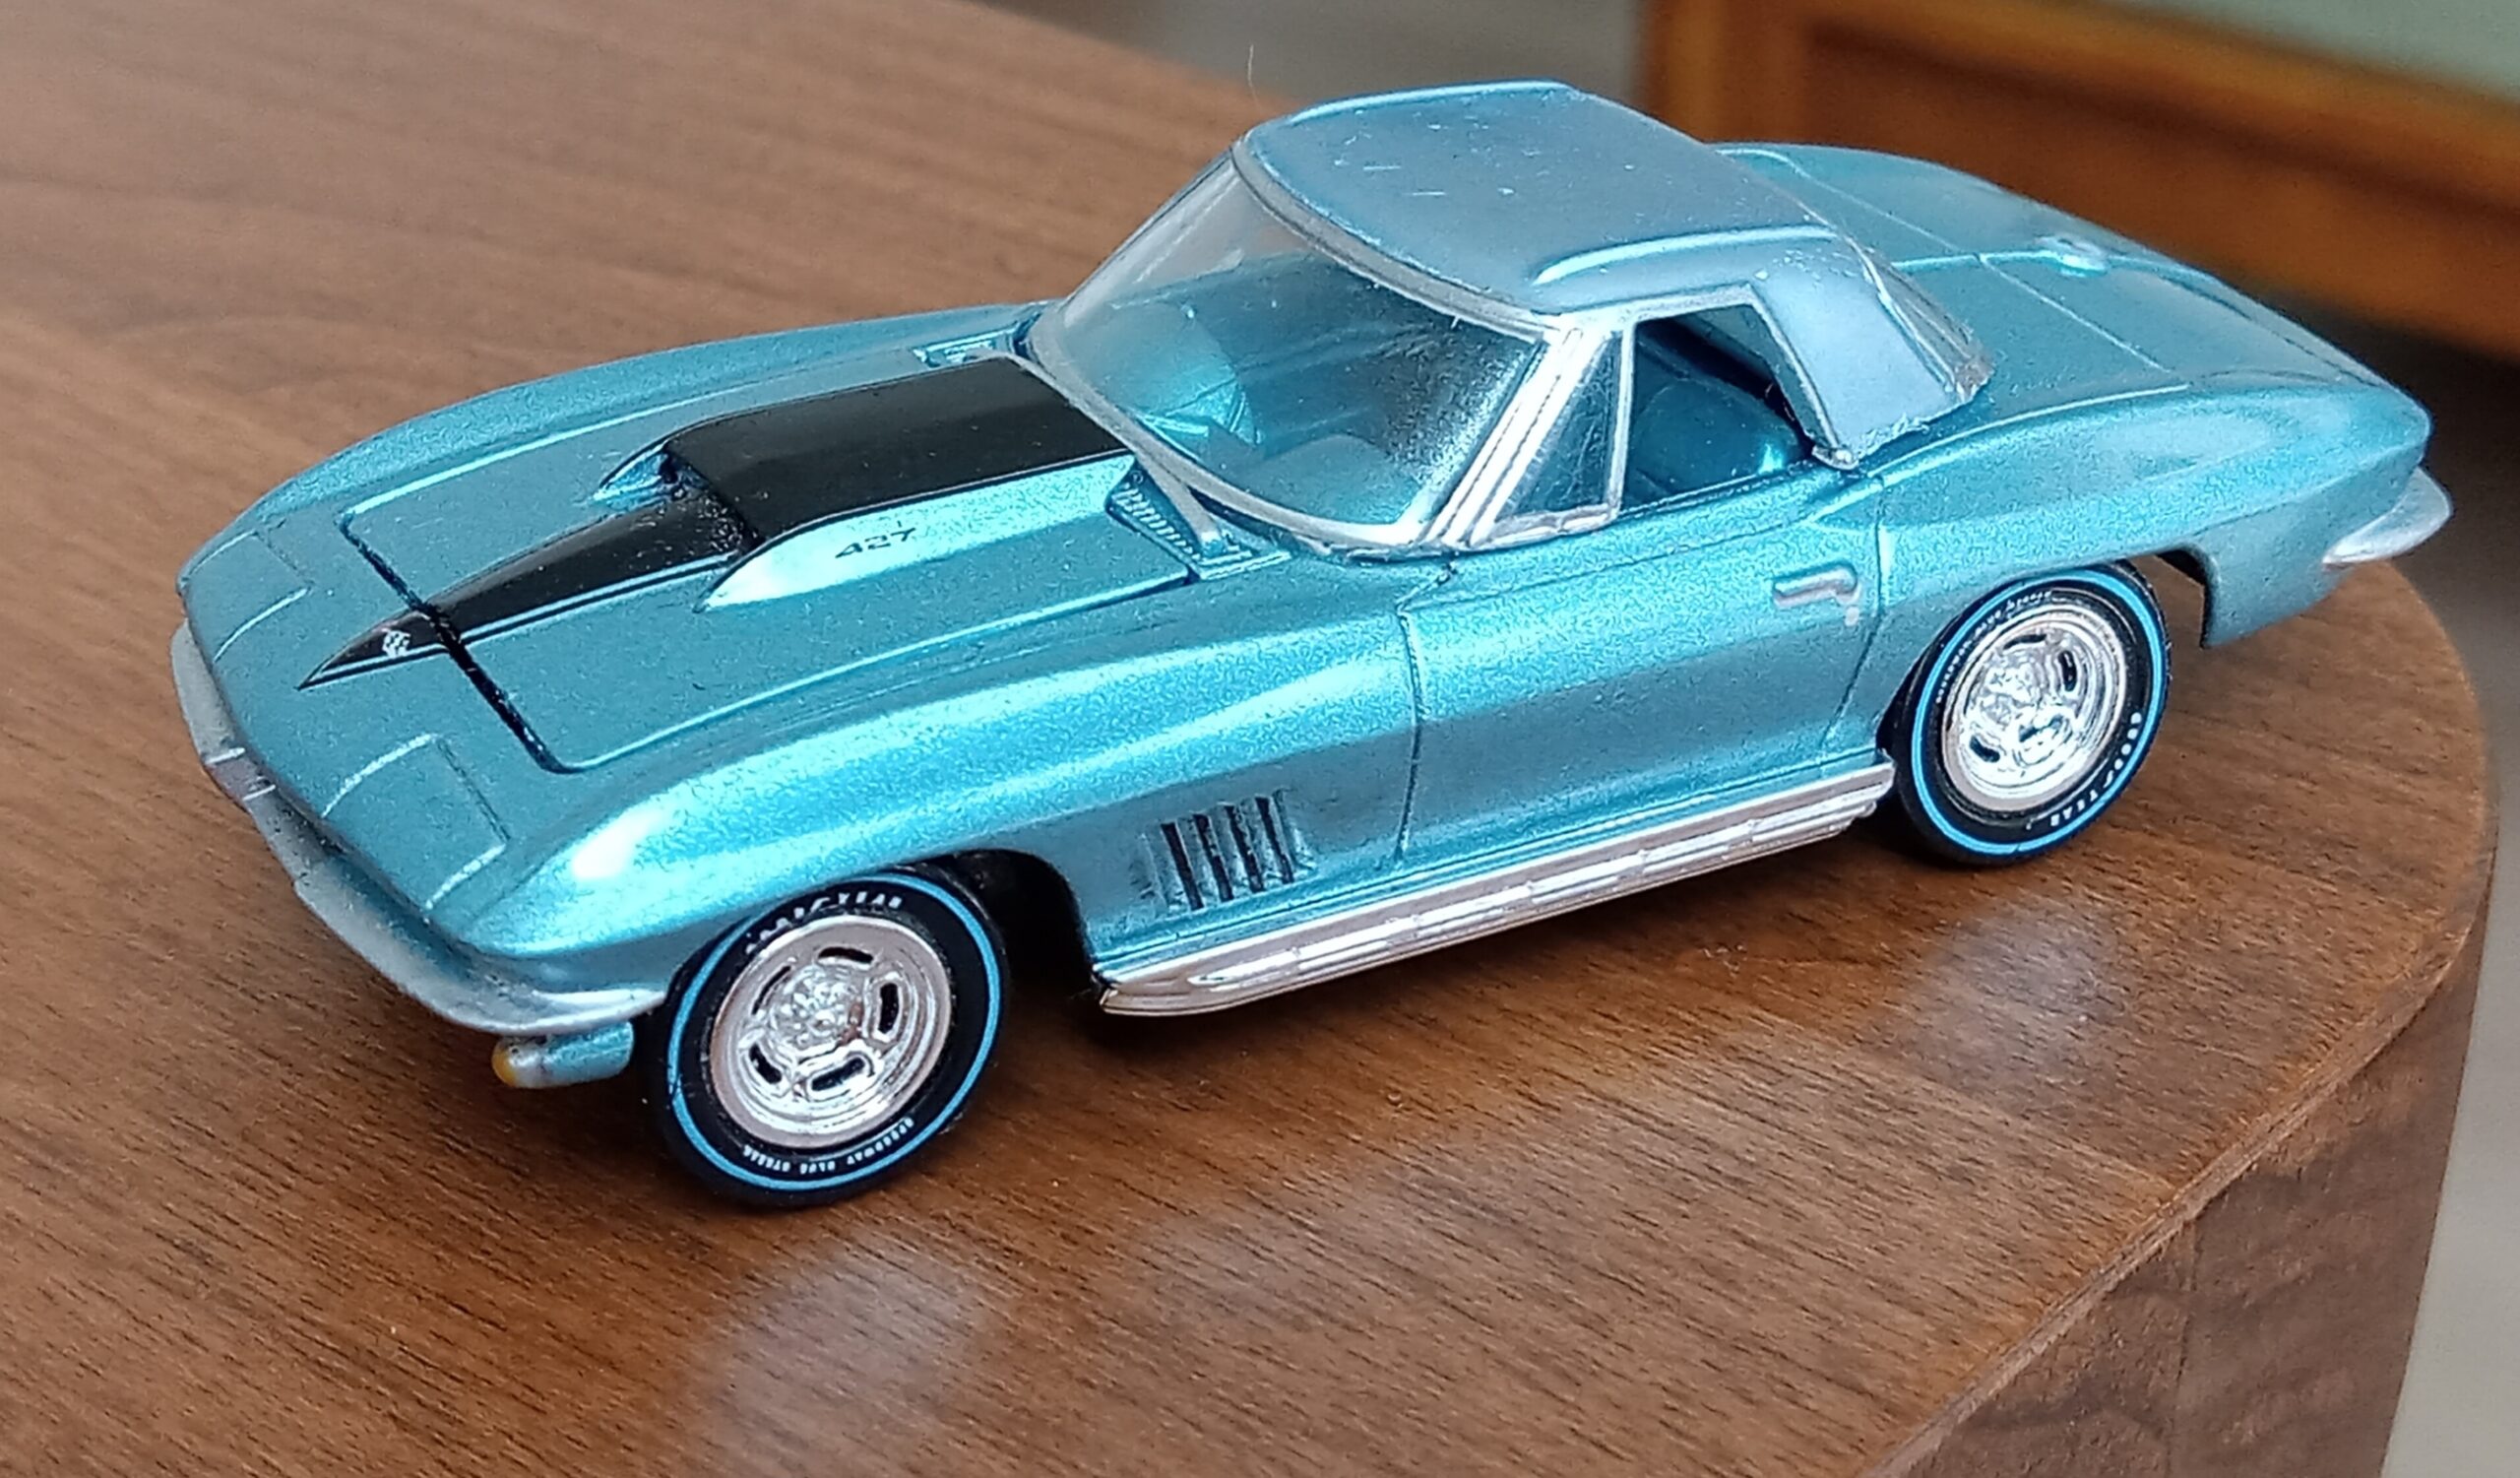
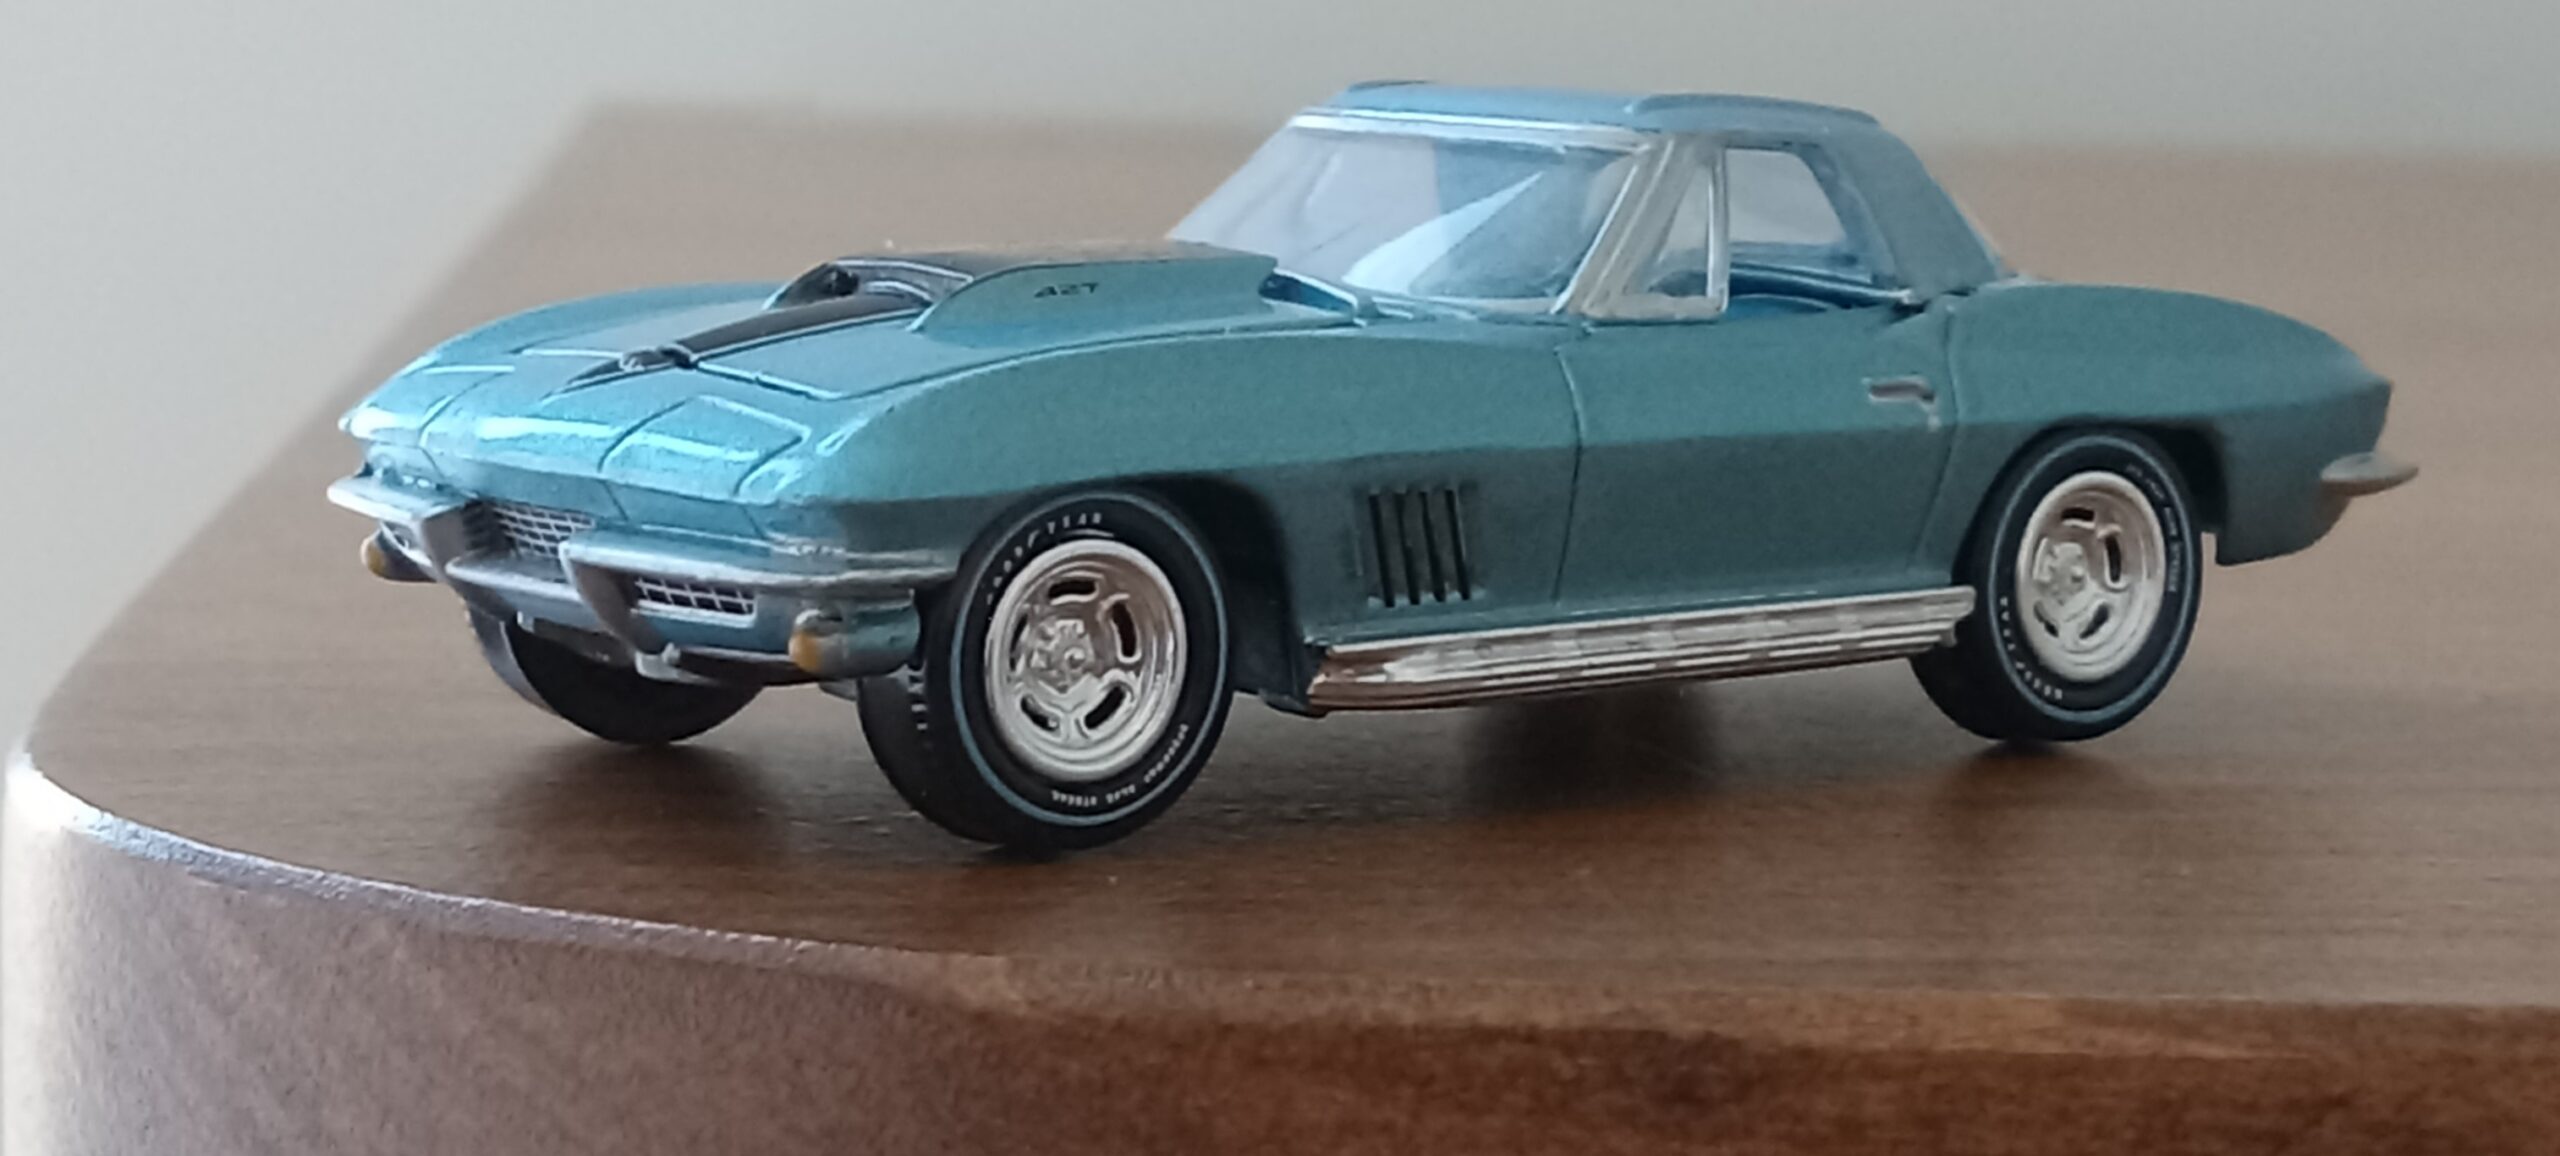
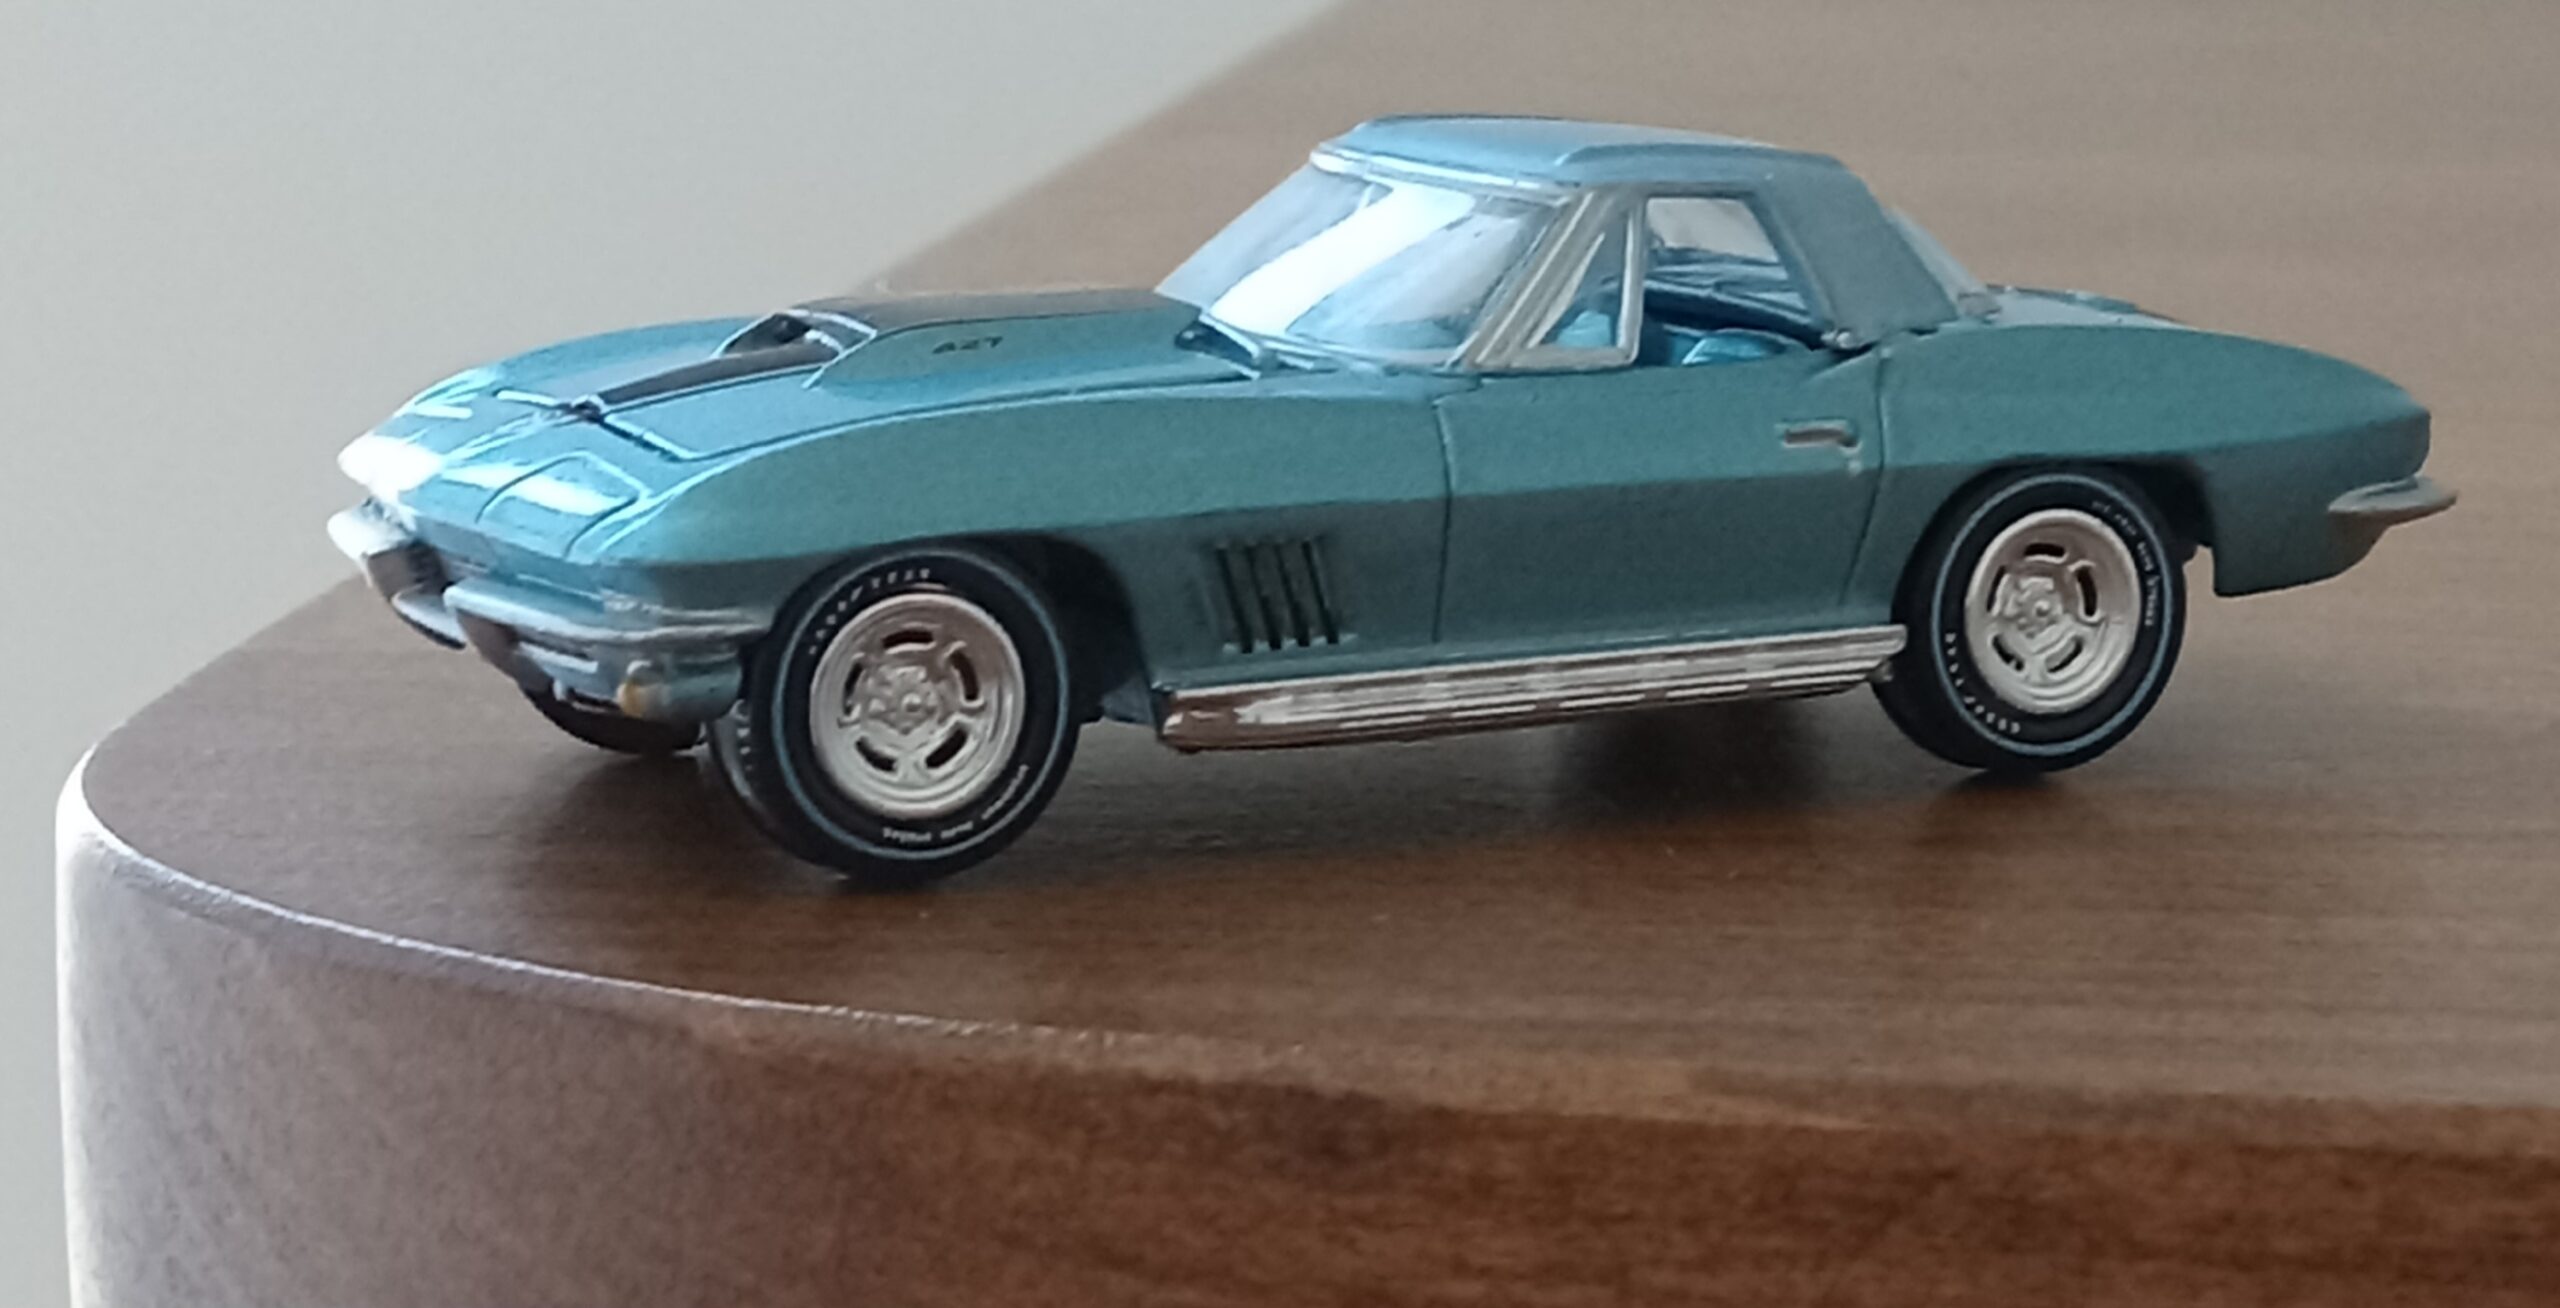
4:ライトブルー・メタリック、同色ハードトップ付き版
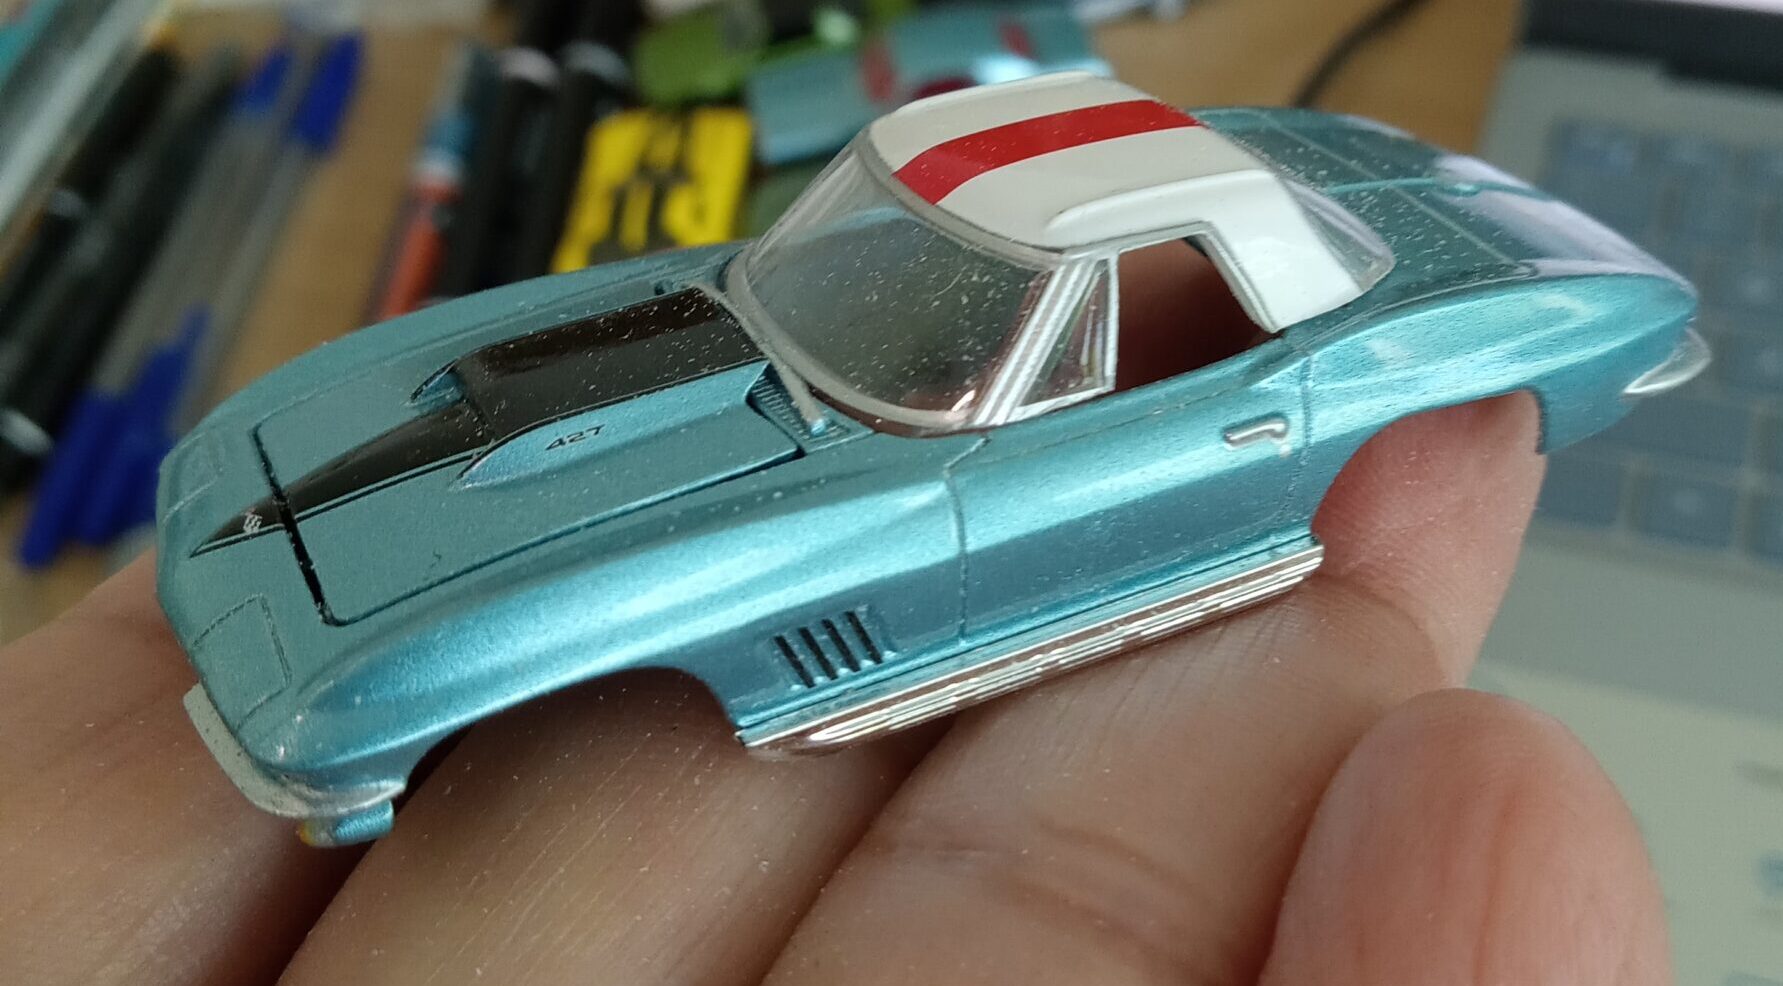
(グリーンライトの’67青メタ・ボディー+グリーンライトの’67レーシングバージョンのハードトップ+ジョニーライトニング社製の’67青メタクーペのホイールとタイヤ移植)
ーーーーーーーー>綺麗にまとまってますが、迫力不足?
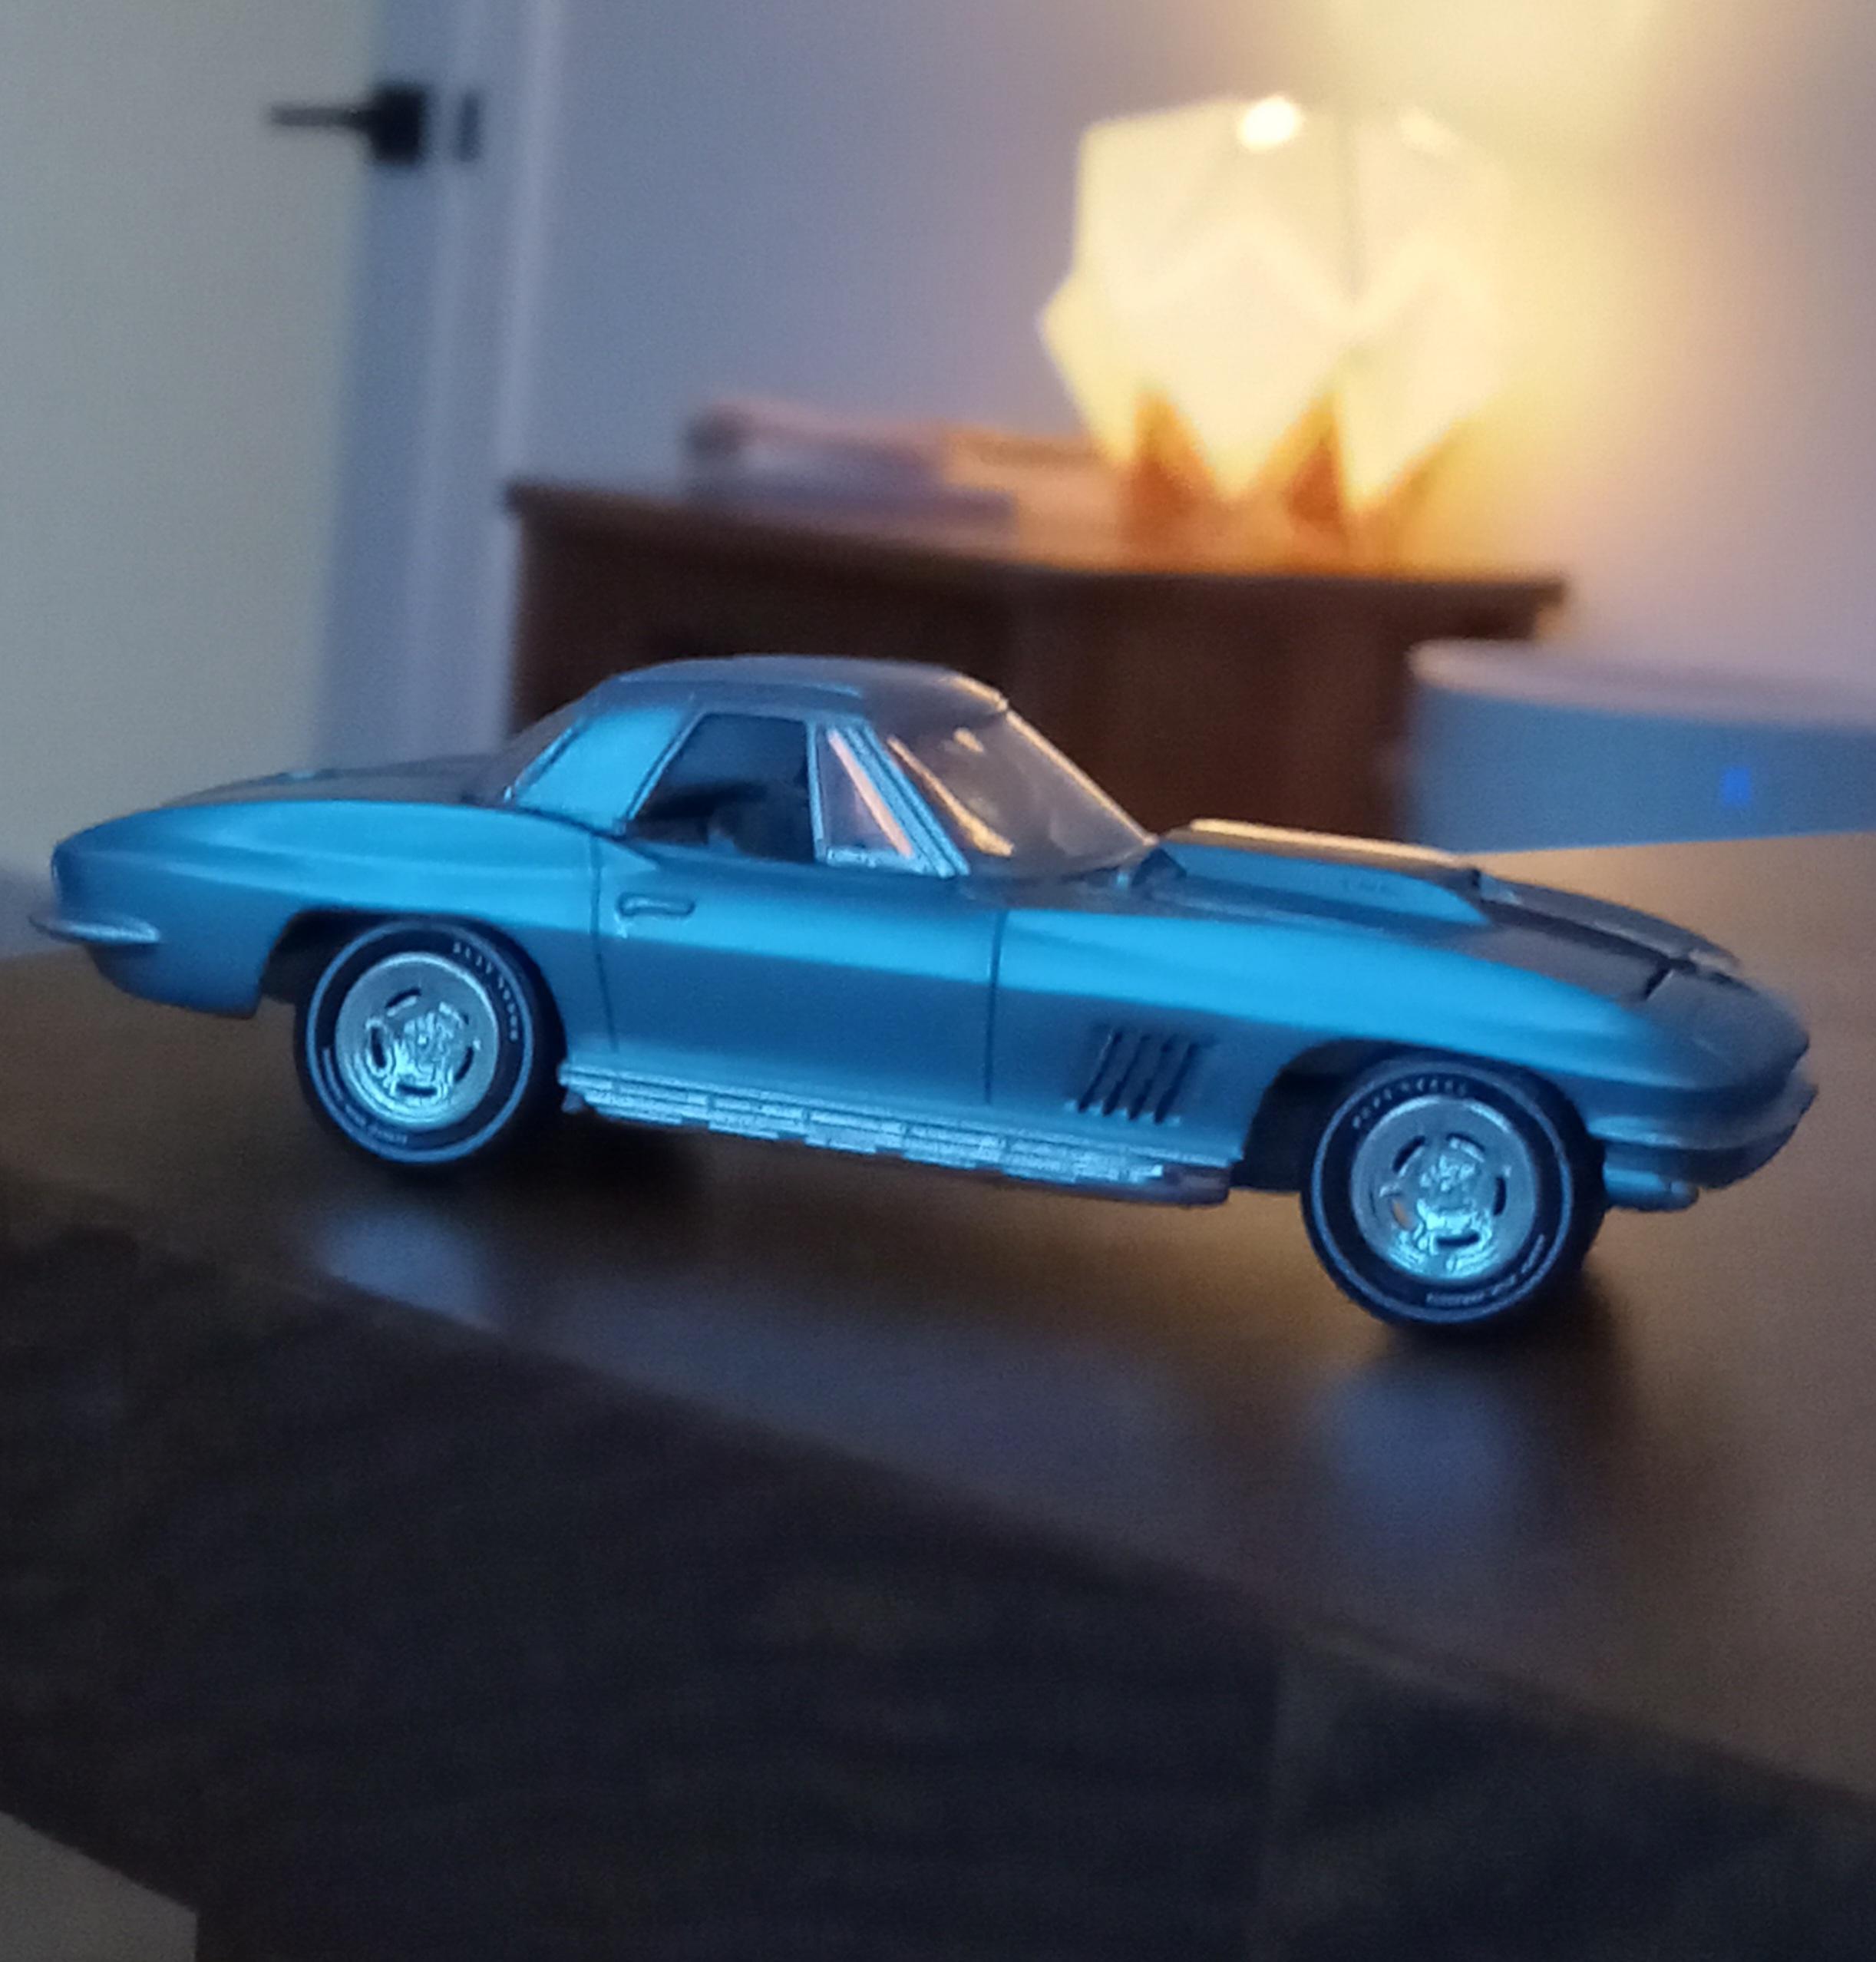
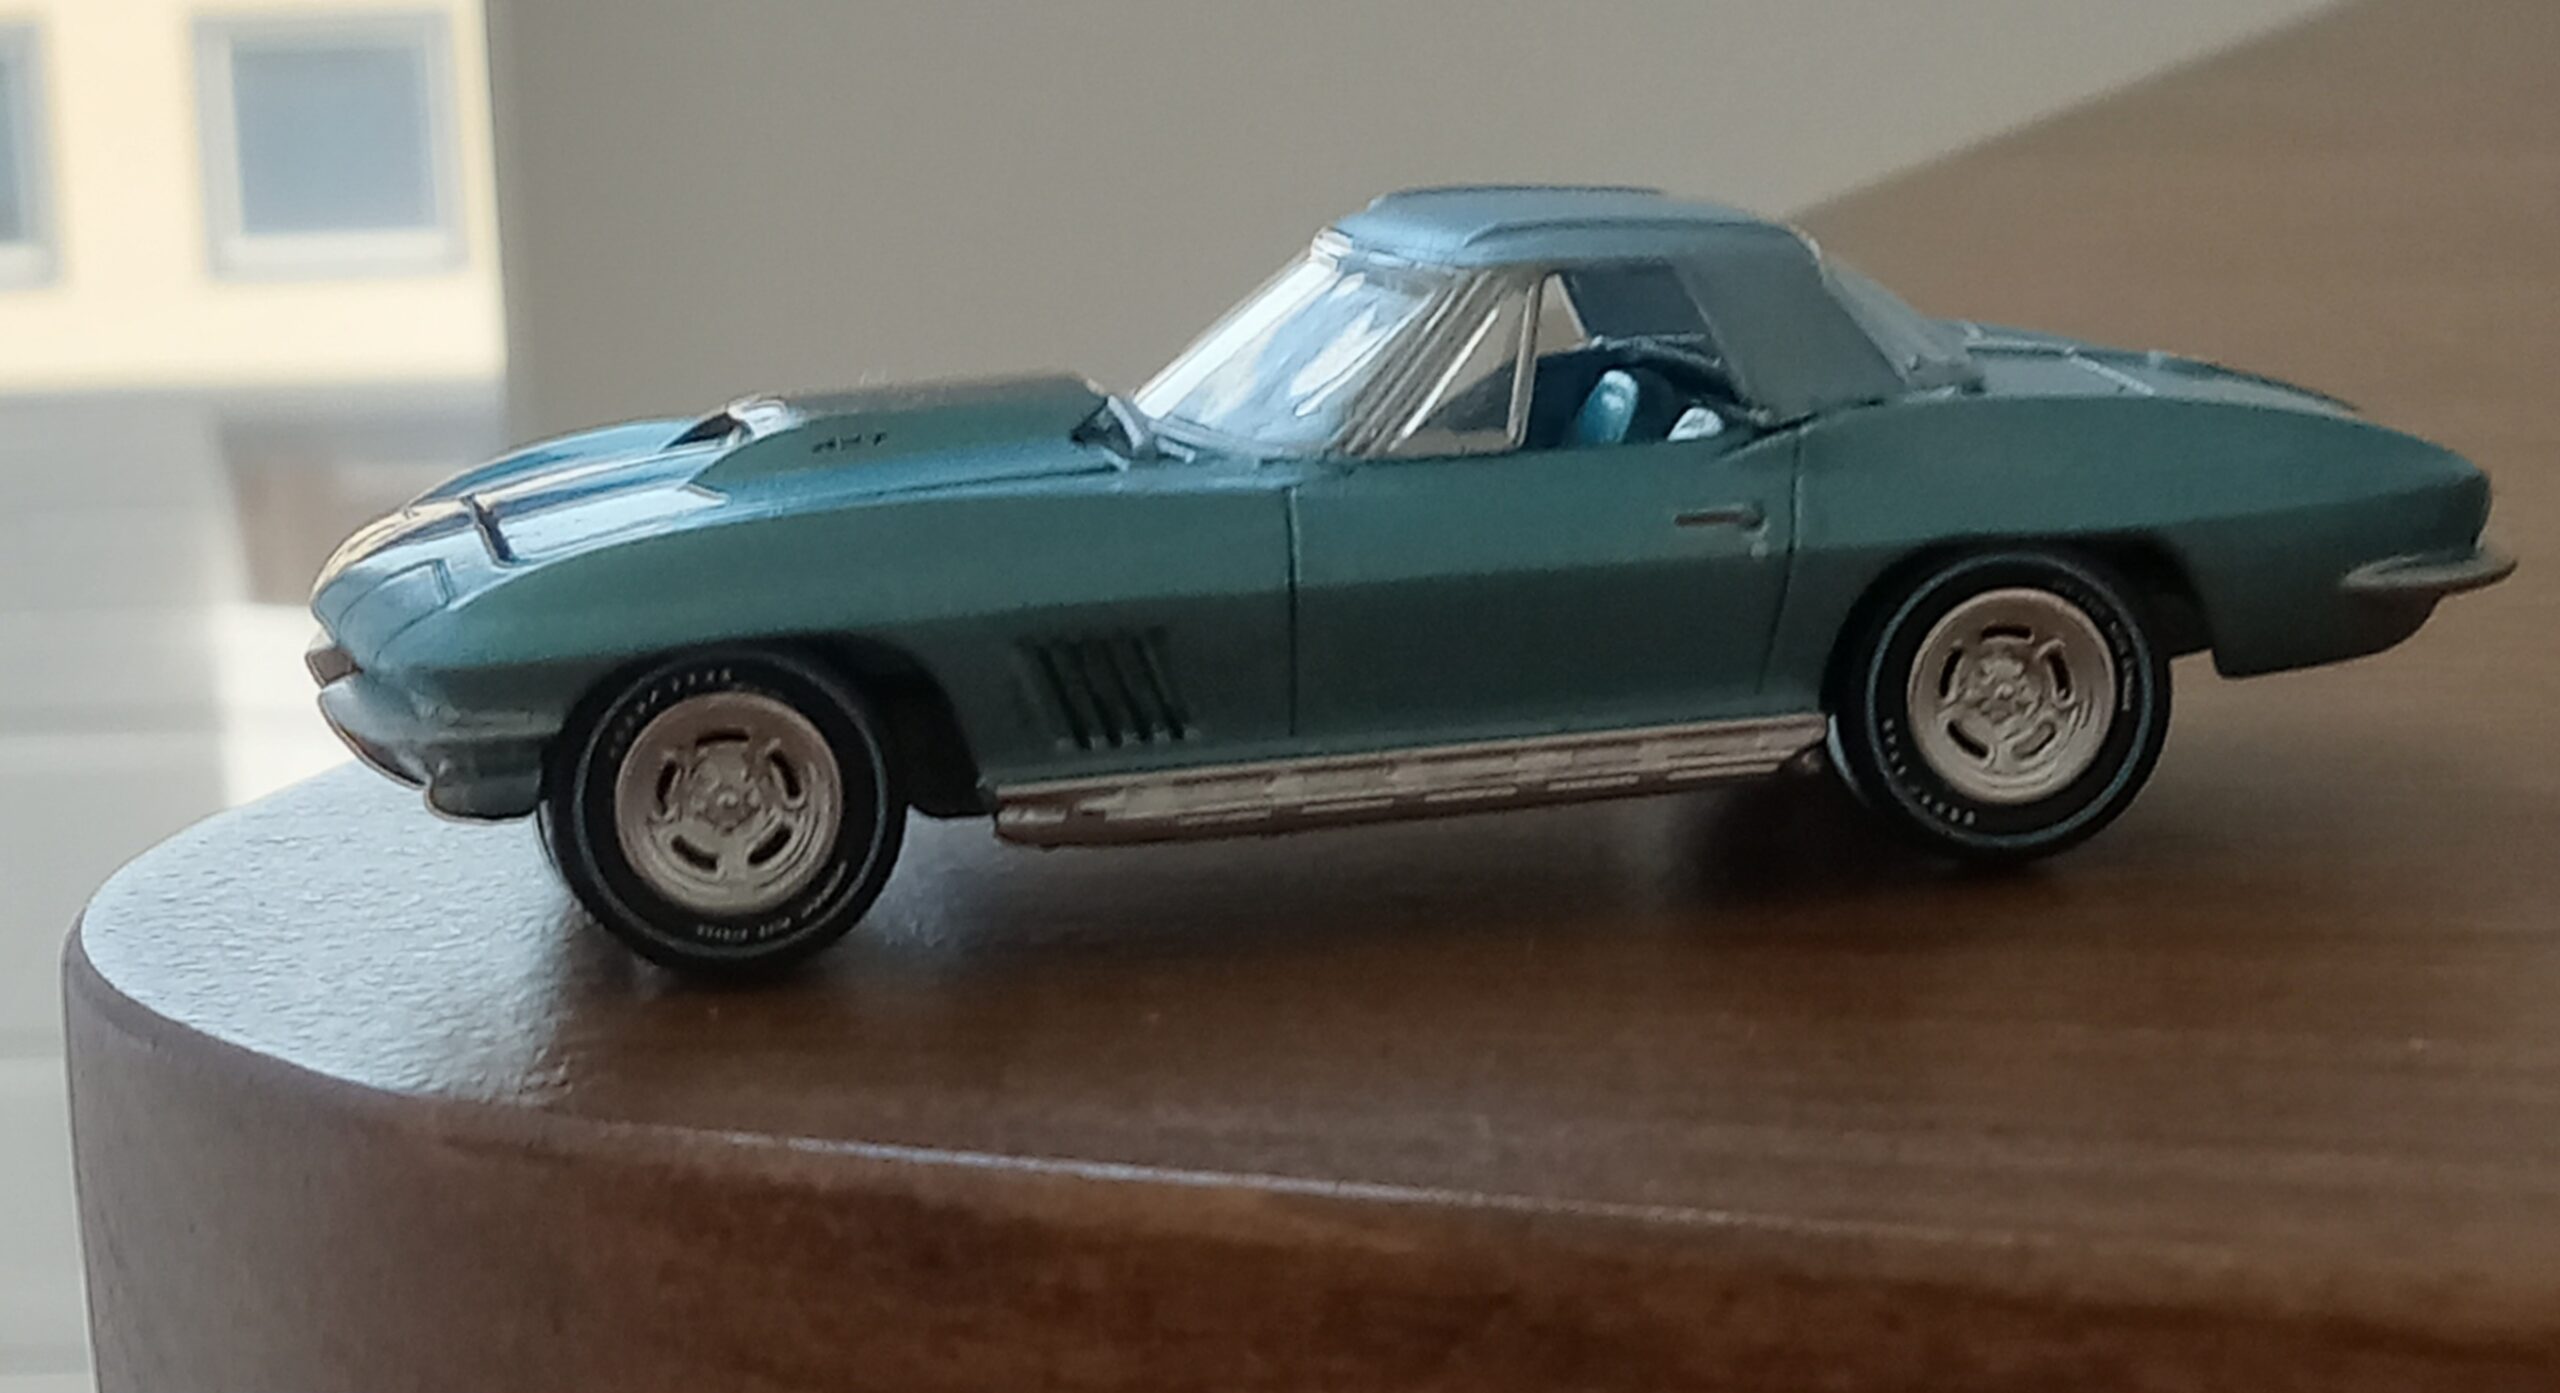
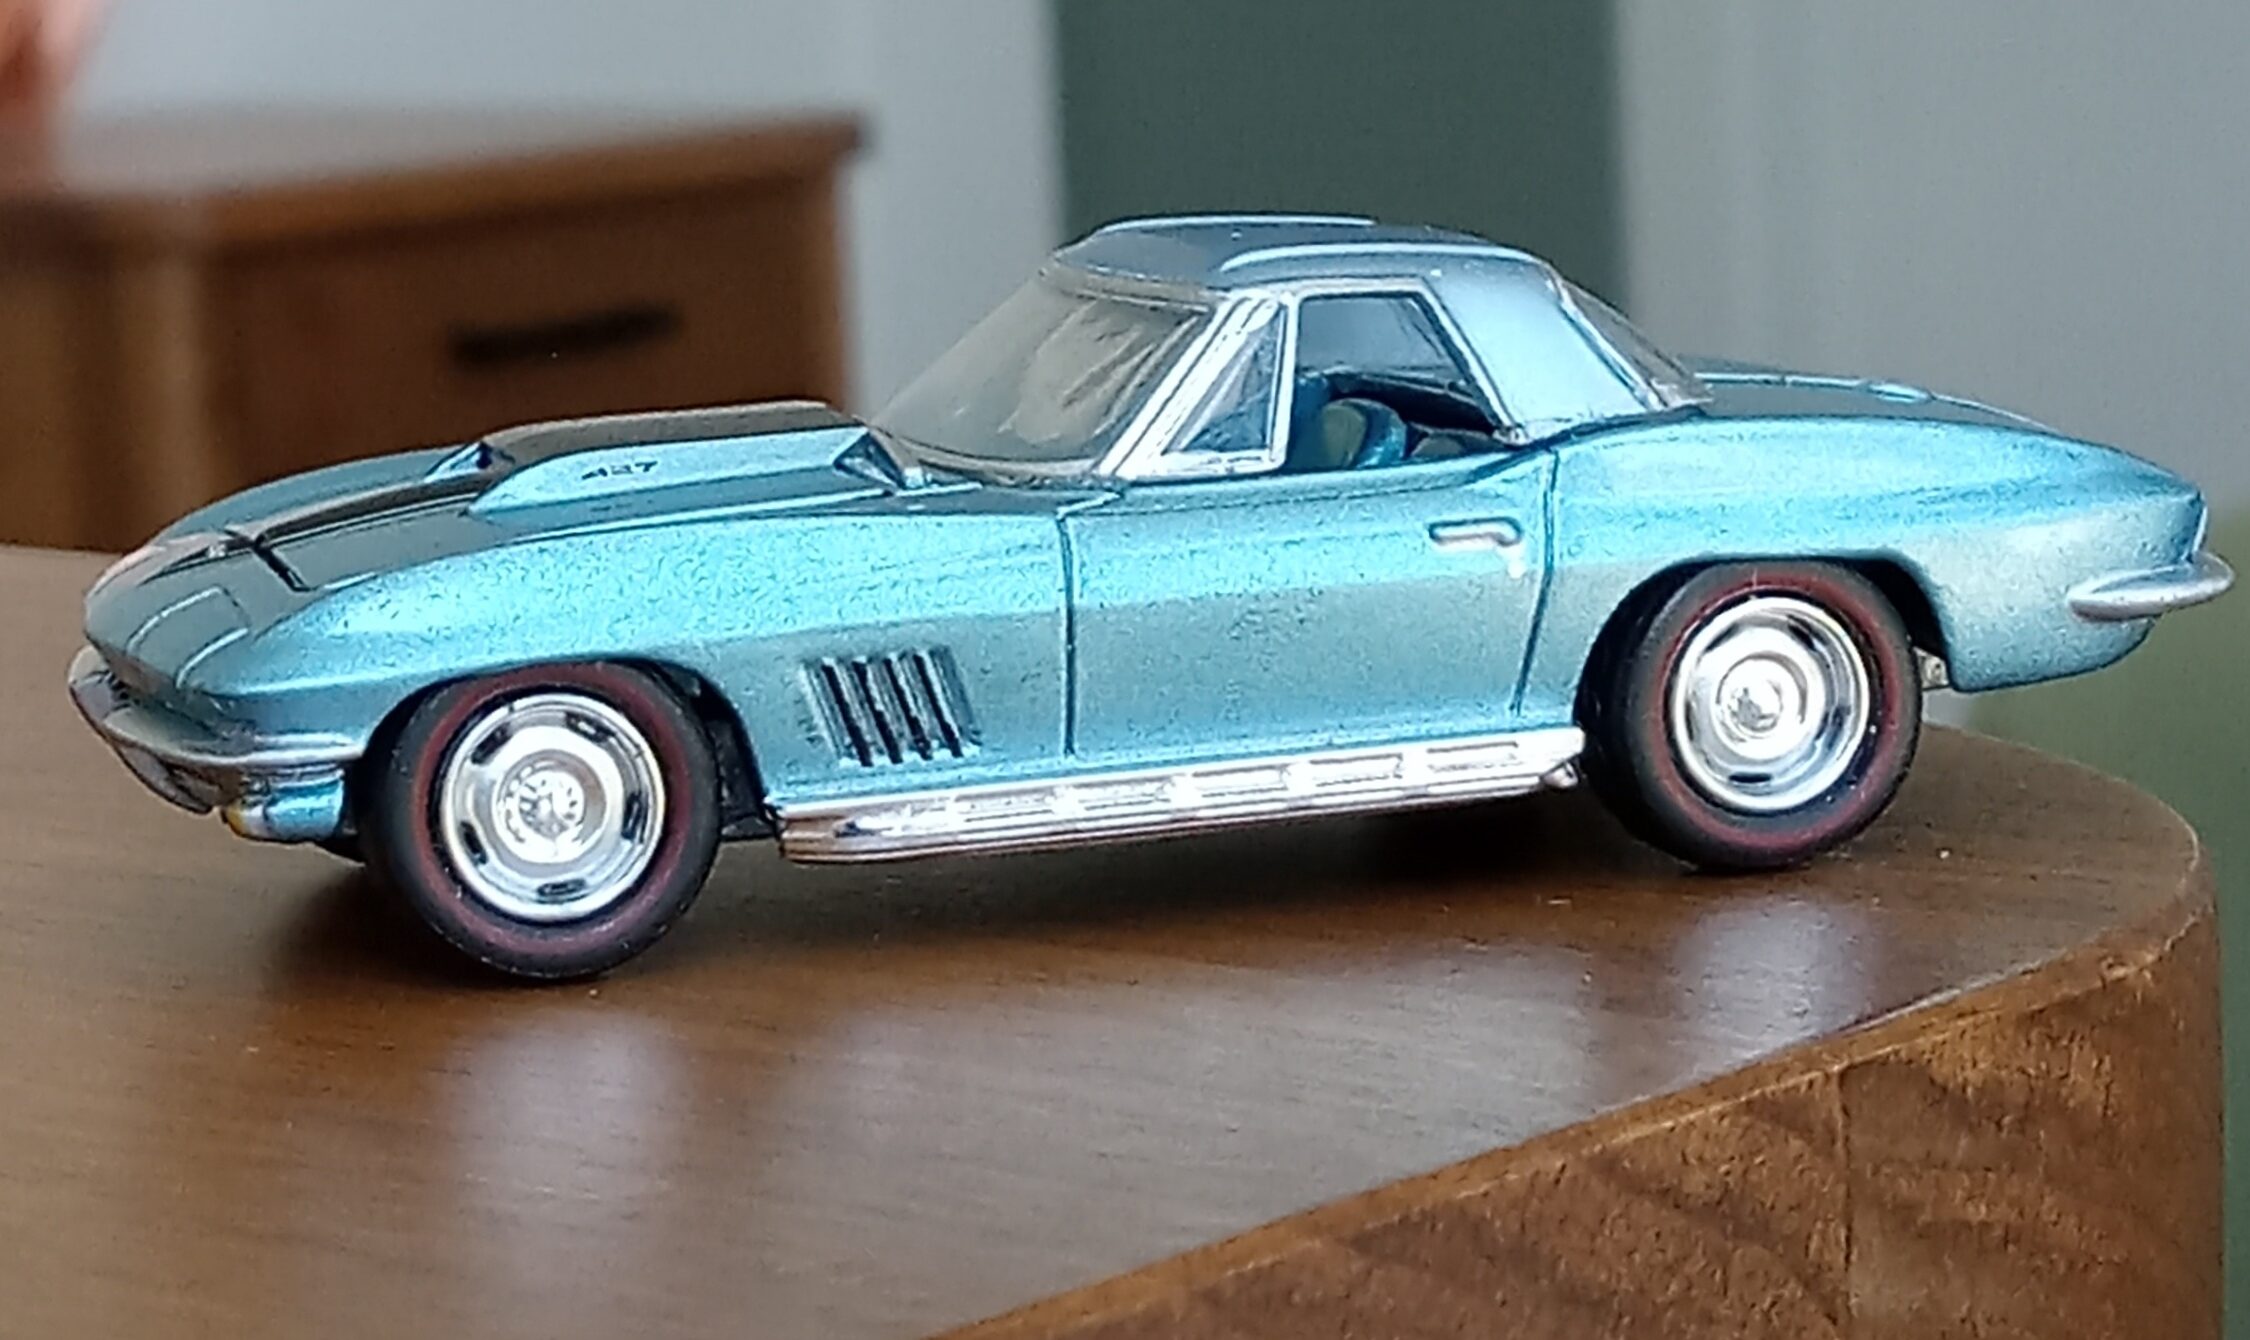
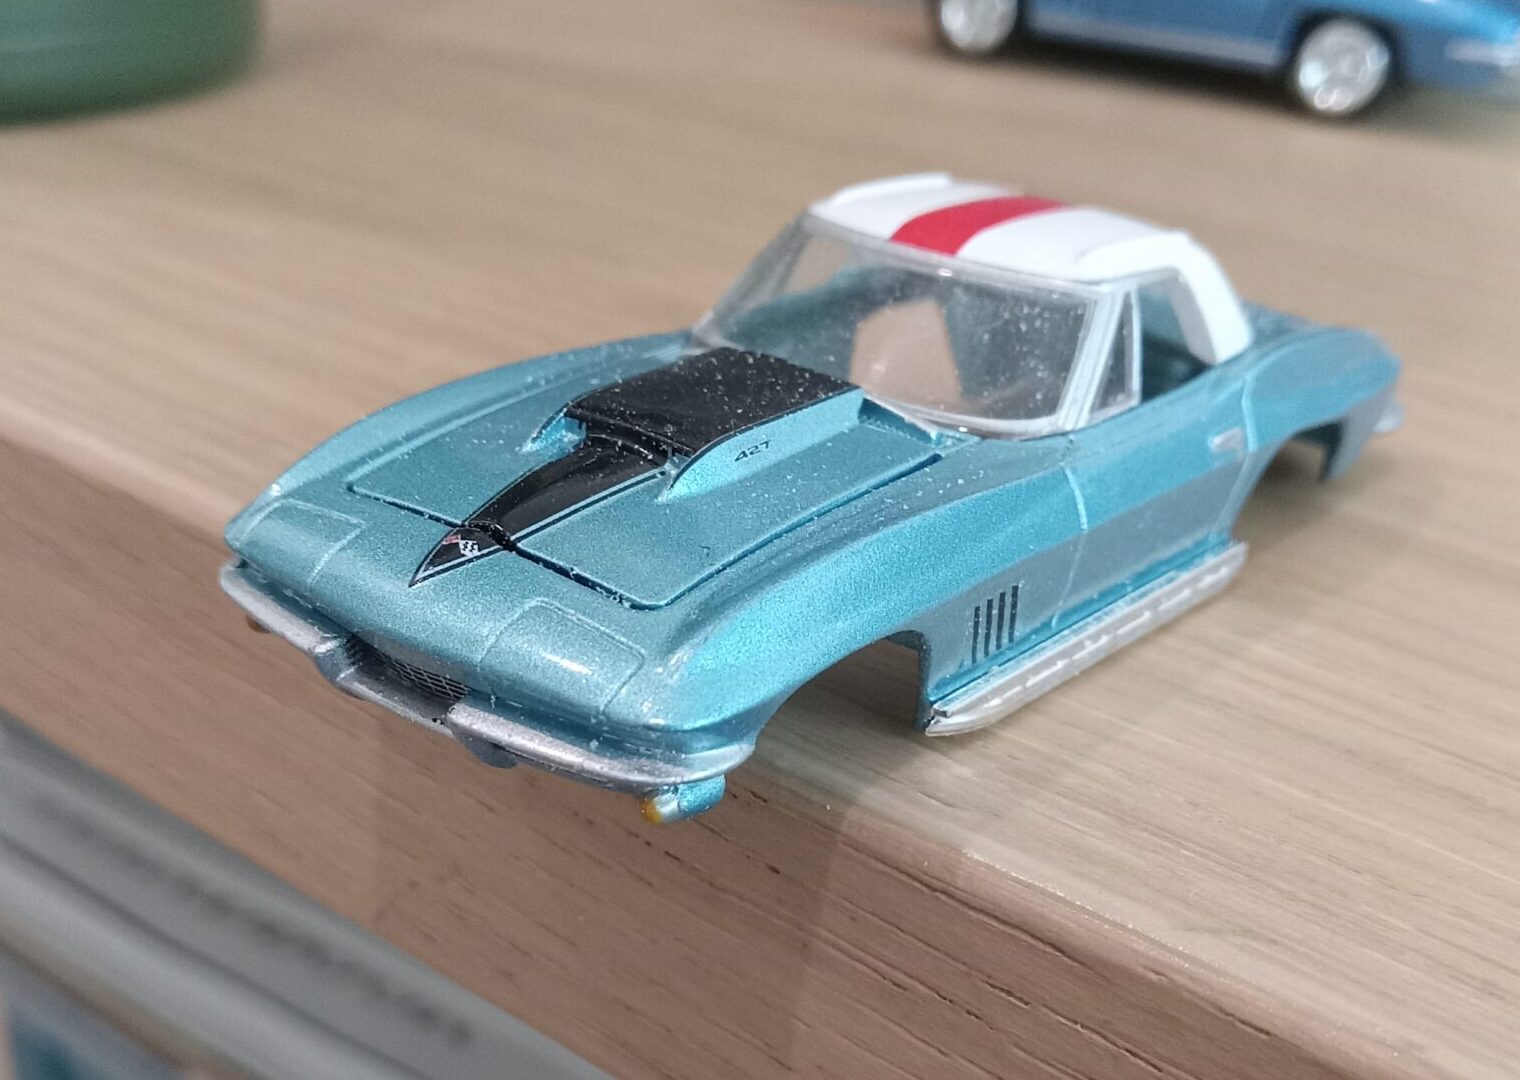
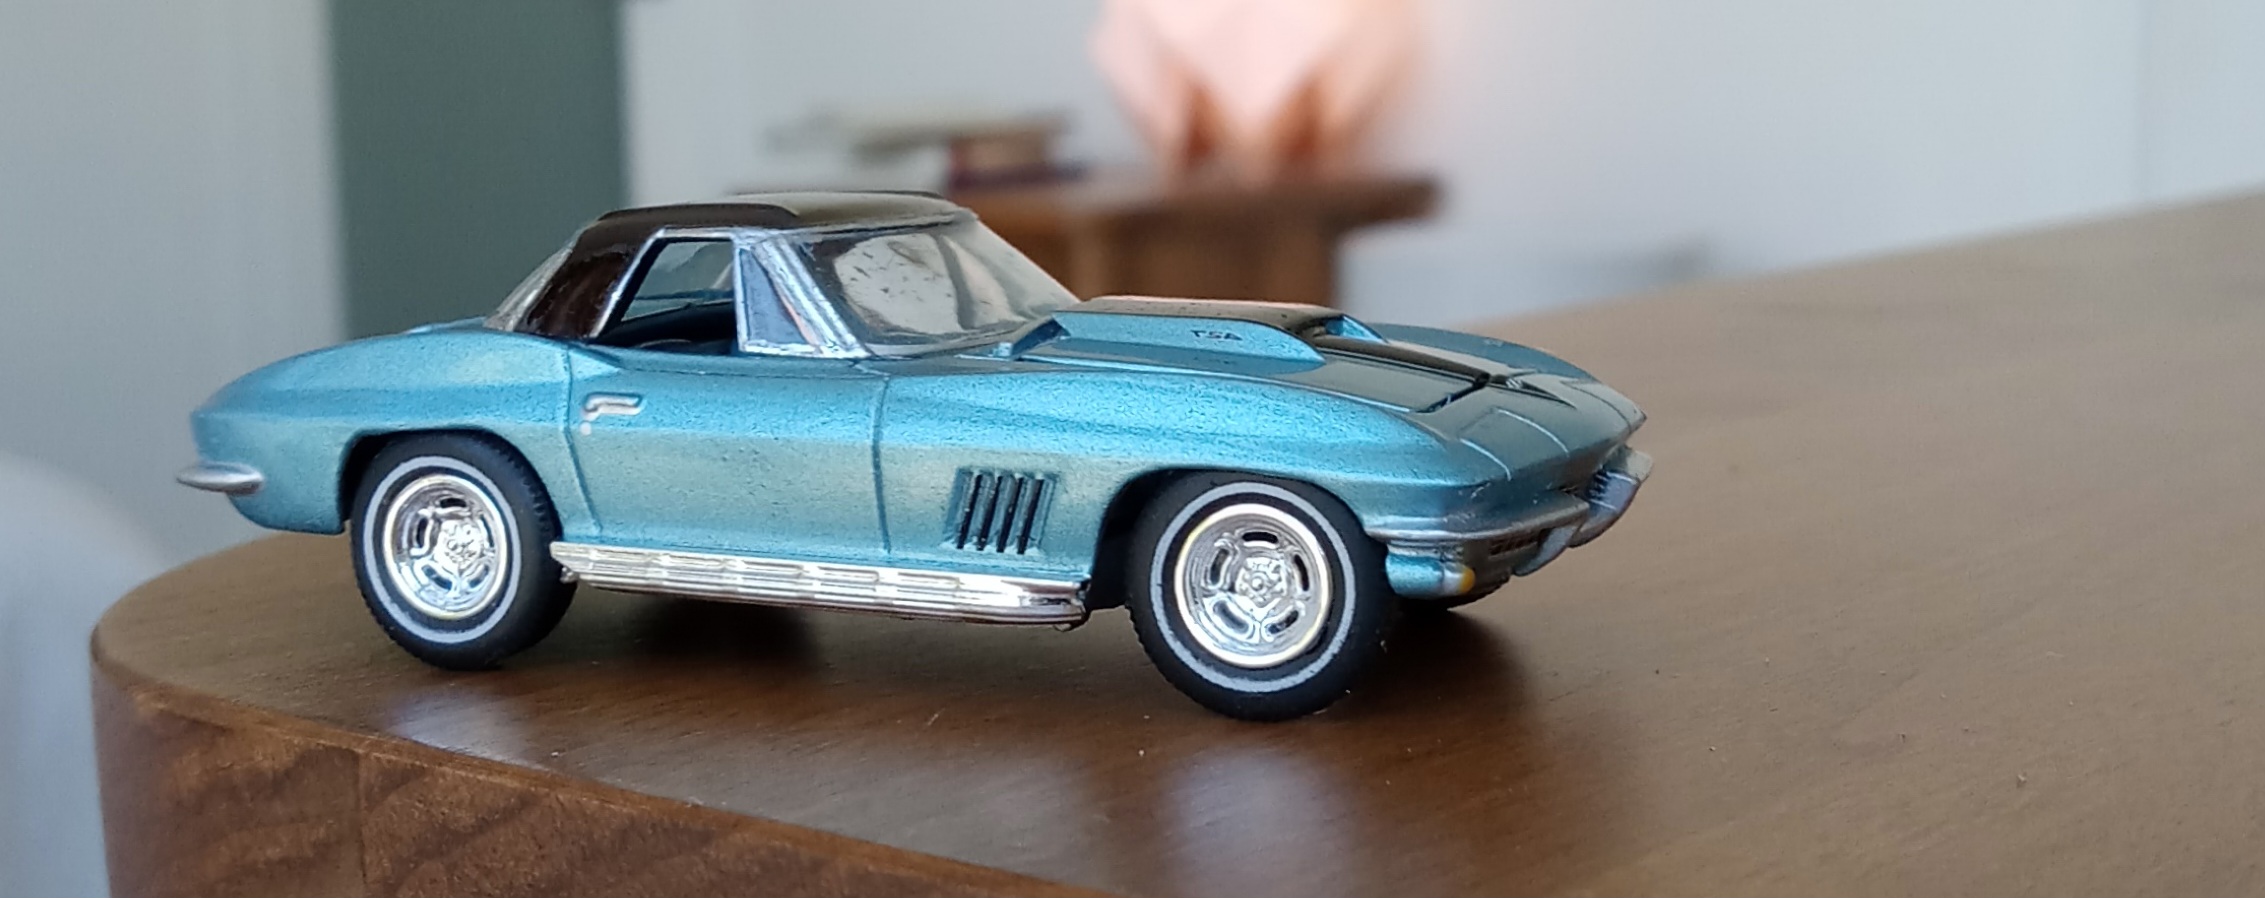
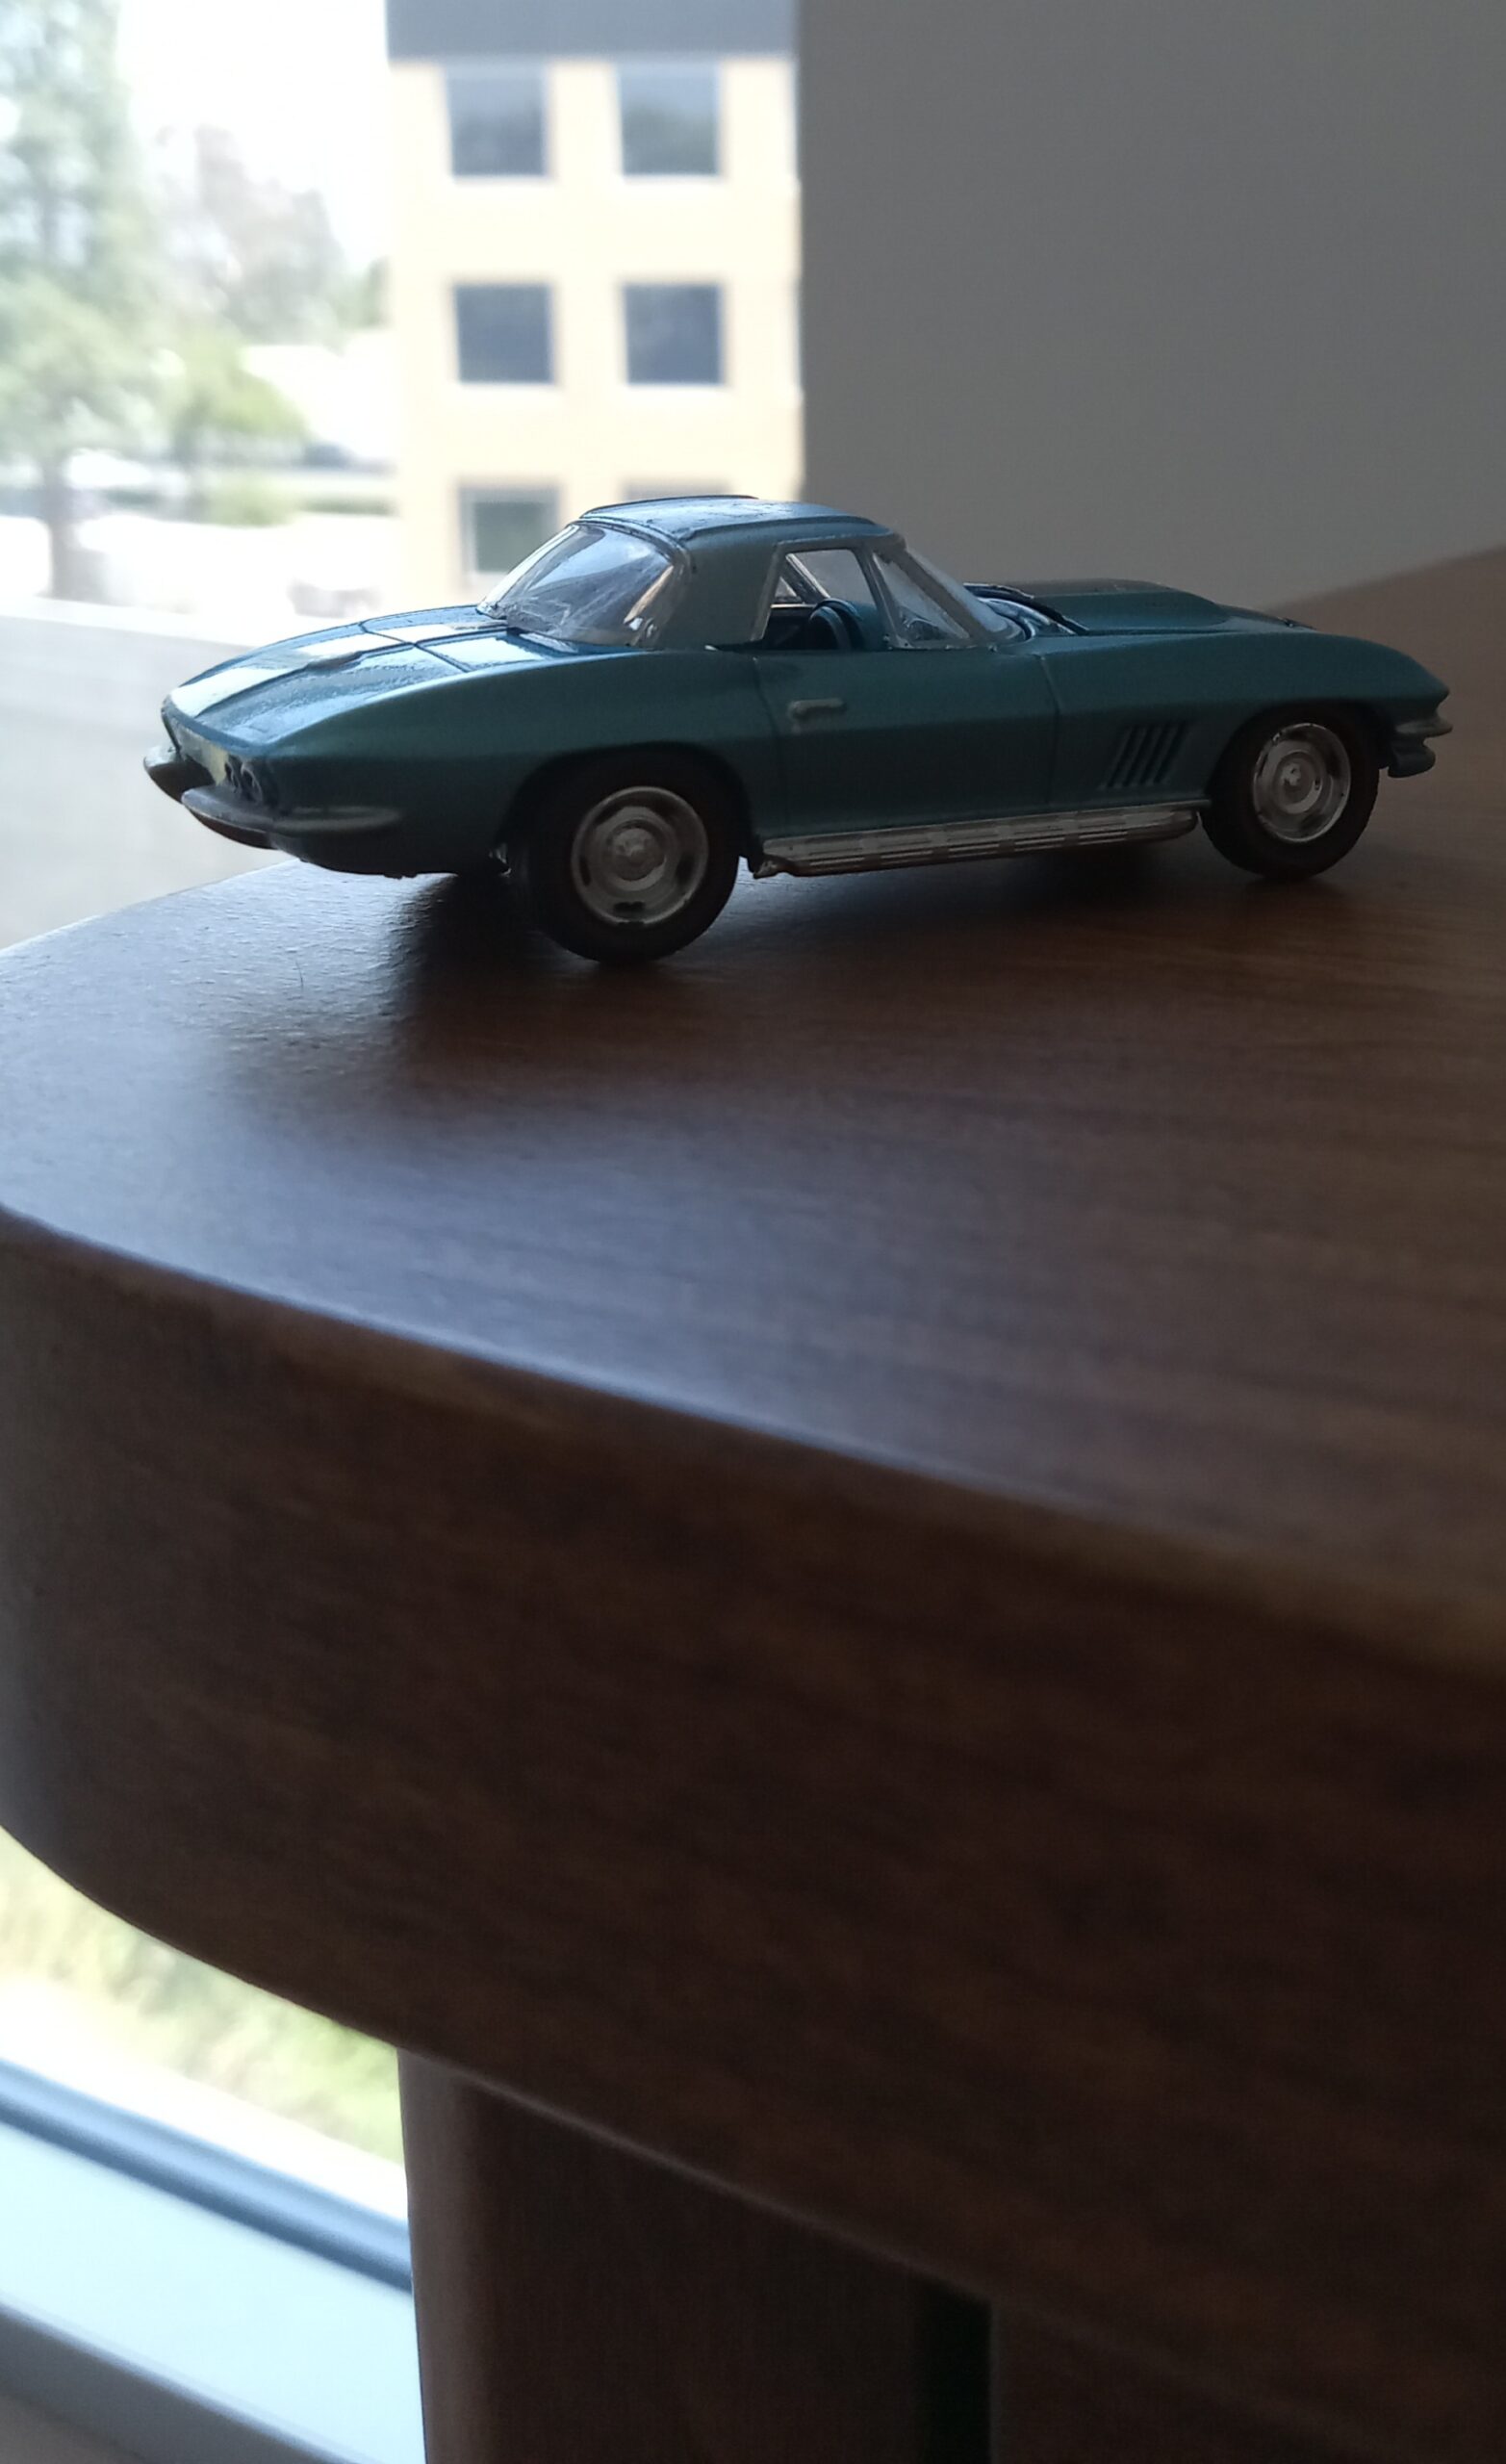
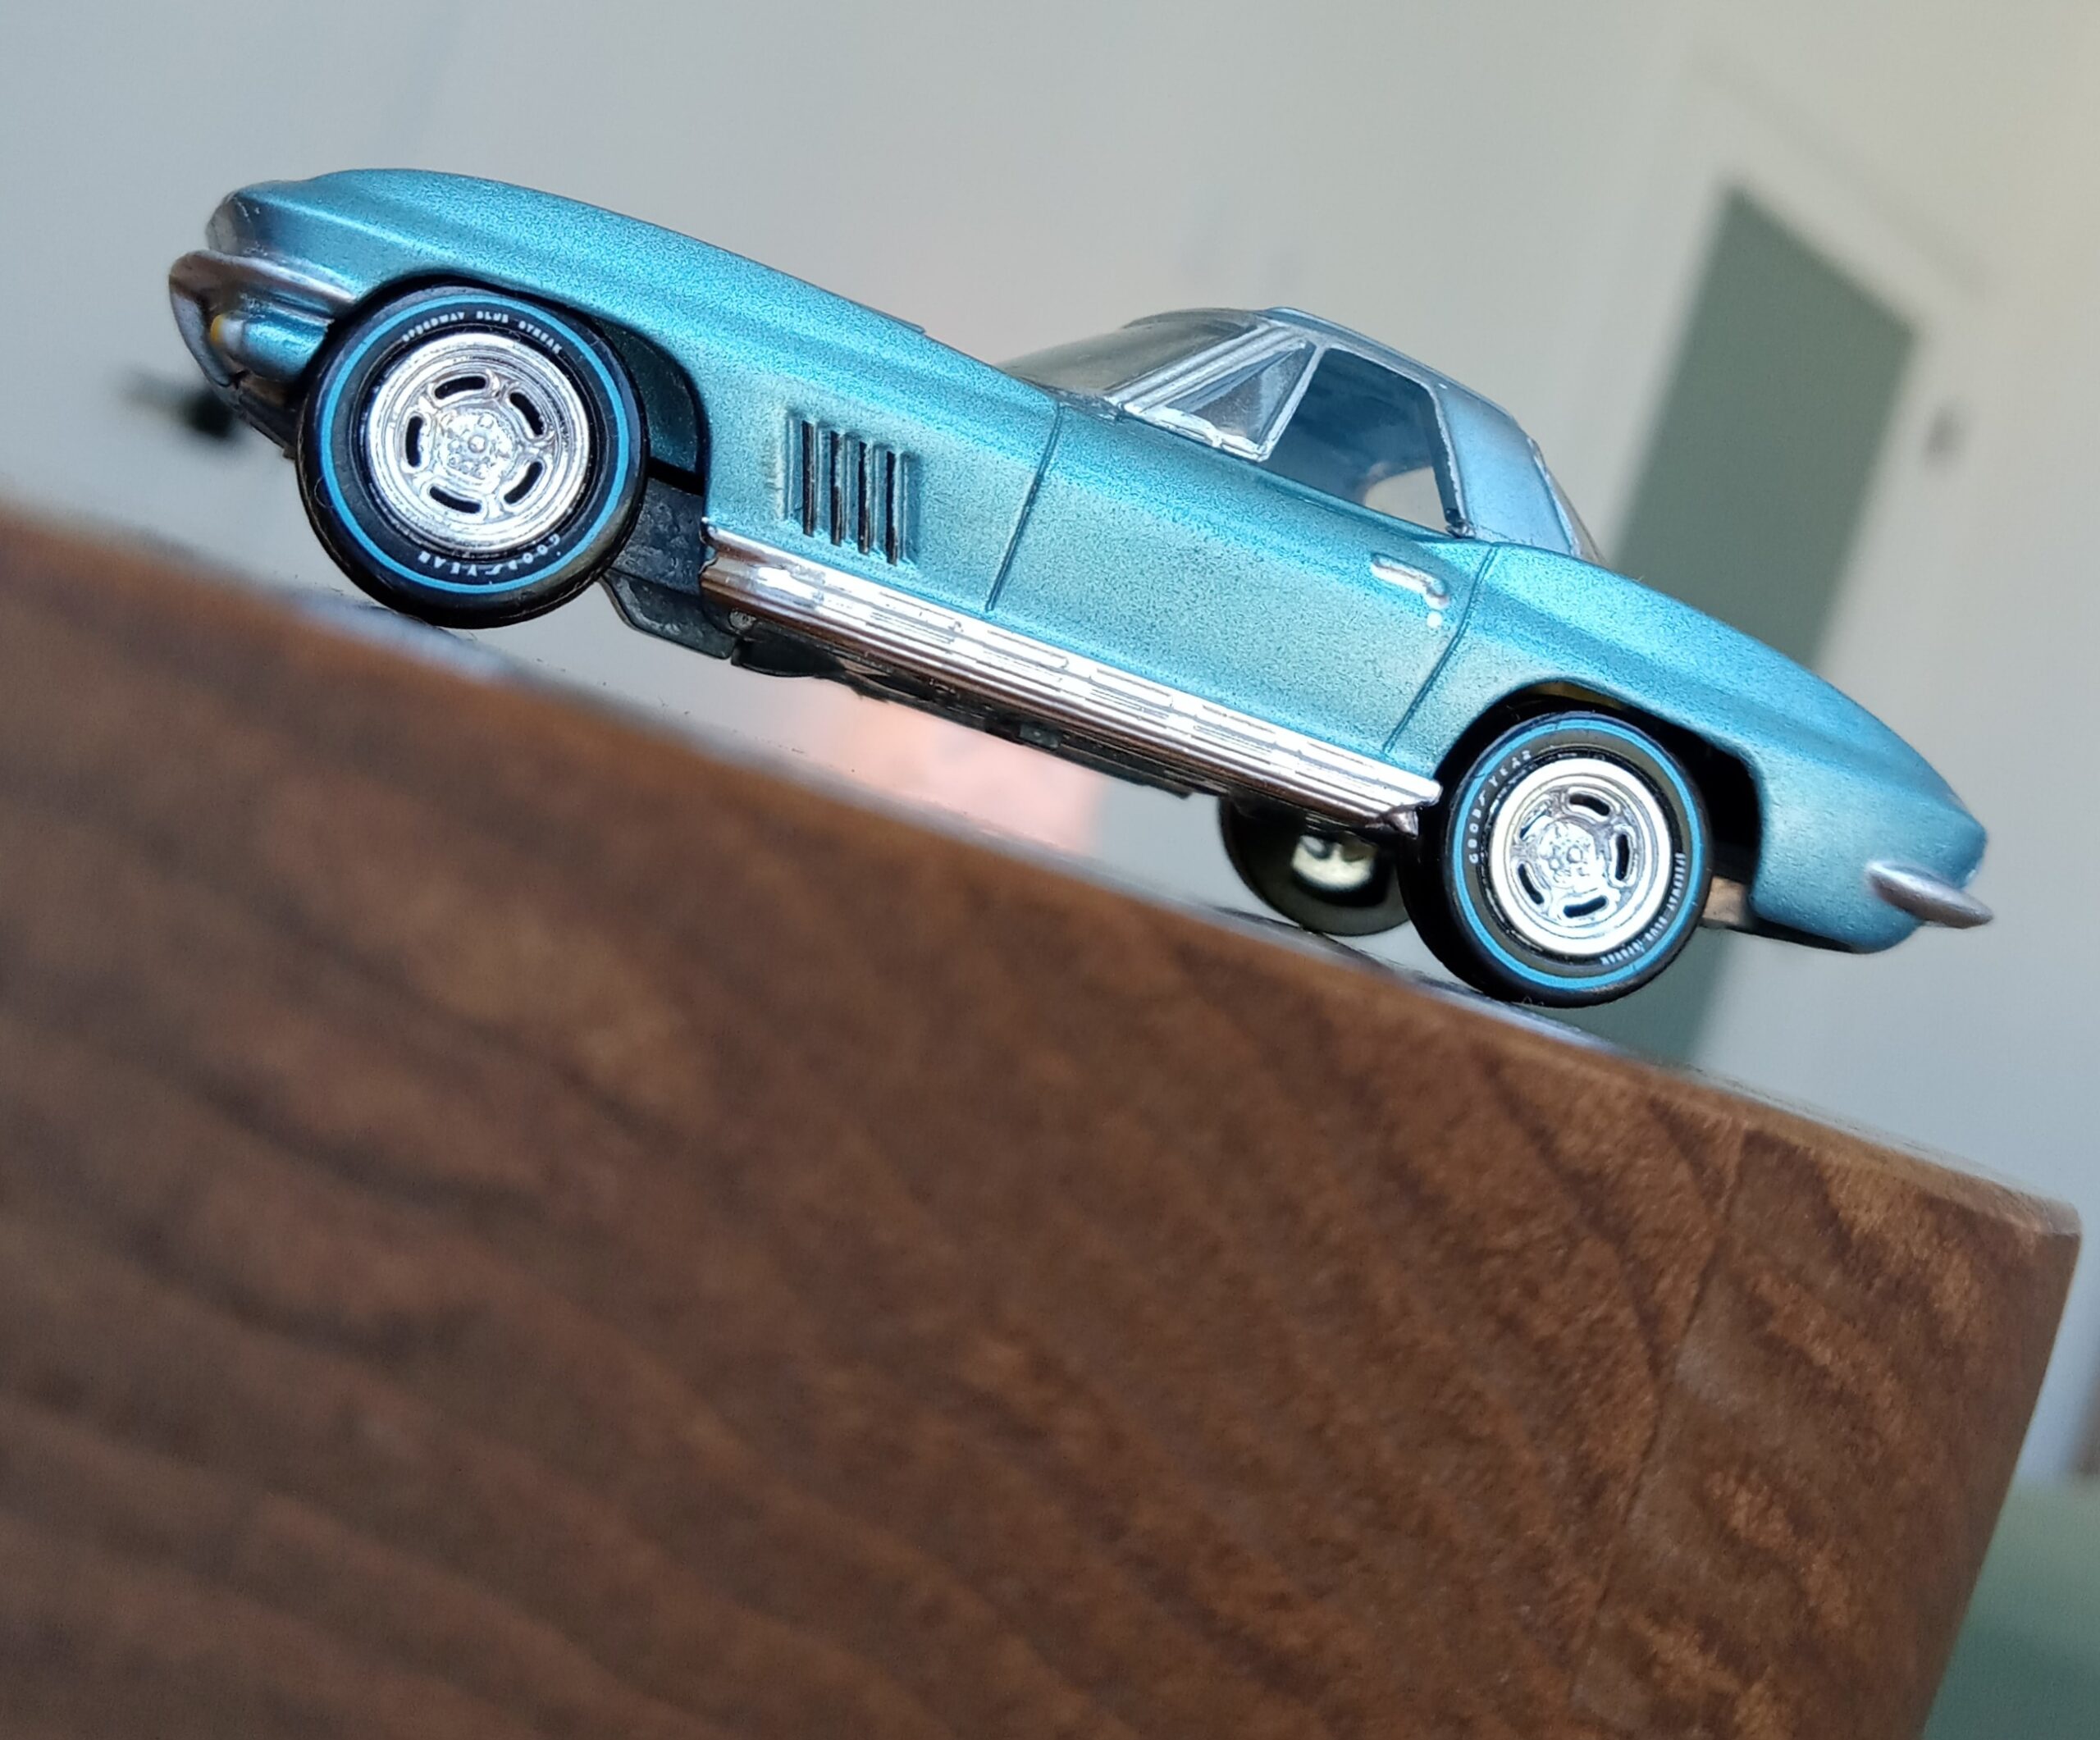
4’:ライトブルー・メタリック、同色ハードトップ、ブルー・レタータイヤ付き版
(グリーンライトの’67青メタ・ボディー+グリーンライトの’67レーシングバージョンのハードトップ+ジョニーライトニング社製のディスプレイケース封入版’67青メタ・クーペのホイールとブルーレター・タイヤ移植)
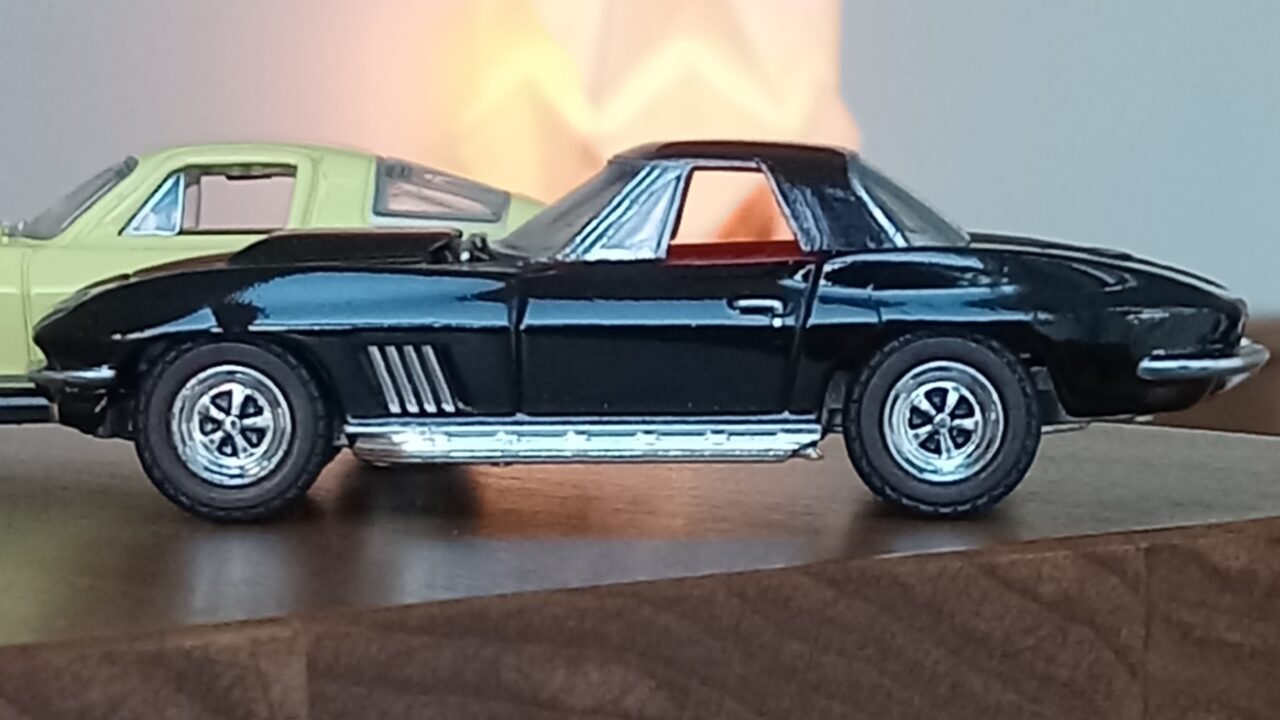
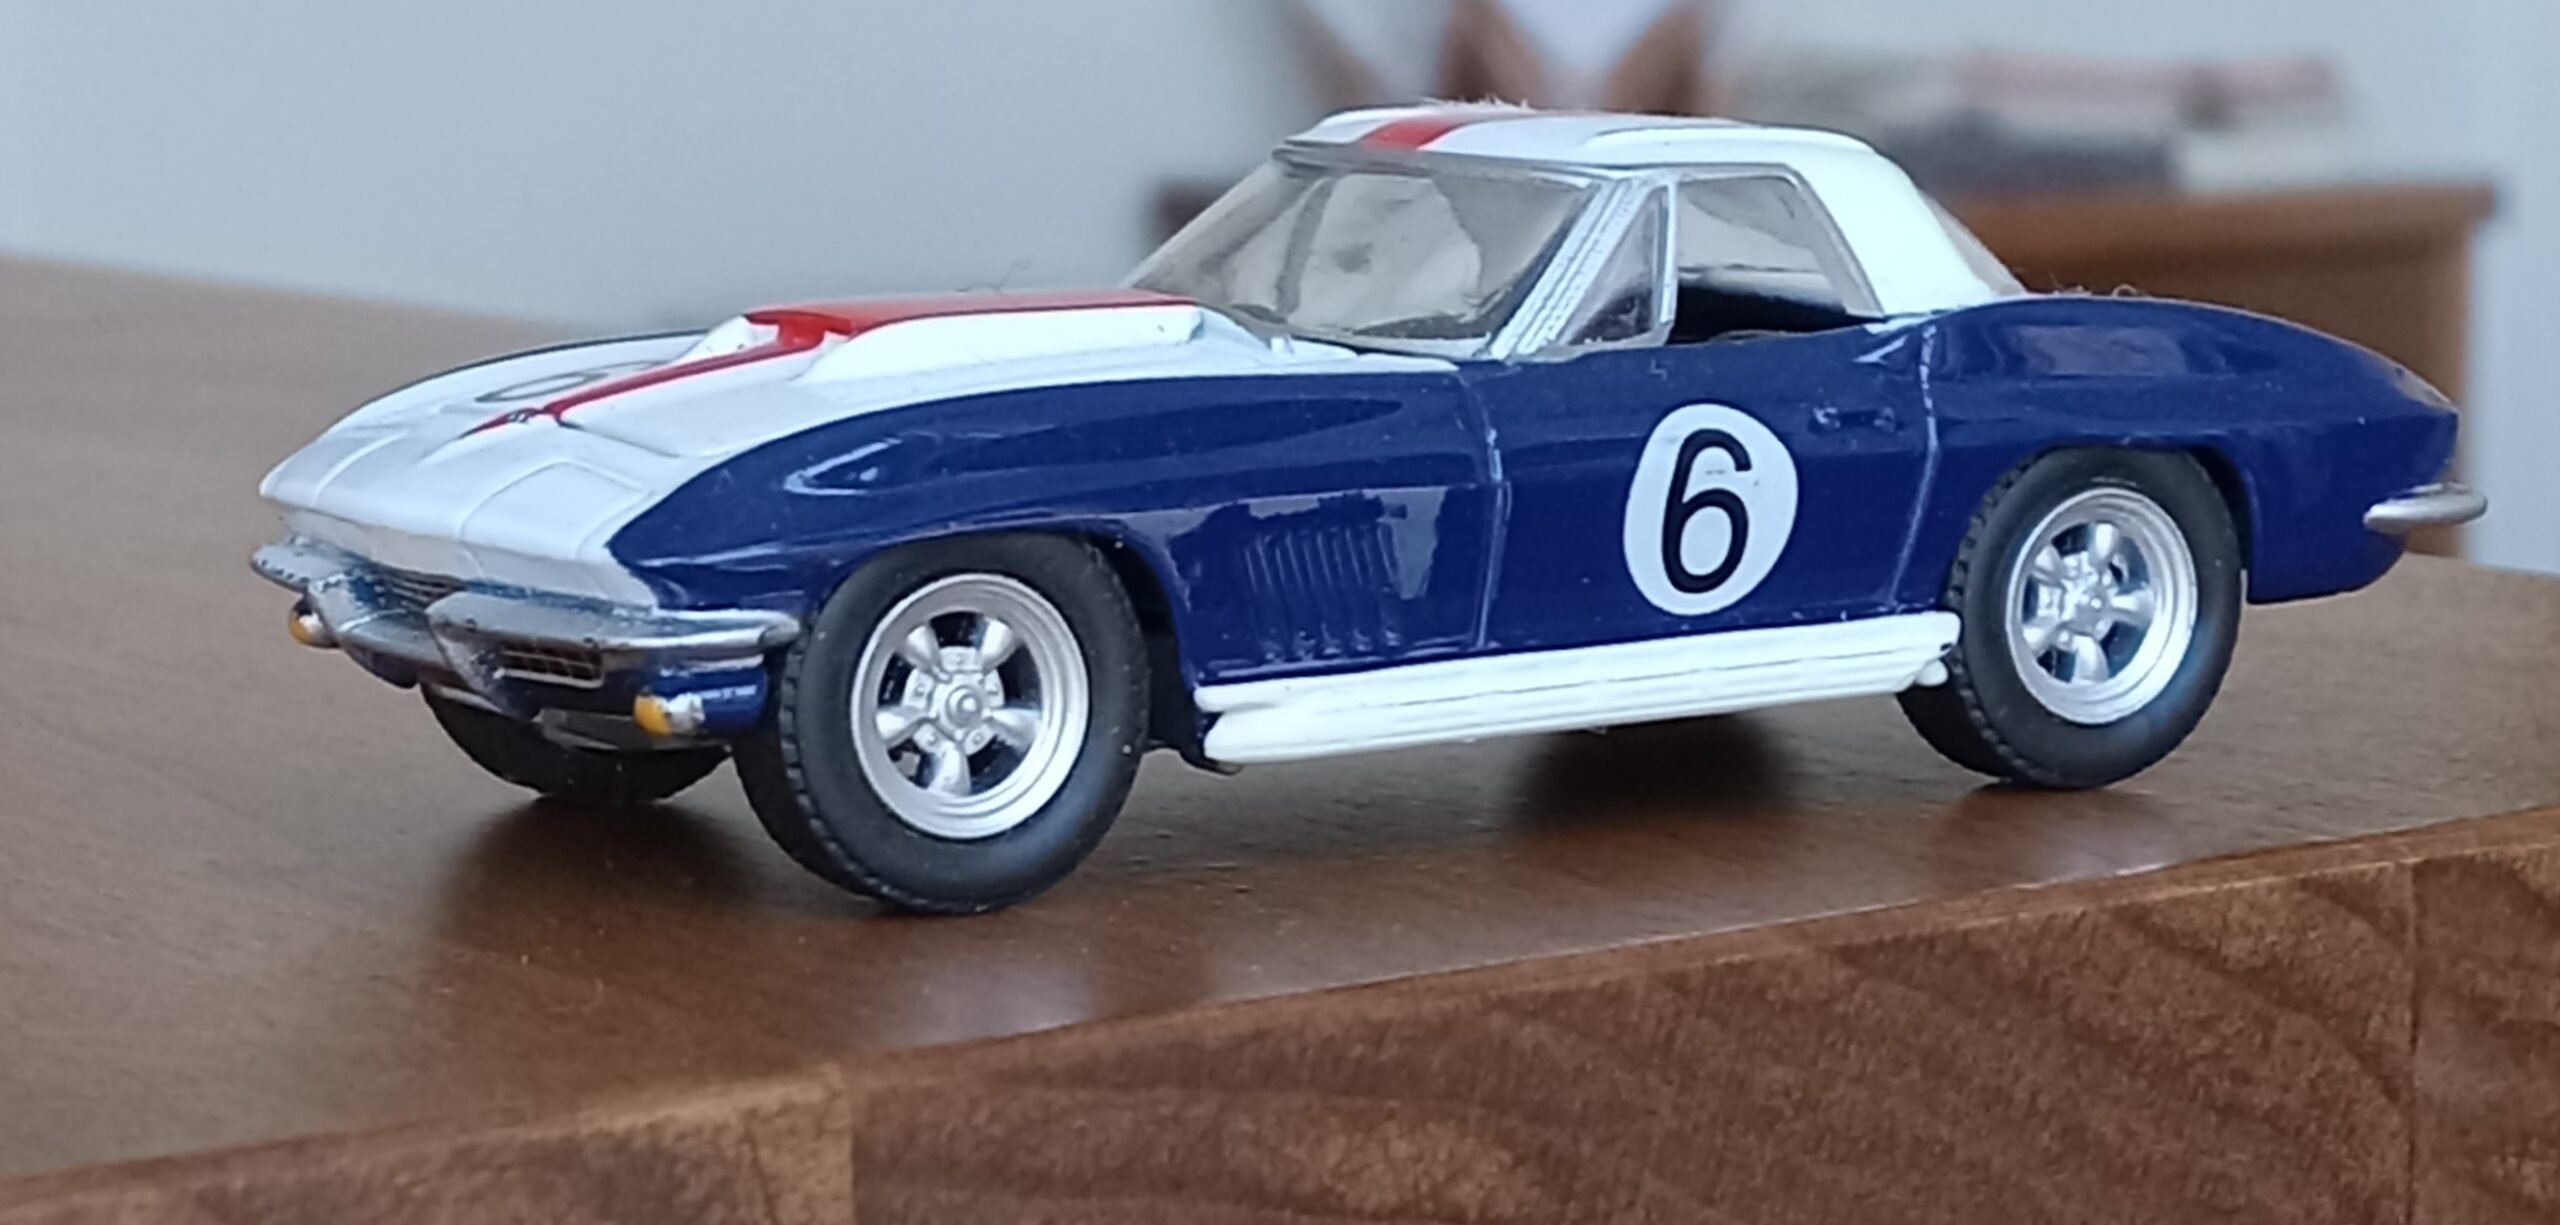
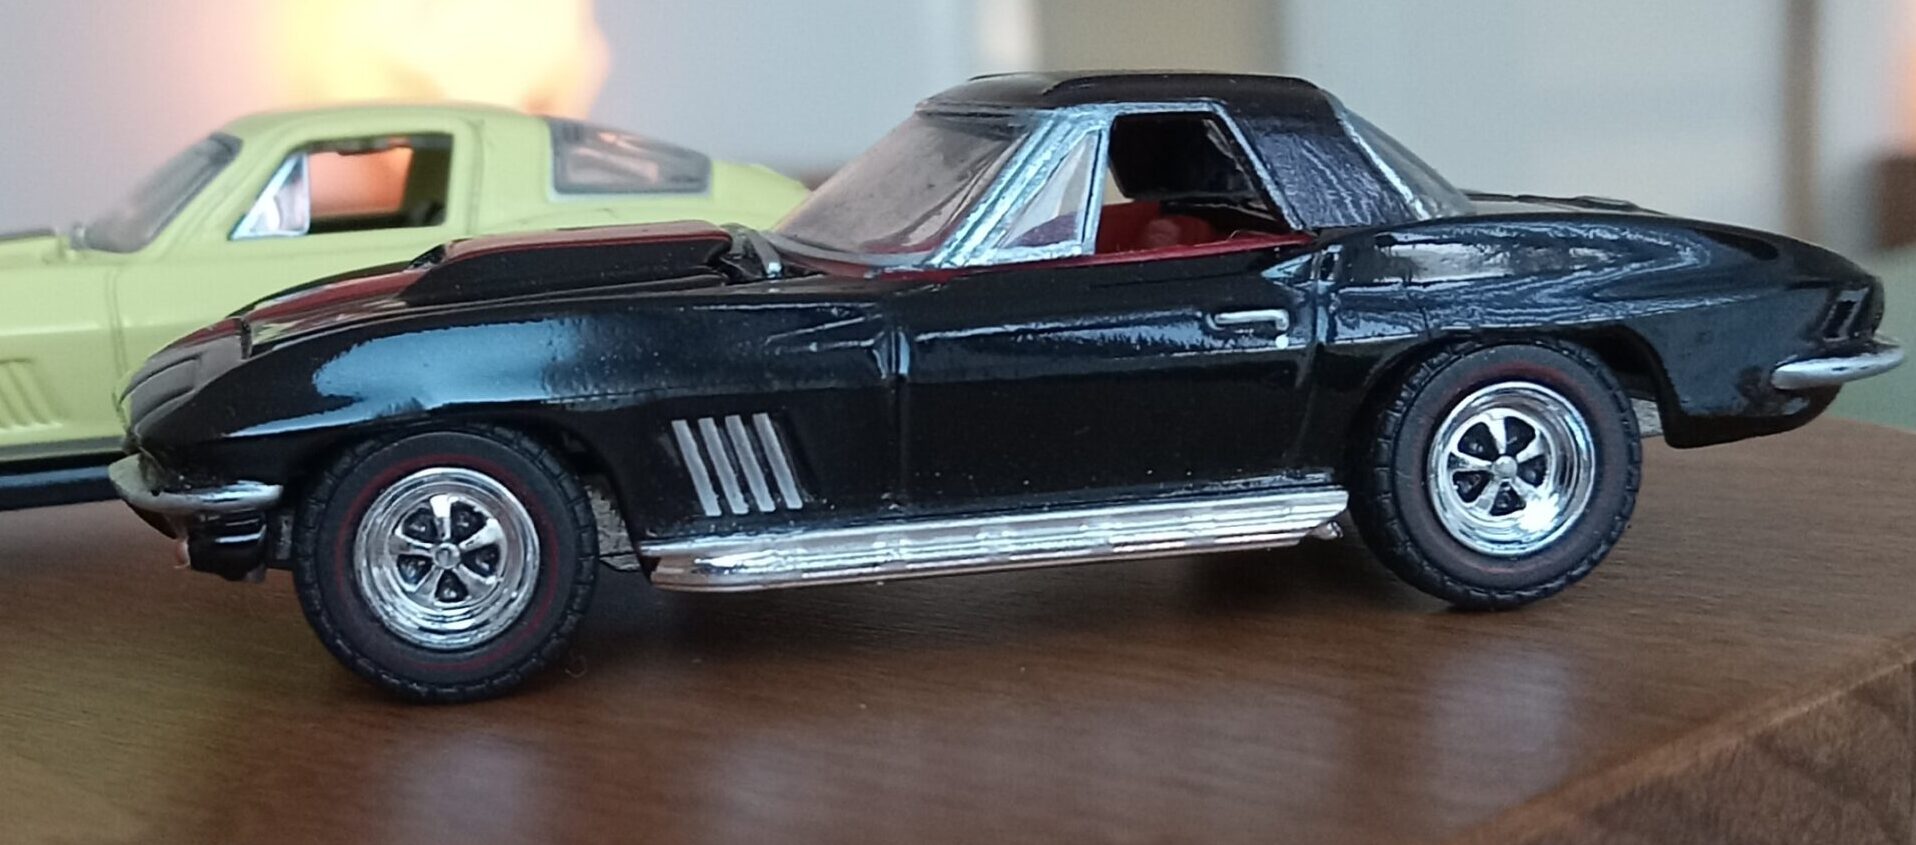
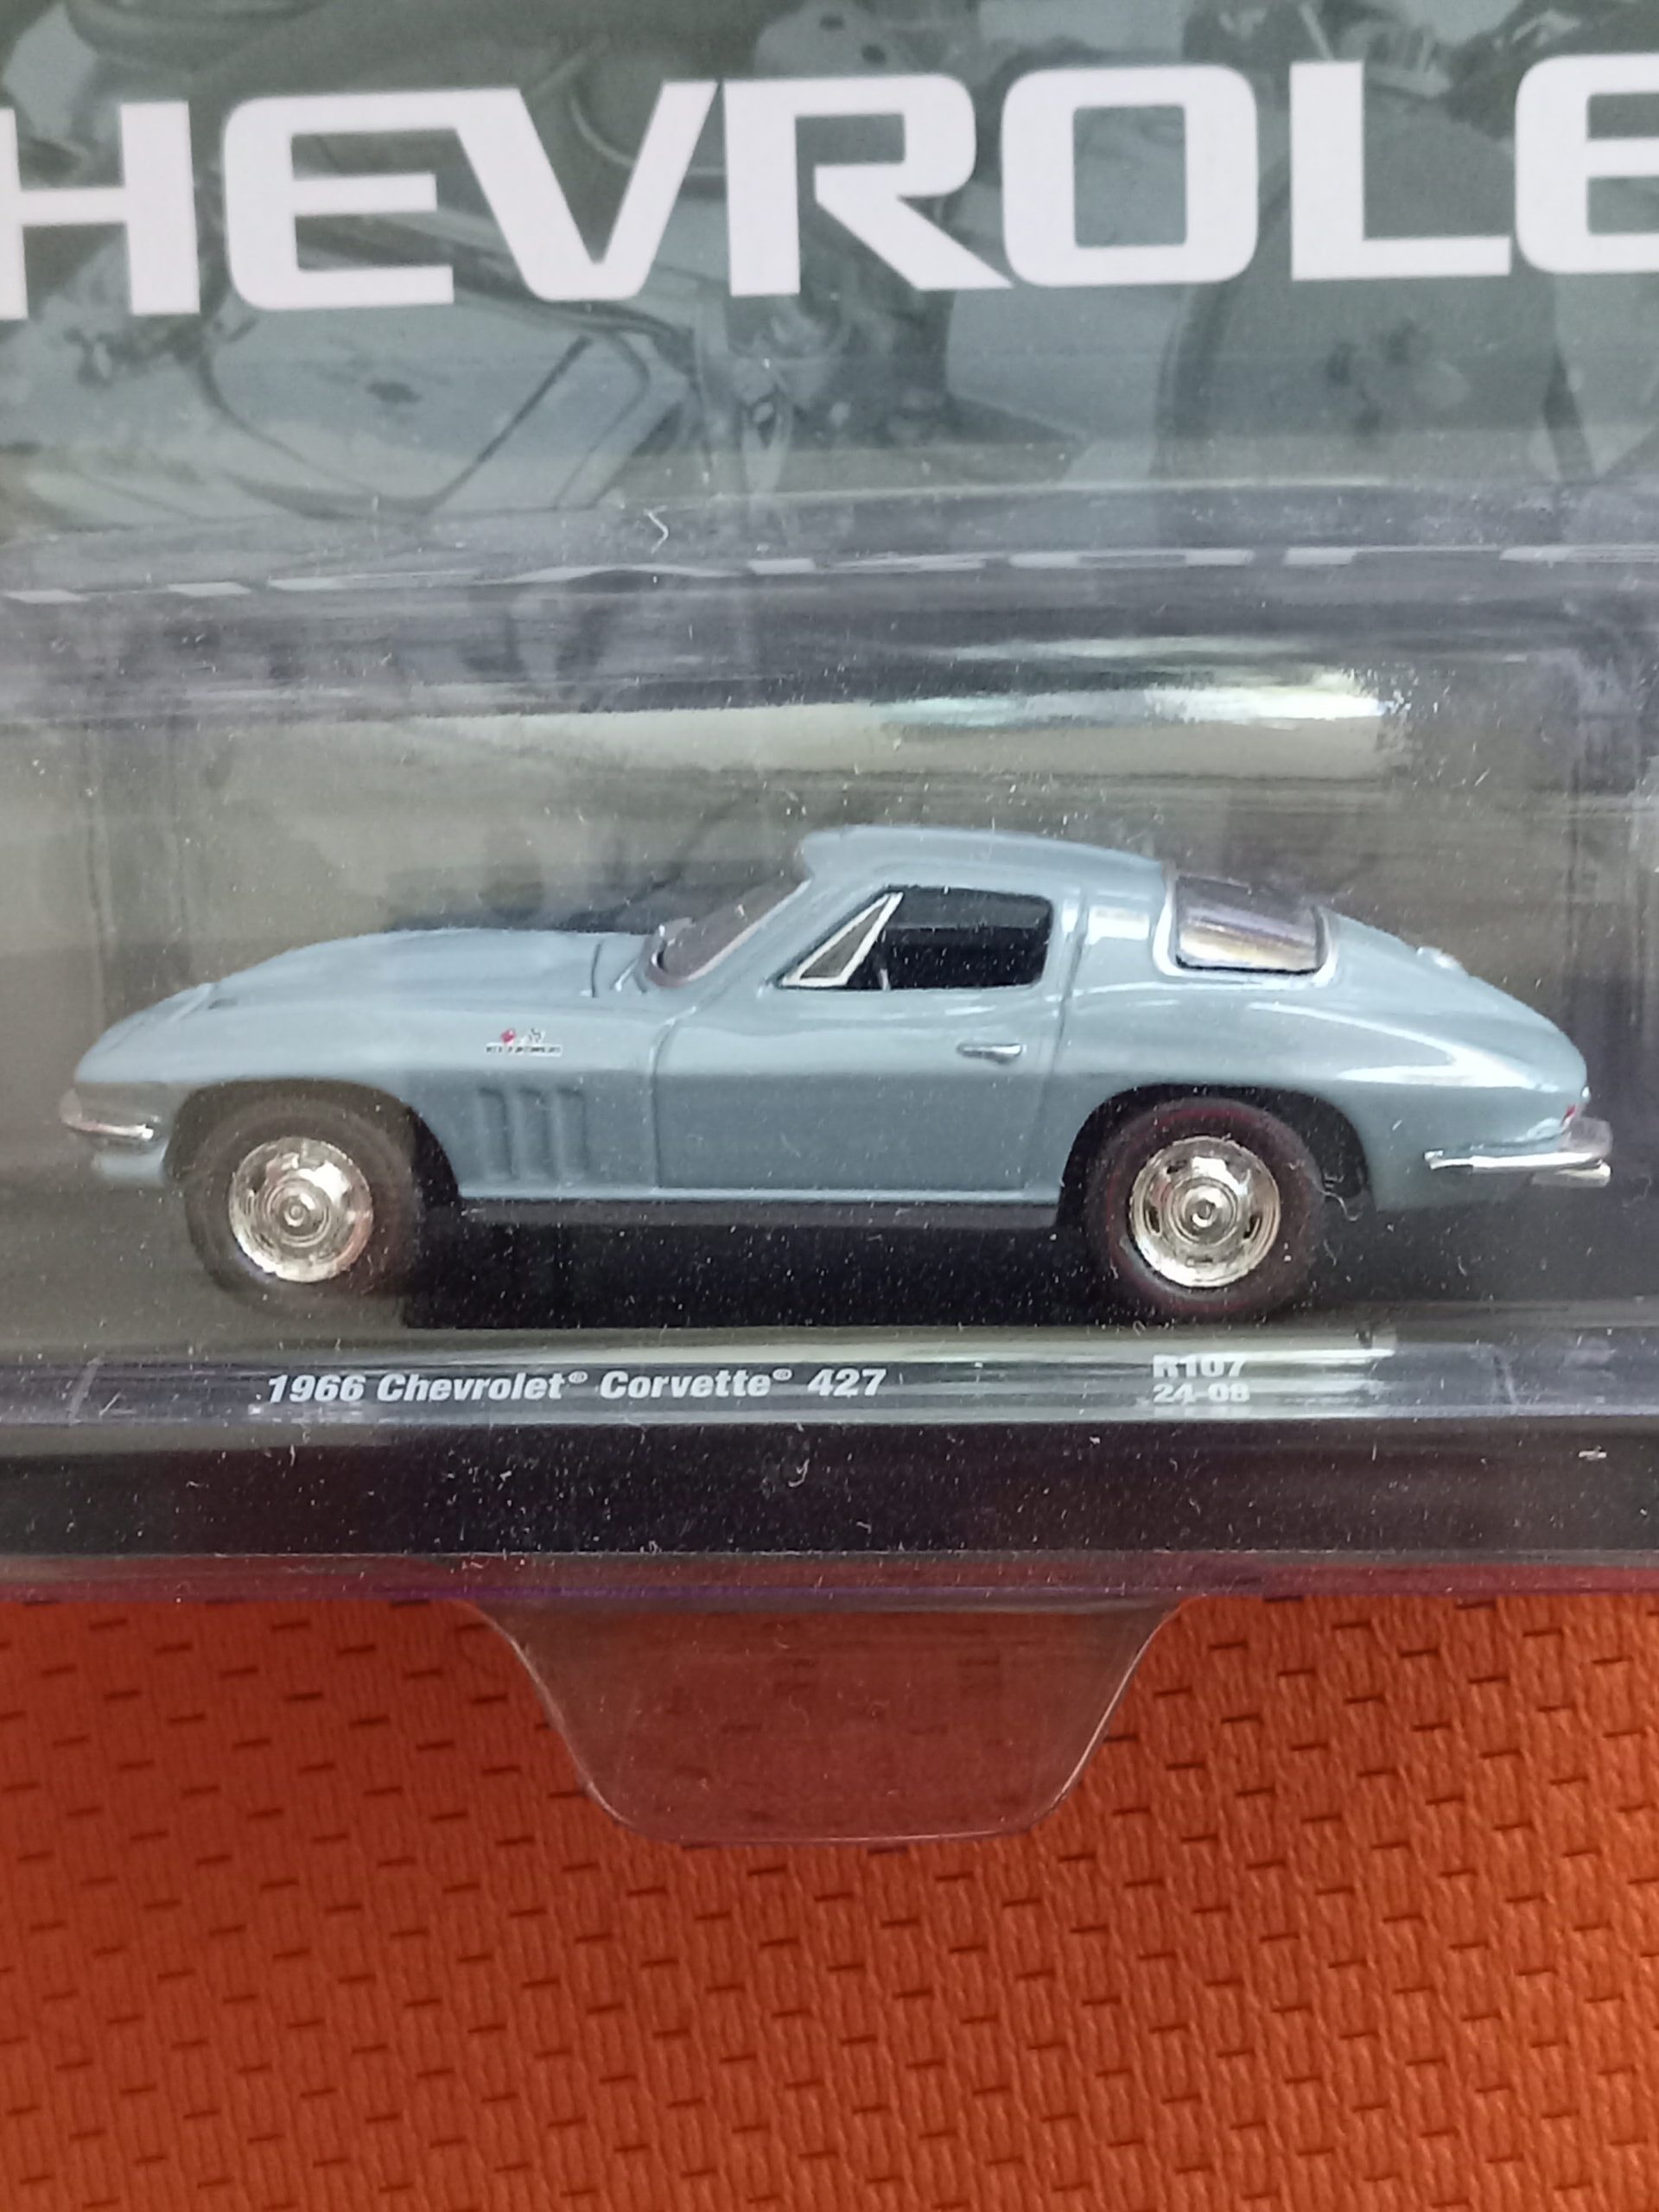
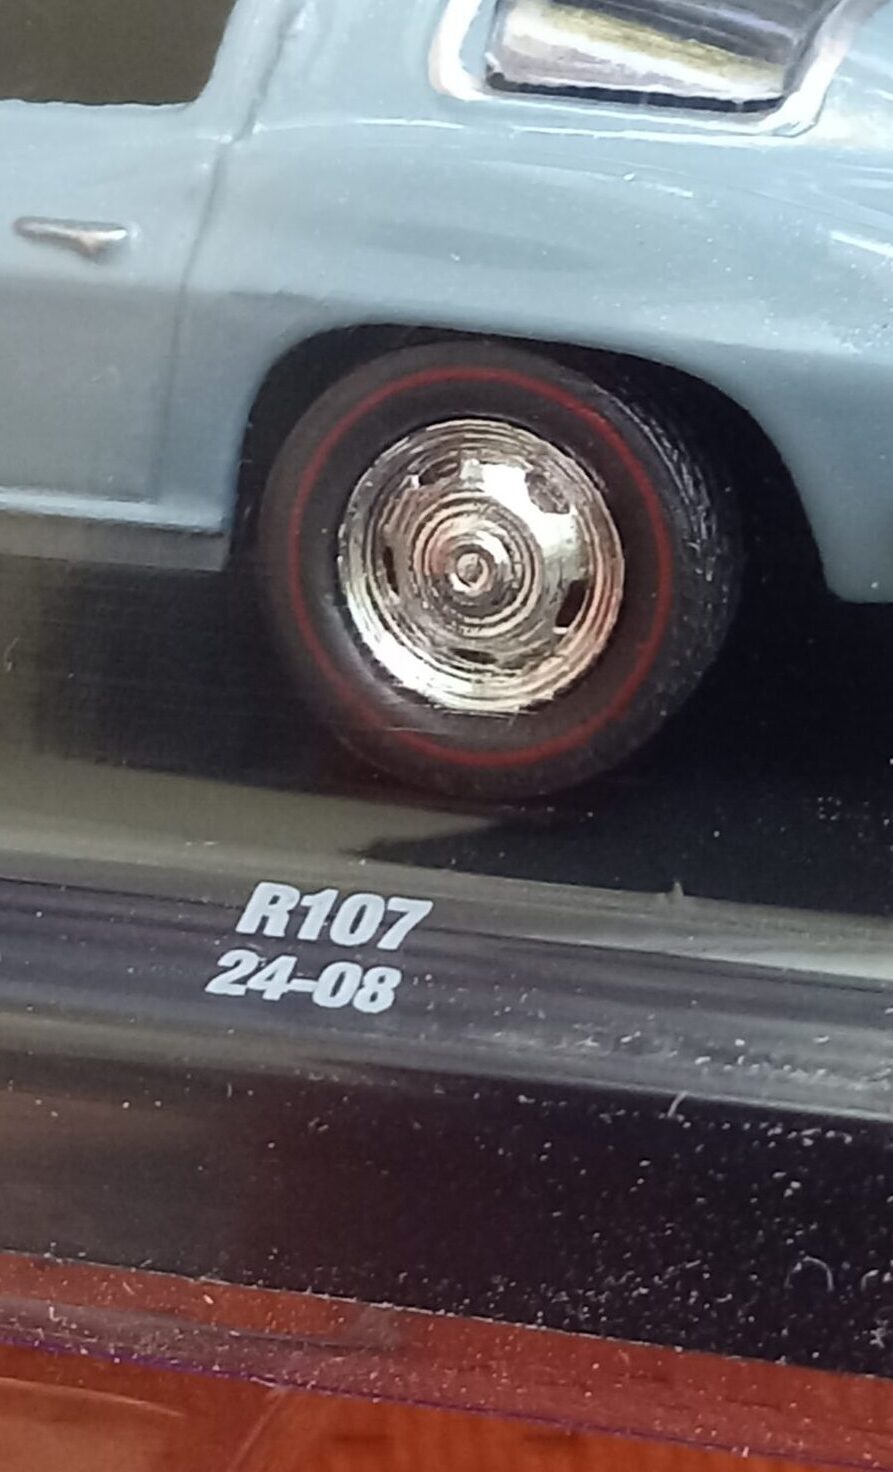
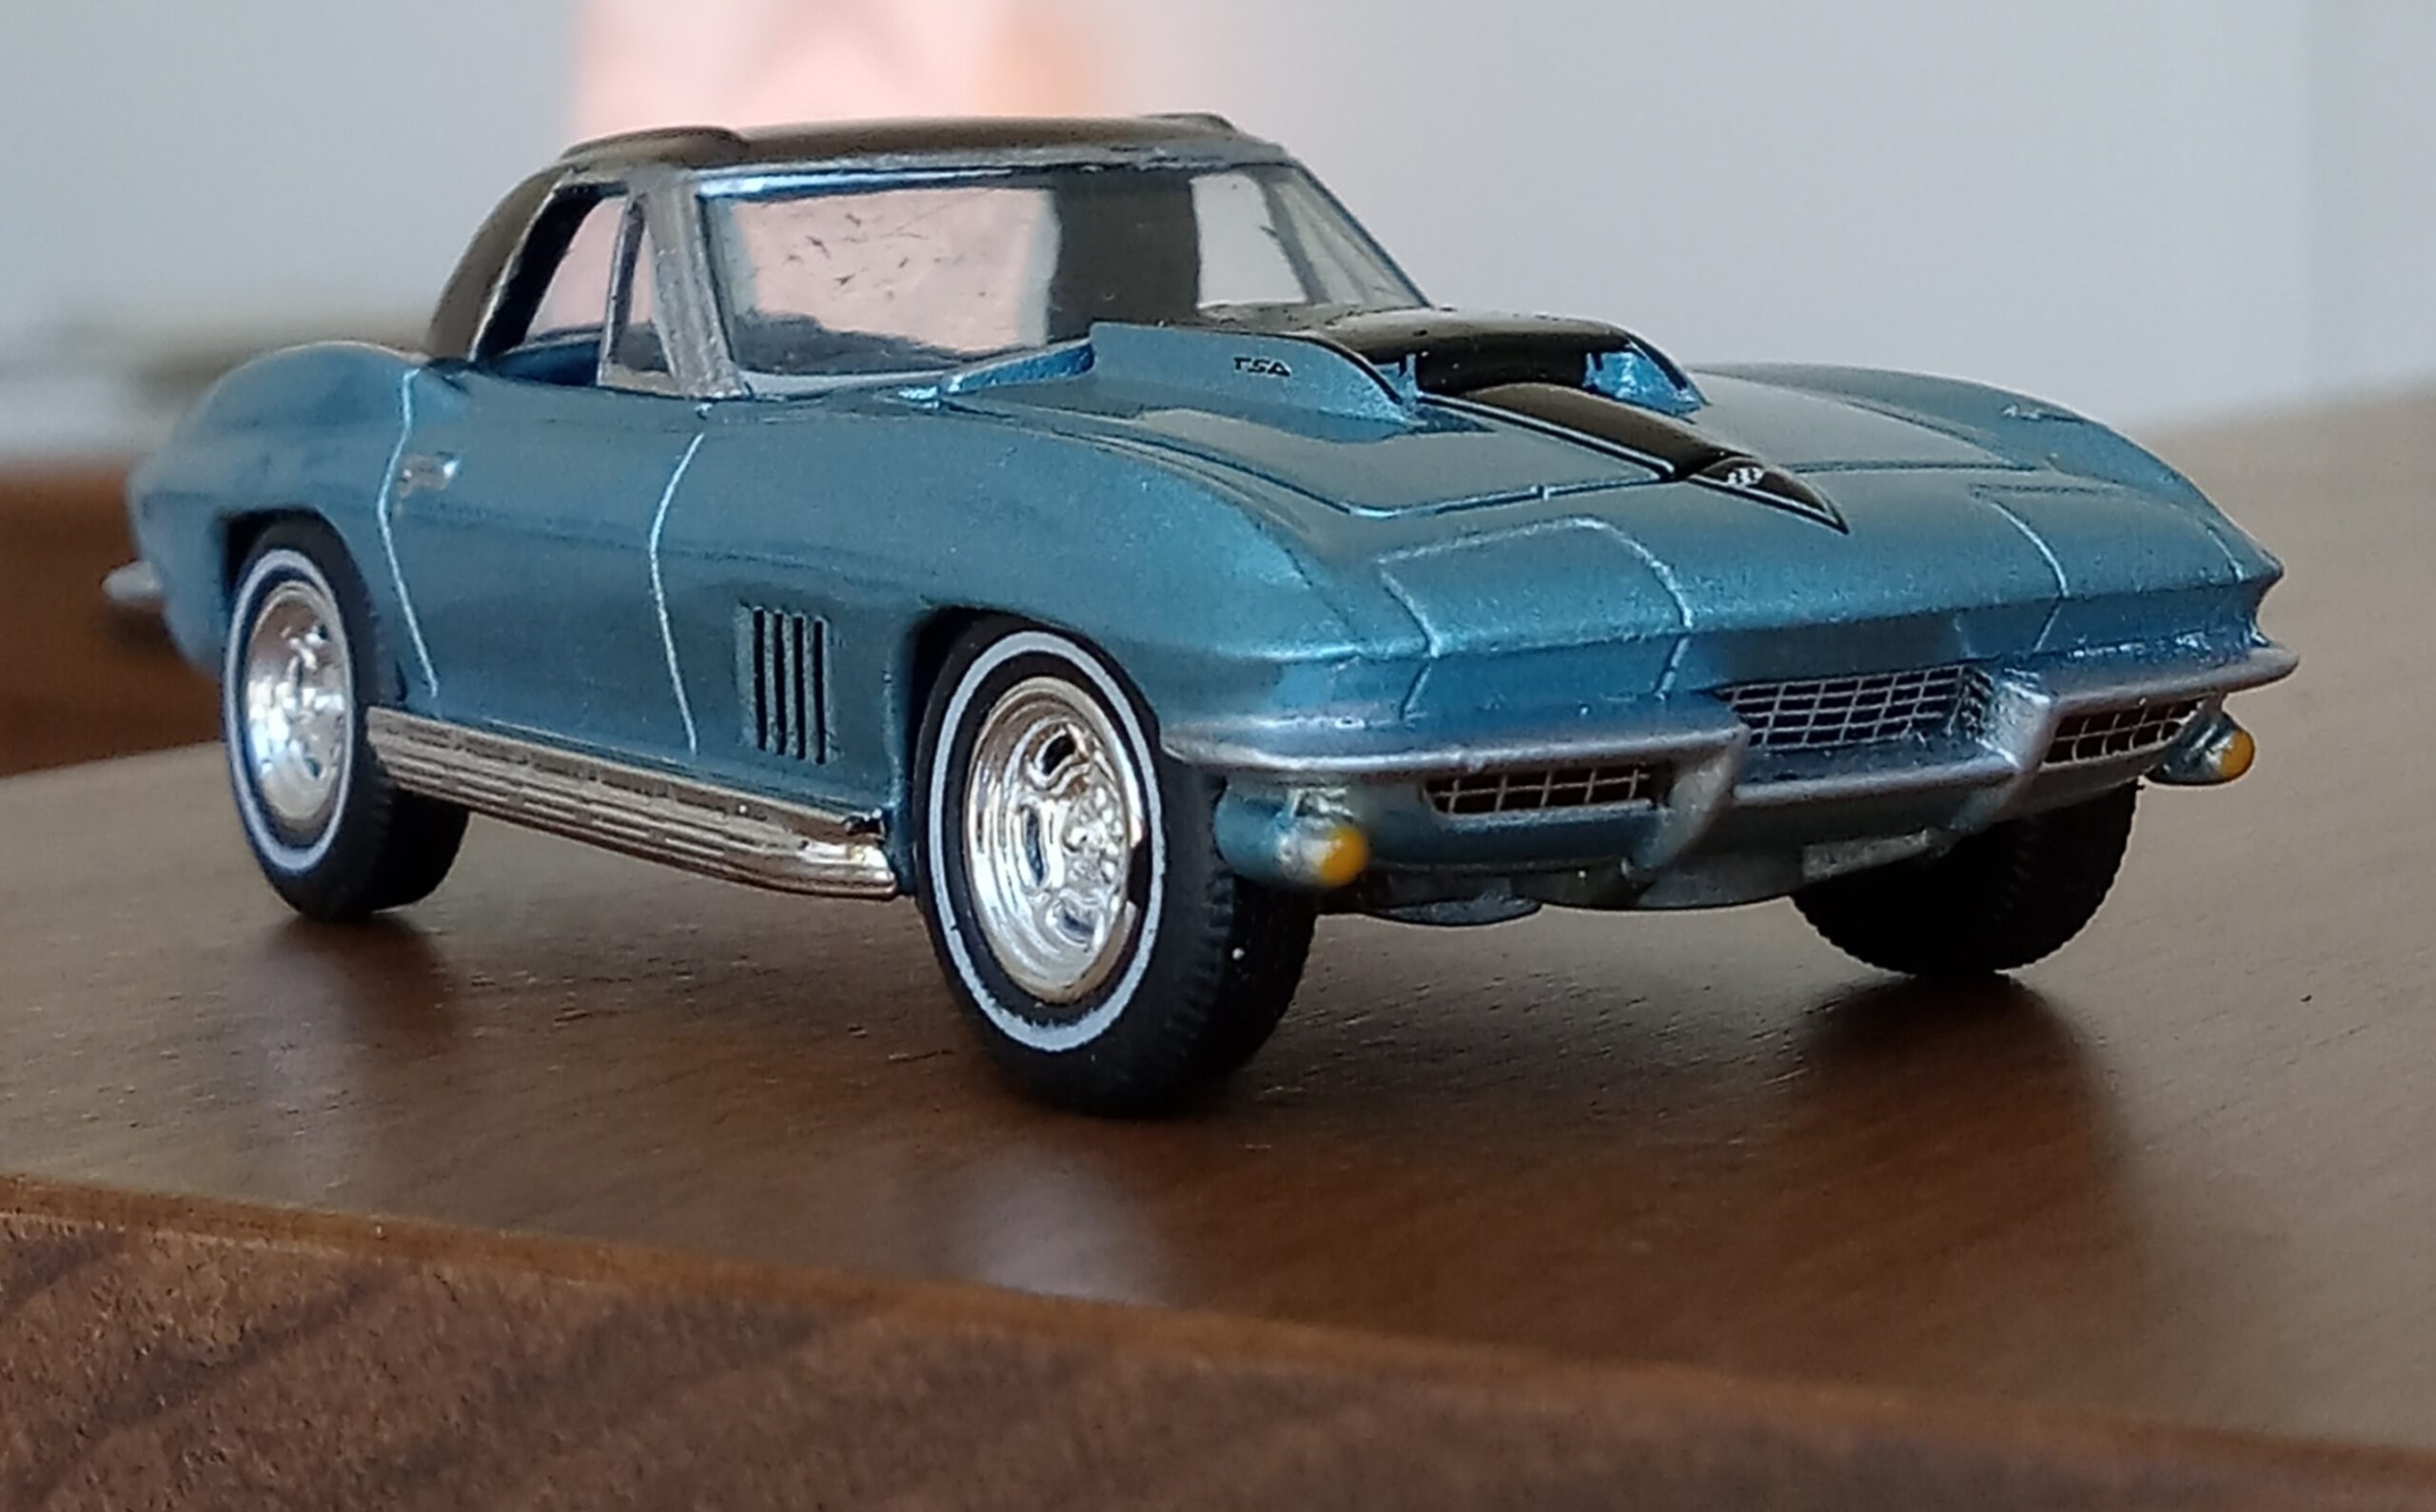
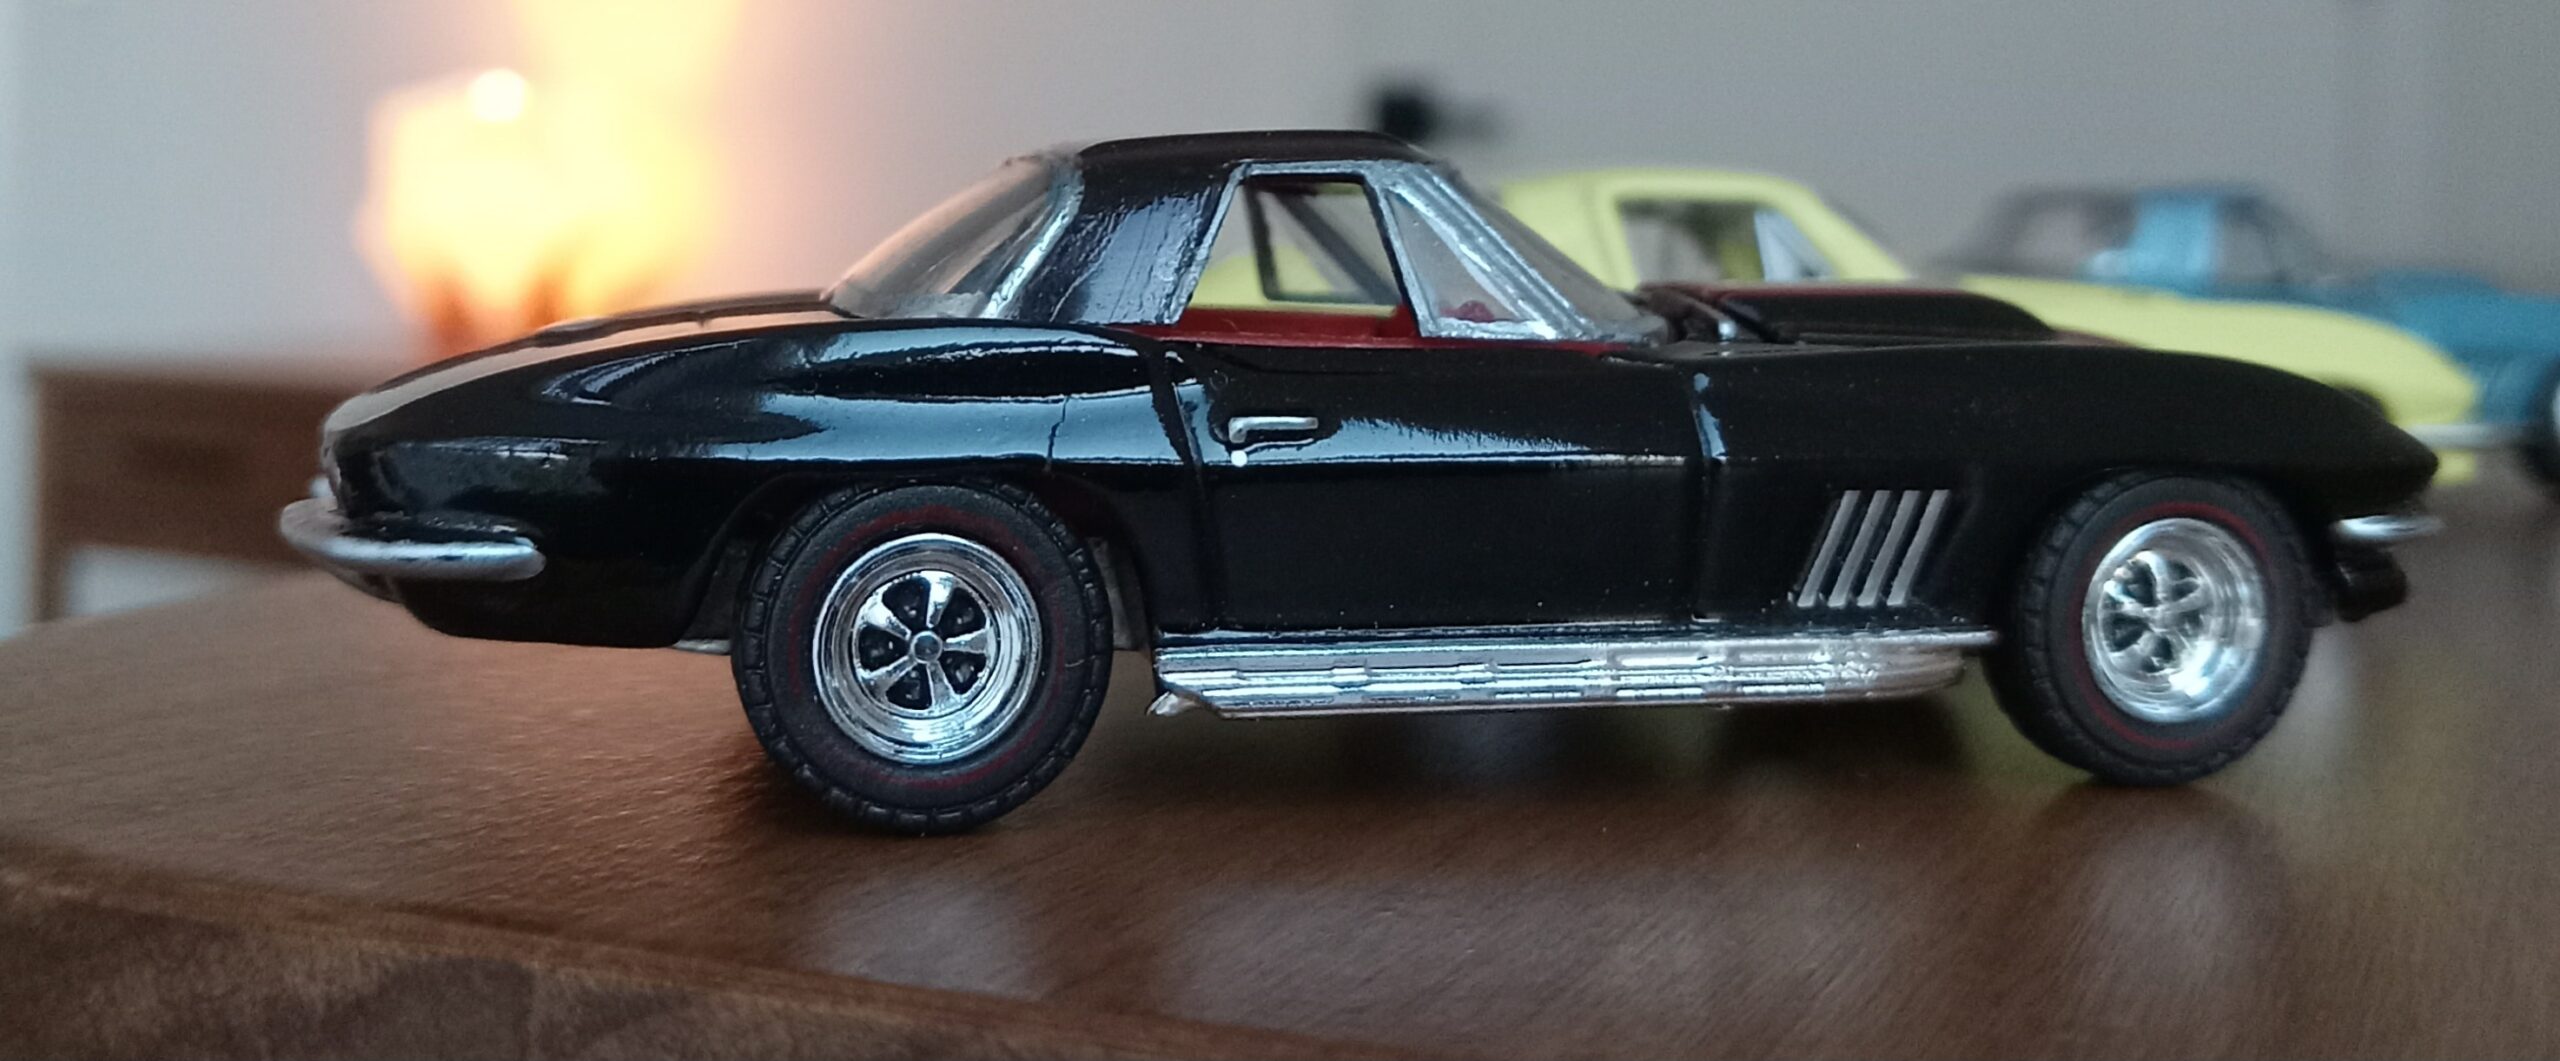
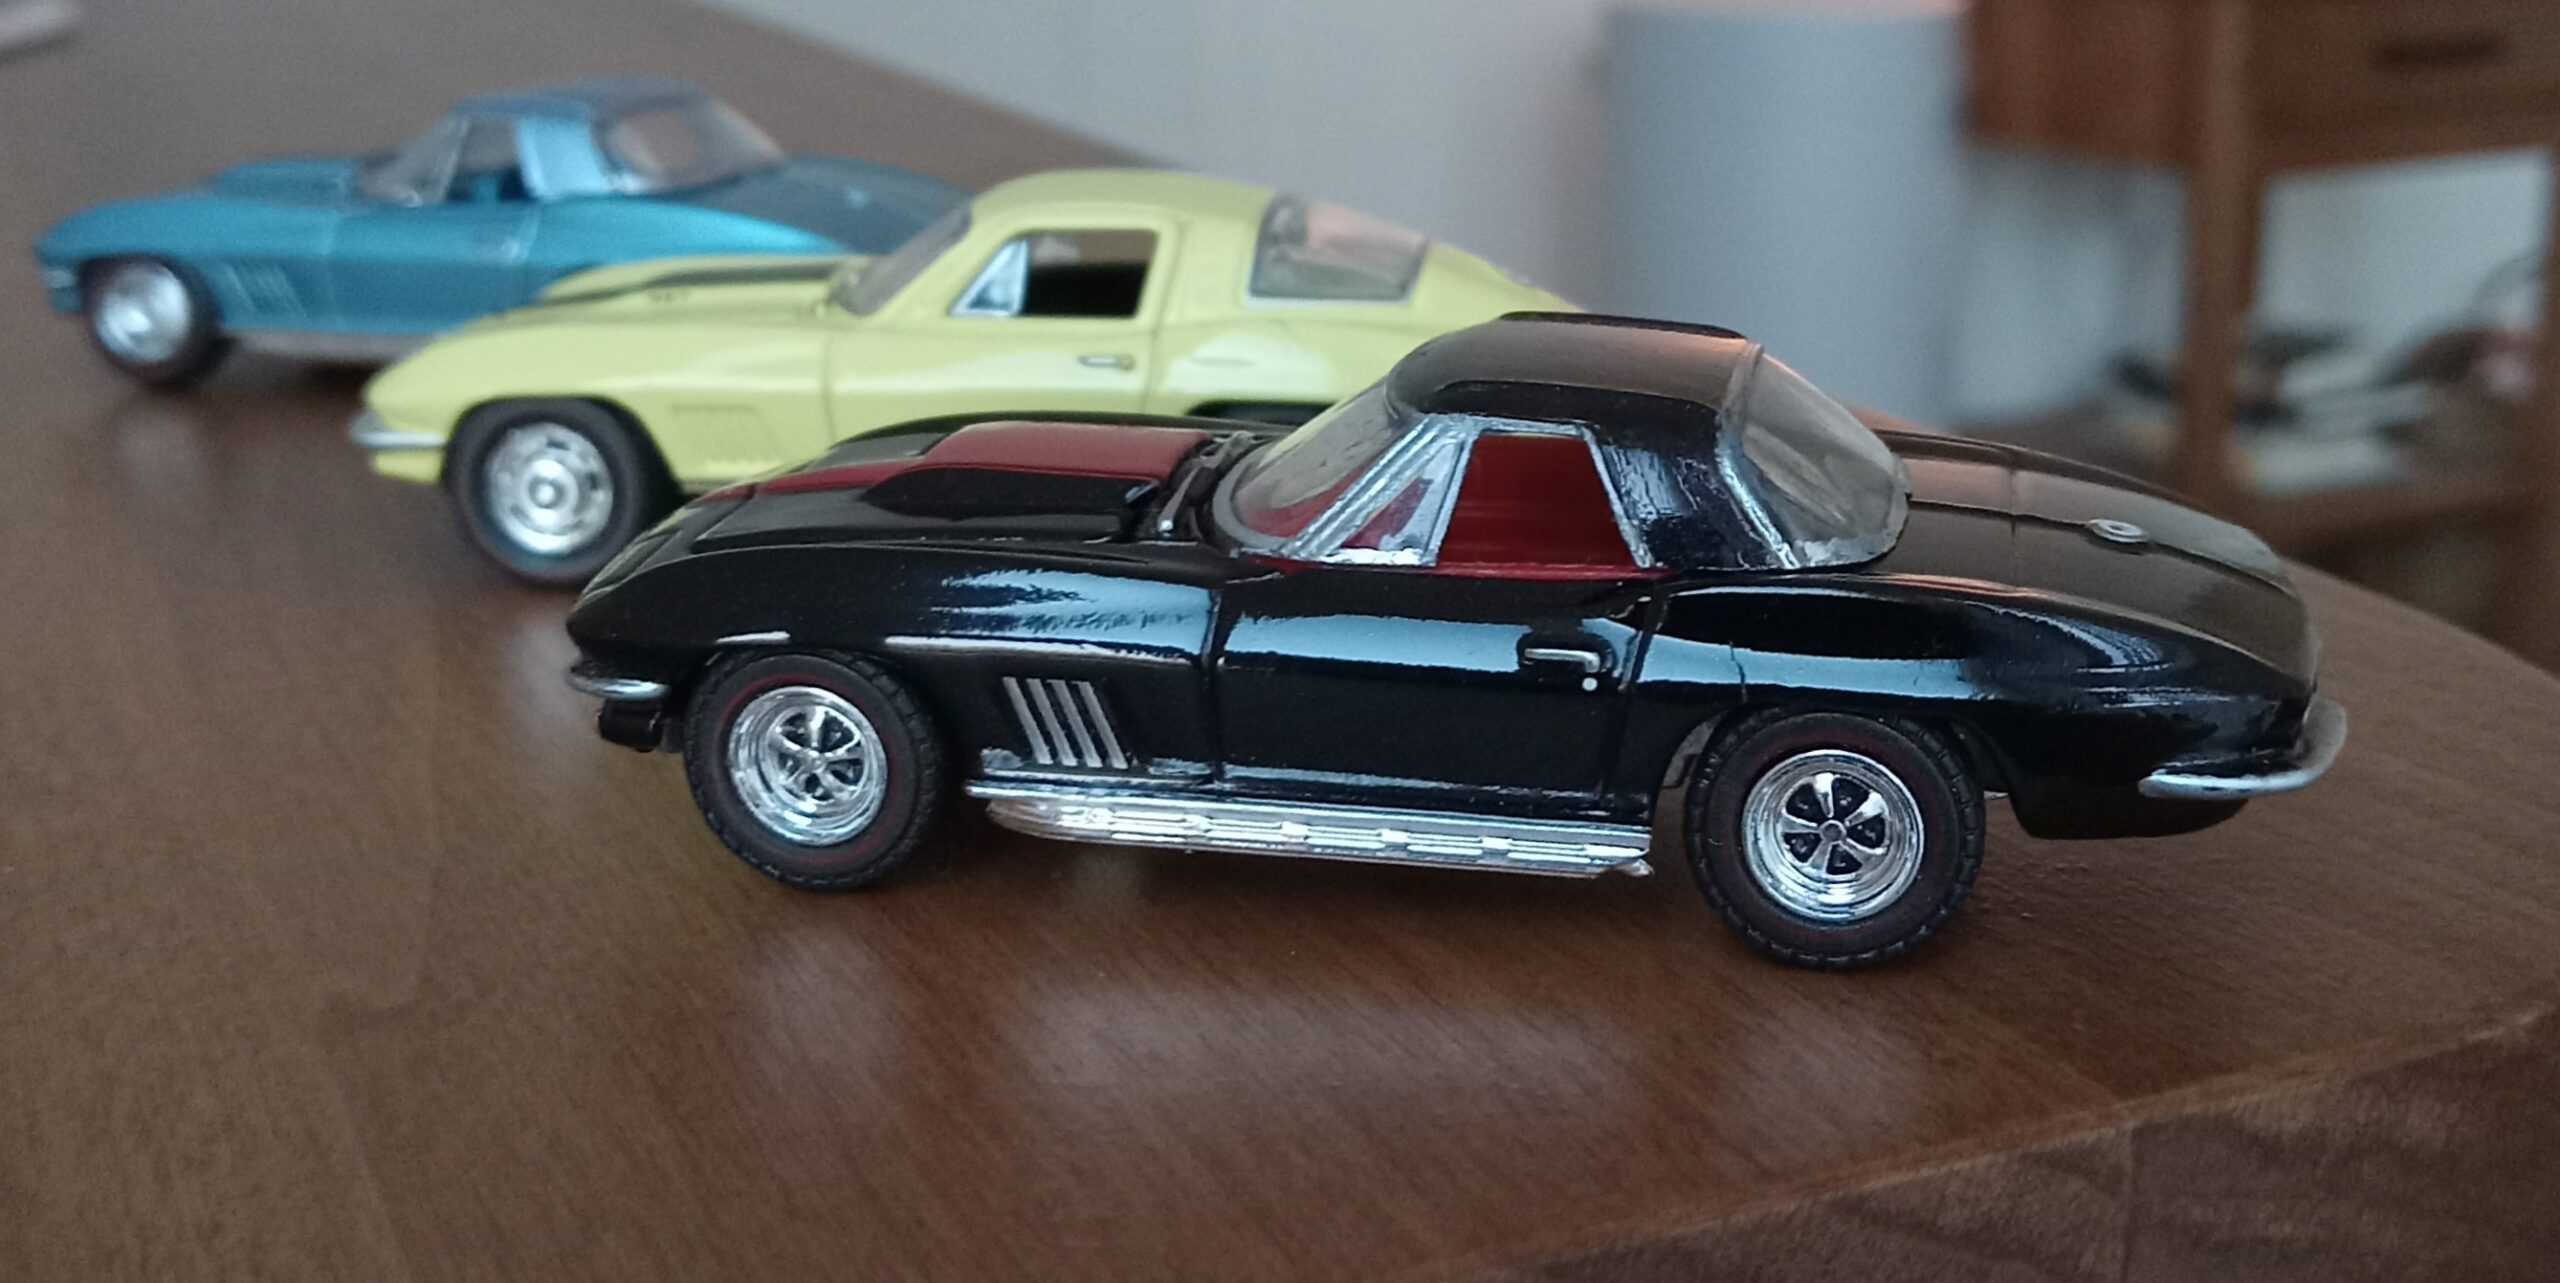
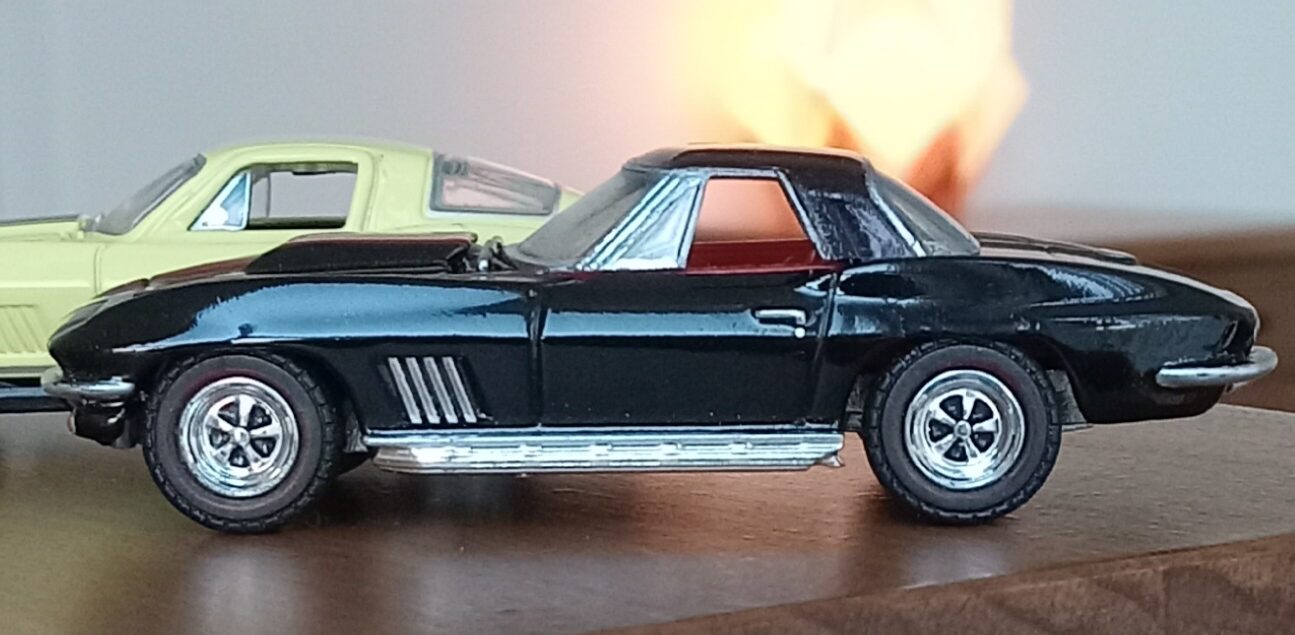
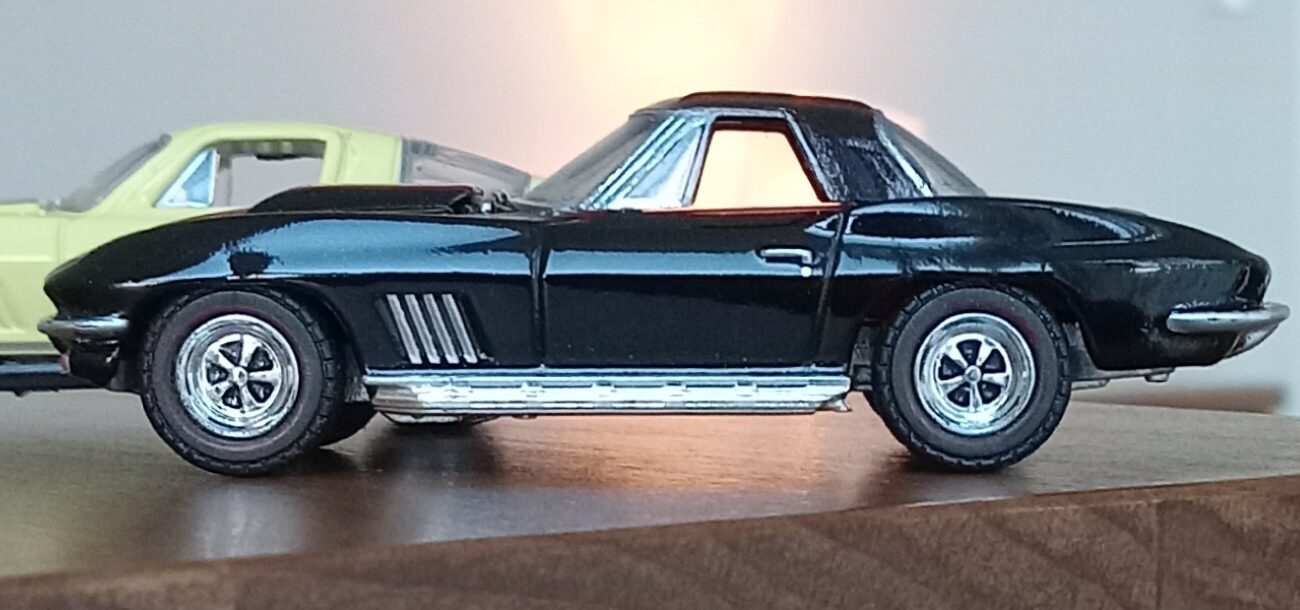
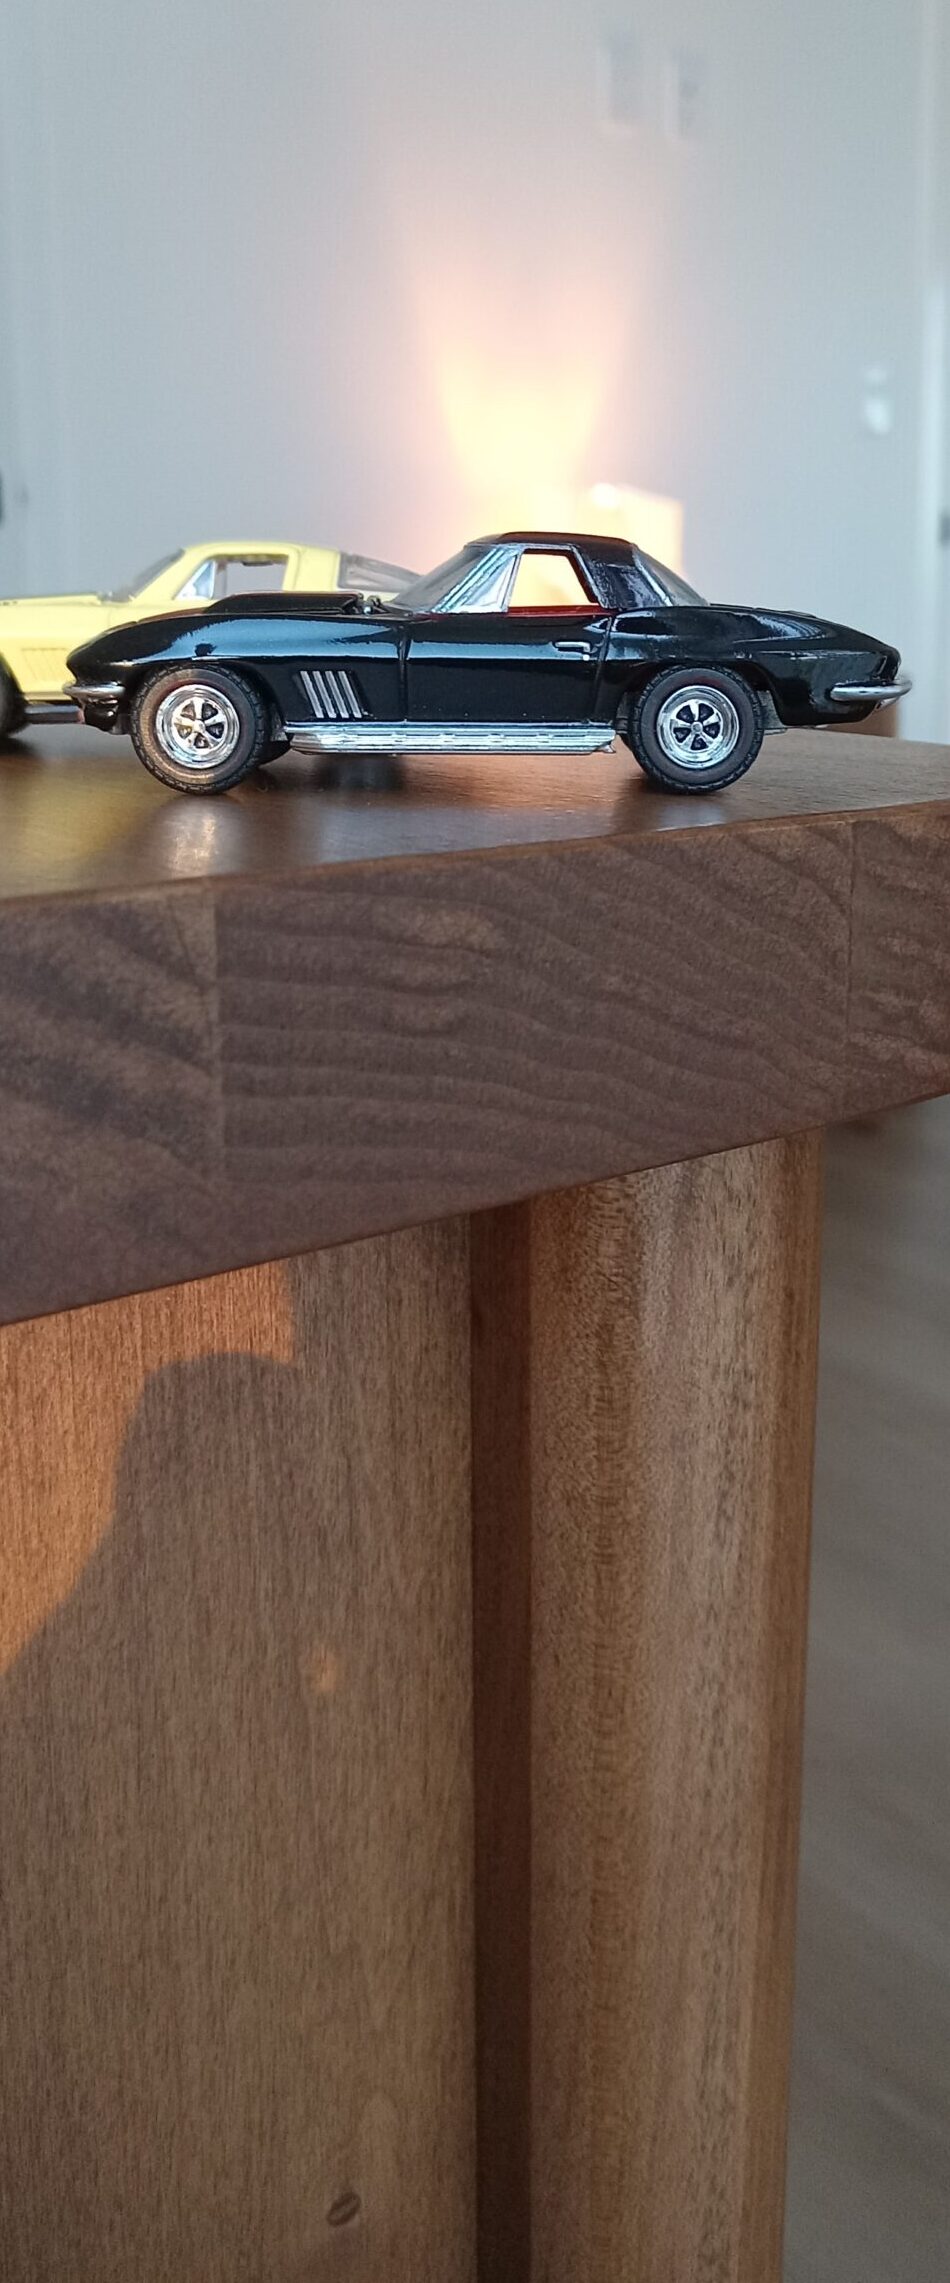
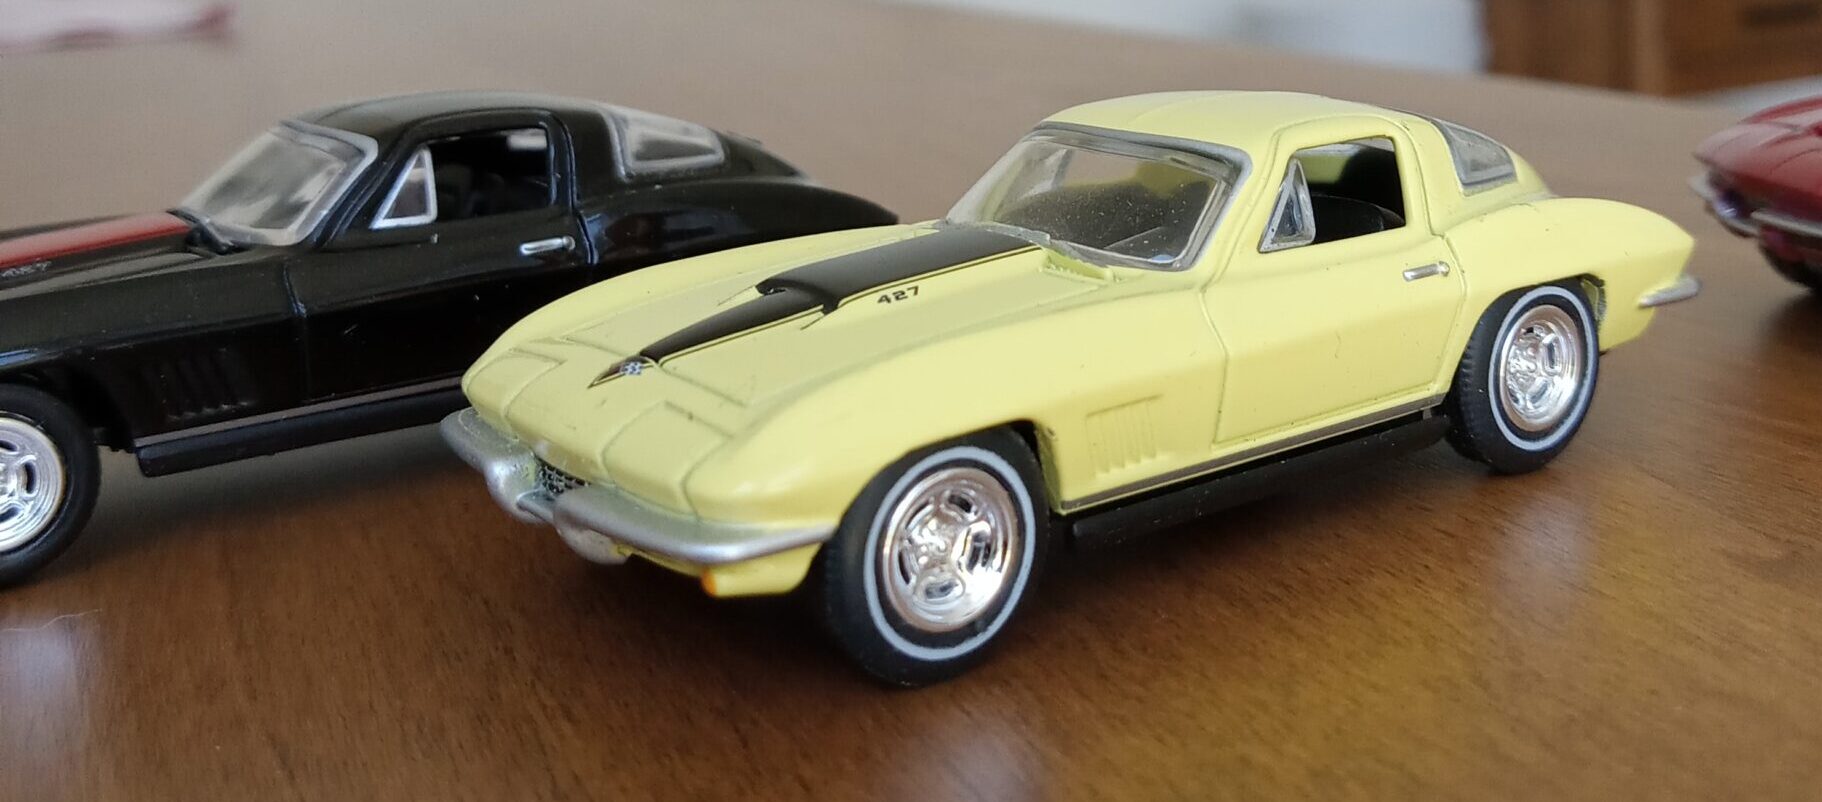
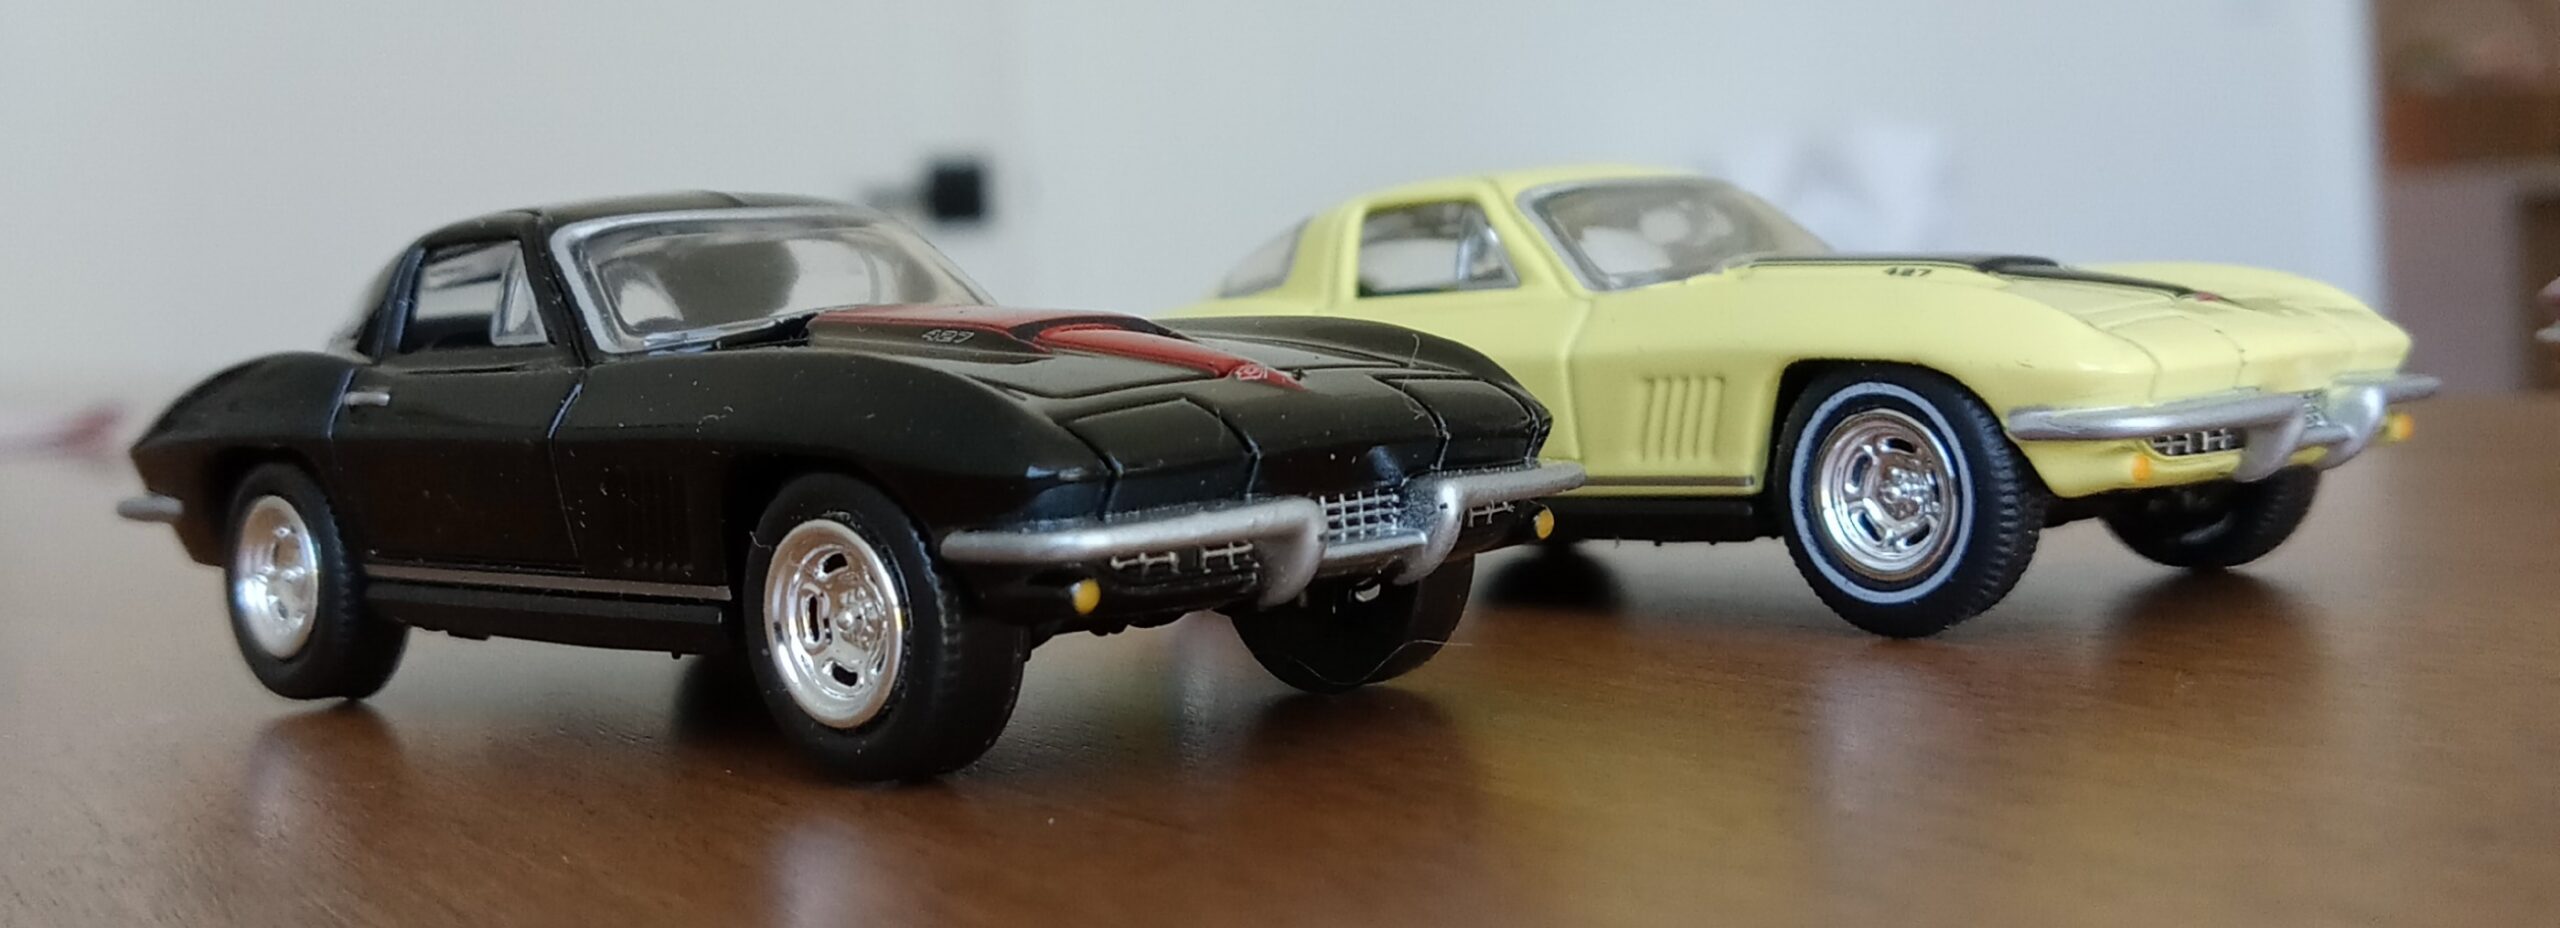
5:タキシードブラック、黒のハードトップ付き版
(グリーンライトの’67タキシード・ブラック版のボディーとタイヤ+グリーンライトの’67レーシングバージョンのハードトップ)
ーーーーーーー>結局この感じが『黒豹』的で気に入りました!(ホイールが14インチなので、違和感はありますが、、、、、、我慢がまん))
 ーーーーーーーー>最後に「イエロー版」も準備してましたが、力尽きました。)
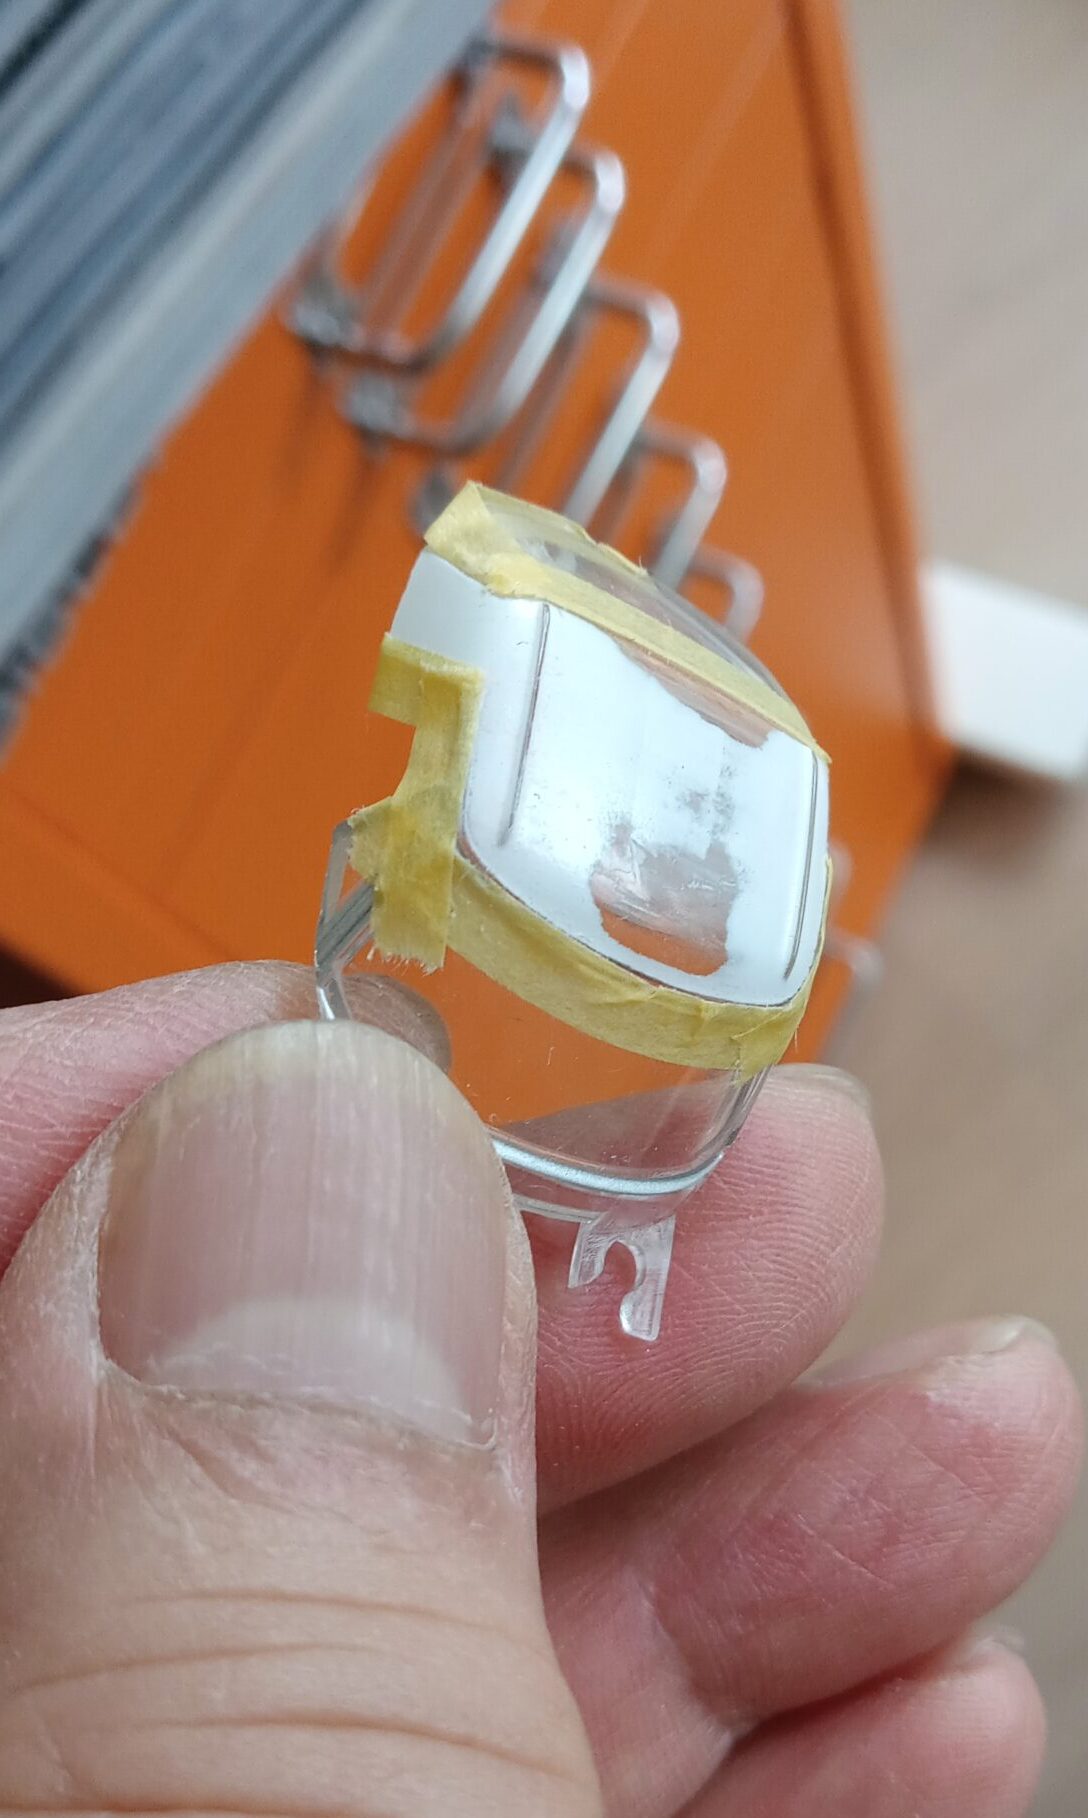
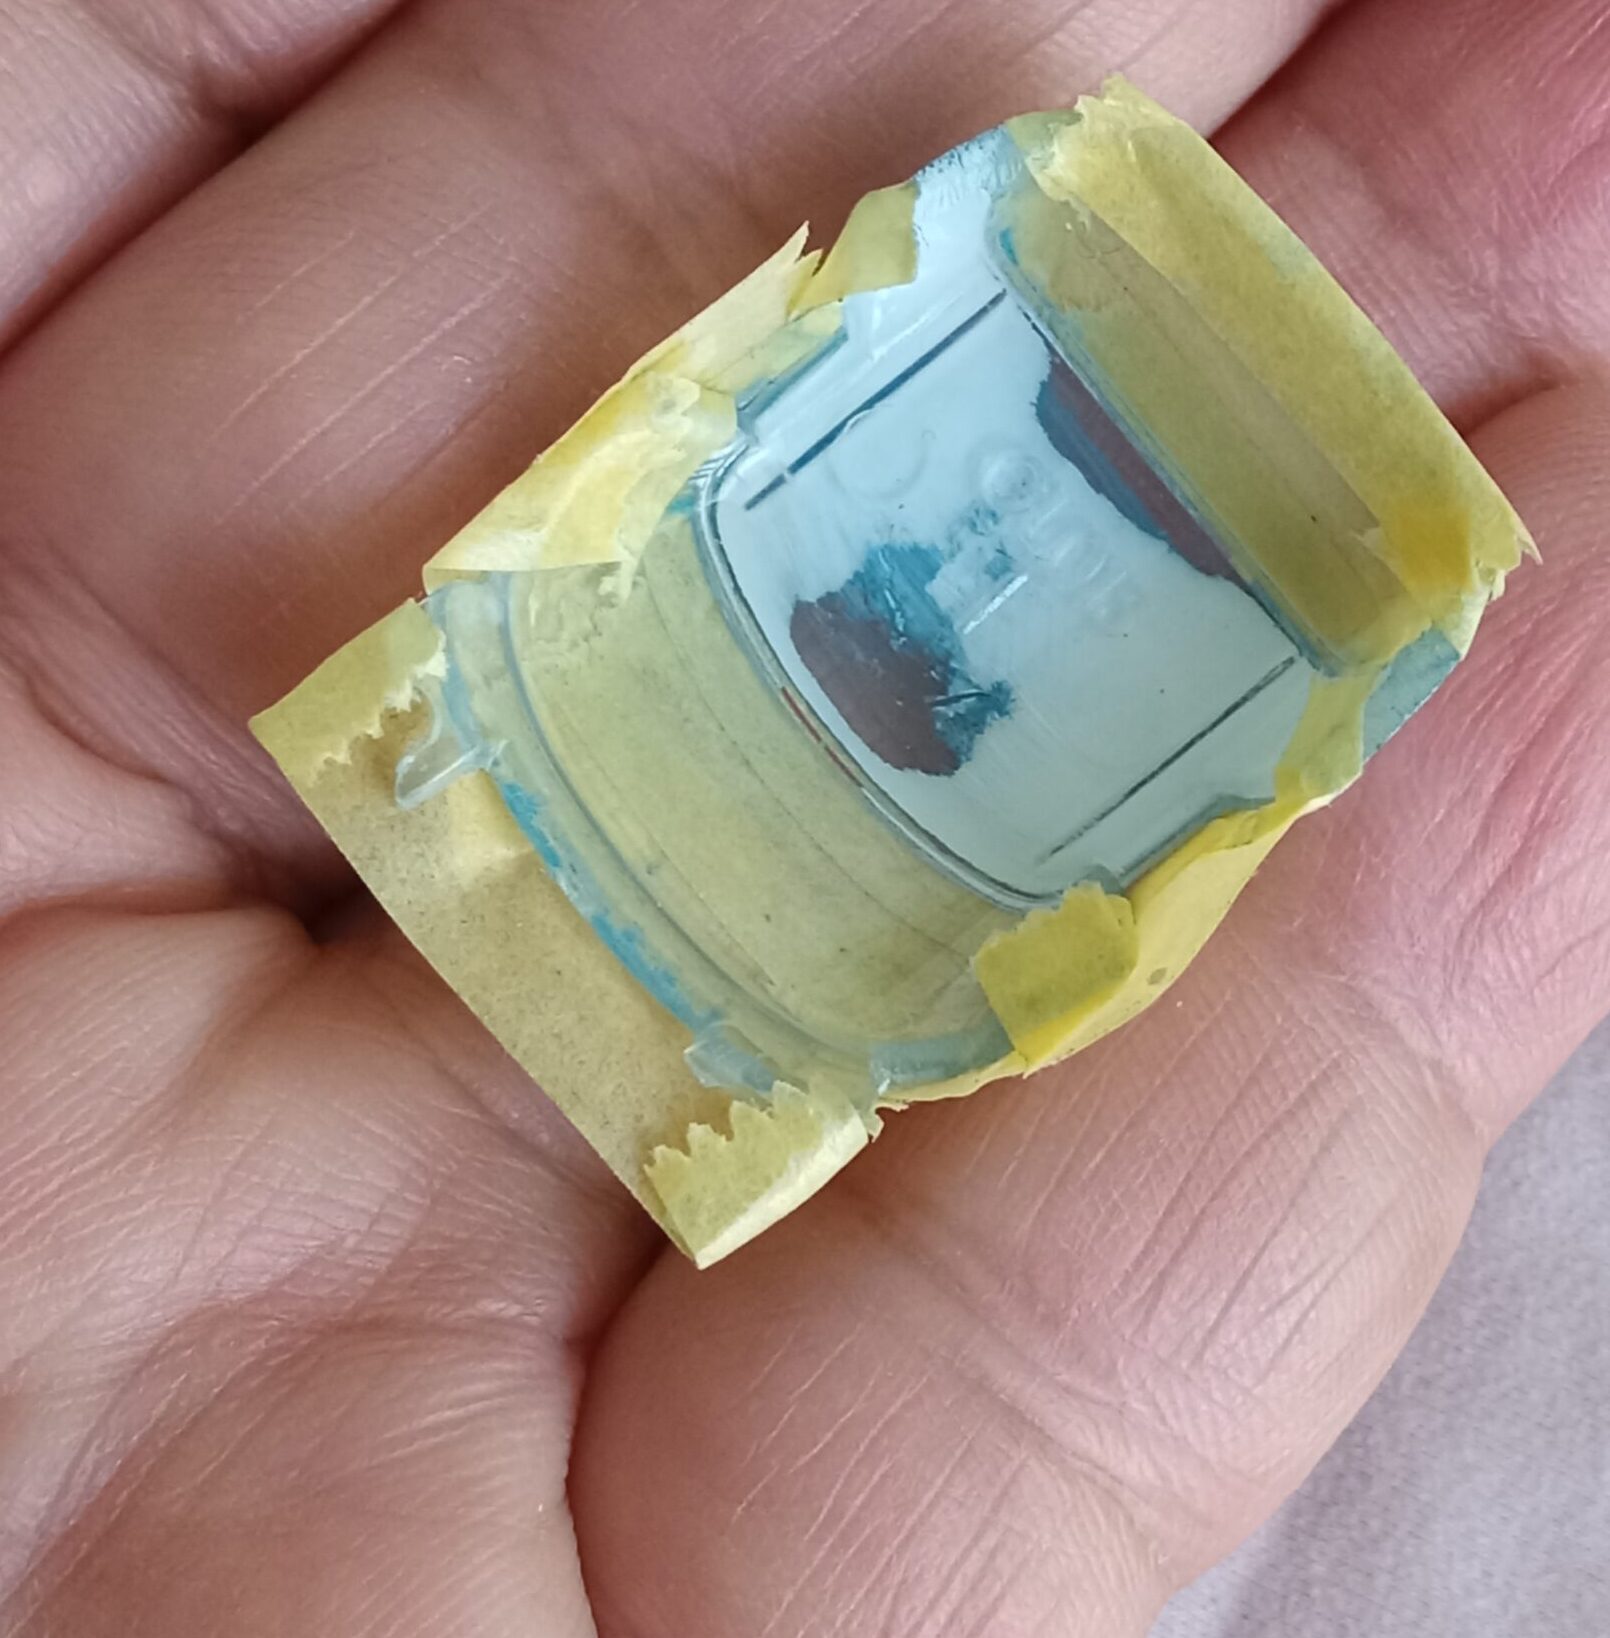
#今回のハードトップ部分の改造に、
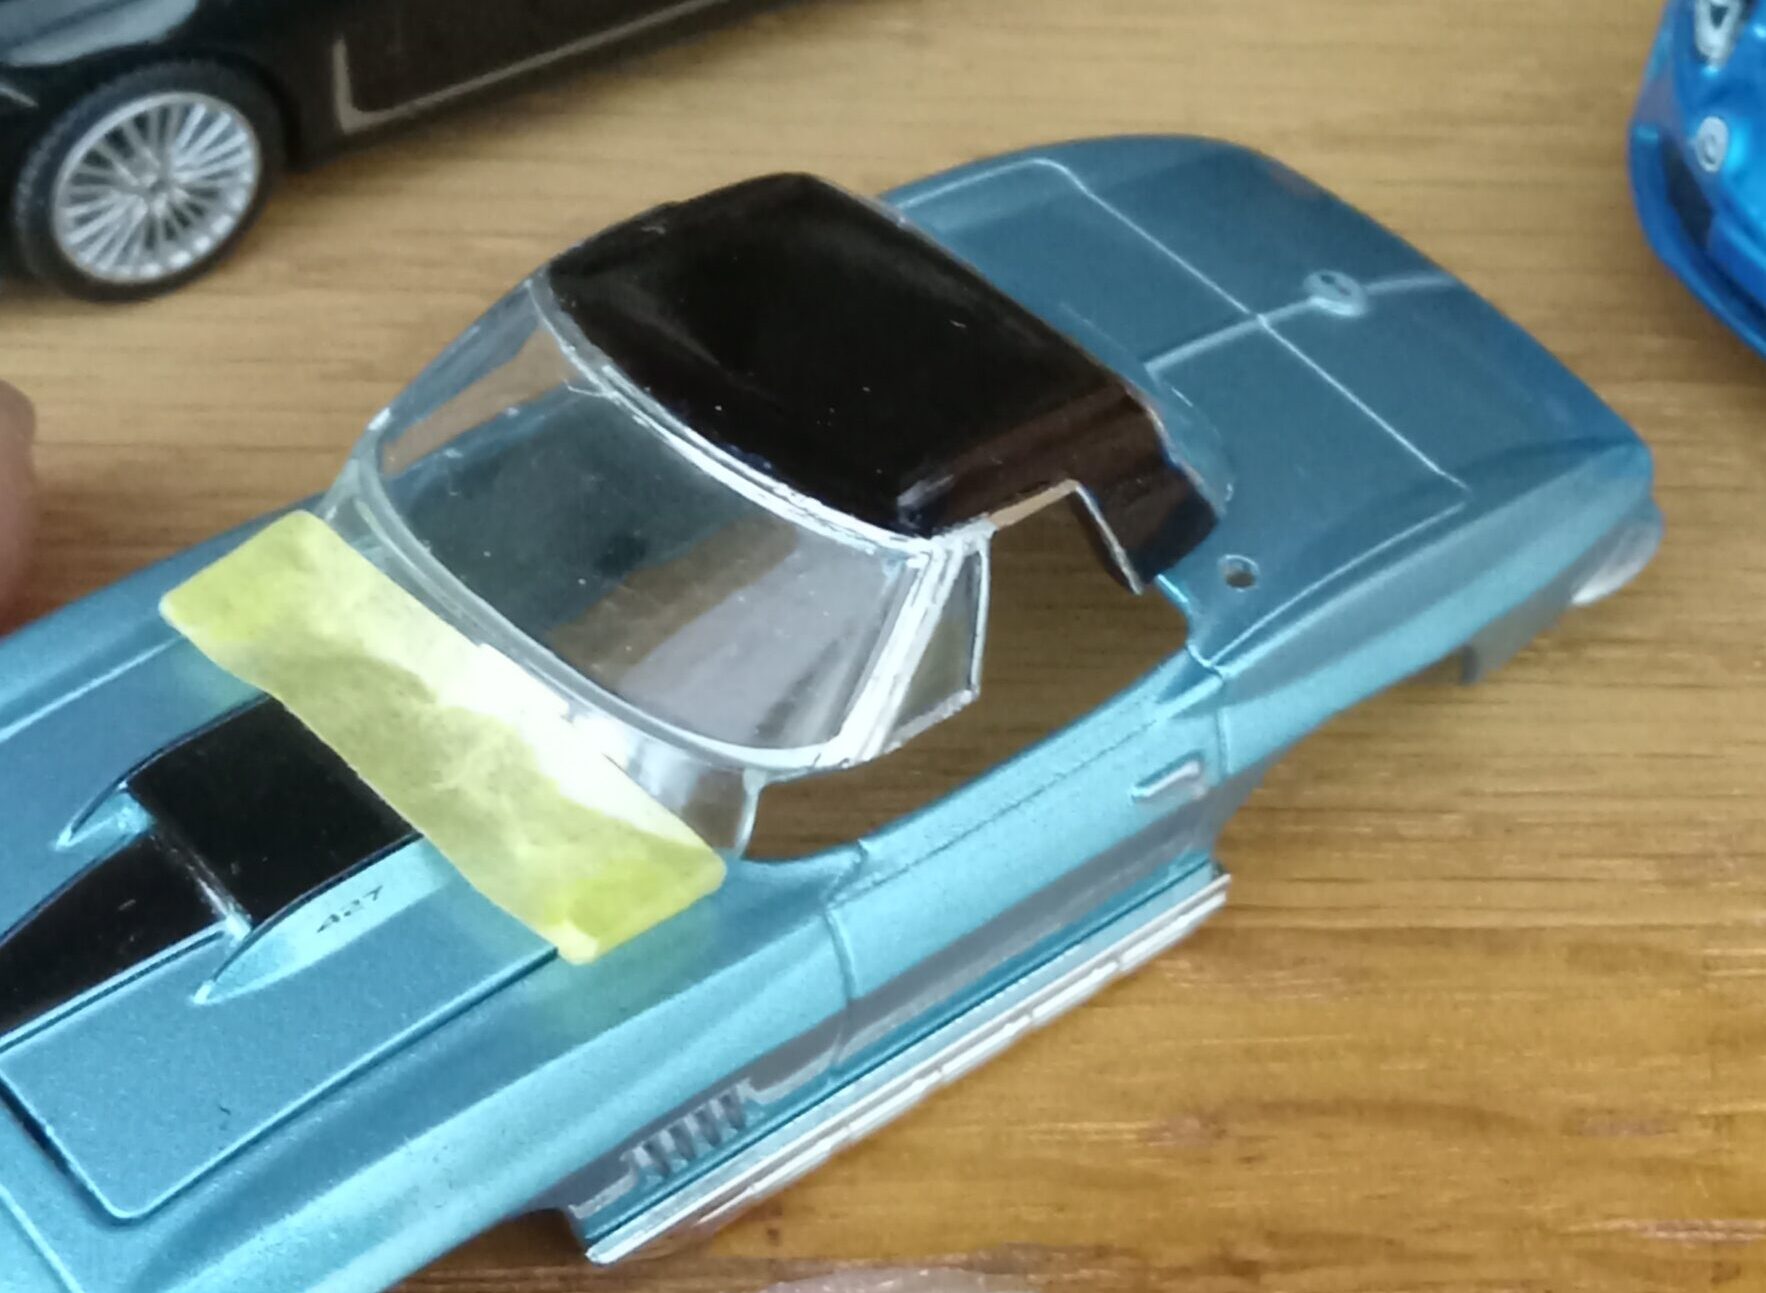
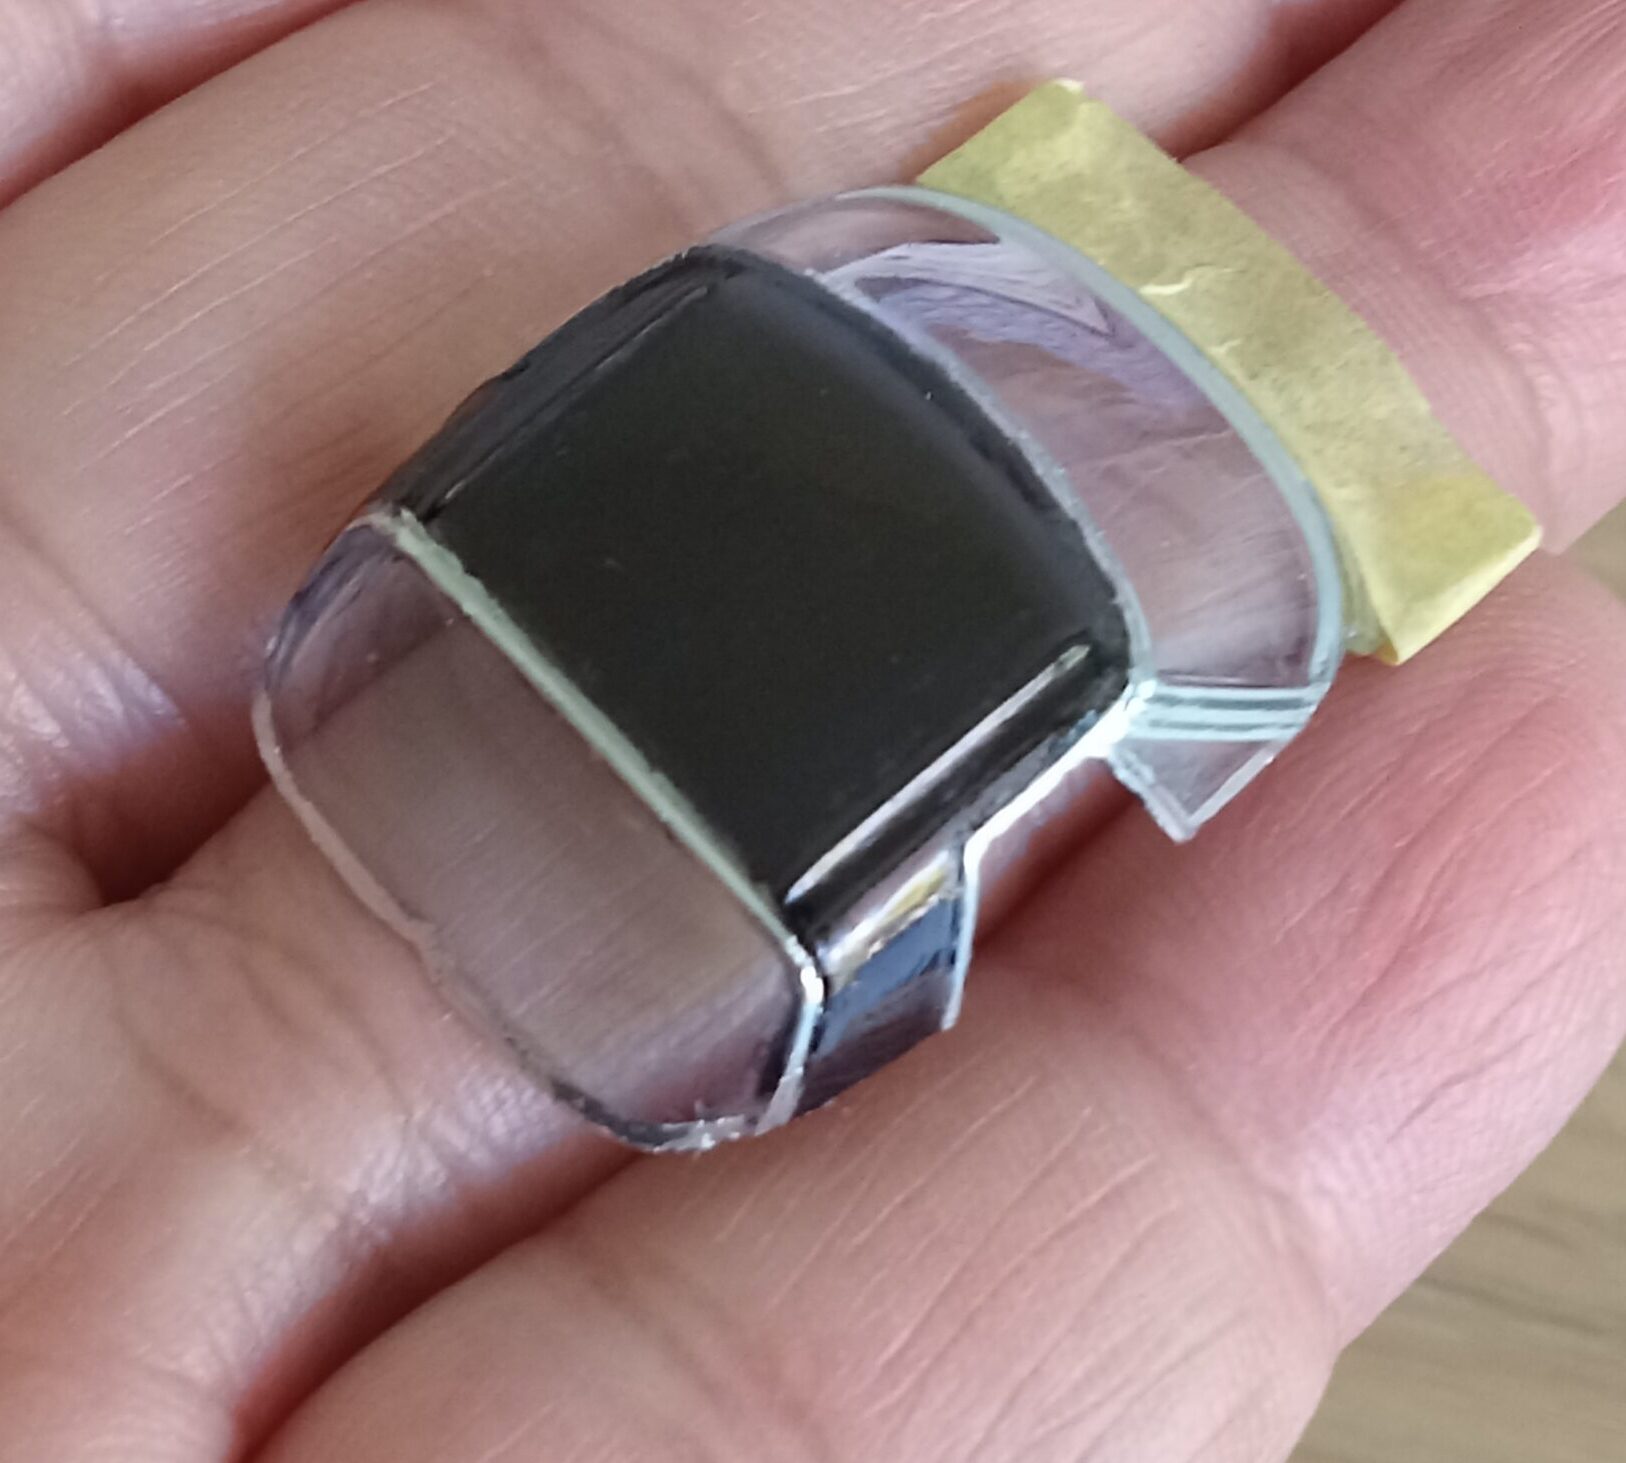
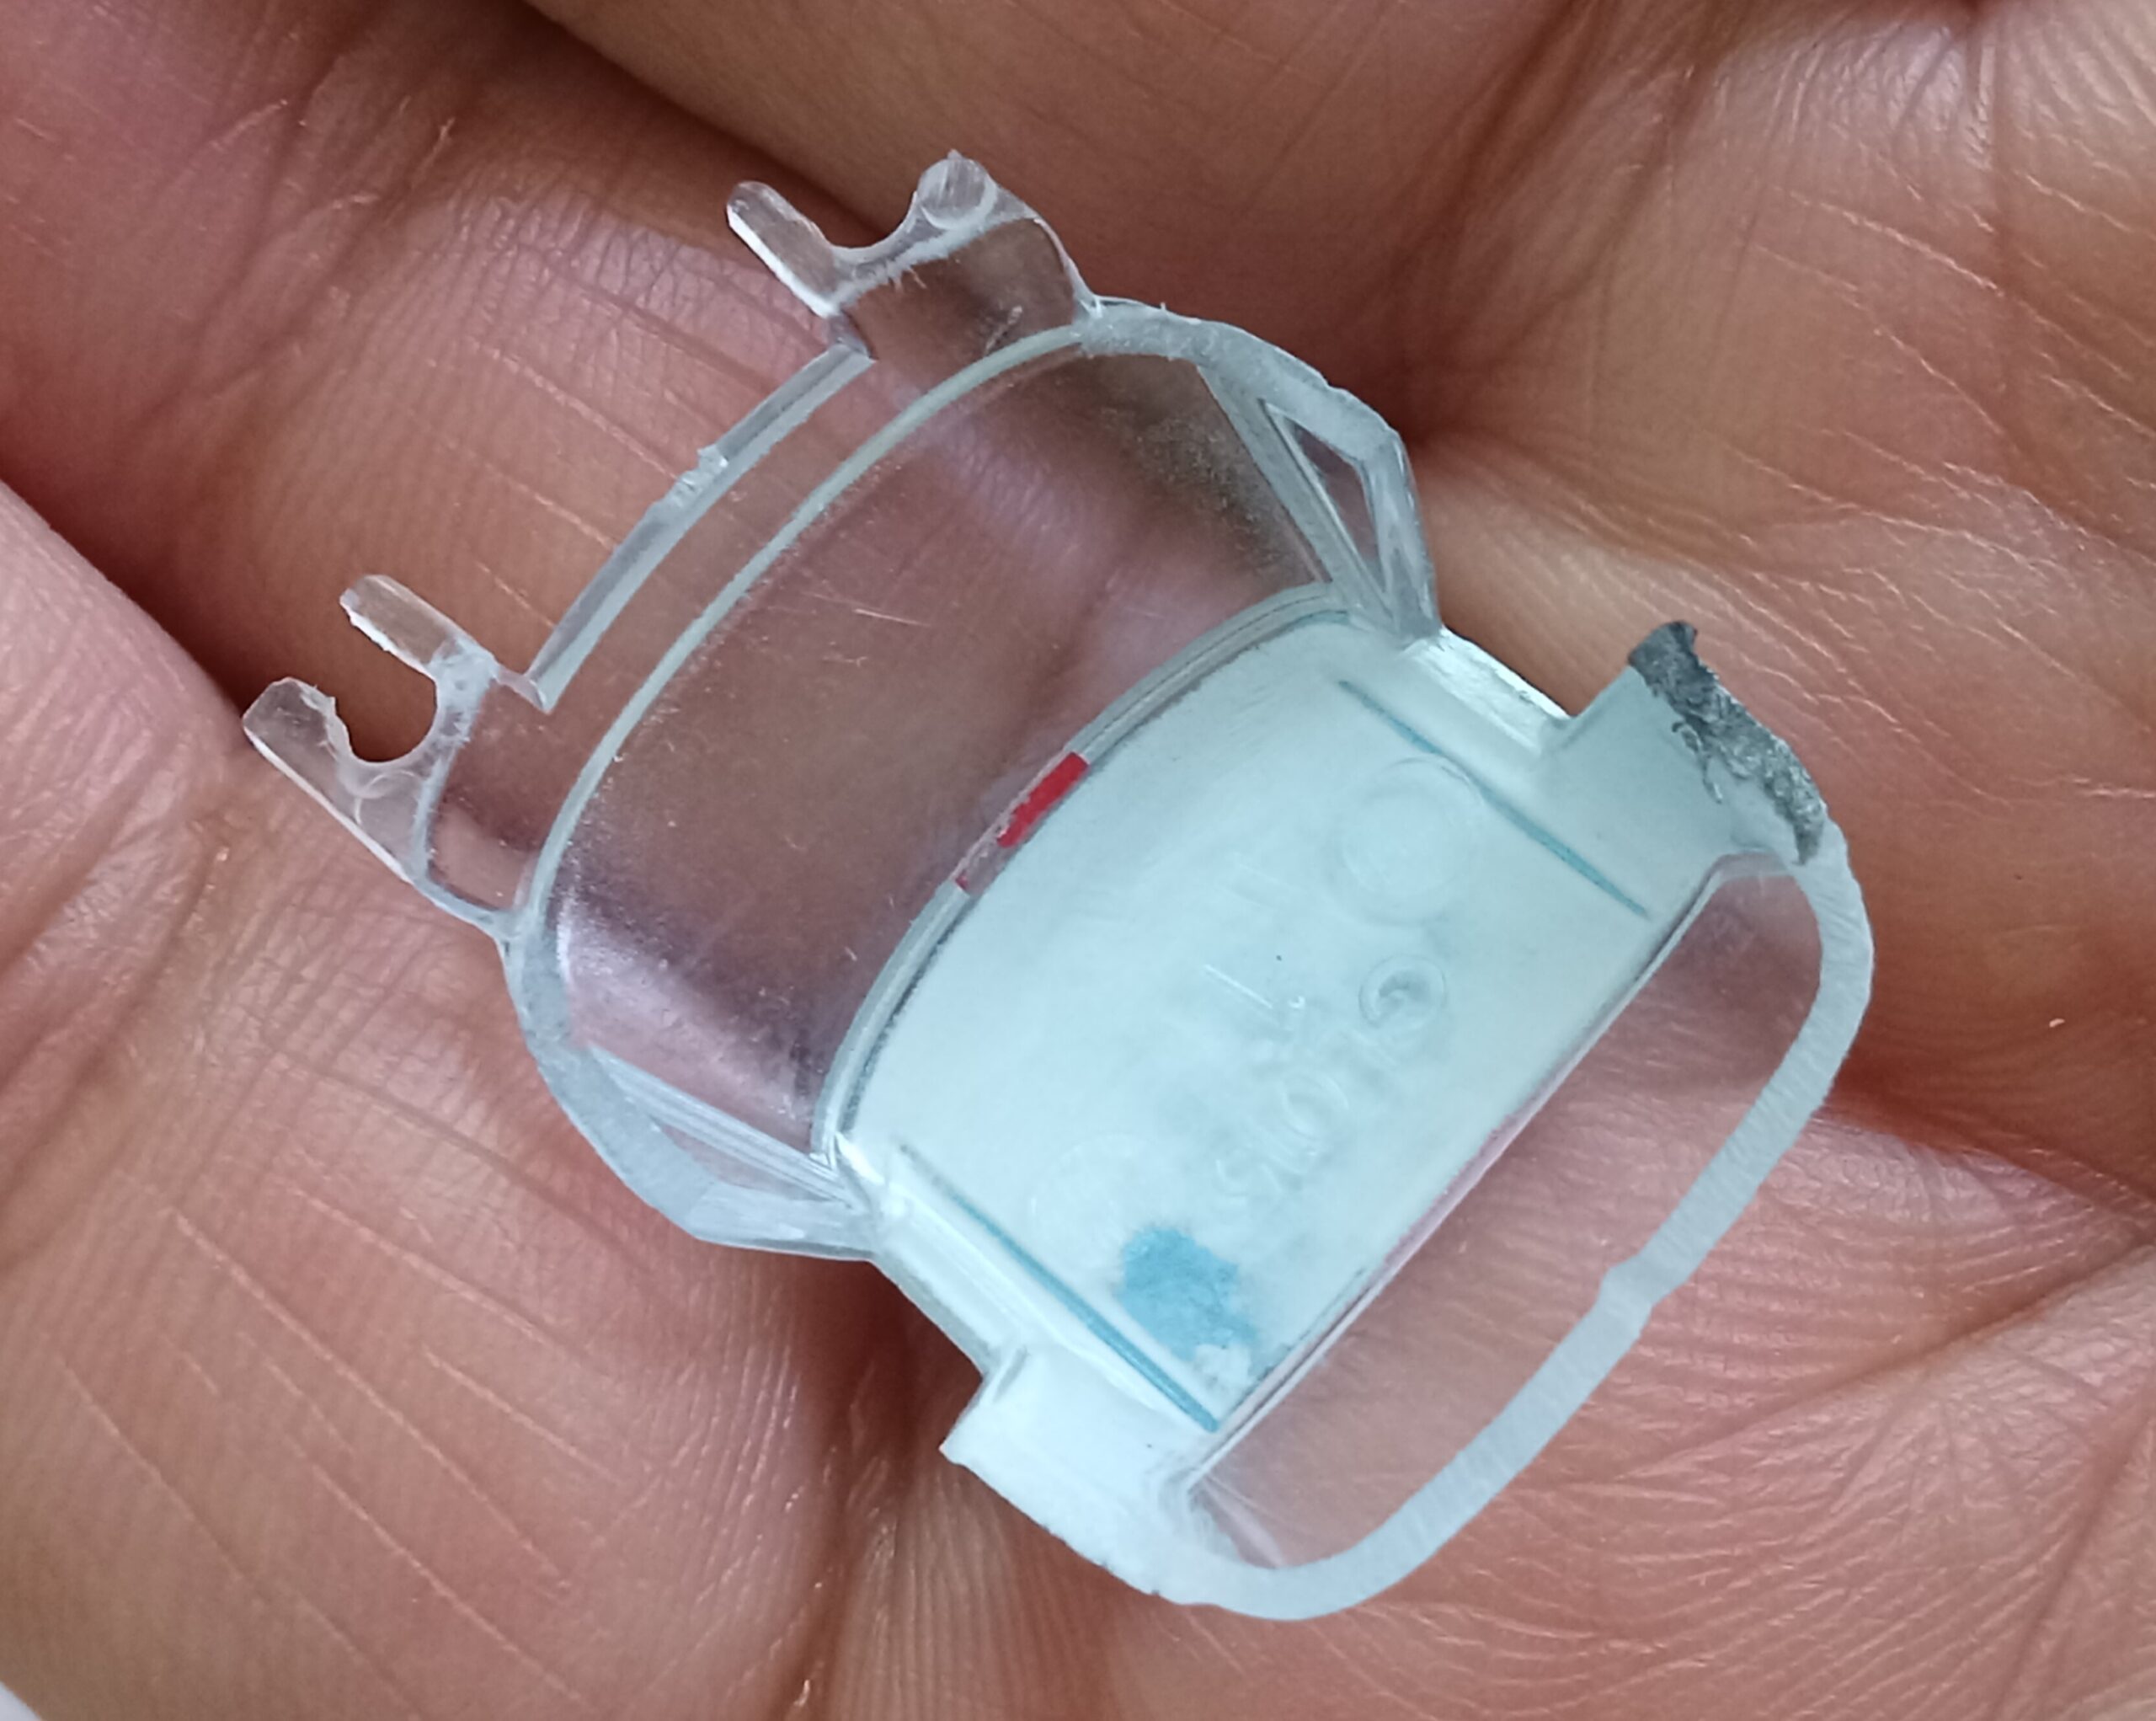
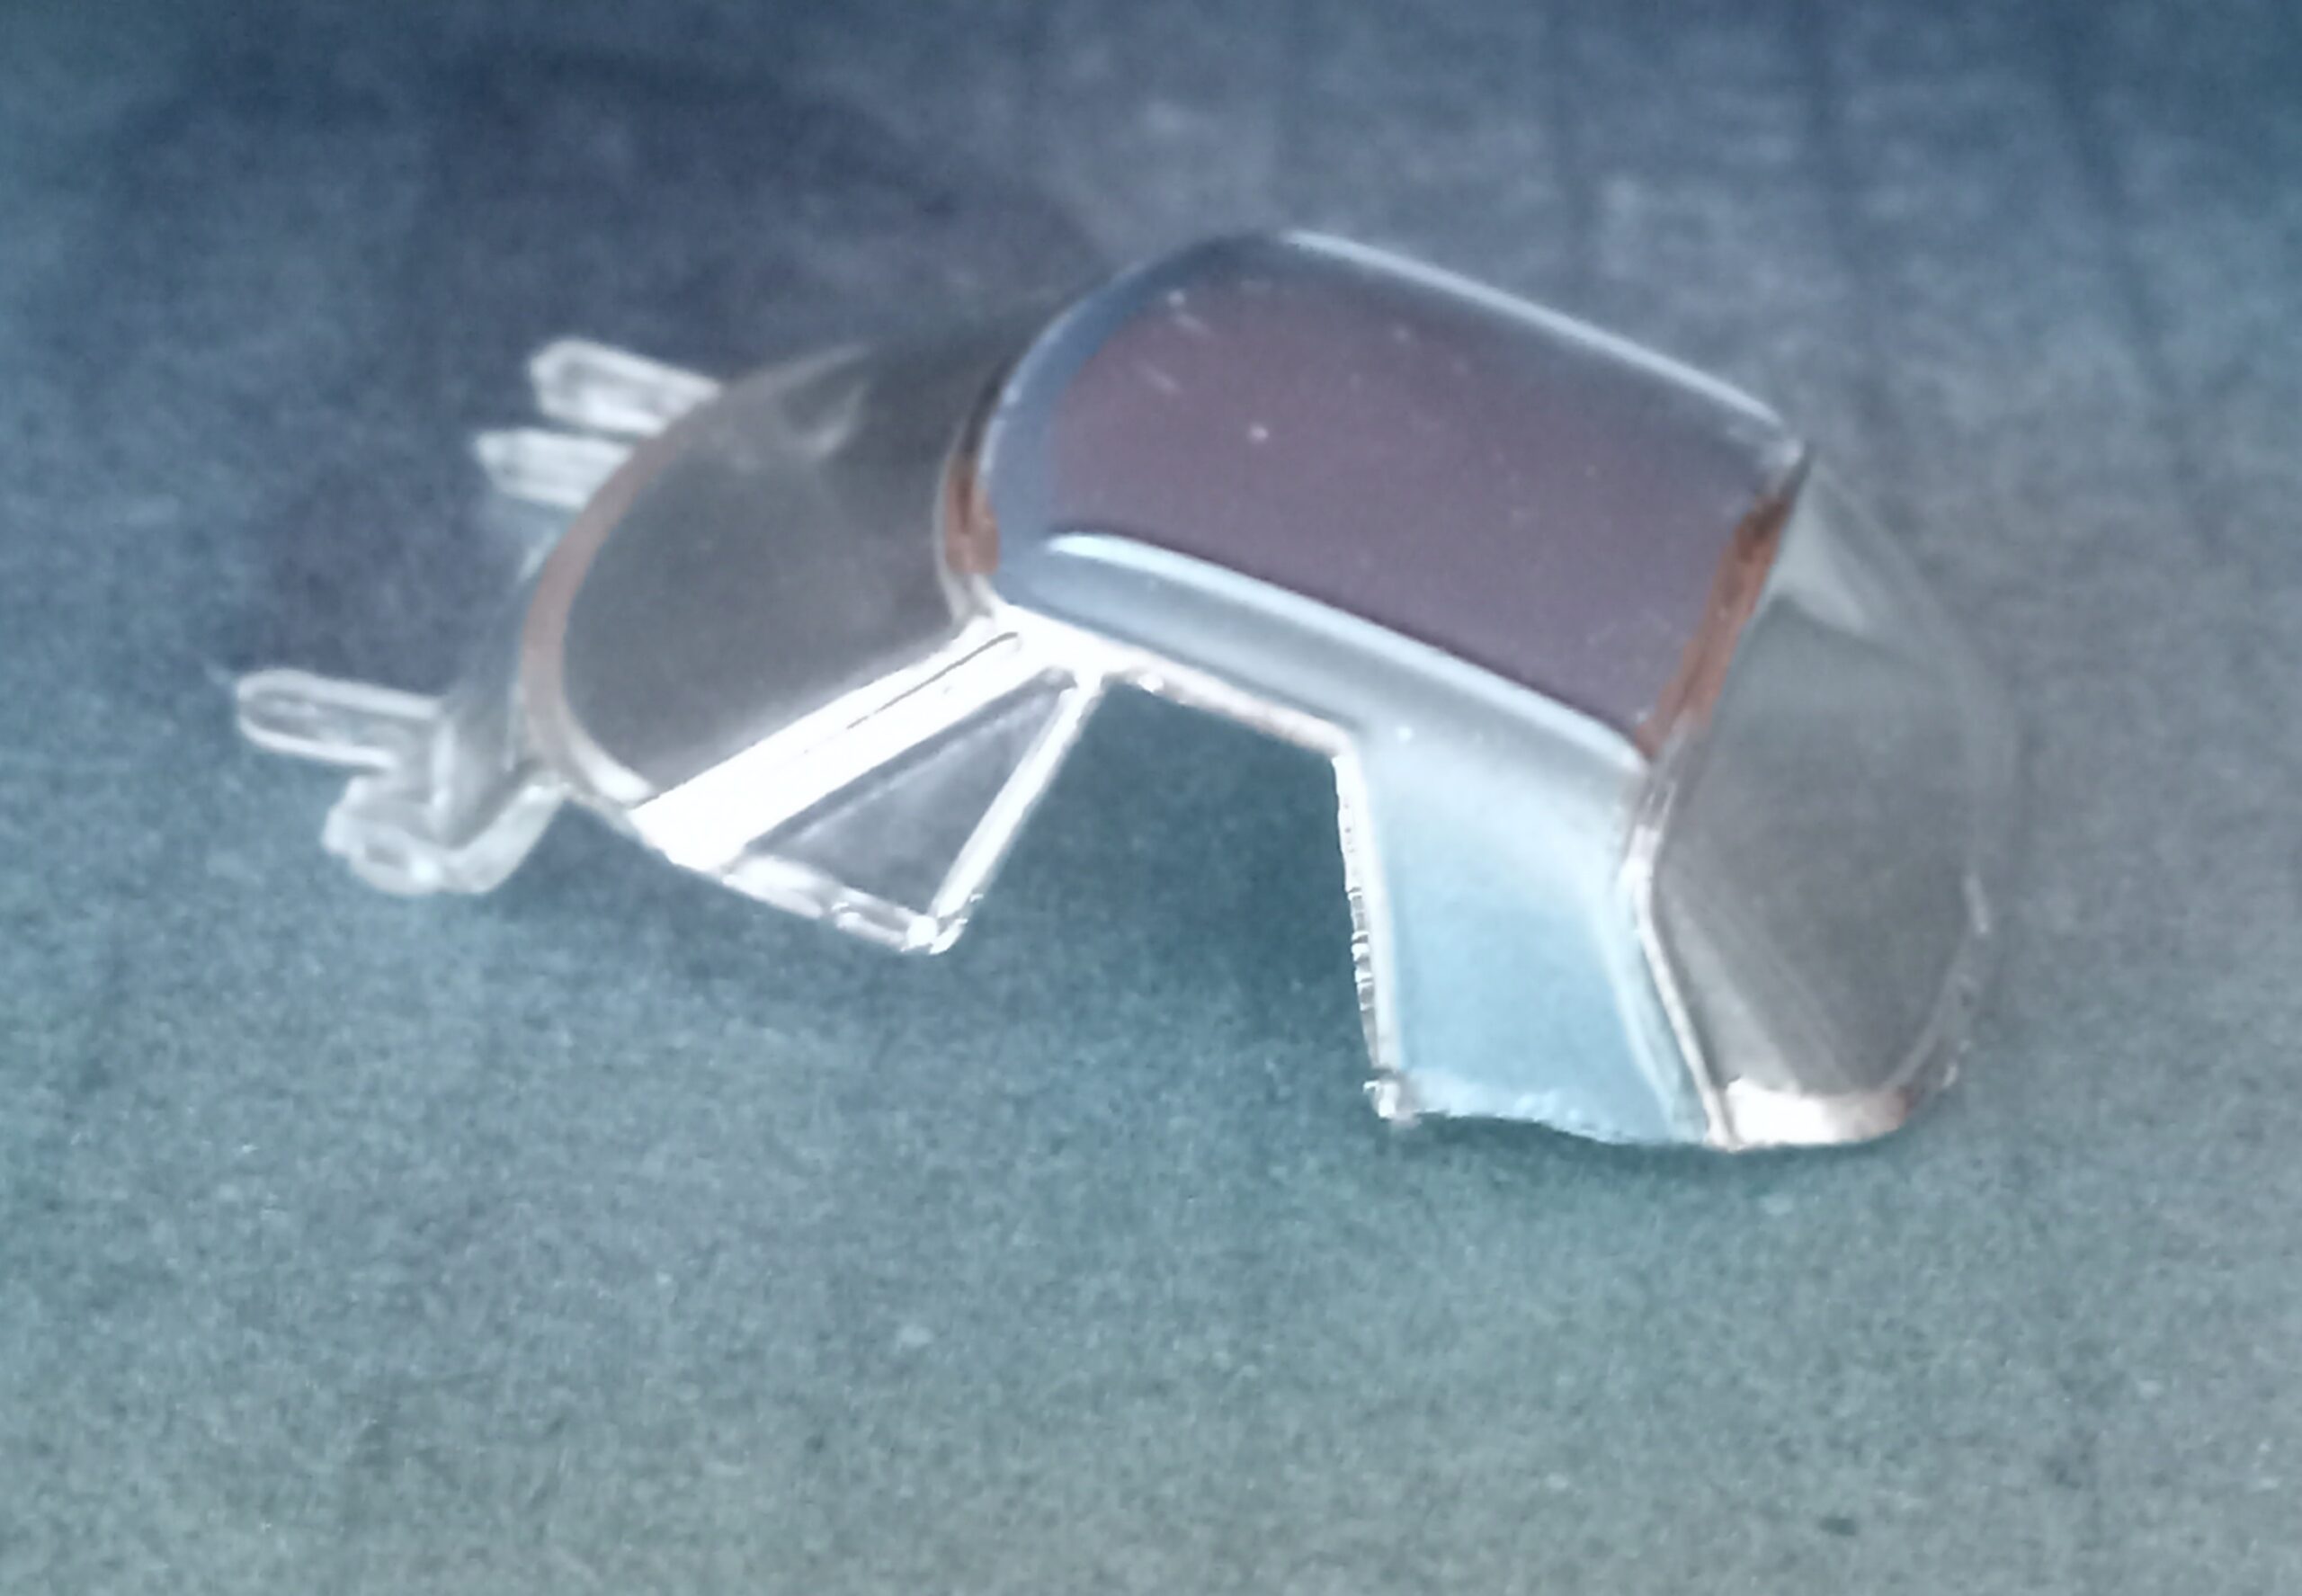
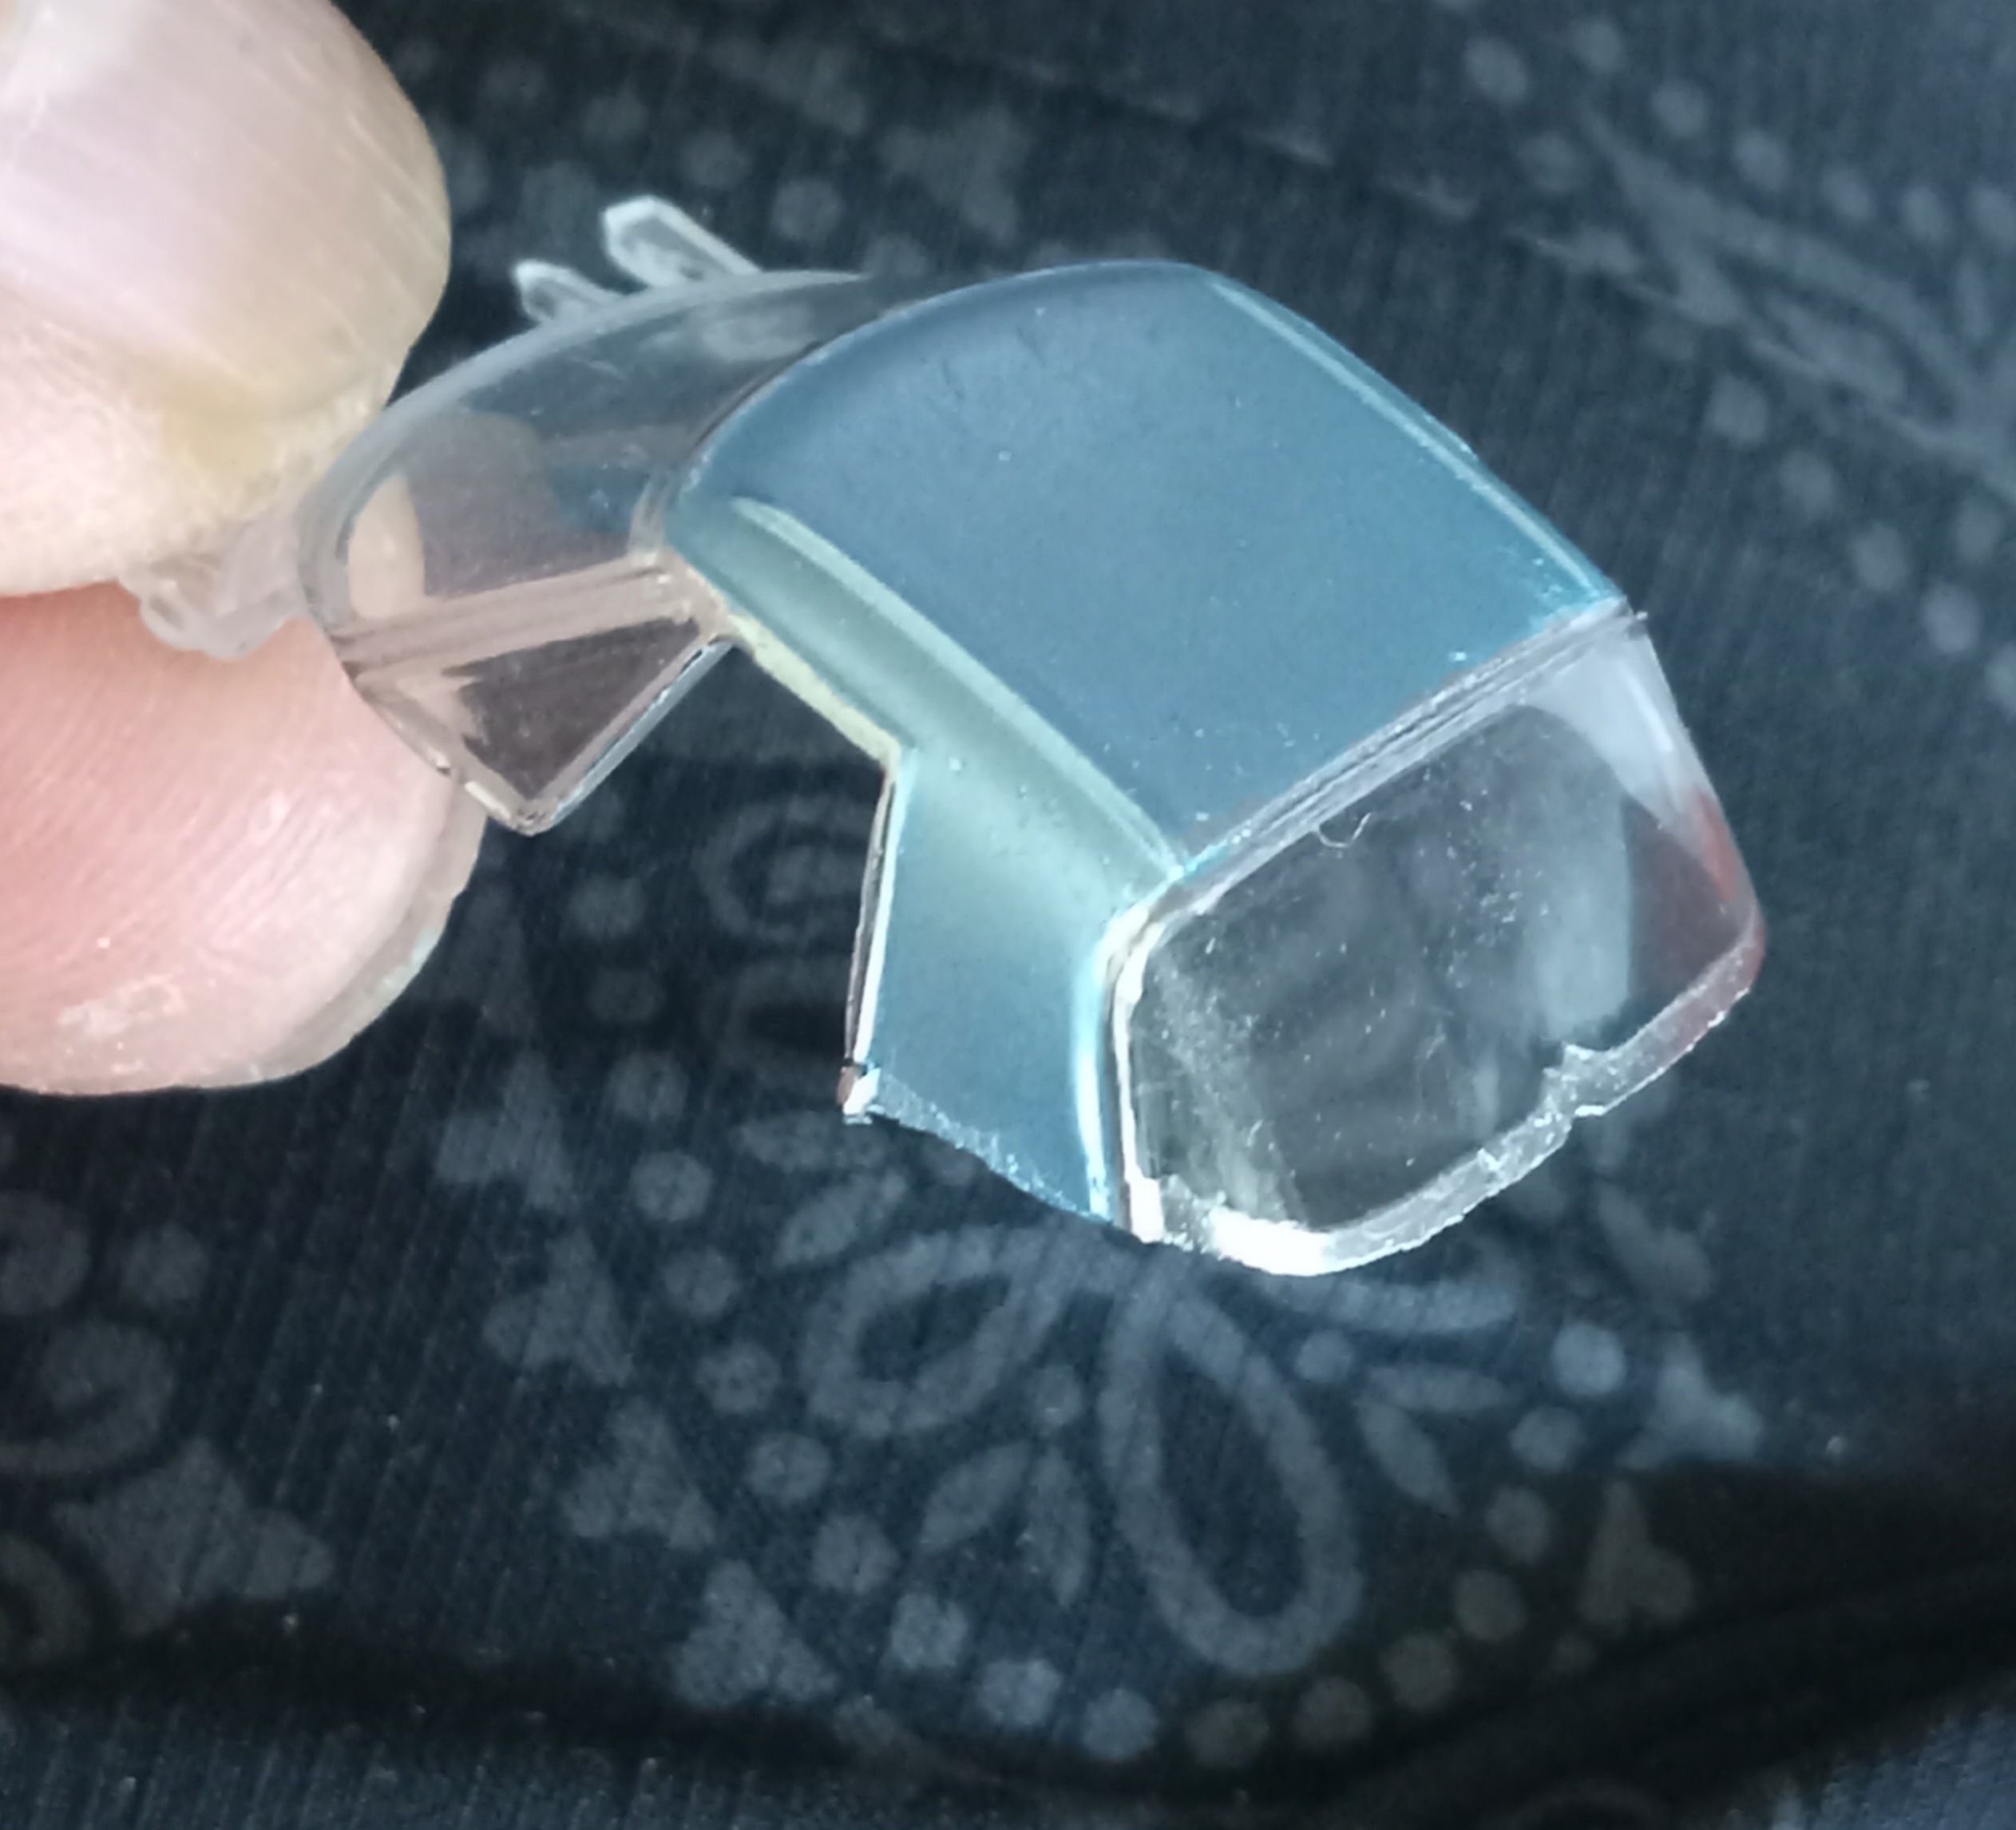
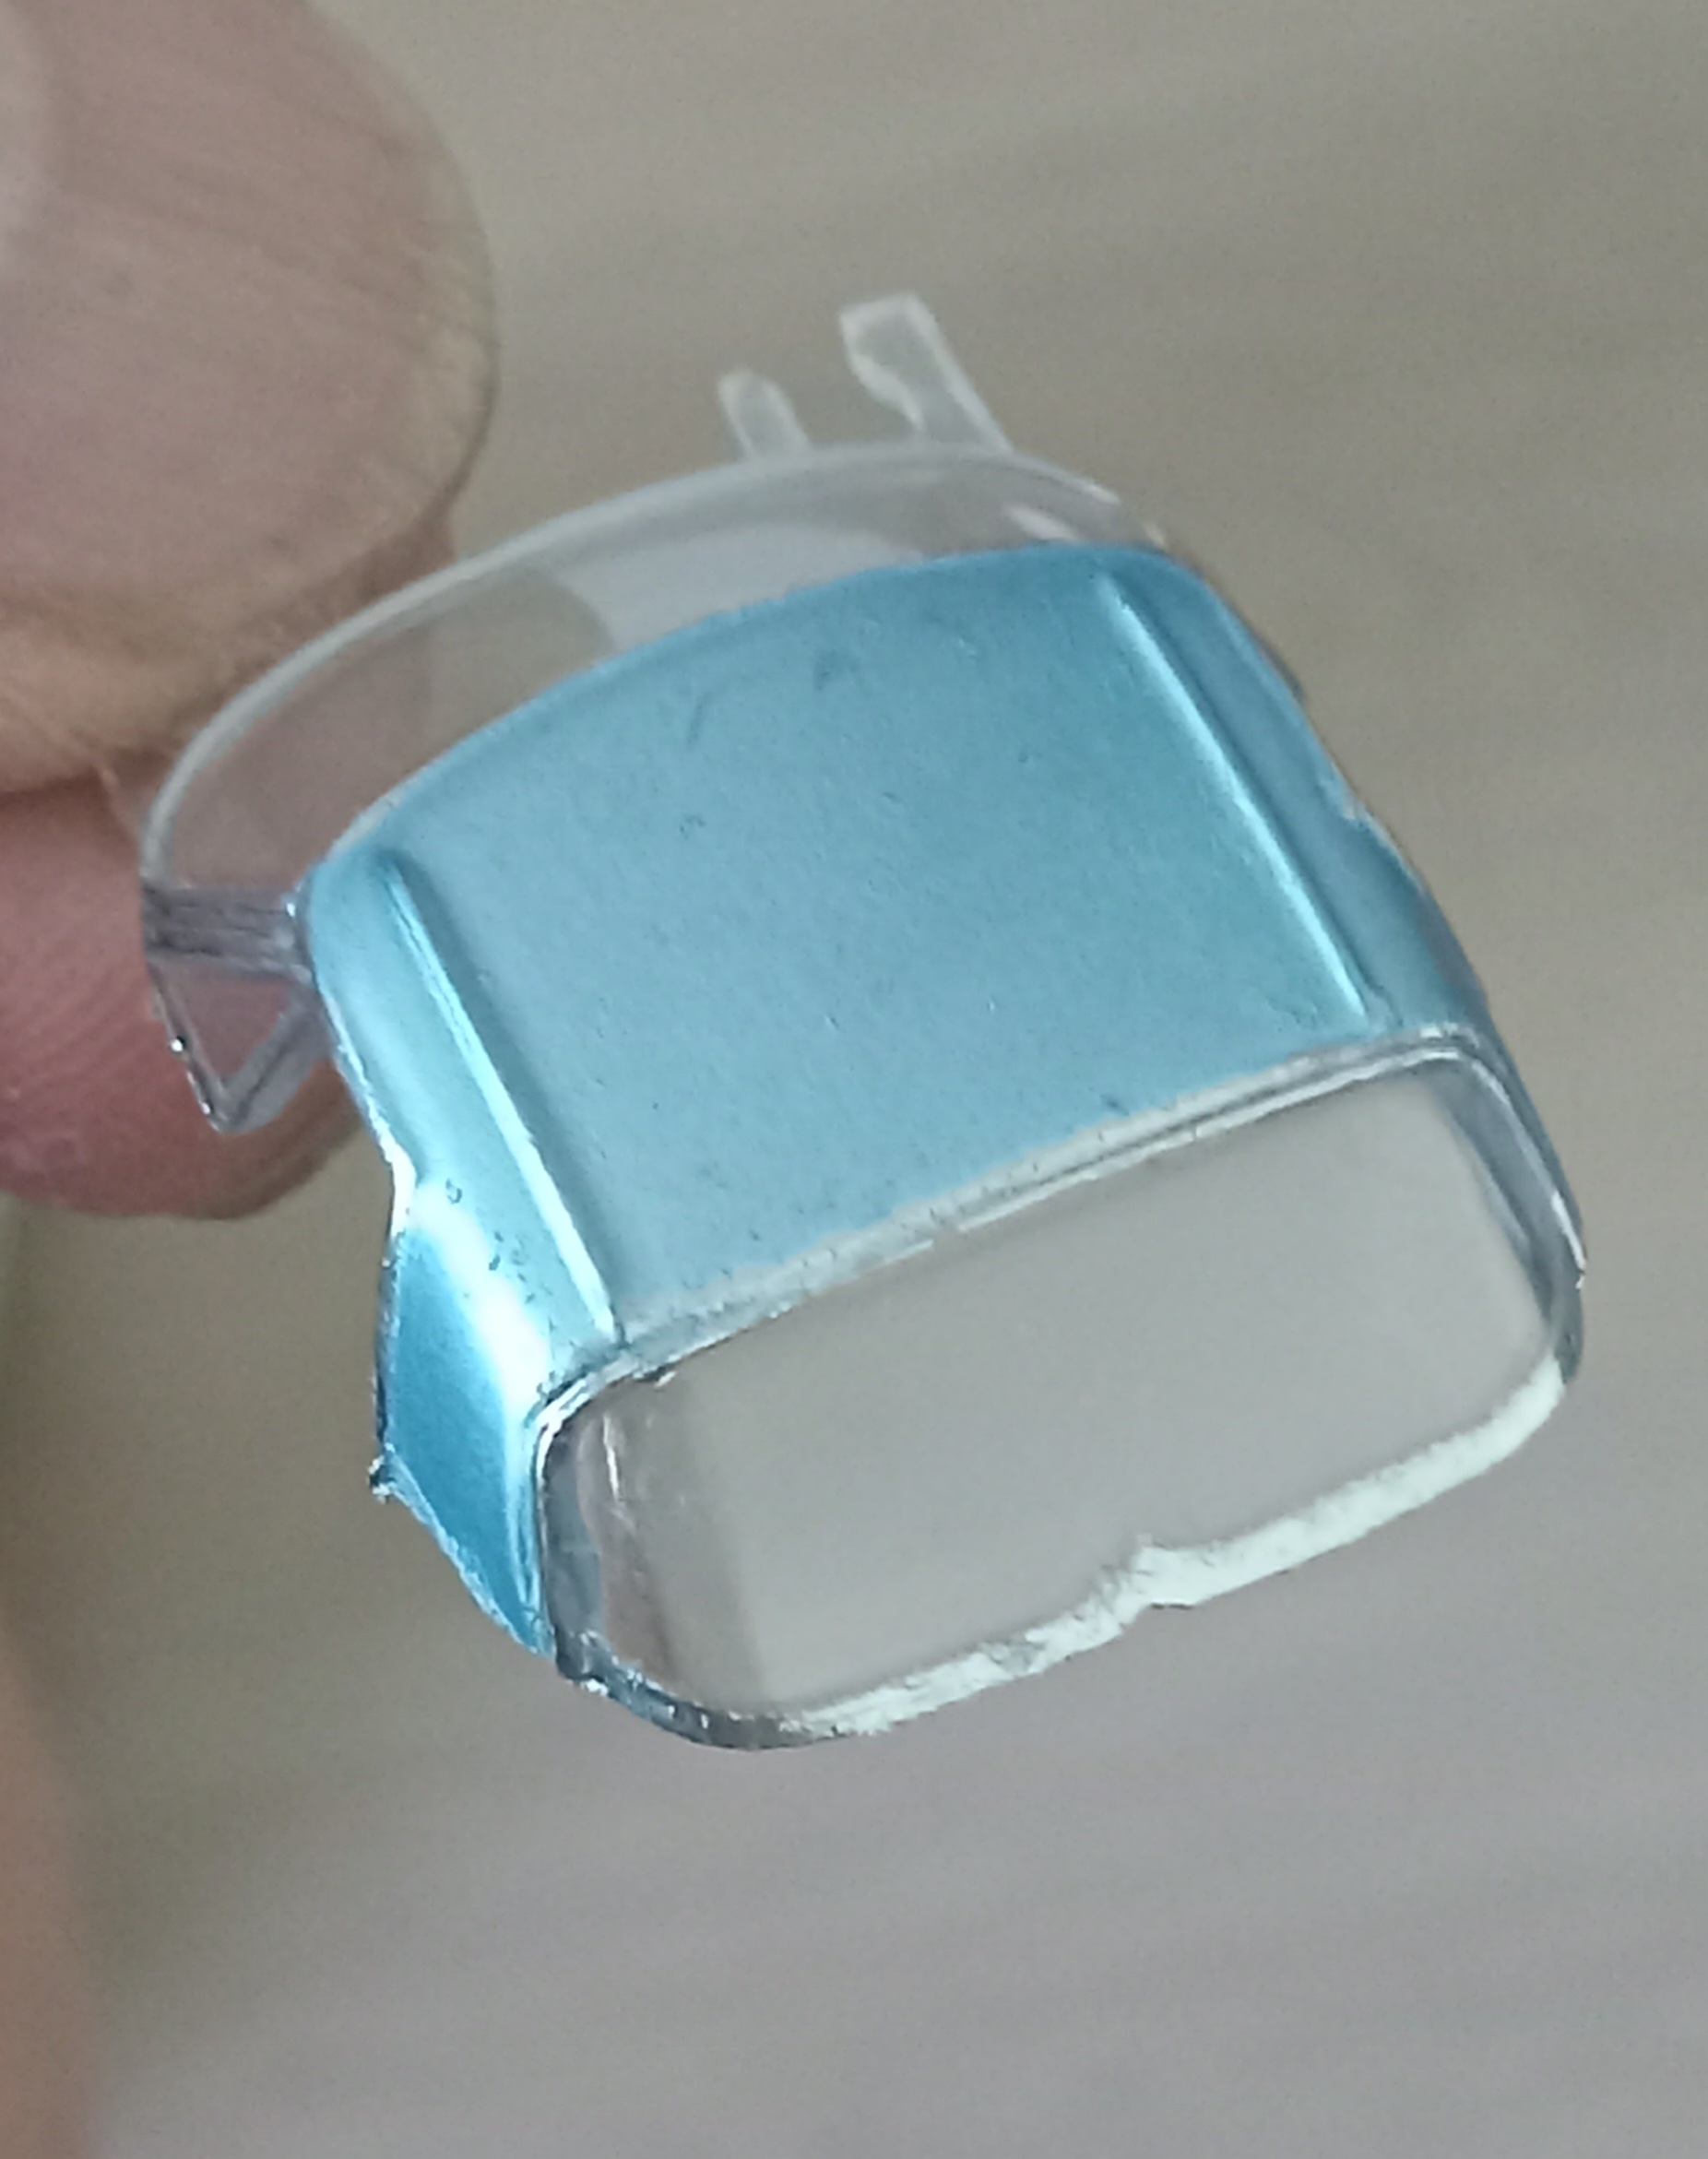
無くてはならかった【カナメ】の商品です。(合計3台消費しました。)
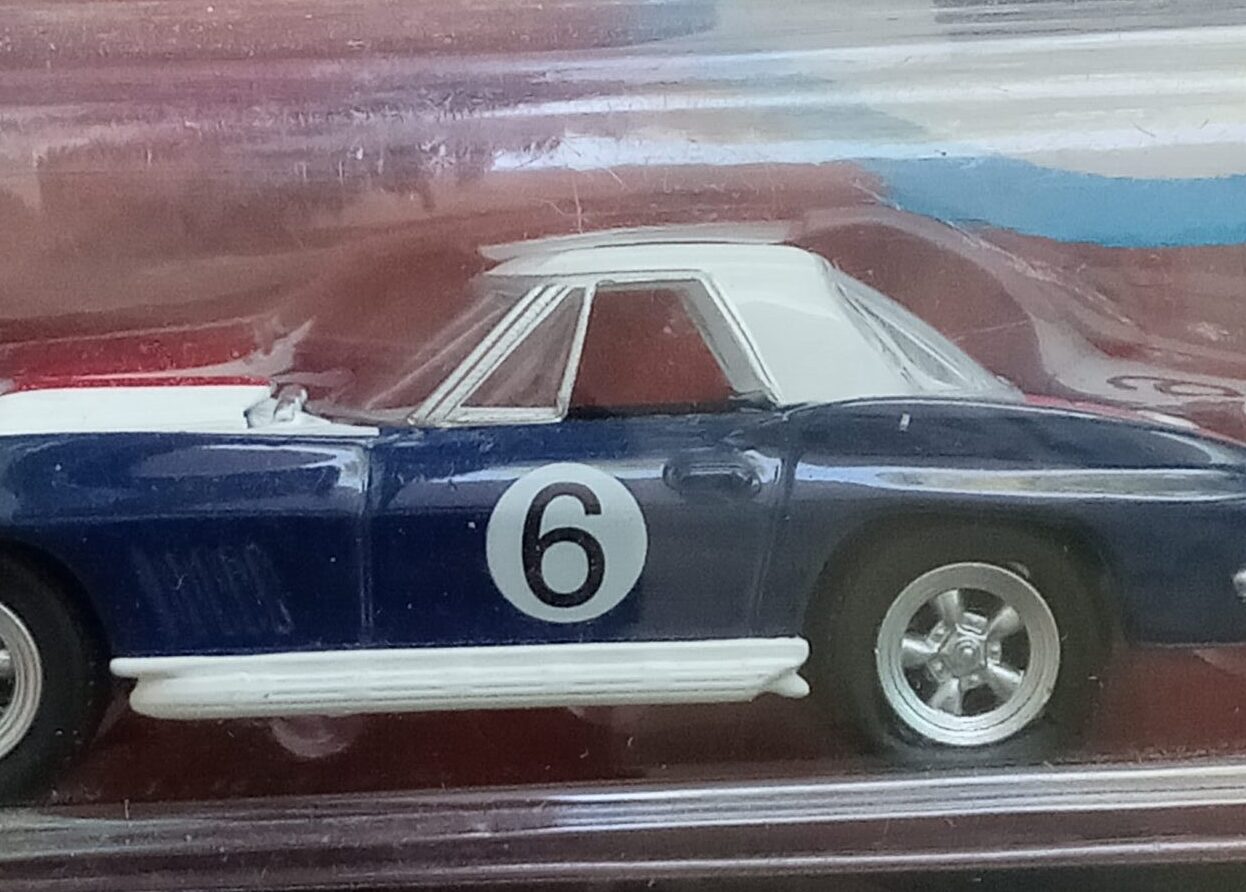
(グリーンライト社製の’67スティングレー・ロードスター・レーシングバージョンのハードトップ部分の拡大写真です。)
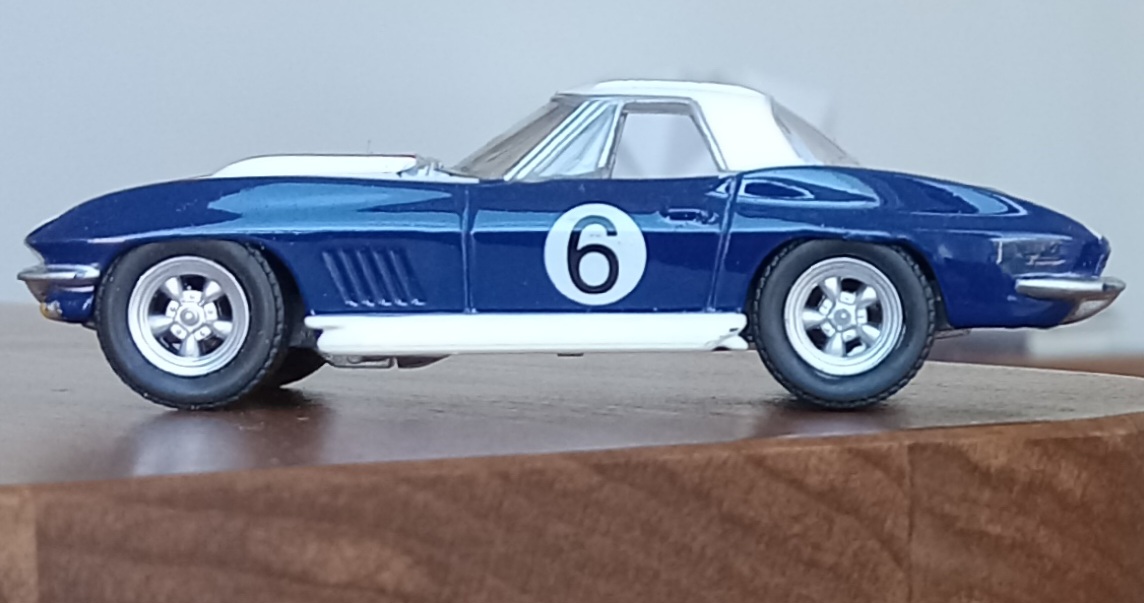
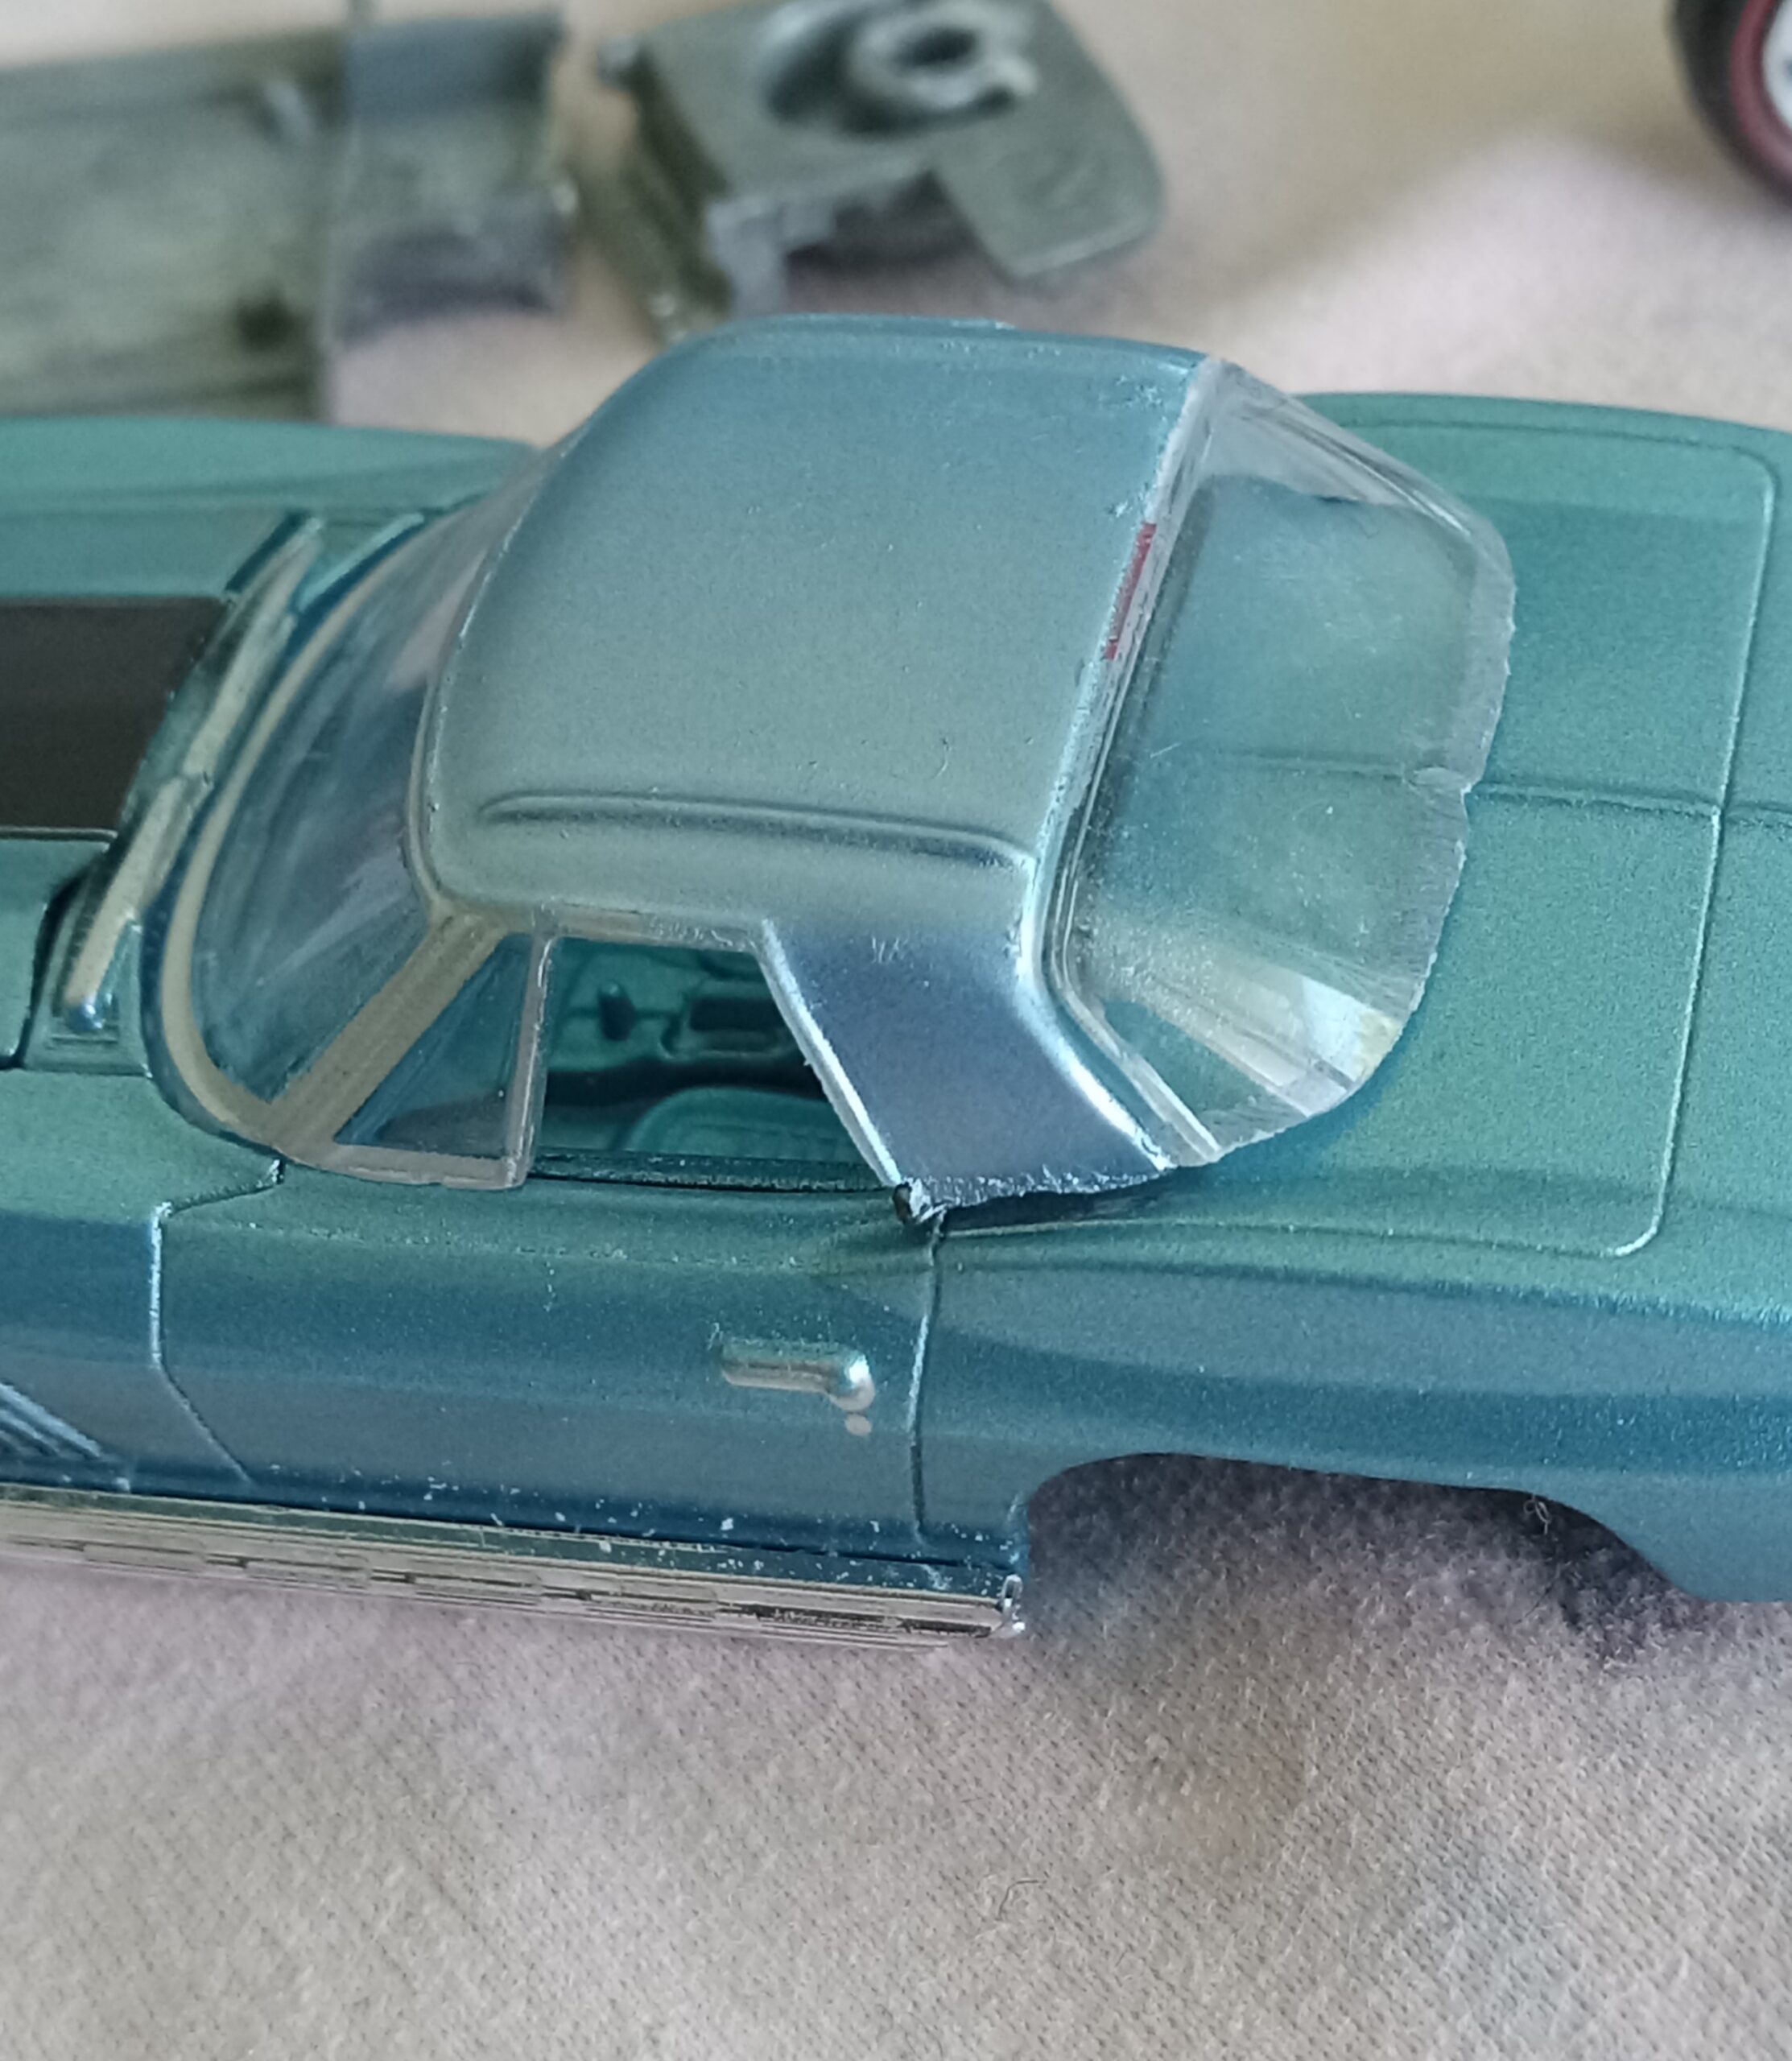
0:最初に、プロトタイプとして改造したのが、
ーーーーー>こちらのレースカー仕様のハードトップ装着版ロードスターです。
それでは、
こんな感じで見て行きます。
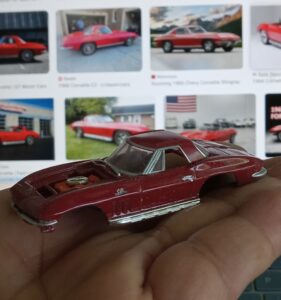
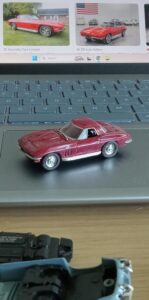
*設定資料:参考写真集
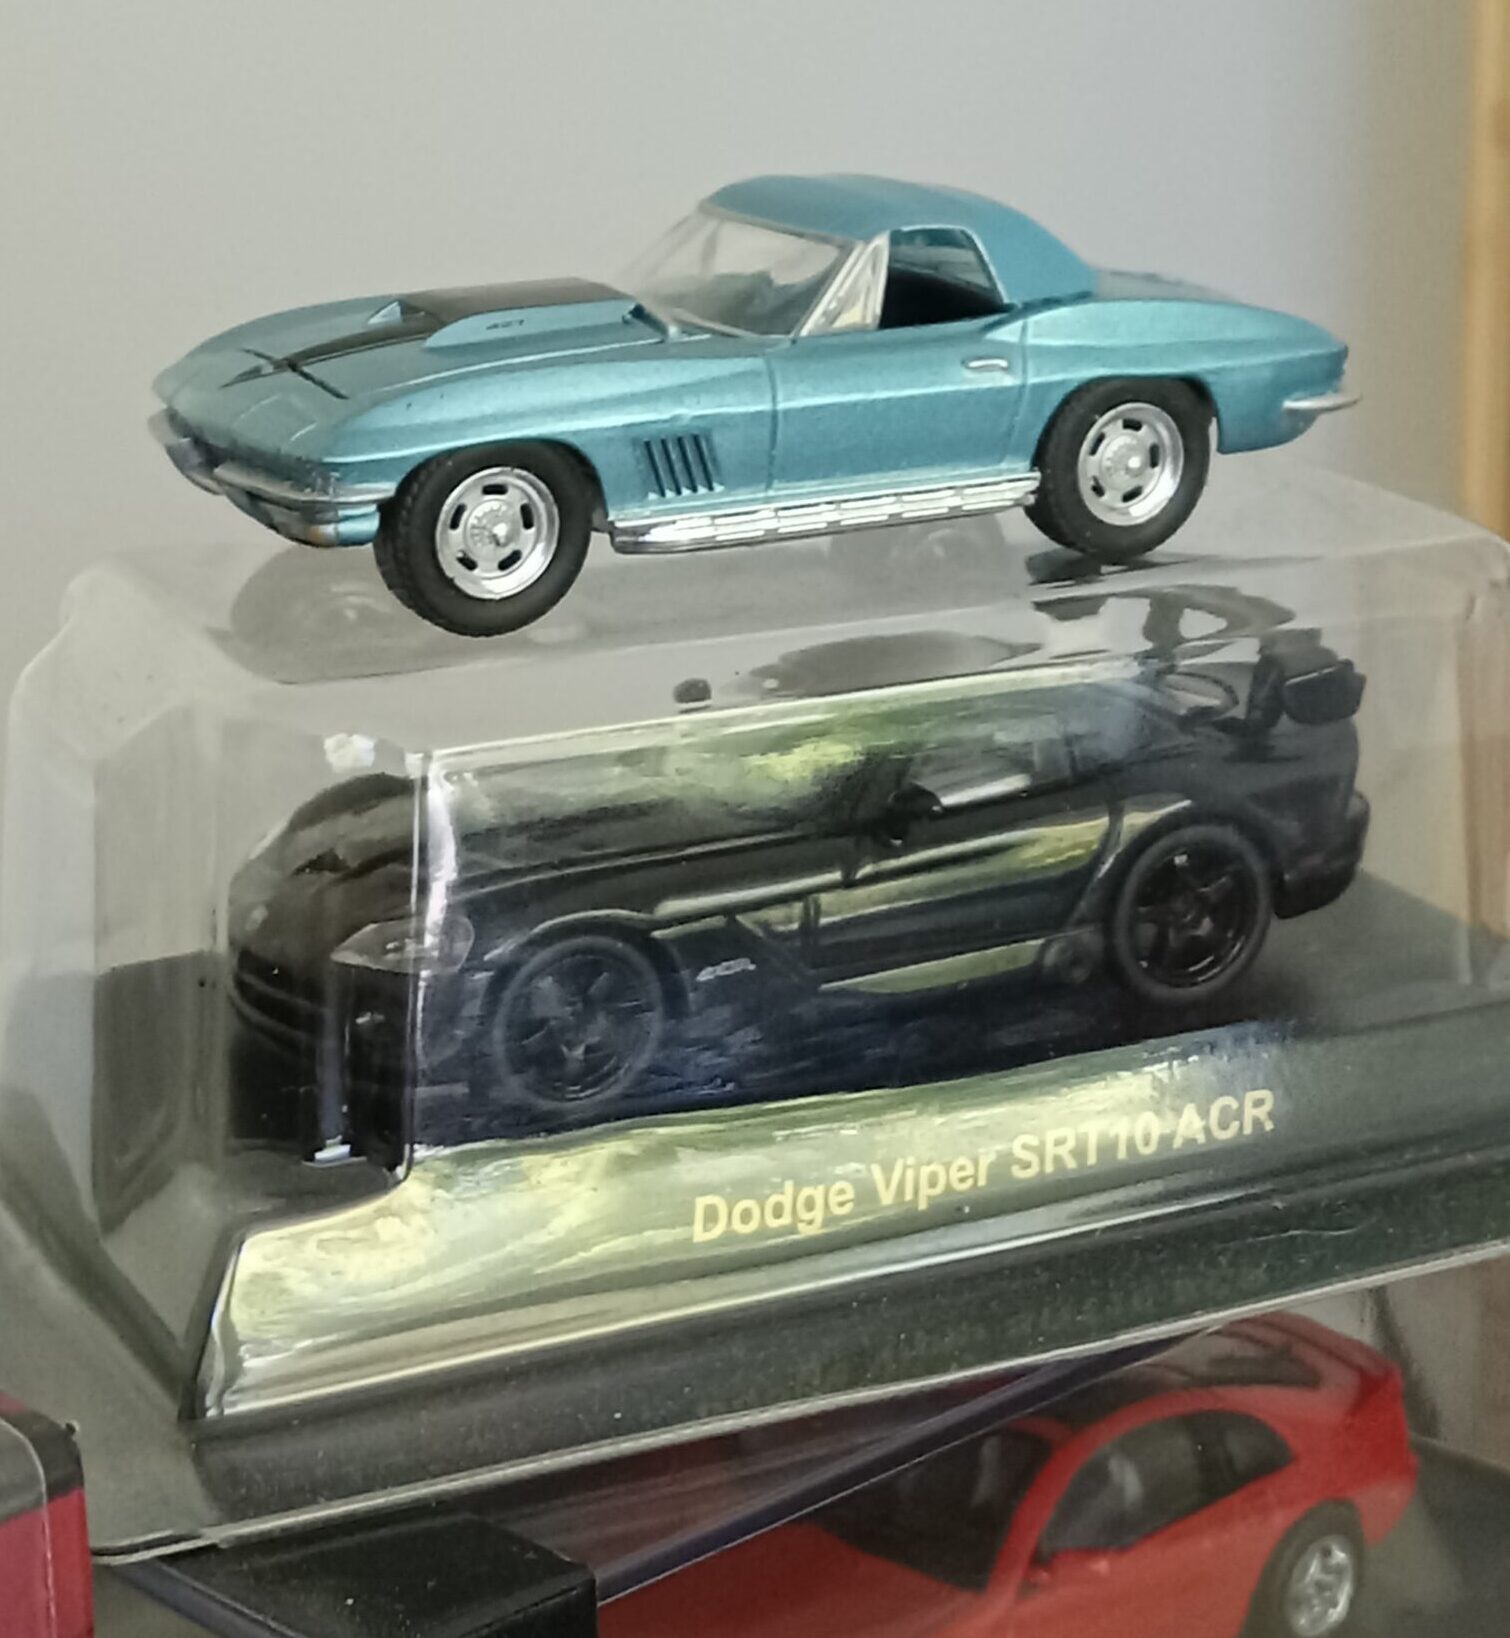
*グリーンライト社製1/64 67年型コルベット・ロードスターの評価:
*4台分の改造プロジェクト:
*感想:『みっちり楽しませてもらえました!』
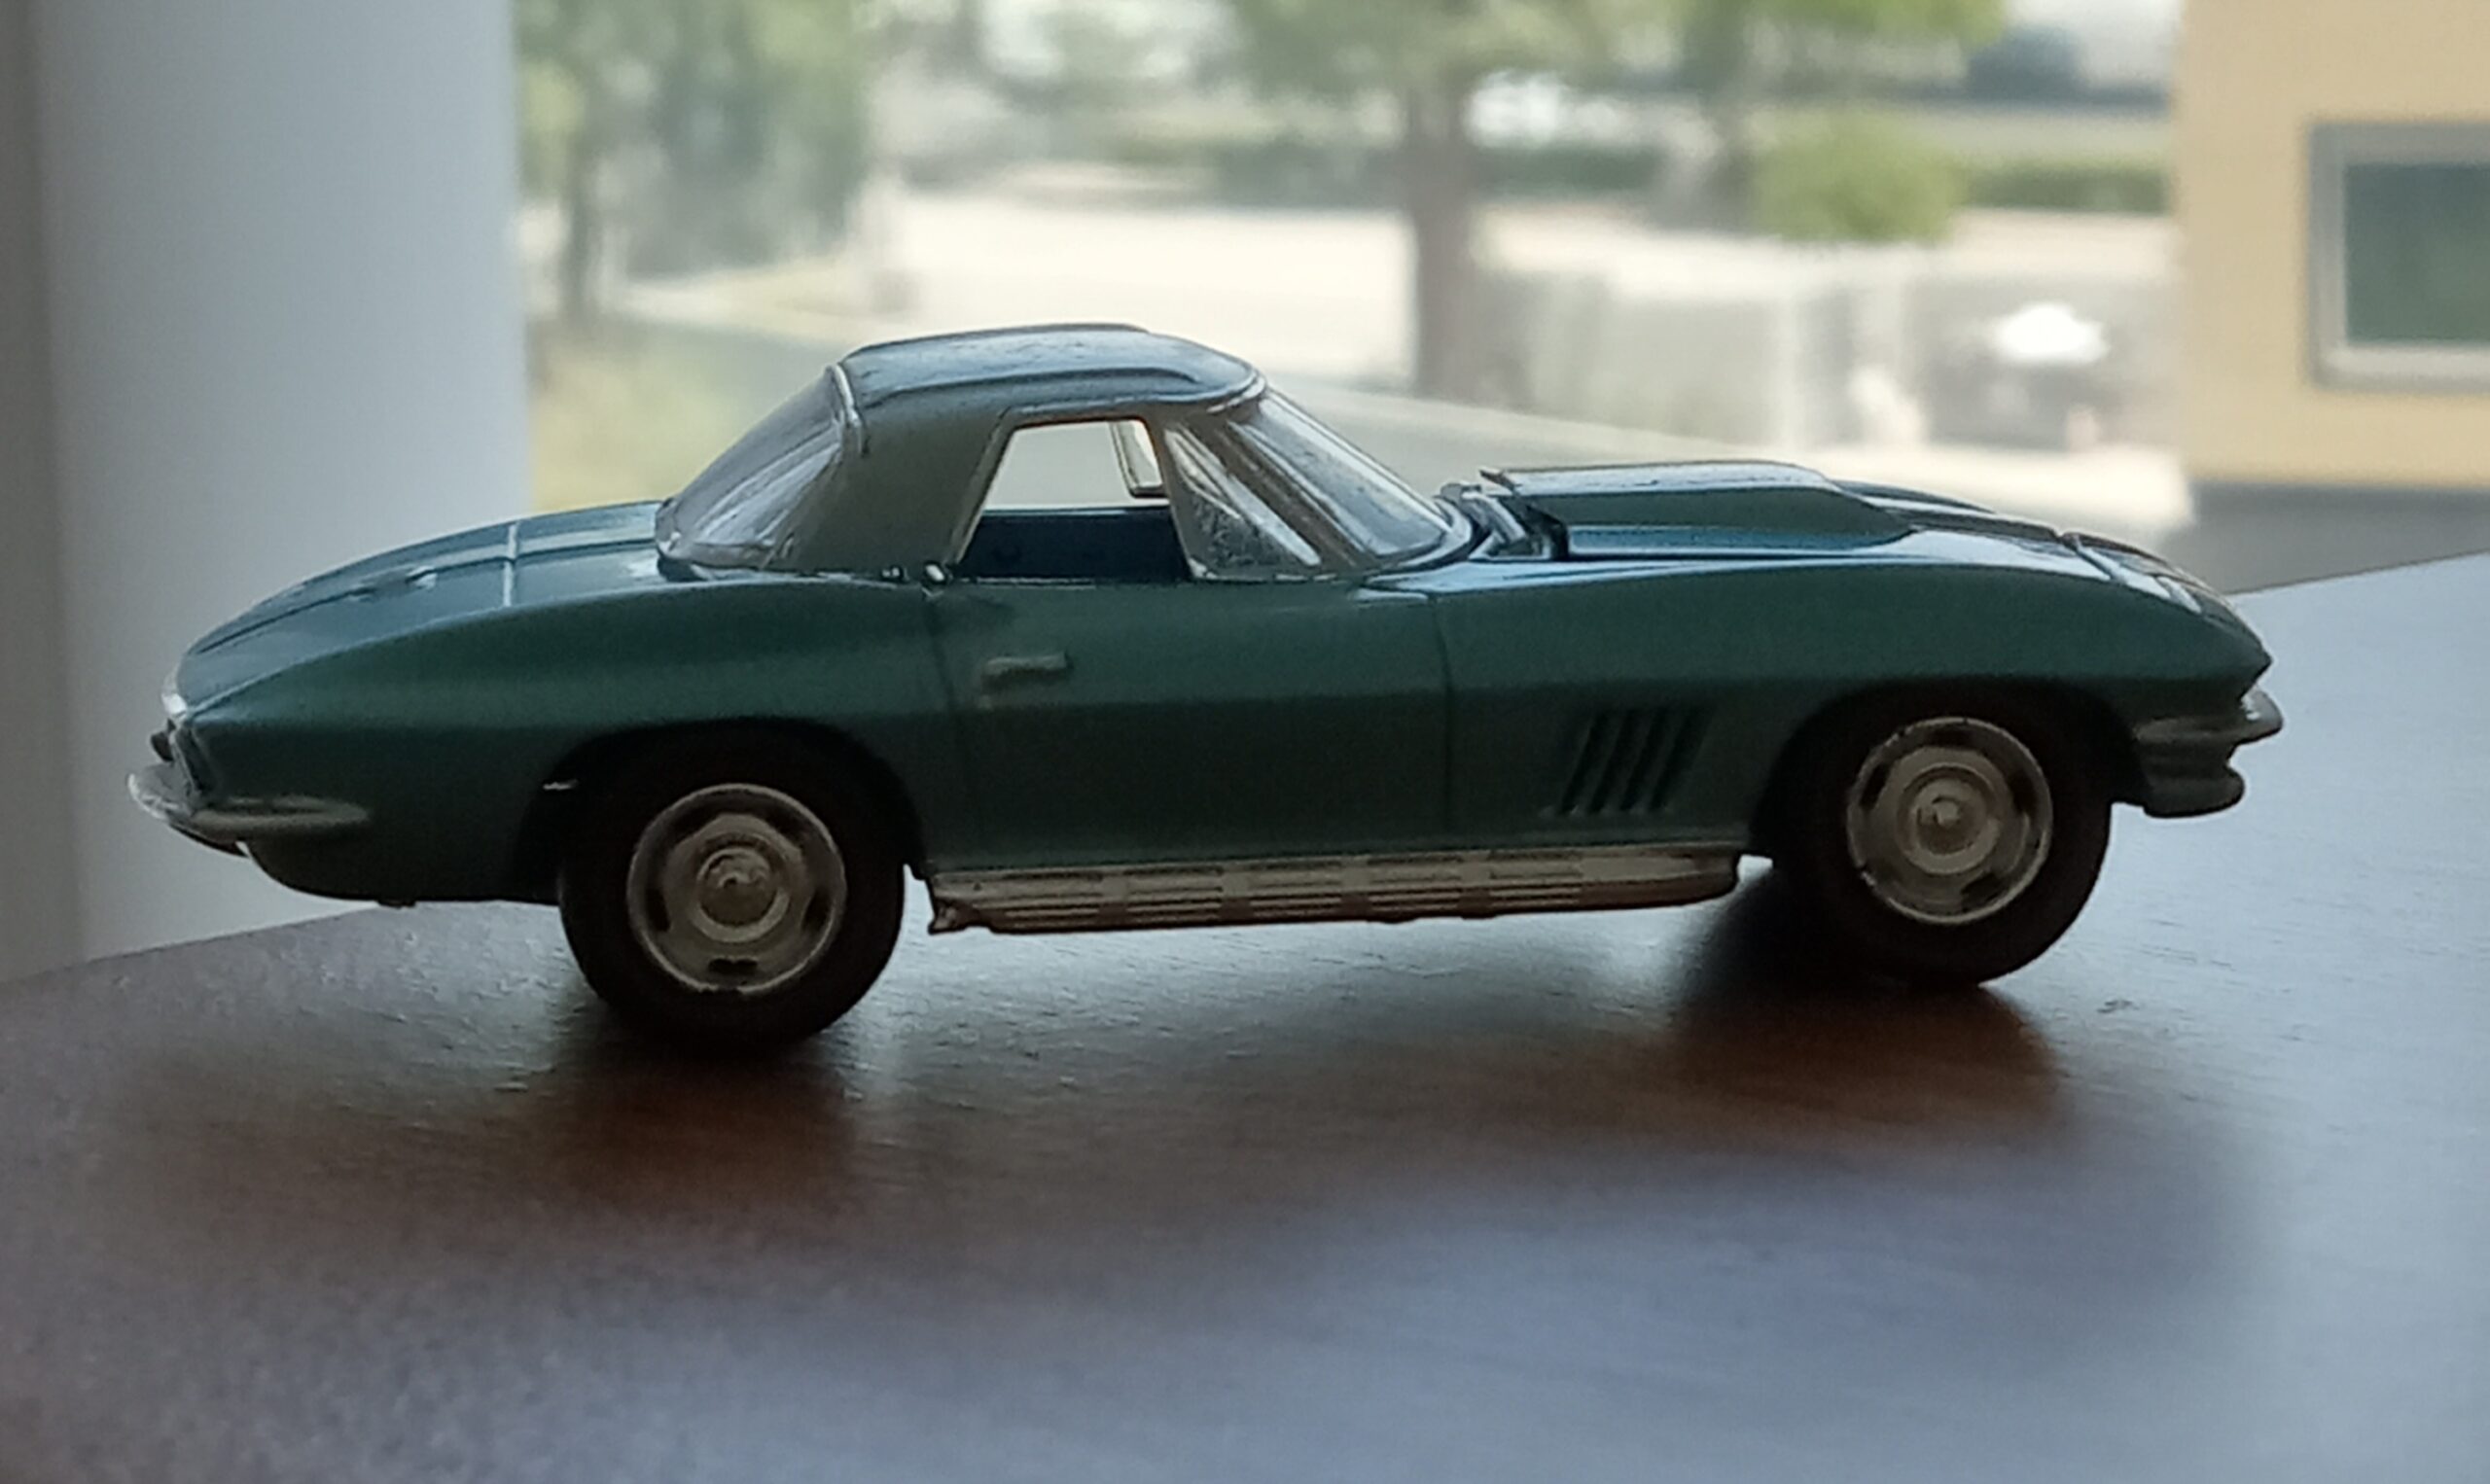
*設定資料:実車写真集ーーー(各色別)
#ライトメタリック:

(ハードトップは、後ろに向け
かなり下がってます!)
#バーガンディー:
(ラリーホイールカッコいいですね!)
#タキシード・ブラック:
(このアルミホイールは全然見つかりませんでした。泣)
*モデルの評価:グリーンライト社製, 1/64 1967年型コルベット・ロードスターの評価
それでは次に、
今回の4台のコルベットの改造、
すべてに使用しました、
グリーンライト社の
メタリック・ブルーのロードスターにつての
私なりの評価を書いておきたいです。
(イーベイで2個見つけることが出来ました。
青のソフトトップ版です。)
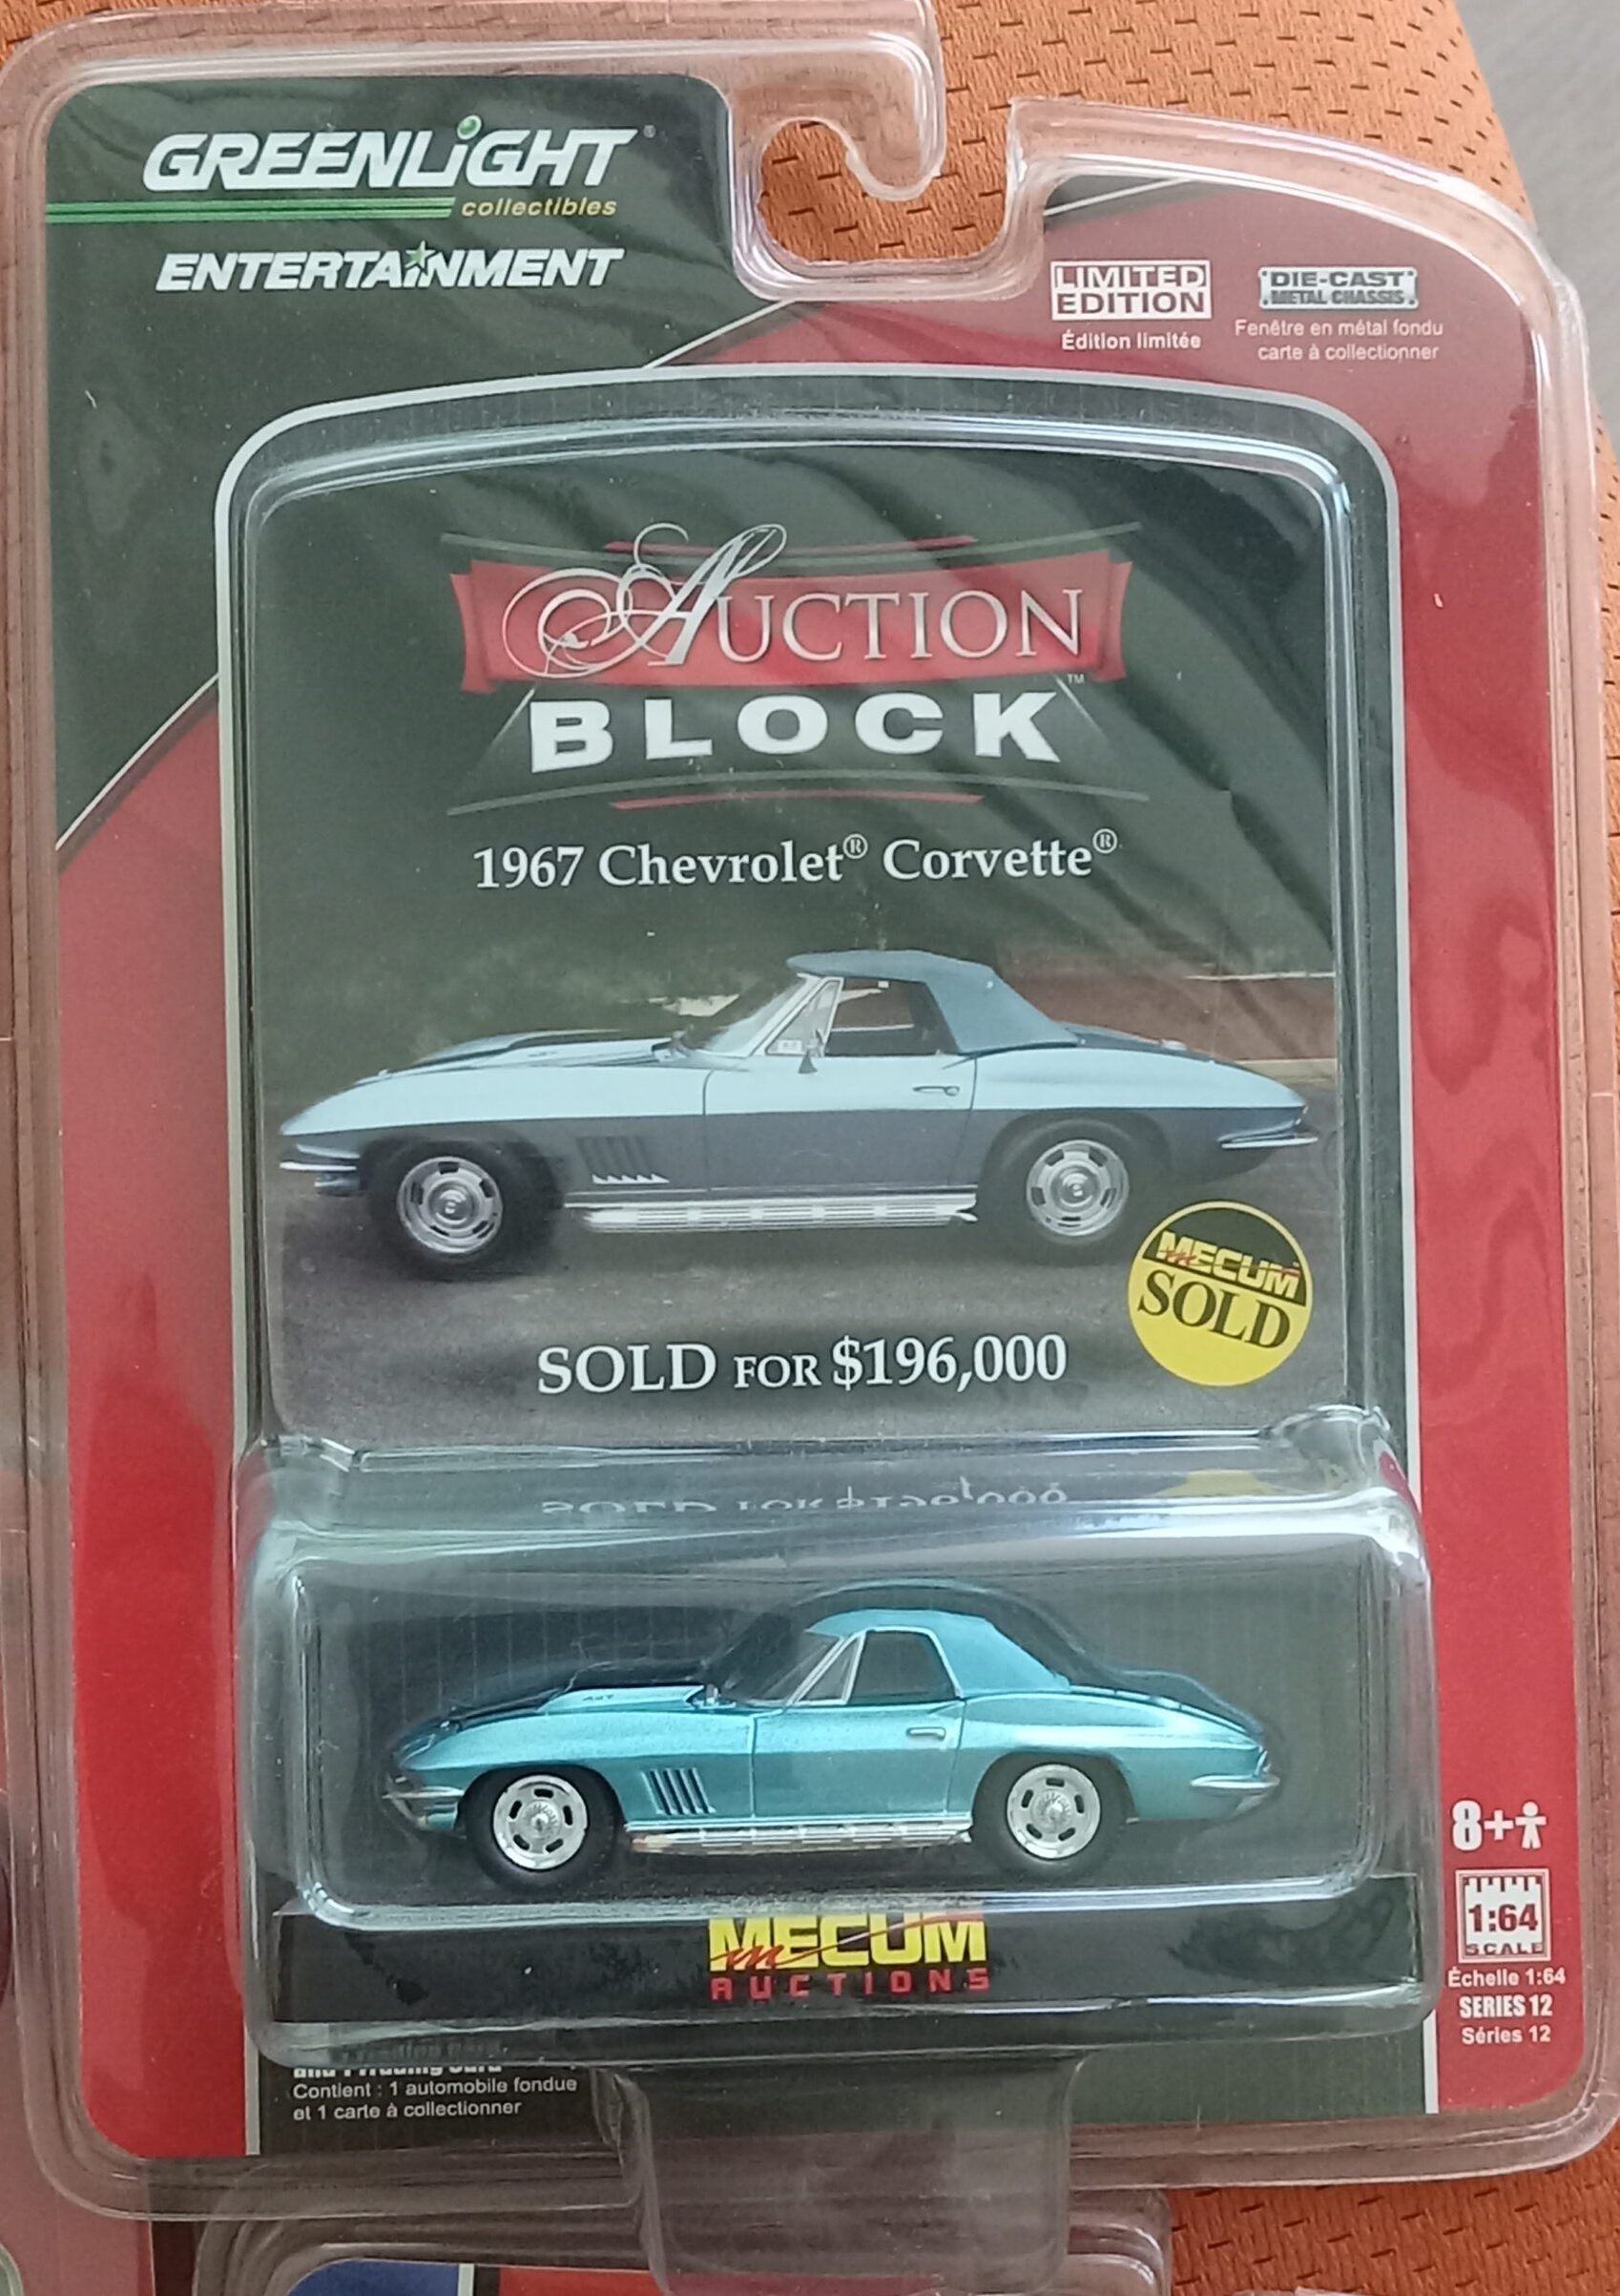
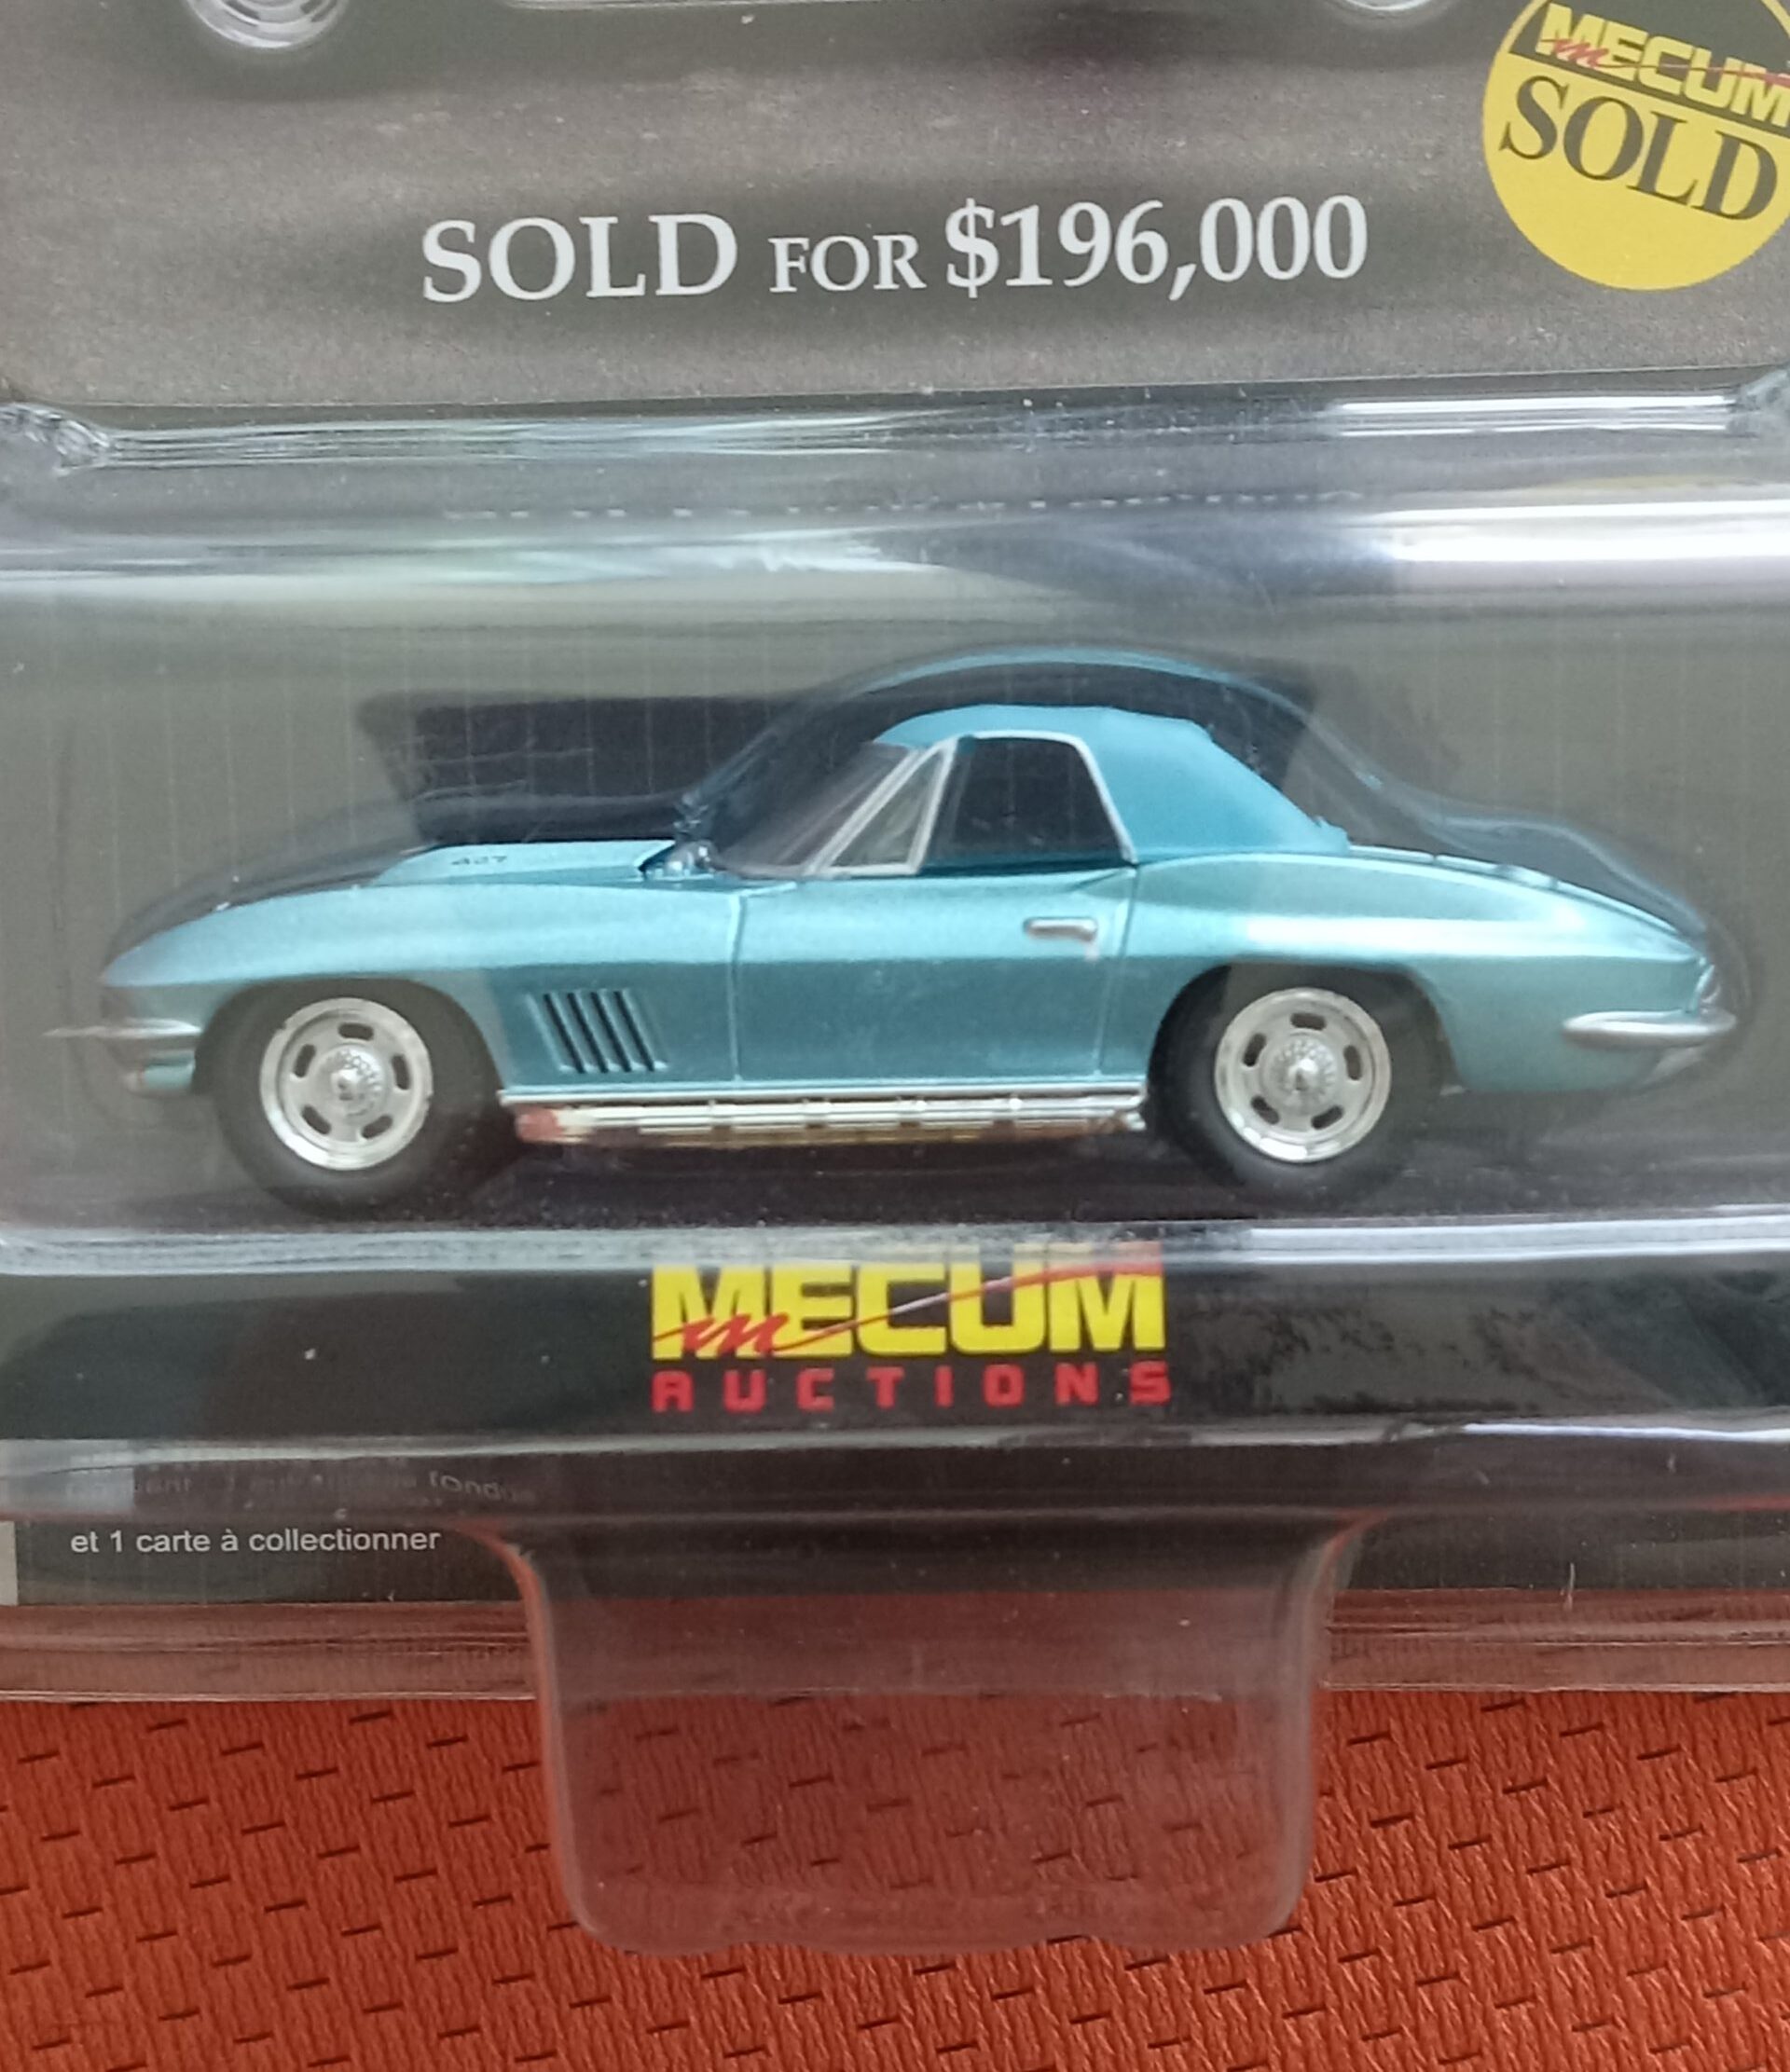
グリーンライト社から2007年に発売された金型を使った派生モデルで、
『メカム』オークションで高額落札された実車を正確にモデル化しているようで、
20010年に発売されました。
#美点と弱点:
美点:
*実車の持つ筋肉質なフェンダー周りを微かに強調したボディー造形
*67年型のオープンモデルとしては、最新作で、モールド、インテリア、筋彫り、タンポ・プリントなど、細部まで素晴らしい出来栄え
*珍しいカラーチョイスを正確に再現
残念な点:
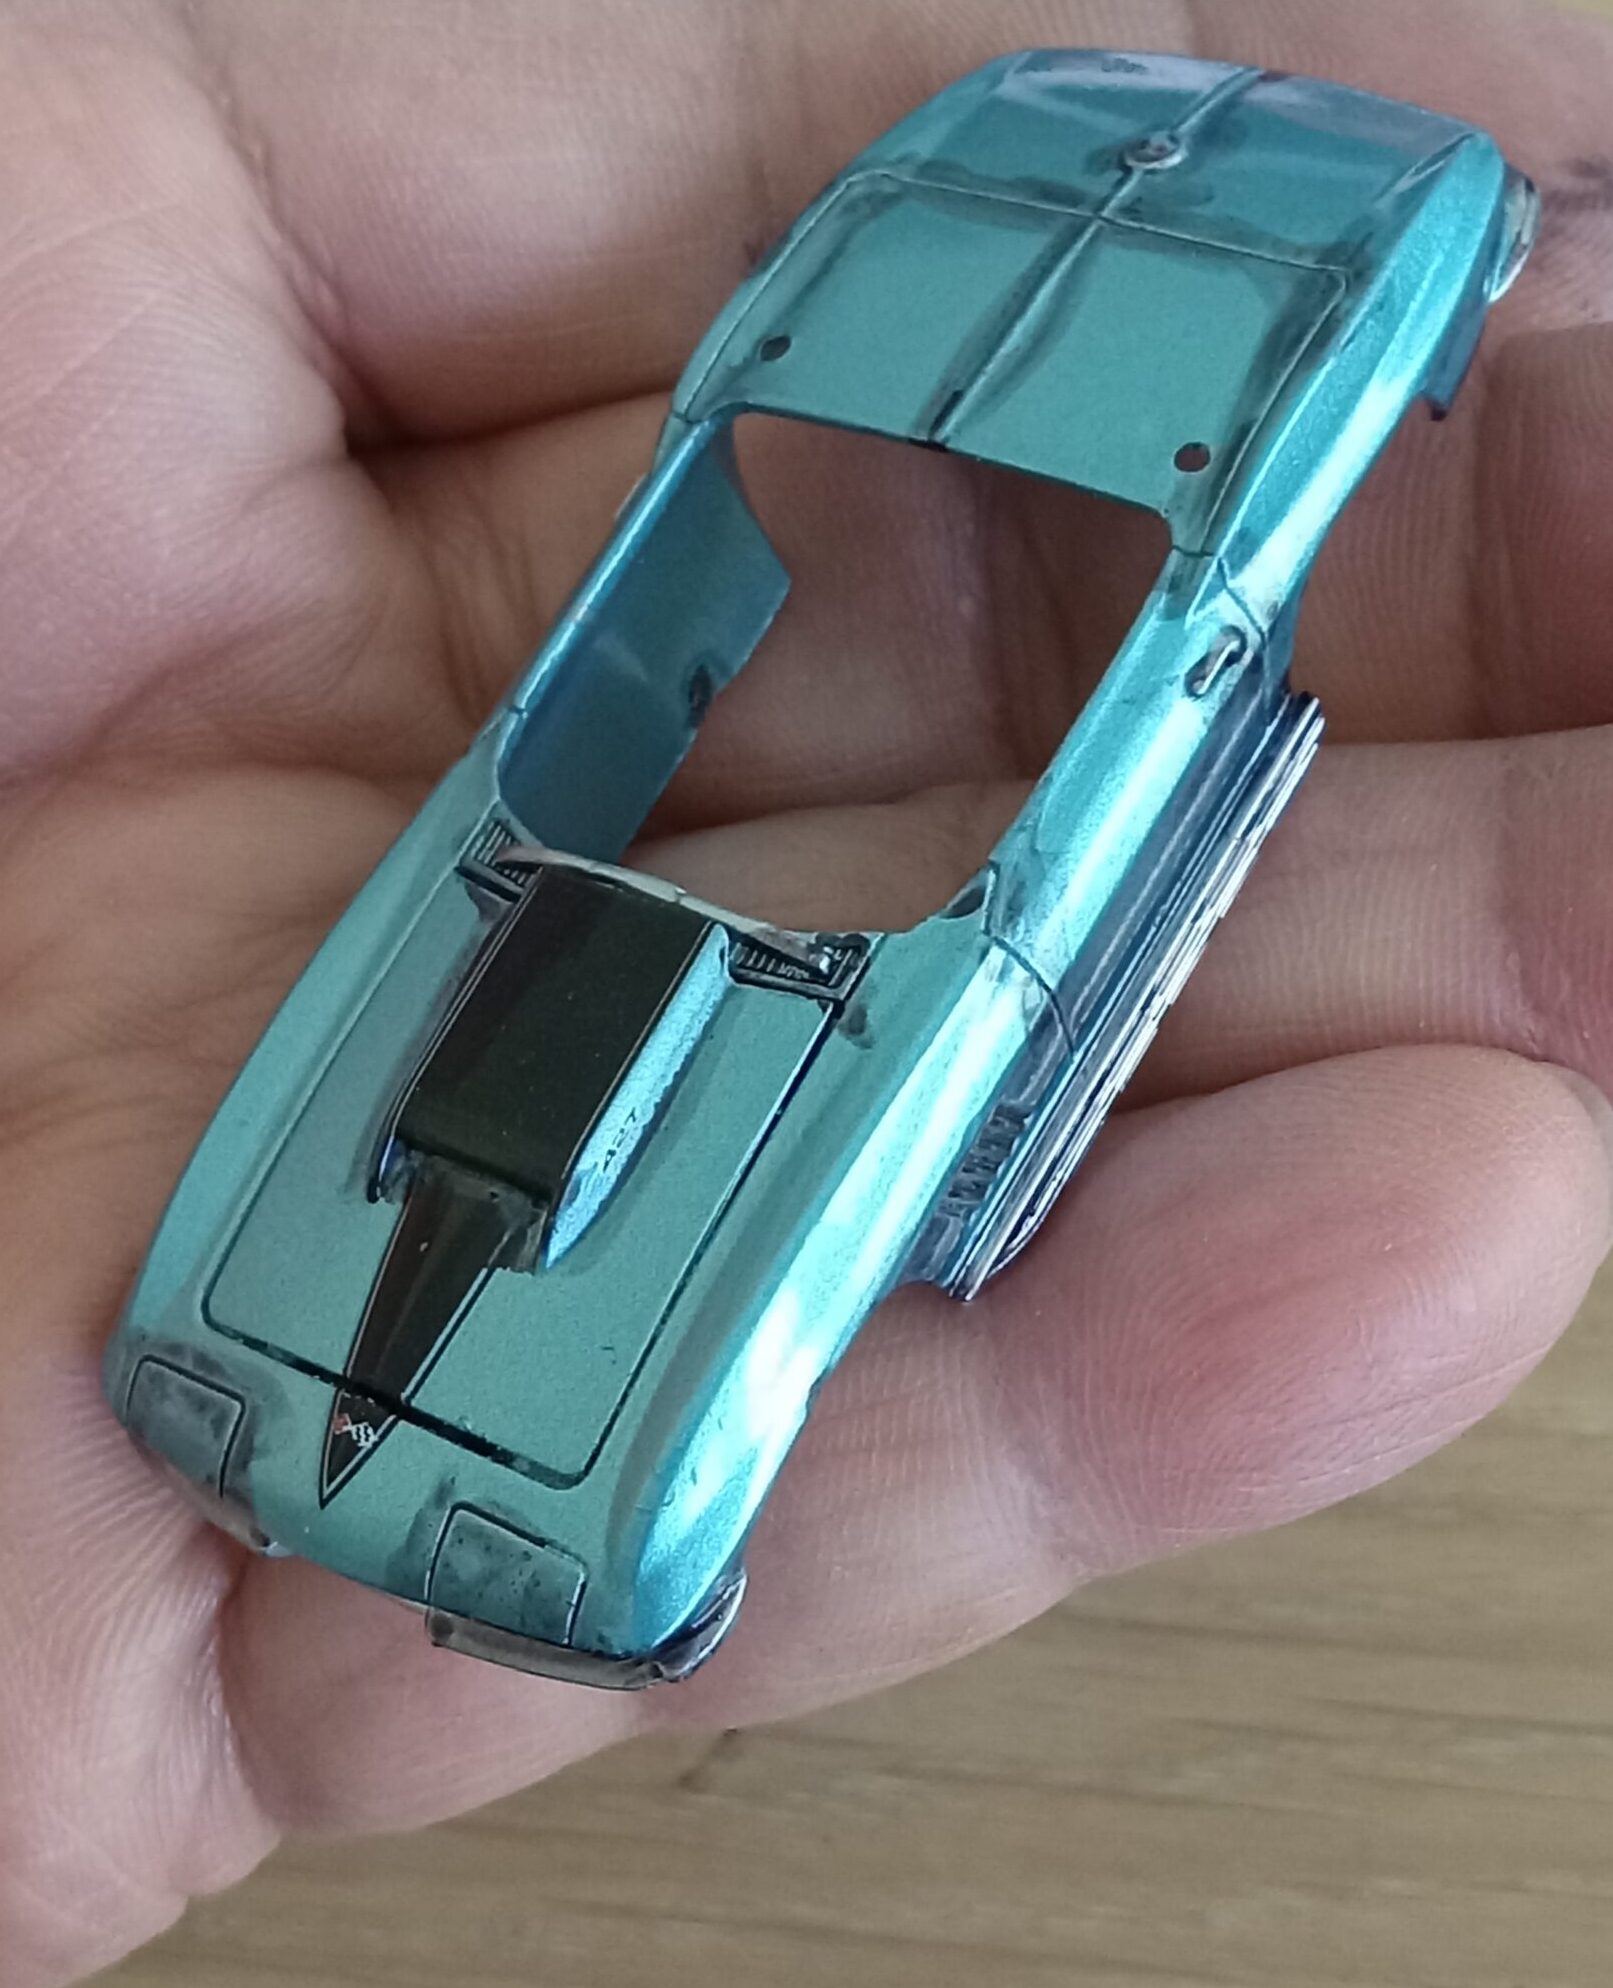
*タイヤサイズが少し大きめで、全体のイメージが少し玩具ぽく見えるところ
*塗装クオリティーが雑で、艶がなく、埃が付着している部分があること
*ボディー後端部分が少し『尻下がり気味』に見えるところ
*改造プロジェクト:4台分、実況生中継!!
それでは、
4台分(x6バージョン)に膨れ上がりました
改造記事、行ってみ す!!
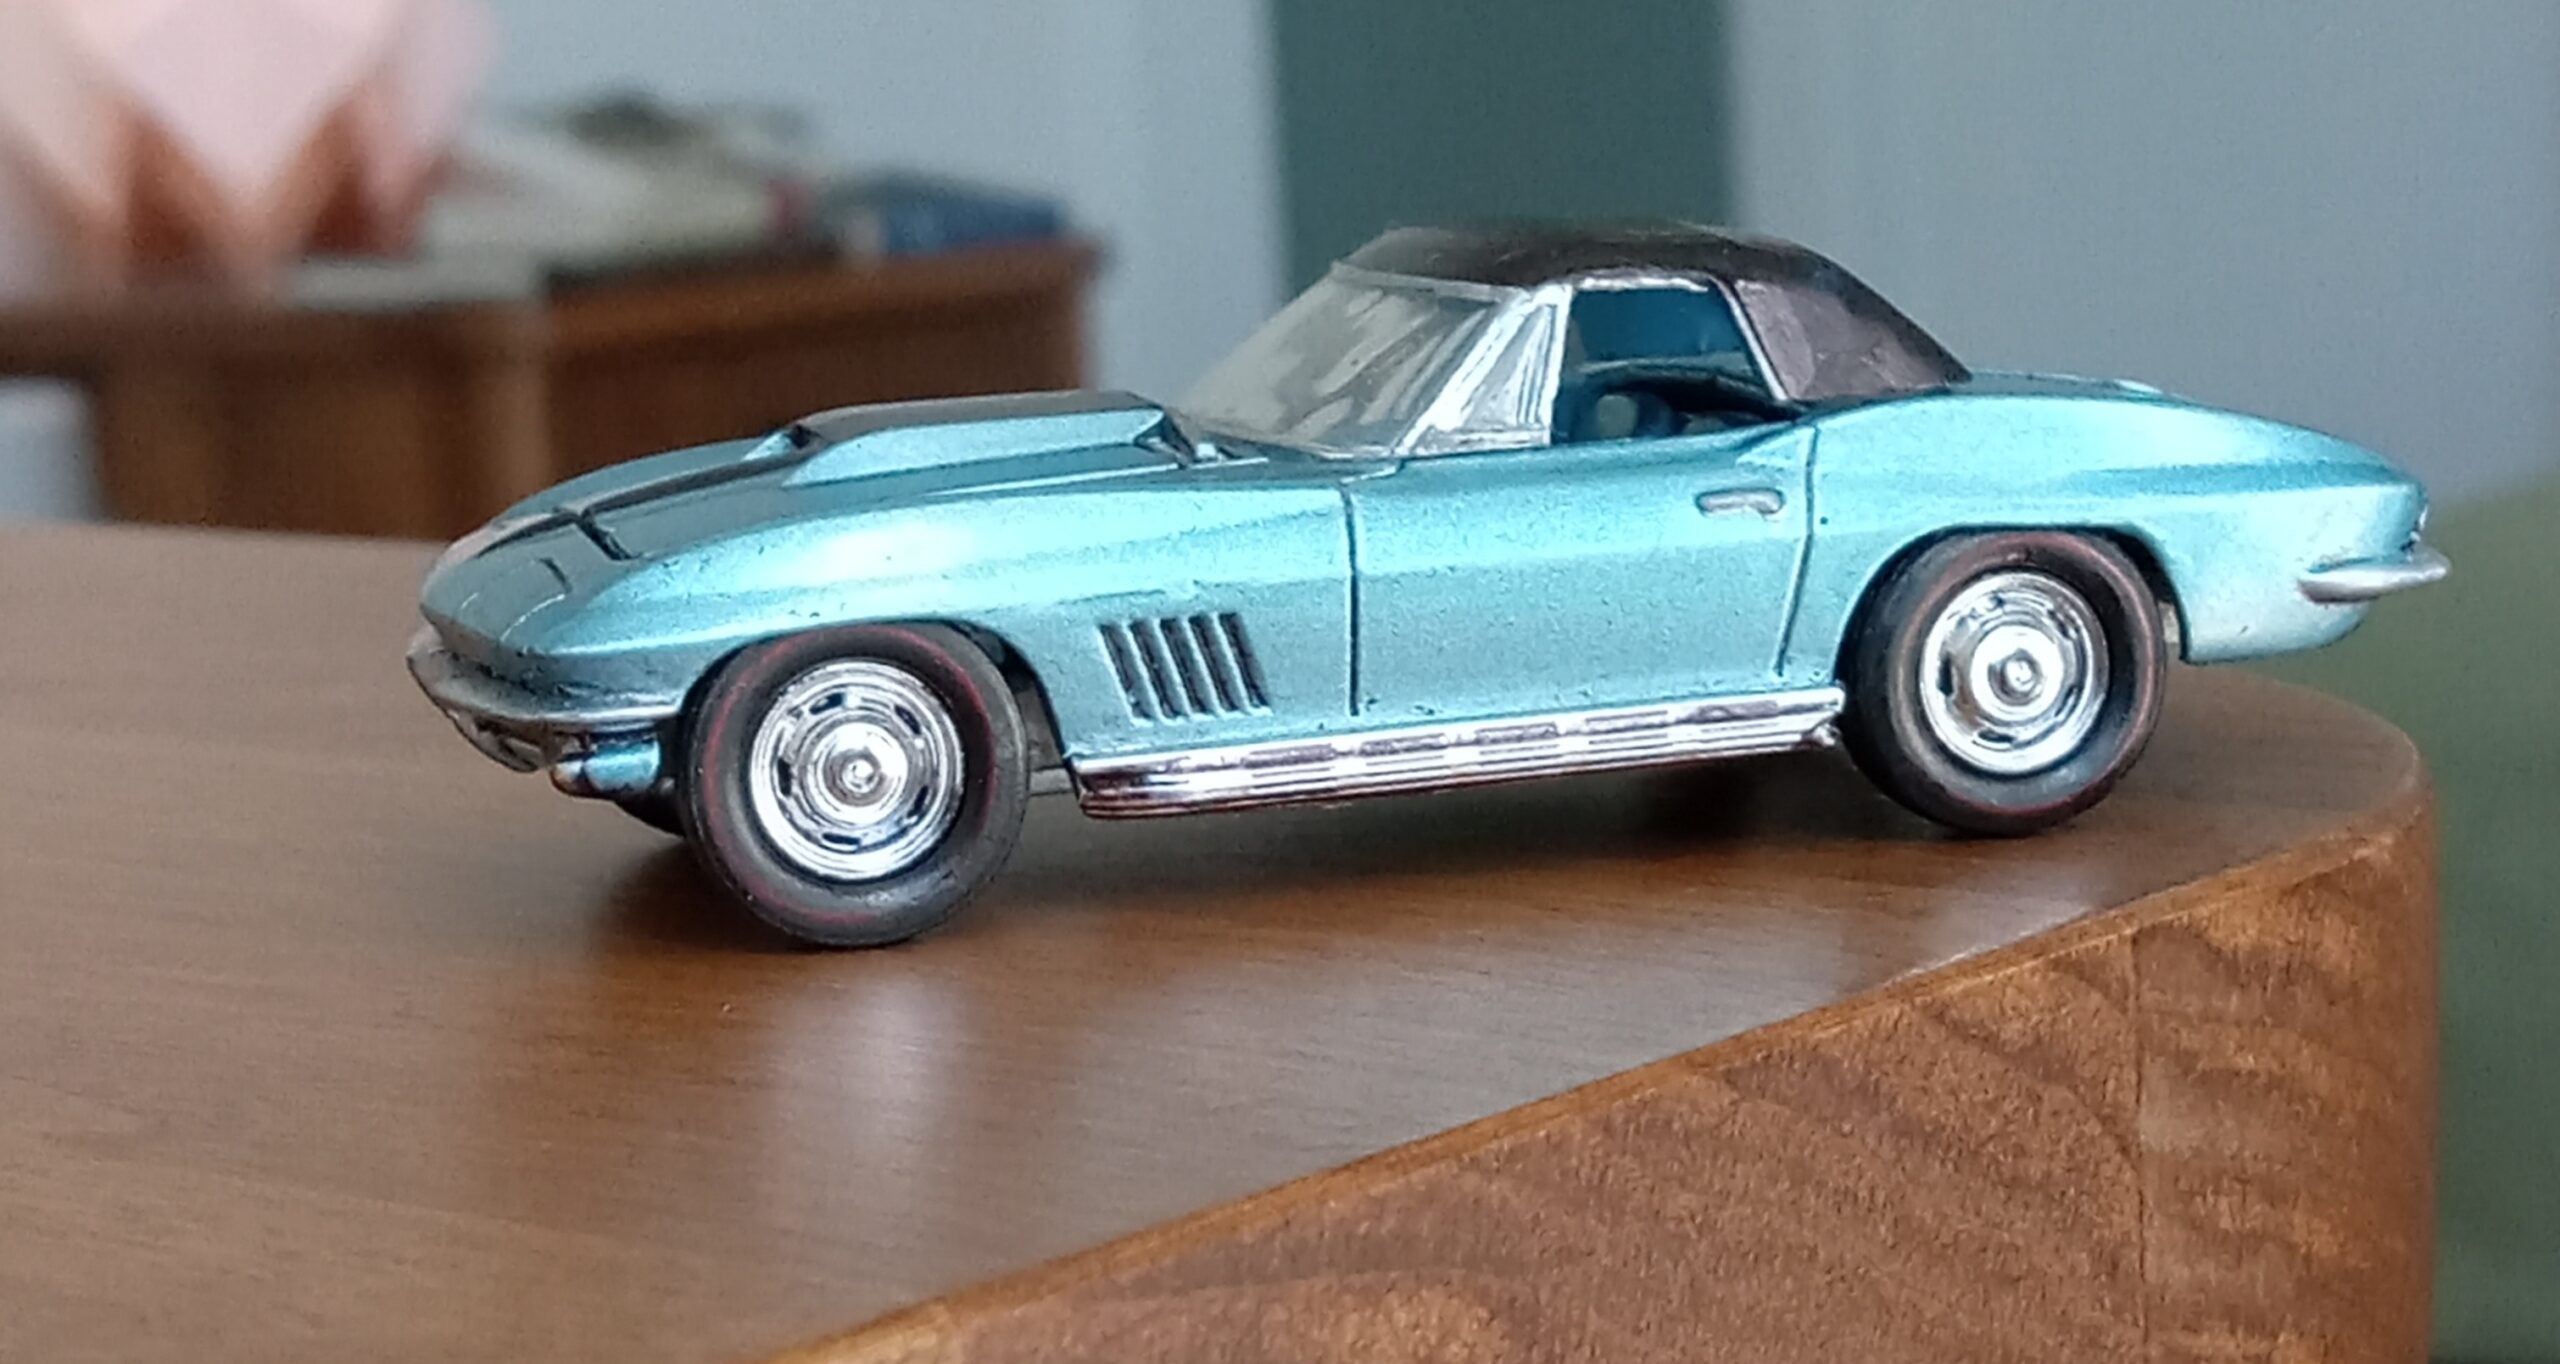
1:ライトブルー・メタリック、黒の幌付き版
(グリーンライトの’67青メタ・ボディー+M2社製青グレー’67のホイールとタイヤ移植)
(タイヤ・サイズの調整と、幌のサイズダウン
&黒塗装が主な改造ポイントとなります。)
#改造手順:
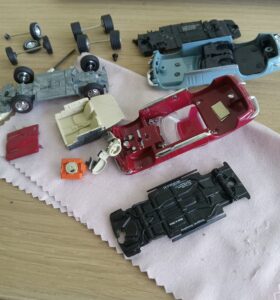
分解過程:
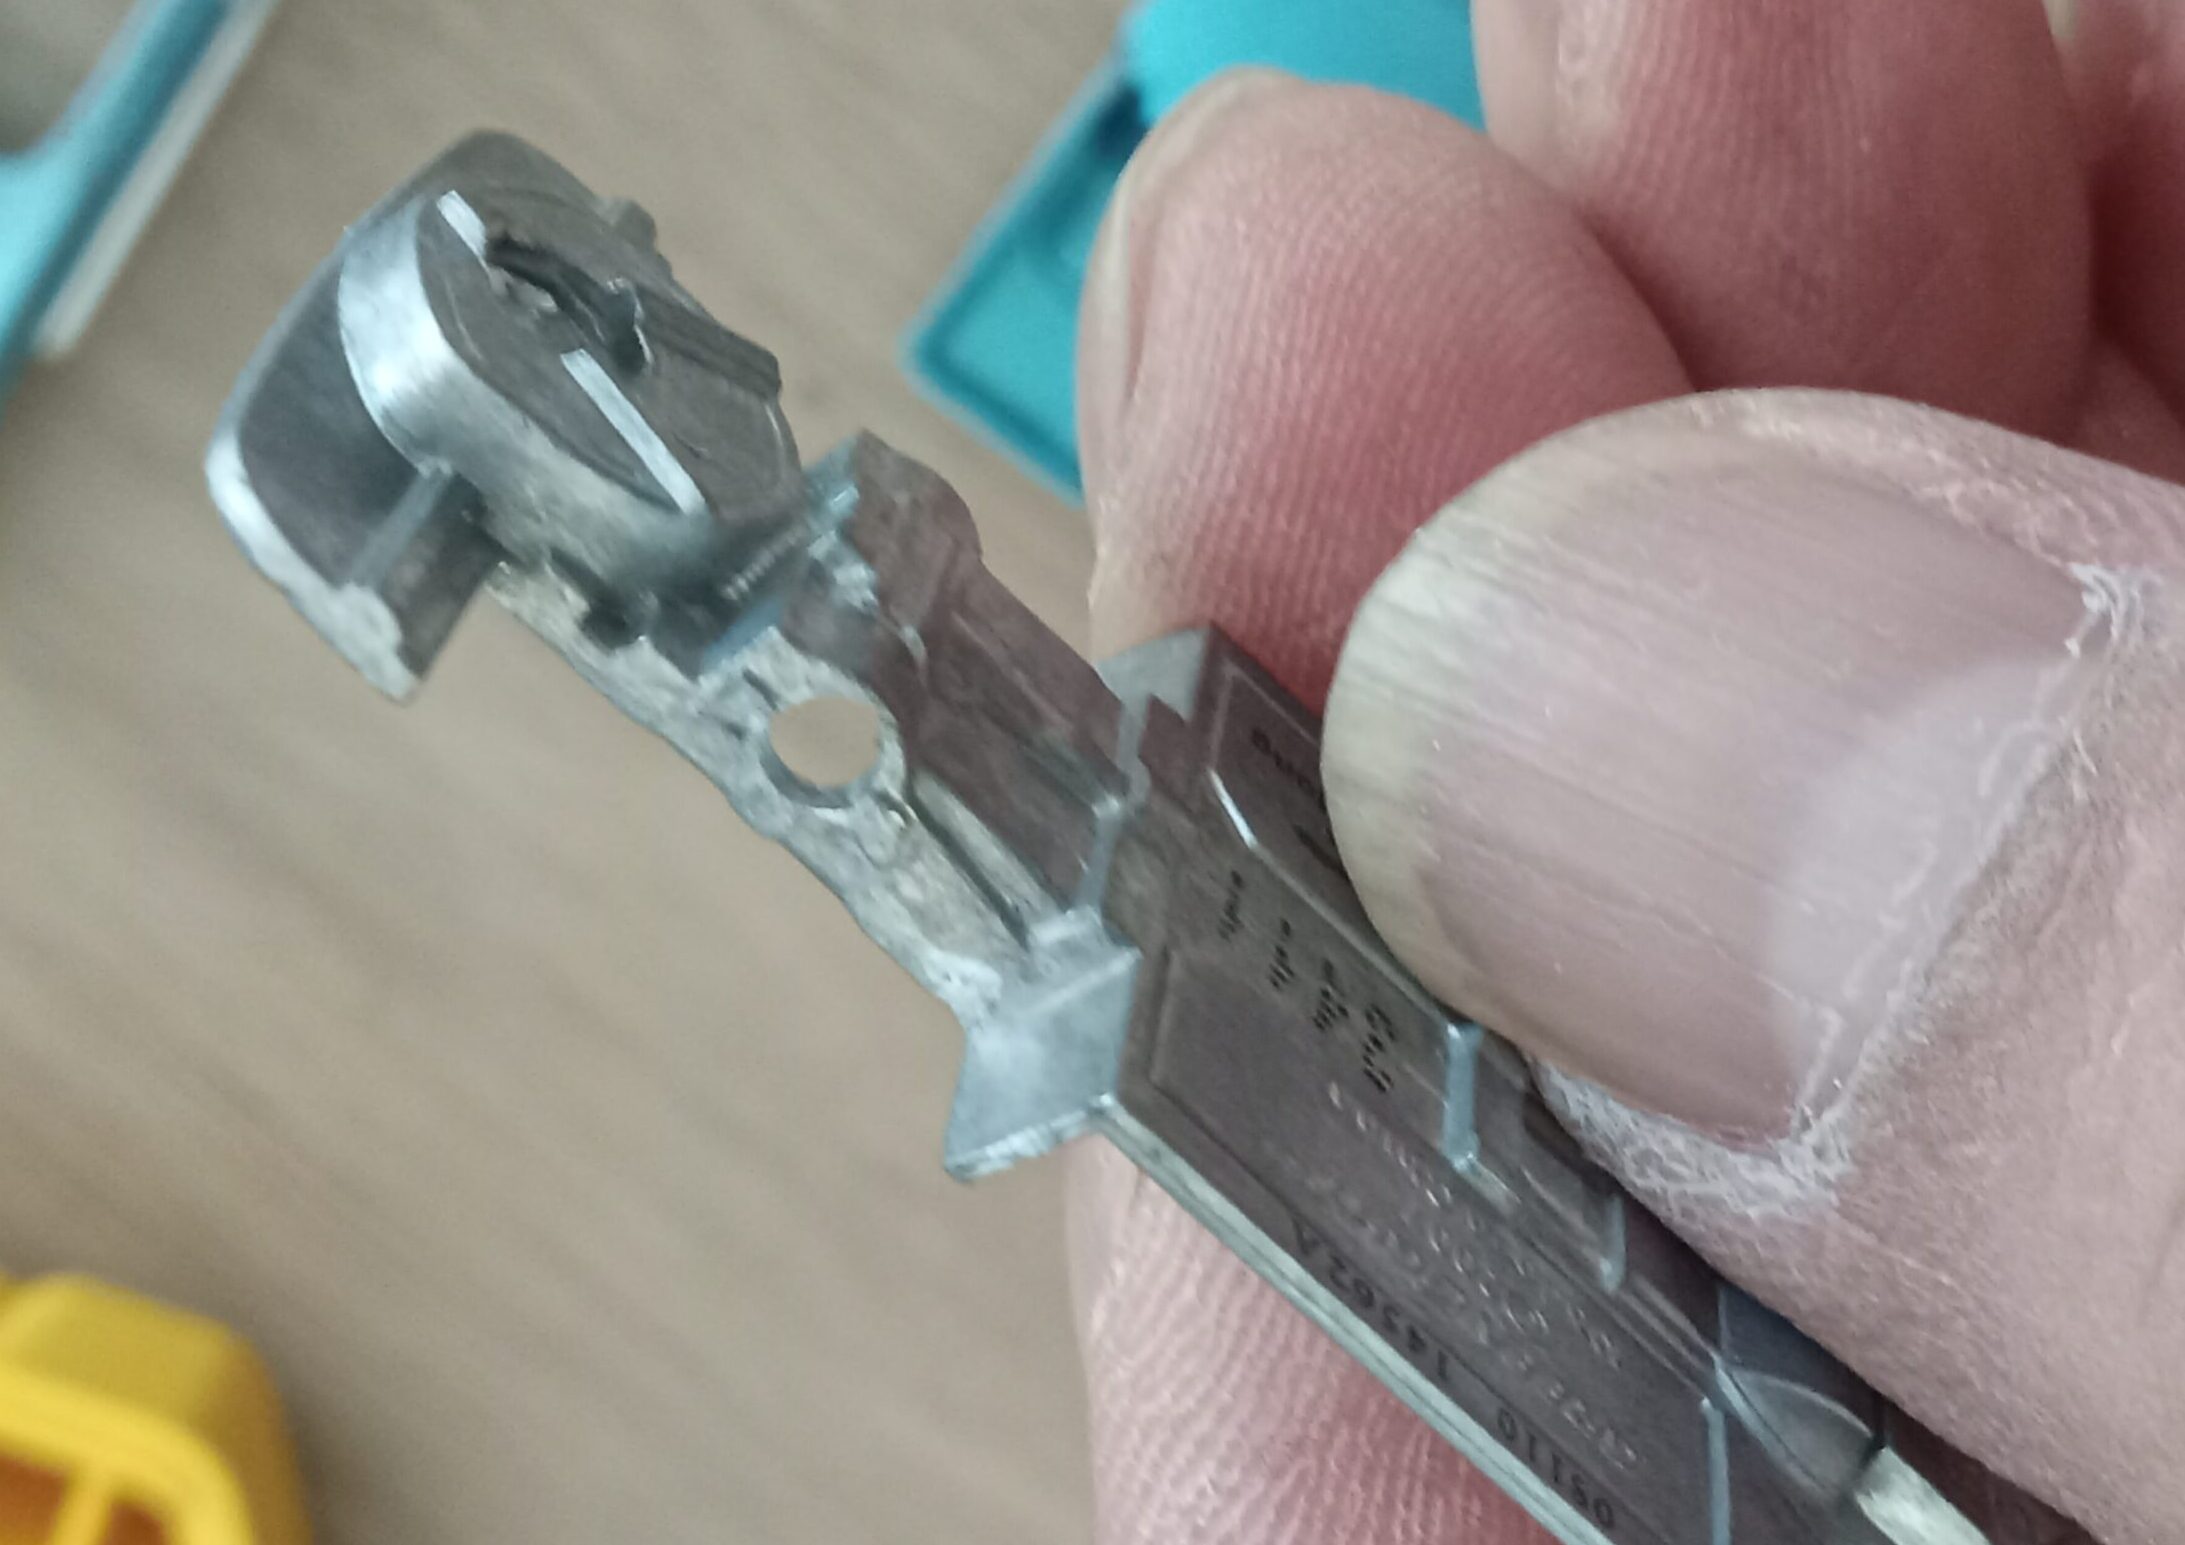
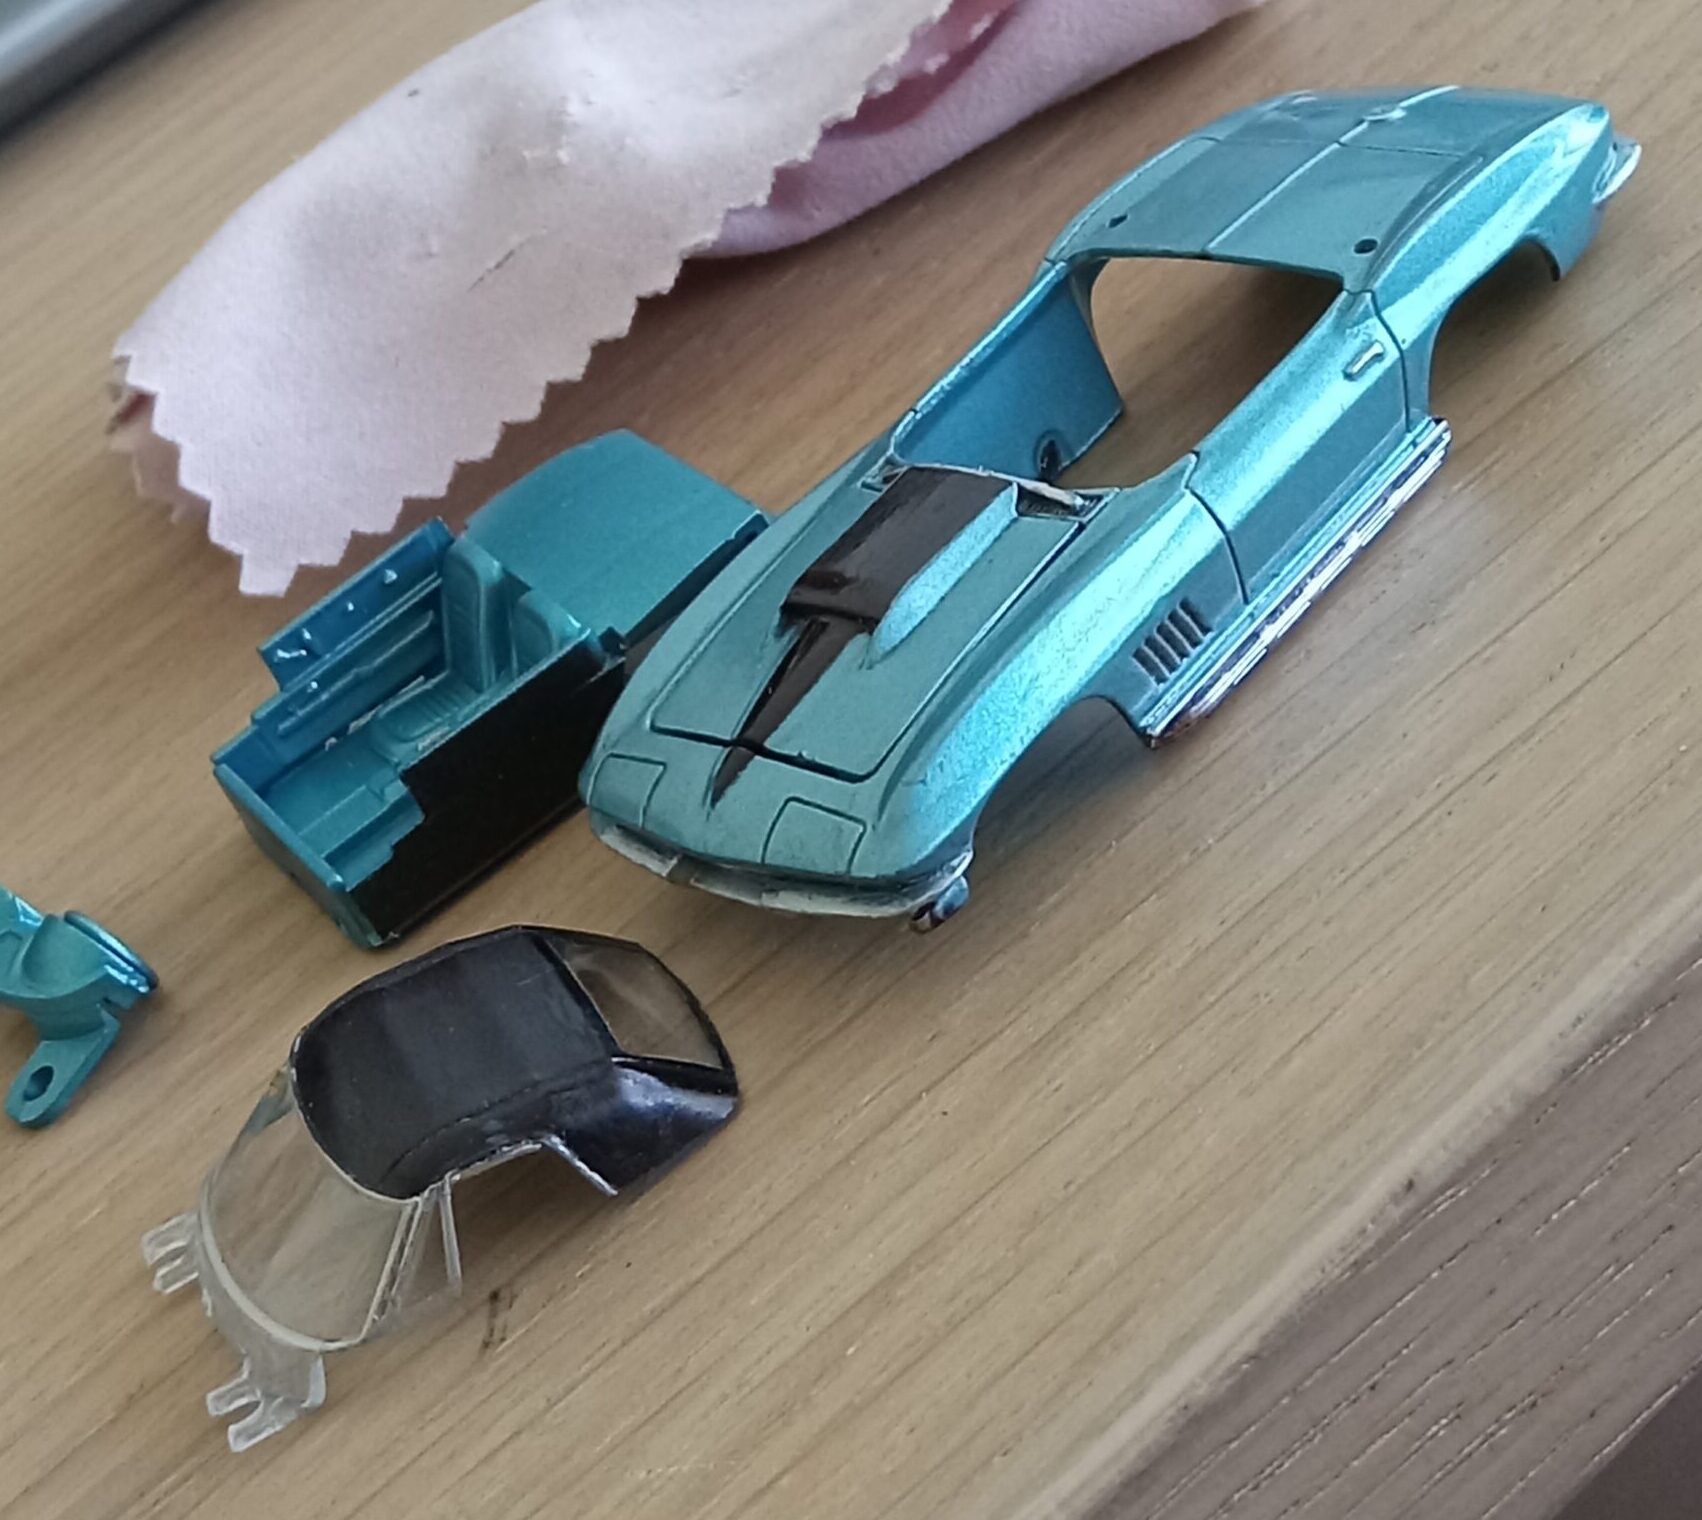
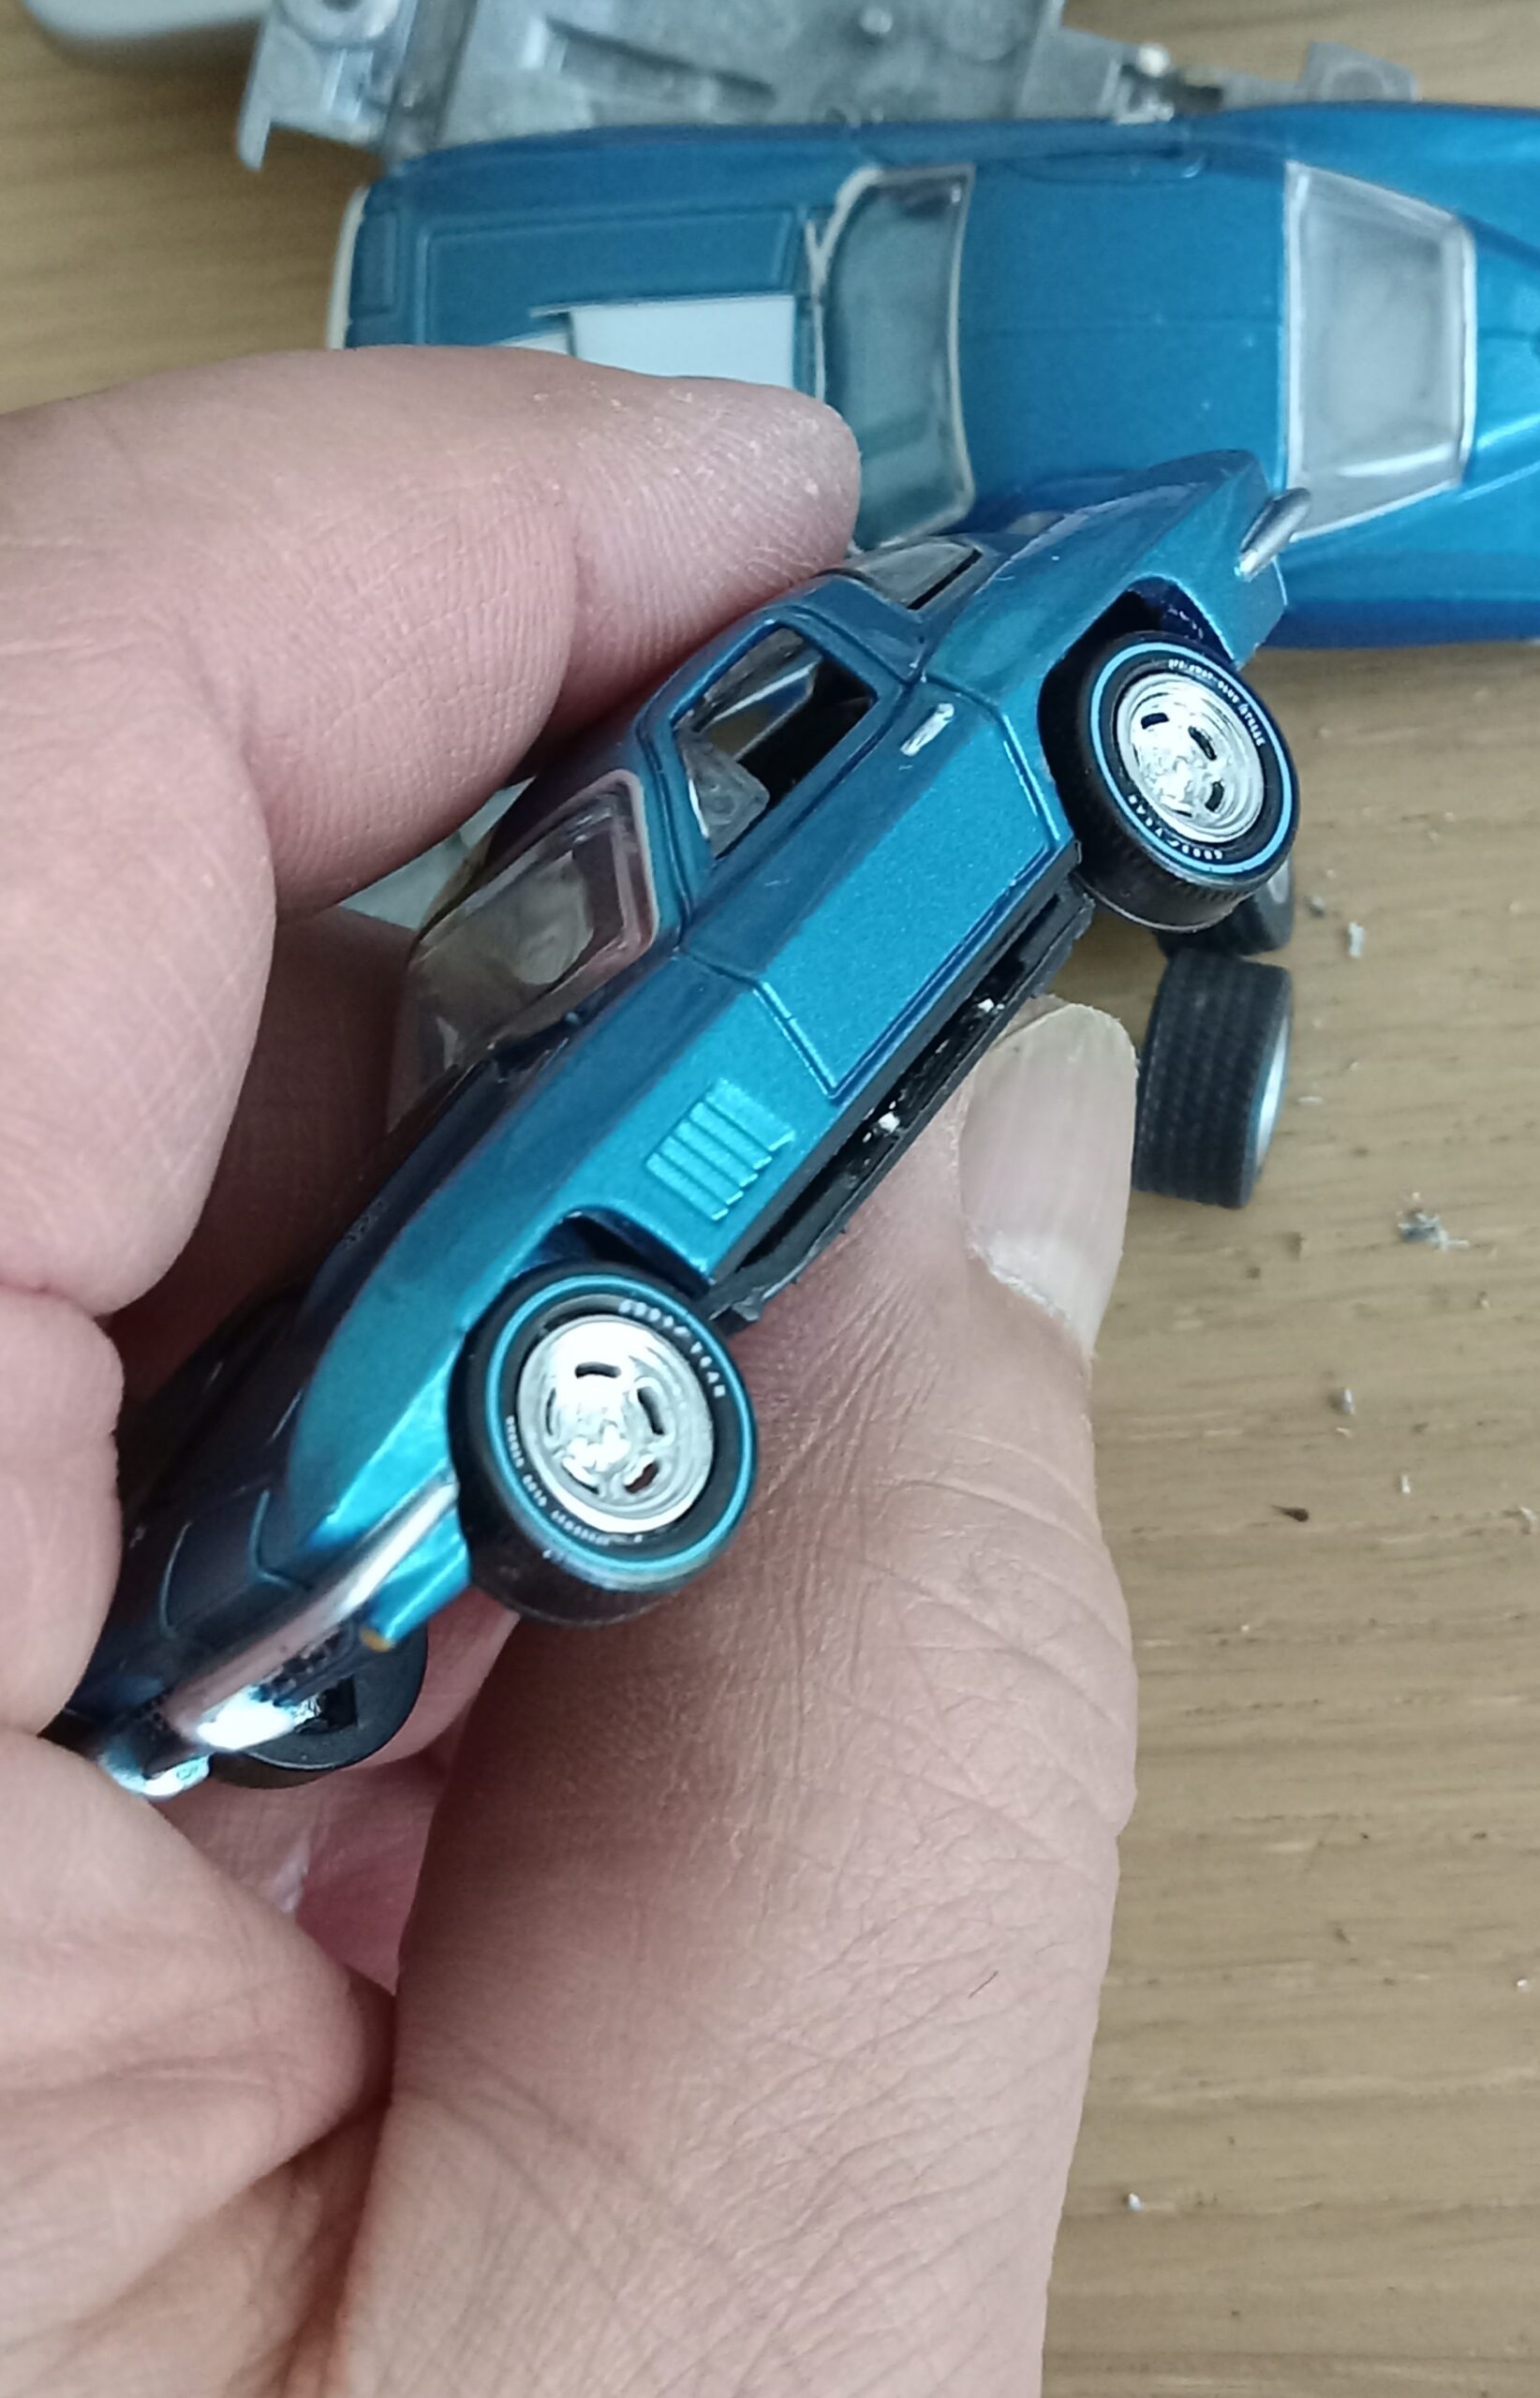
1:電動ドリルで、シャーシのカシメ留めを外し、ボディーと分離したのち、タイヤ・ホイールをペンチでこじ開けるようにして外す。
2:内装パーツ、風防・幌パーツを2点のカシメ留めを外して、傷つけないように分解
タイヤ・スタンス調整:
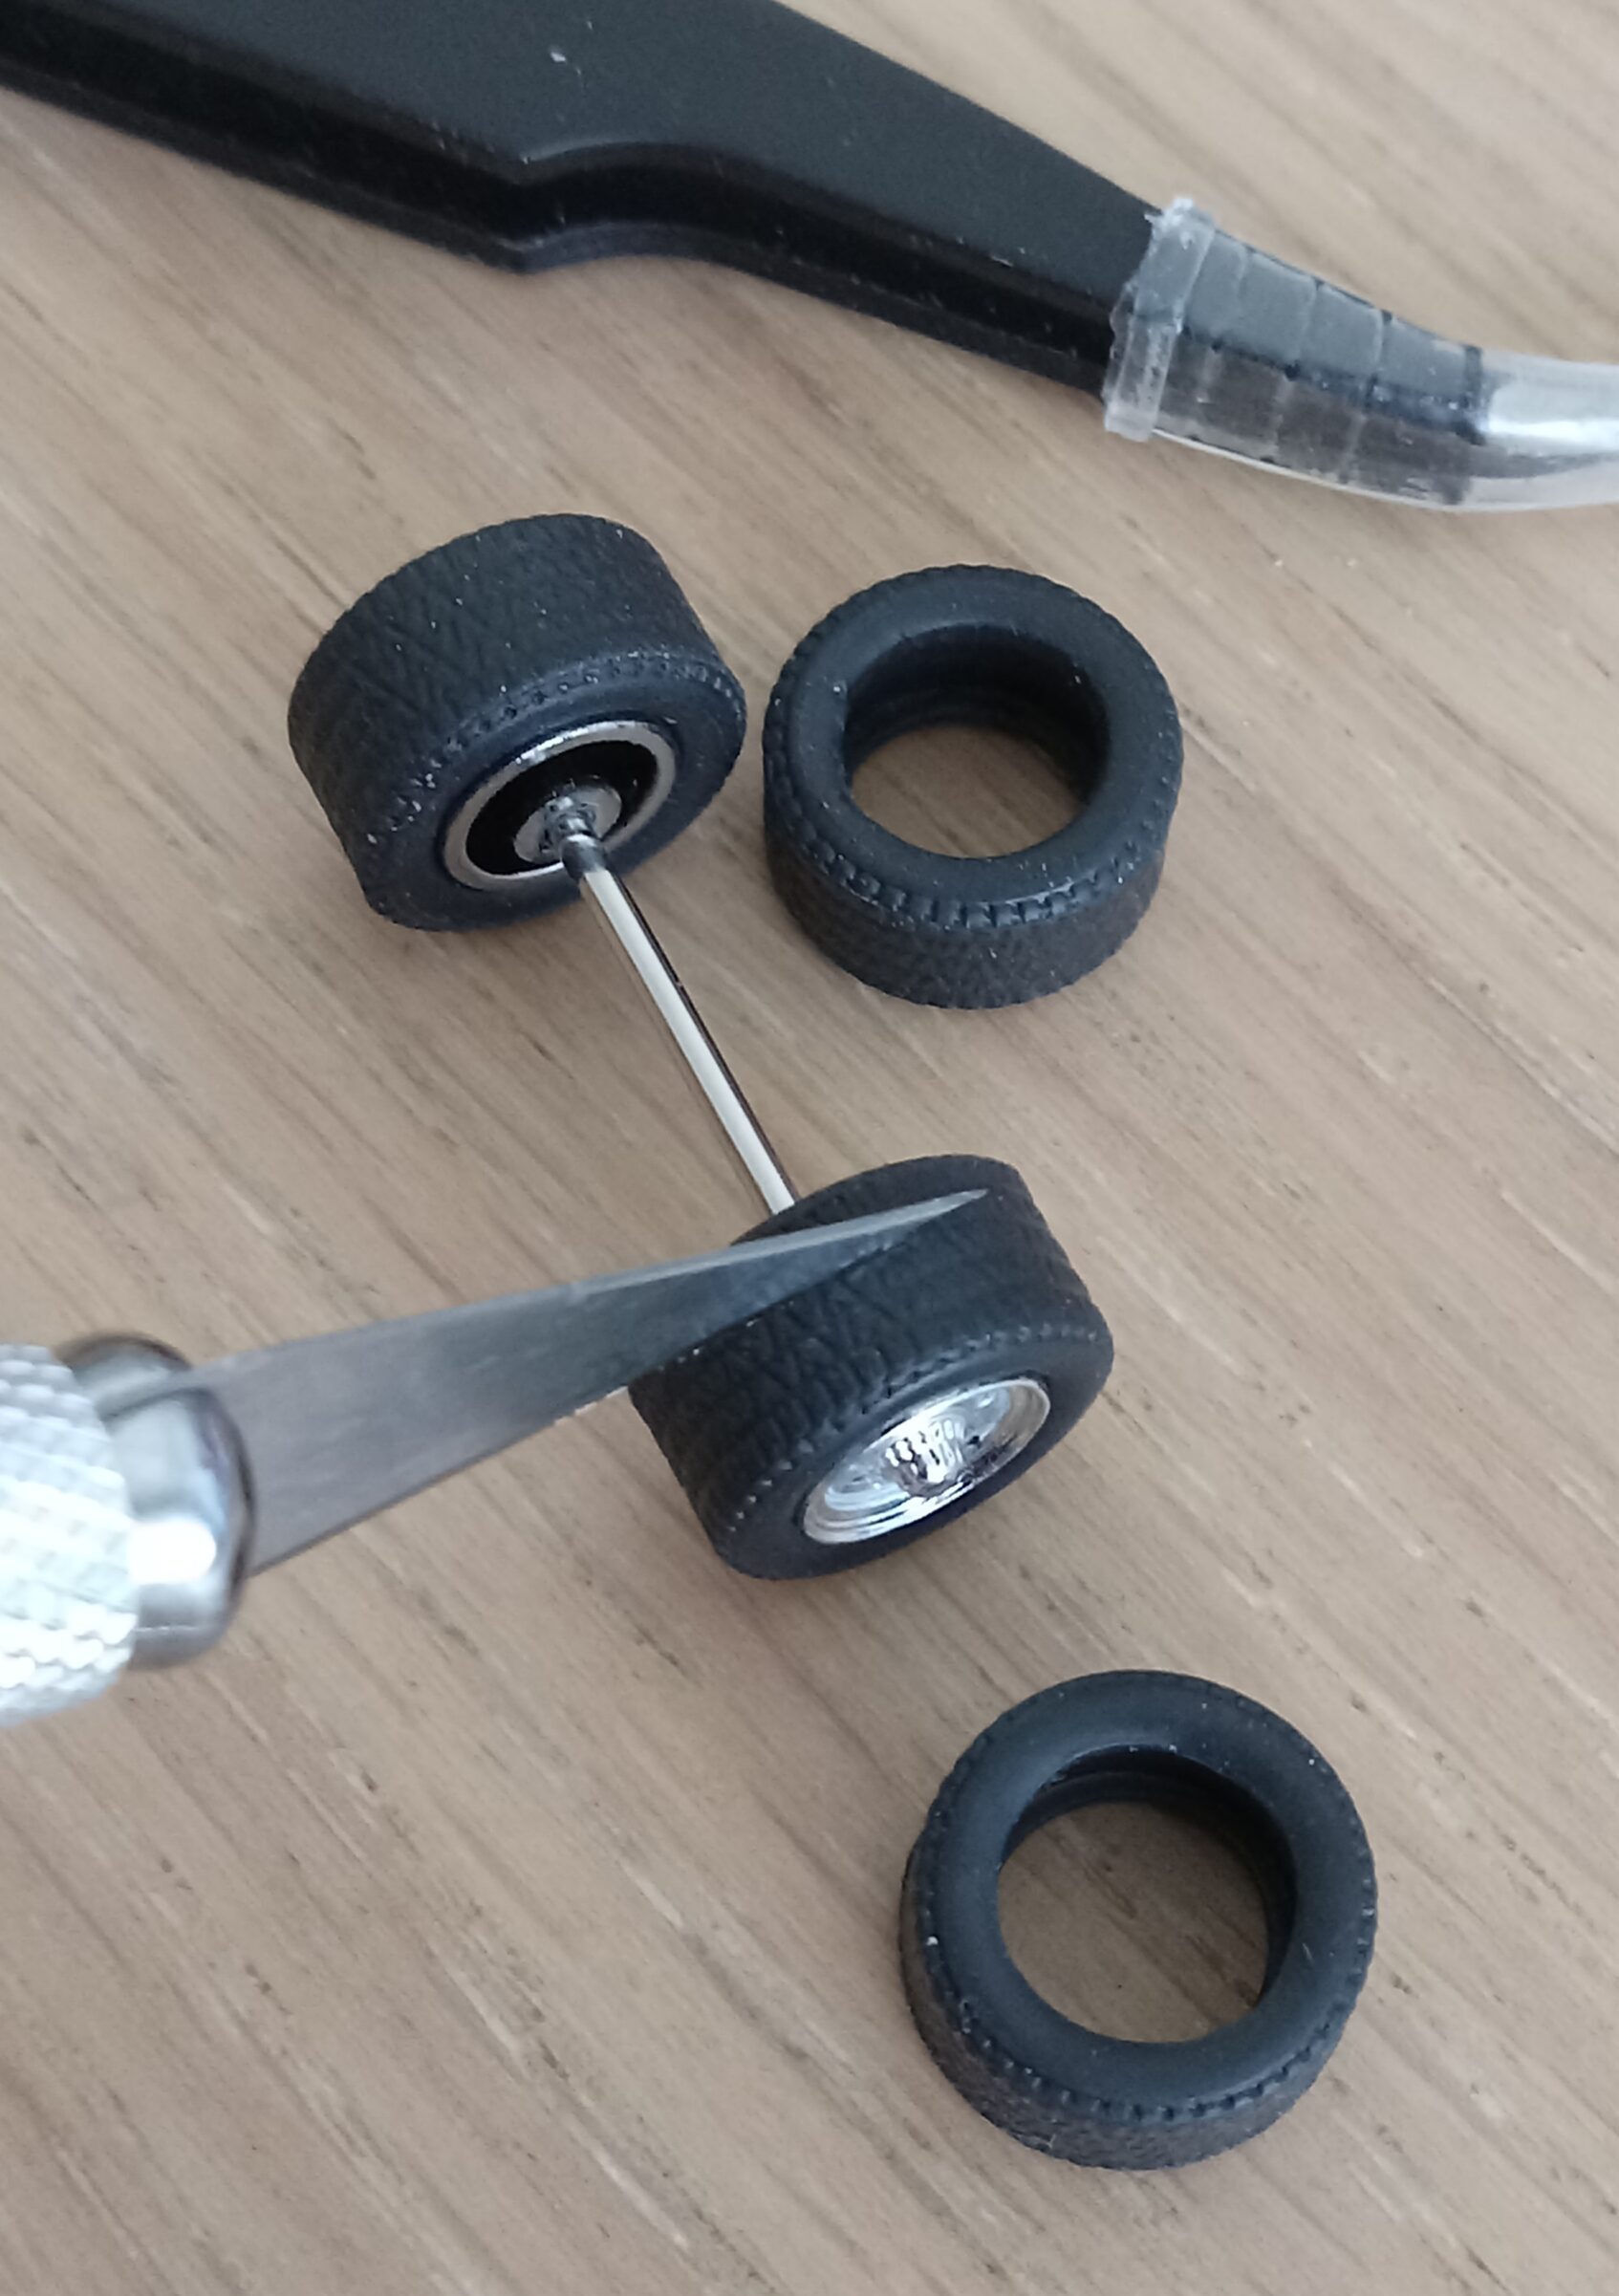
3:タイヤをナイフで、3分の2の太さに切断後シャフトに戻しトラック幅を調節
4:シャーシ側の車軸受けの穴をドリルで大きくして、『シャフトを通してタイヤをつけて仮組』を何度も繰り返し、車高/スタンスを調節する。
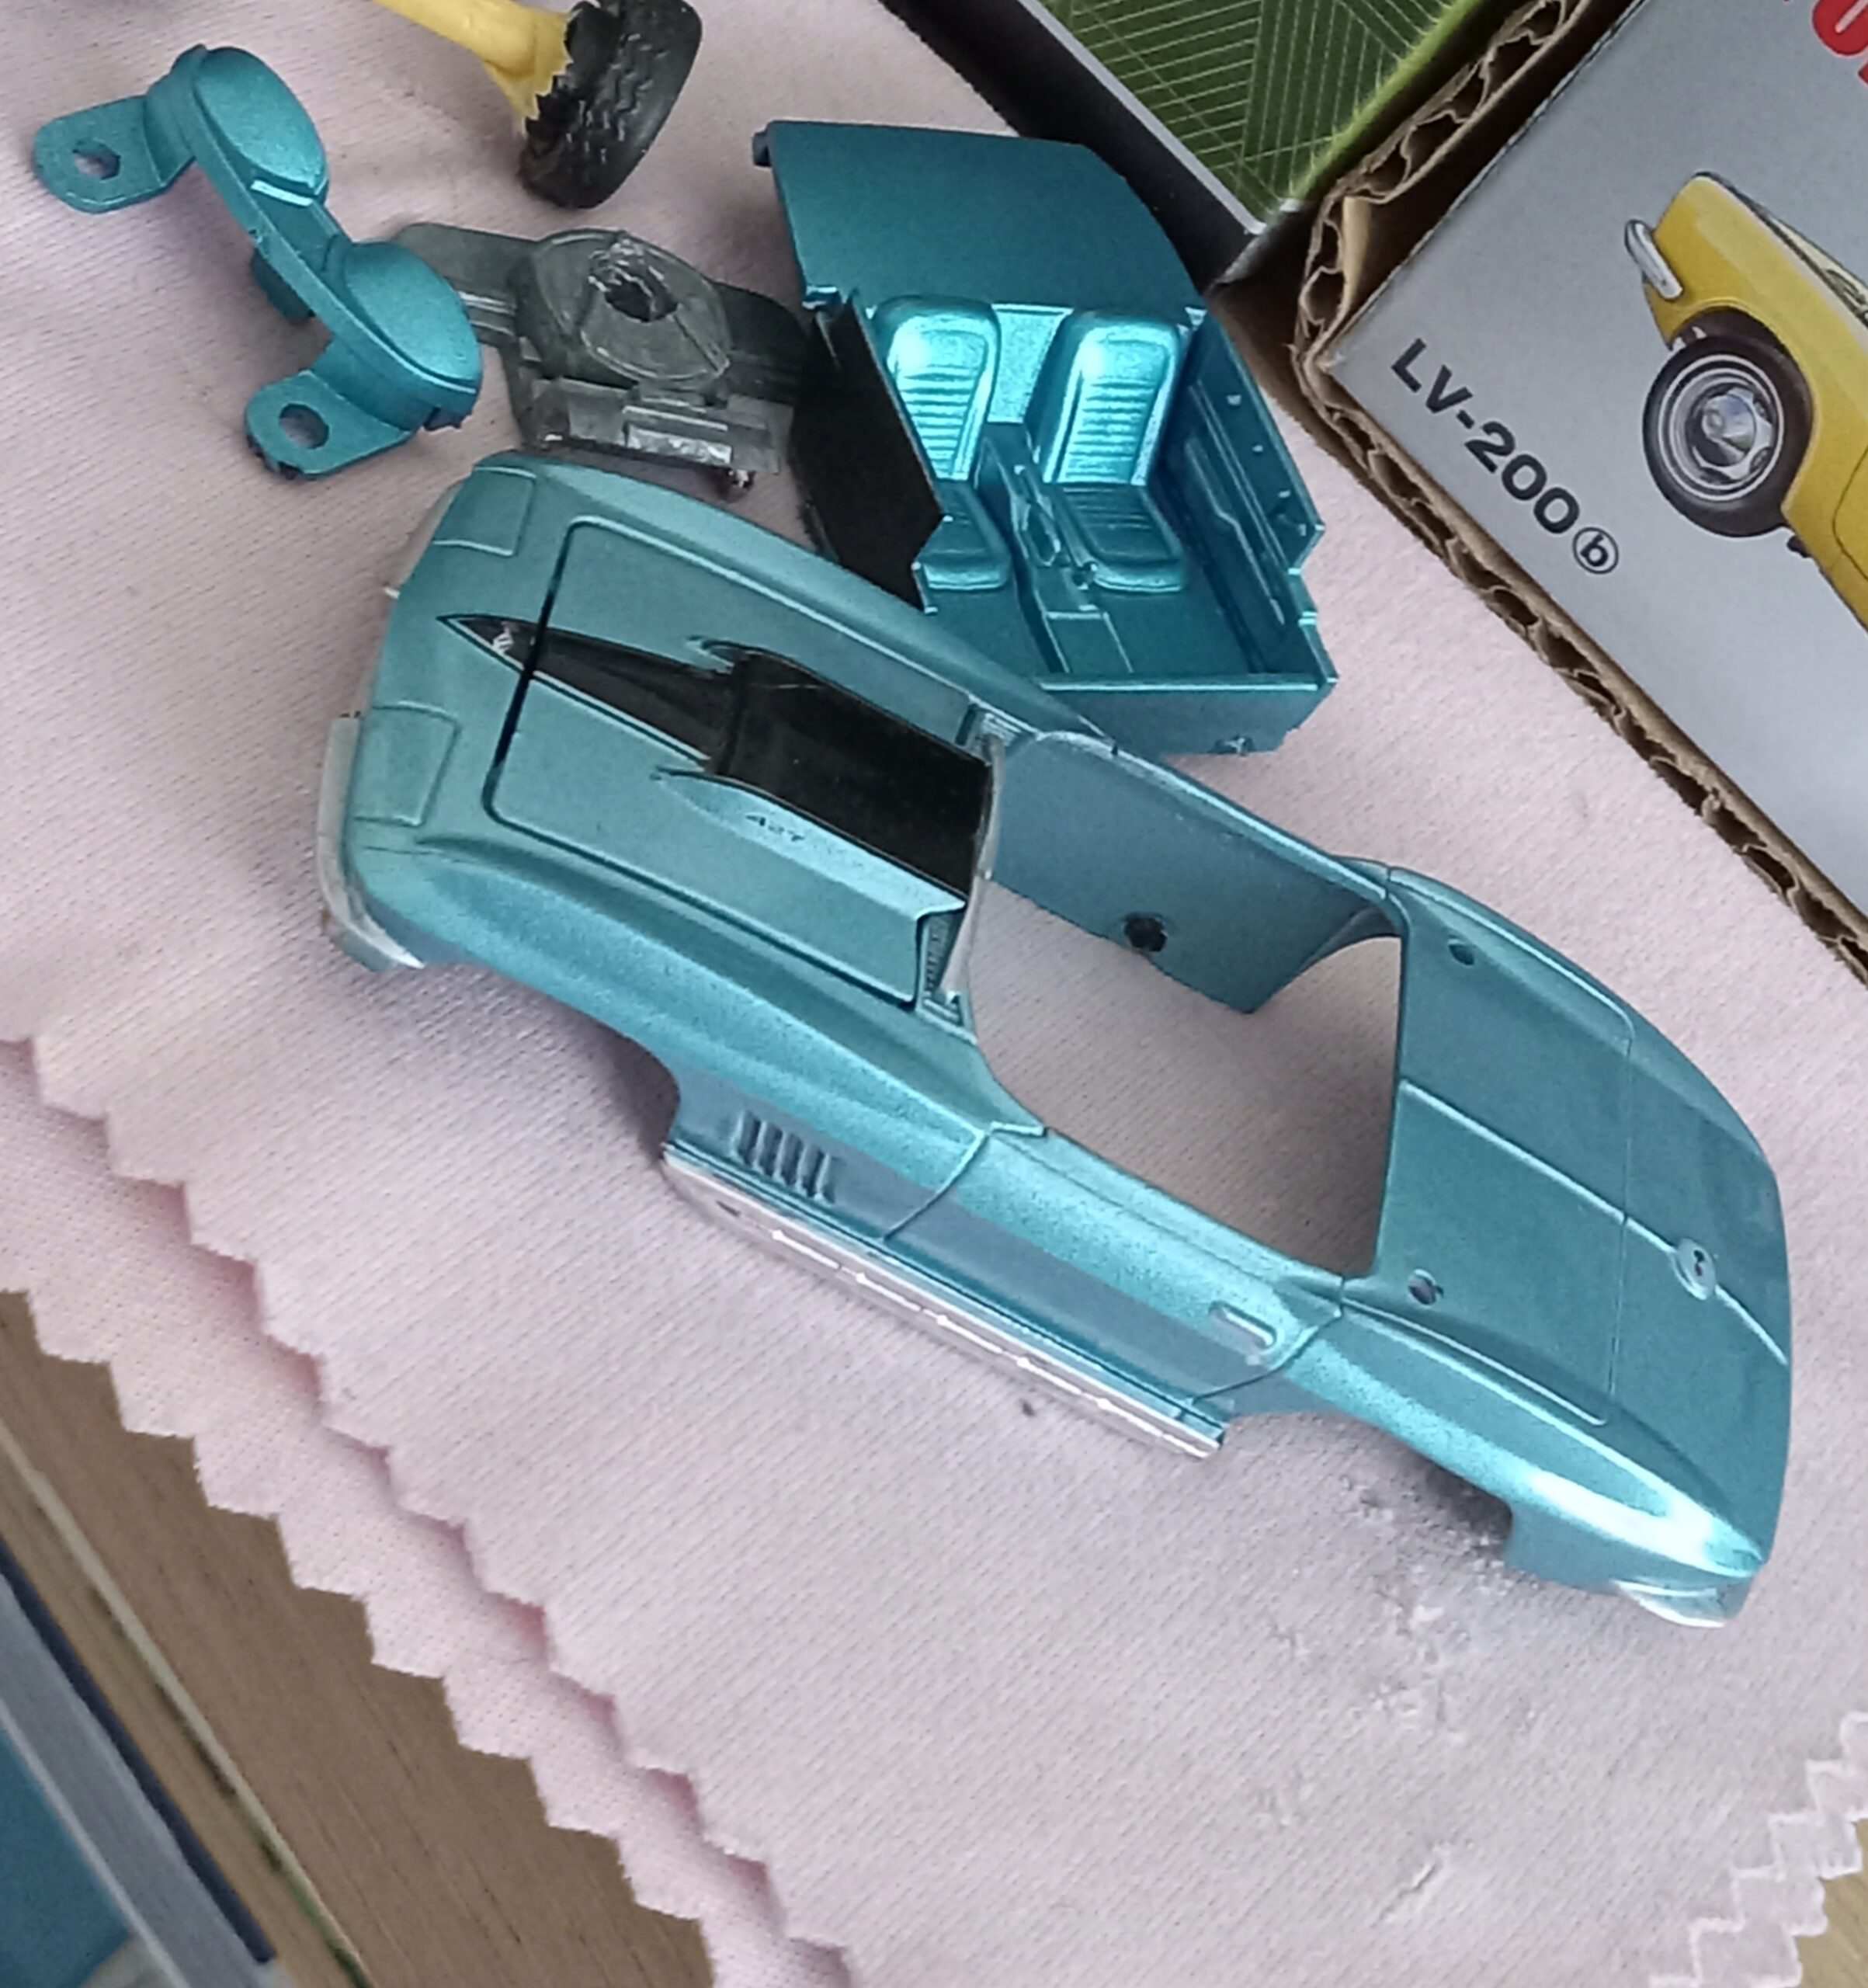
幌の高さ・フィッティング:
5:風防・幌パーツの幌側の後半部をファイルにて削り、横から見た時幌が後ろに向かって5度ぐらい尻下がり気味に調整(一番の腕の見せ所・削りすぎに注意)
6:幌部分をマーカーなどで黒く塗装&乾いたらサンド・ペパーでやすり艶消しにする
7:マーカーで消えた窓まらりのモール部分を、丁寧にメタル・シルバーにて塗装
仕上げ過程:
8:スジボリ、ボンネットのスクープ回り、フロントグリル、ヘッドライトハイダー、テールライト周り、その他ボディーの下回りの陰になり部分を、50%の暖色系グレーに手墨入れ&ウオッシング、乾く前に、薄め液で拭きながら、影部分などは多少グレーを残す感じで、『やれ味』を出し足ら
ーーーー>再度組み立てたら、出来上がりです。
【完成品ギャラリー】
2:バーガンディー・メタリック、同色ハードトップ付き版(グリーンライトの’67スティングレー、バーガンディー・ハードトップ付き+ジョニー・ライトニング社製’67コルベットスティングレー・クーペのホイールとタイヤ)
【使用モデル】

(かなり珍しい、66年型のハードトップ付きのロードスターモデルです。)
(このモデルも、3台ほど使用してます。)
【完成状態】
【改造過程】
改造手順:
*ハードトップ部分を分解後、高さを「後ろ向きに下がる様」に調整後再接着
*M2社製、67年型スティングレーのホイールとタイヤを車軸位置を微調整しながら移植
(*オートワールド社のスティングレークーペのホイールに穴軸オートワールド社の’75ン3ン型エルドラドのホワイトレタータイヤを装填)
*ボンネットを一度外して裏側を削り、バルジの出っ張りを最小限に抑える
(ハードトップ装着型のC2型のミニカーはかなりレア―な存在で、今回使用したグリーンライト社製のものが優秀です、後はかなり古いジョニー・ライトニングのもの(写真の青メタのもの)しか確認できませんでした。)
【完成品ギャラリー】
3:ライトブルー・メタリック、黒のハードトップ付き版
(グリーンライトの’67青メタ・ボディー+グリーンライトの’67レーシングバージョンのハードトップ+AUTOWORLD社製’67クーペのホイールとAUTOWORLD製’75キャデラック・エルドラドのホワイトレター・タイヤ)

(ホワイトレター・タイヤはこちらのミニカー
から移植しました。)
【改造行程】
分解過程:&タイヤ・スタンス調整:
1~4:こちらはプロジェクト『1』の改造手順を参考にしてくださいね。
幌の高さ・フィッティング:
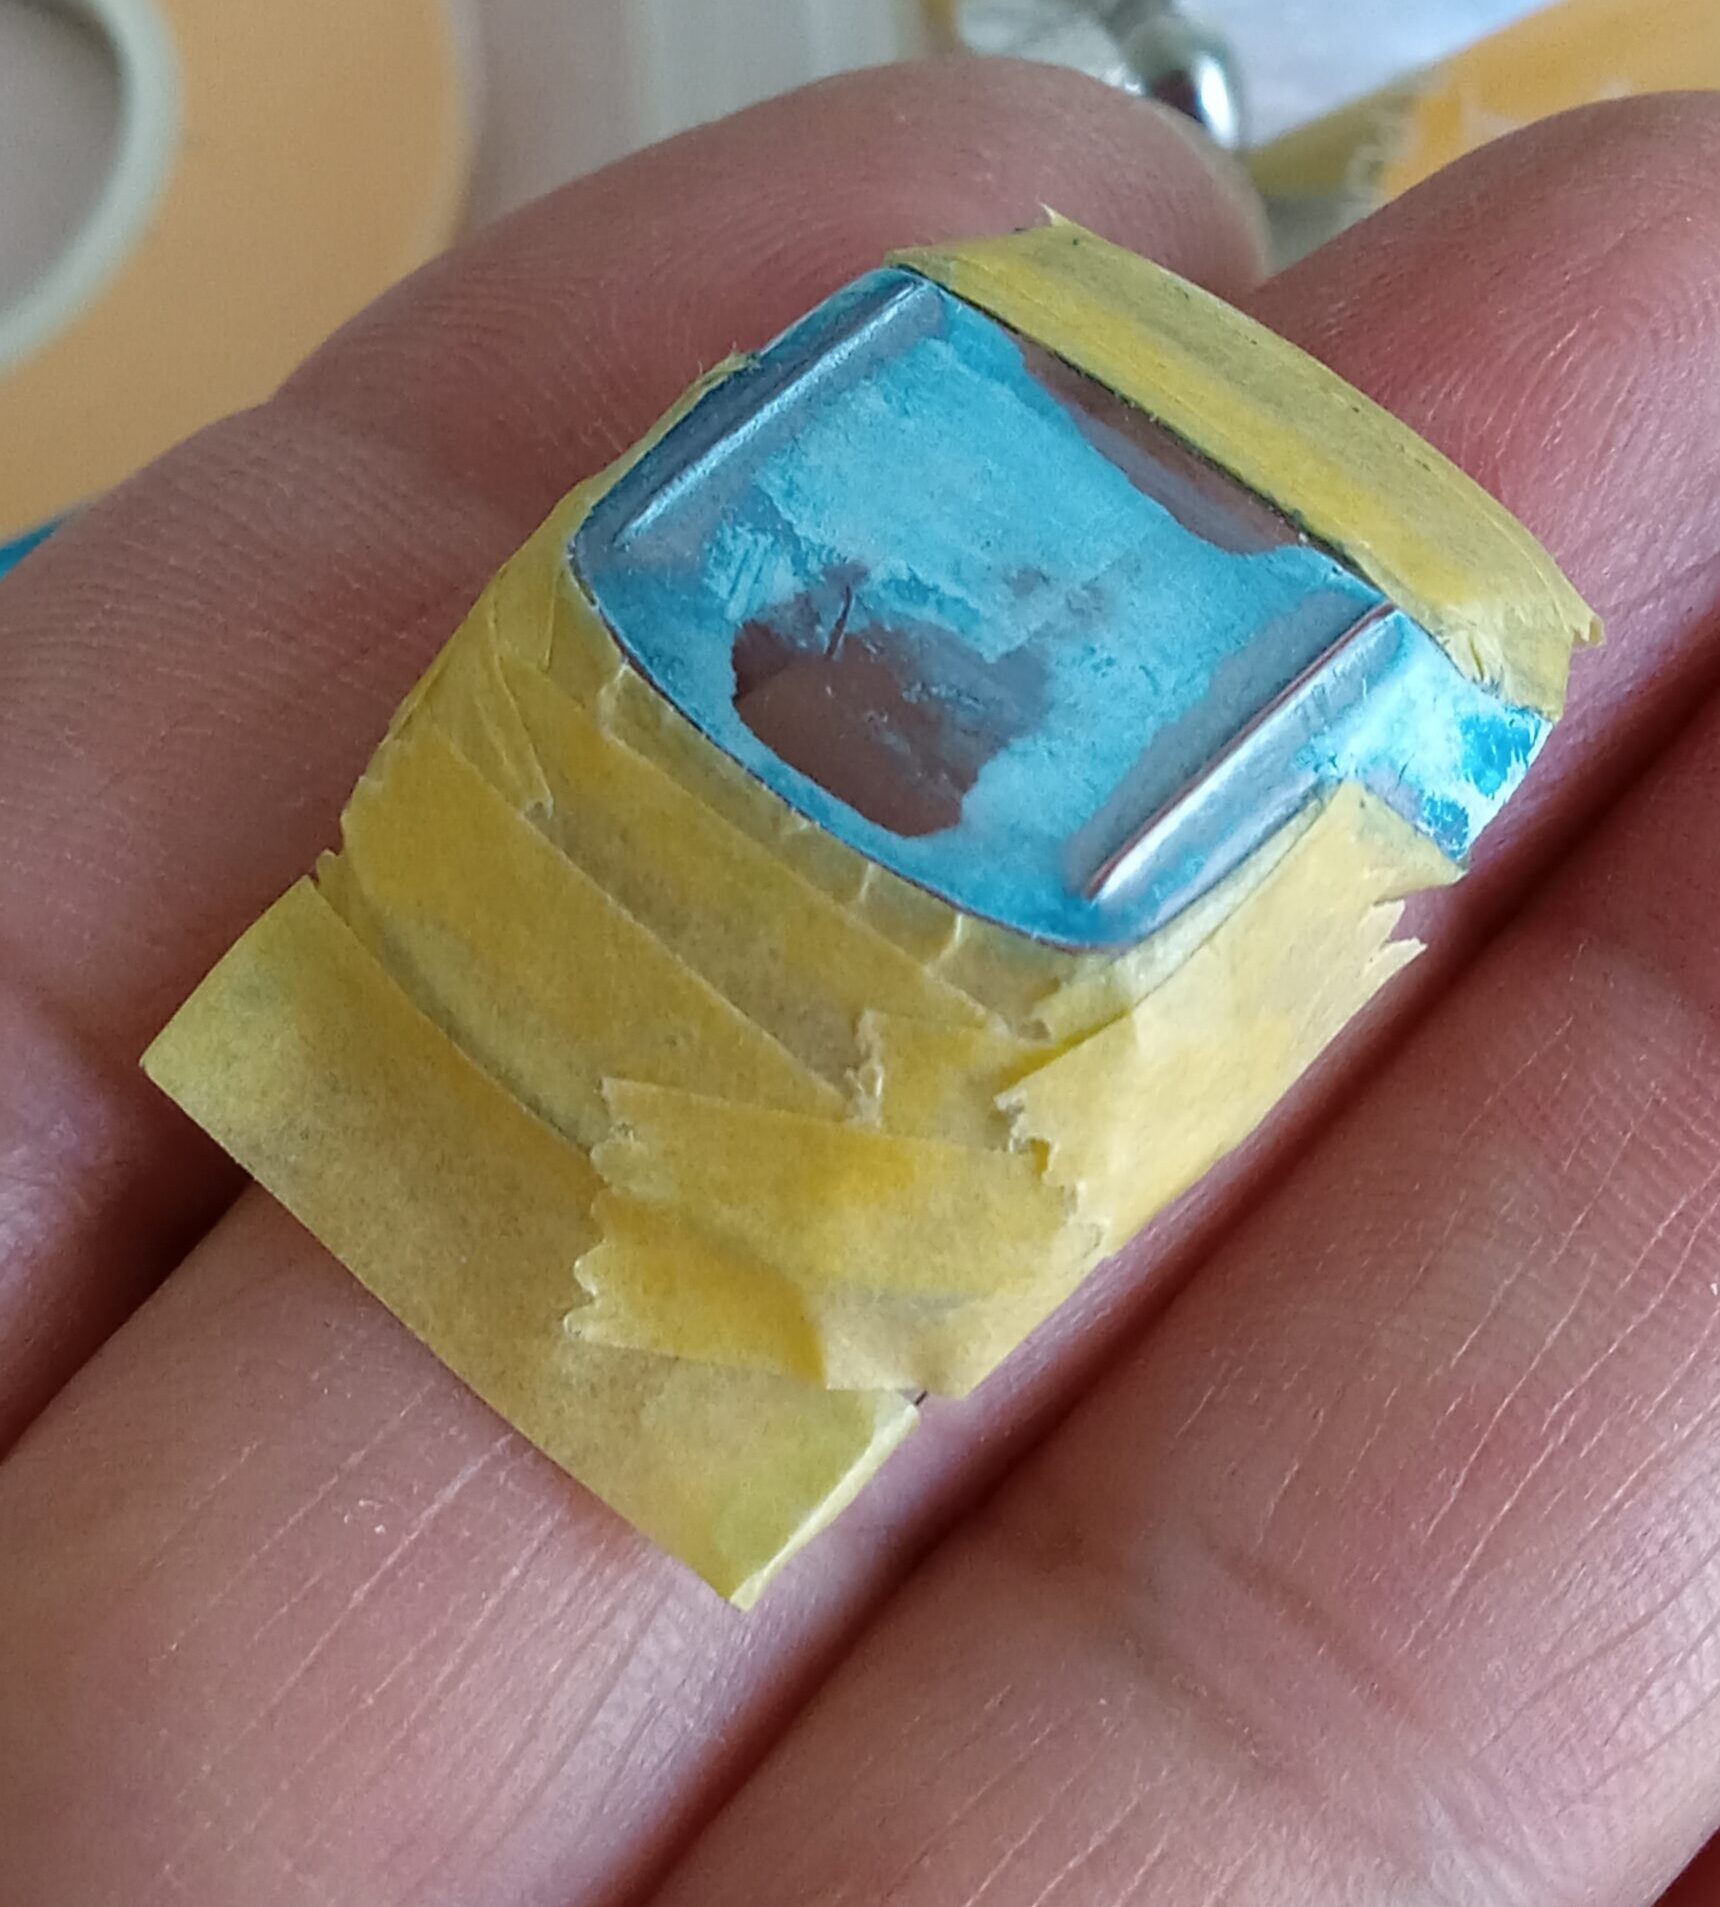
5:風防・ハードトップパーツのHT側の後半部下部をファイルにて削り、横から見た時幌が後ろに向かって5度ぐらい尻下がり気味に調整(一番の腕の見せ所・削りすぎに注意)
6:ハード・トップ部分をマスキングの後、アクリル系のライトブルーのマーカーで塗装&乾いたらマスキングを丁寧にはがす
ーーーーーー>アクリル・マーカーが定着せず、大失敗!!
結局、マーカーで真っ黒に塗装して、何とか満足
7:マーカーで消えた窓まらりのモール部分を、目分量で、、、メタル・シルバー塗装
仕上げ過程:
8:スジボリ、ボンネットのスクープ回り、フロントグリル、ヘッドライトハイダー、テールライト周り、その他ボディーの下回りの陰になり部分を、50%の暖色系グレーに手墨入れ&ウオッシング、乾く前に、薄め液で拭きながら、影部分などは多少グレーを残す感じで、『やれ感』を出し、
ーーーー>再度組み立てたら、出来上がりです。
【完成品ギャラリー】


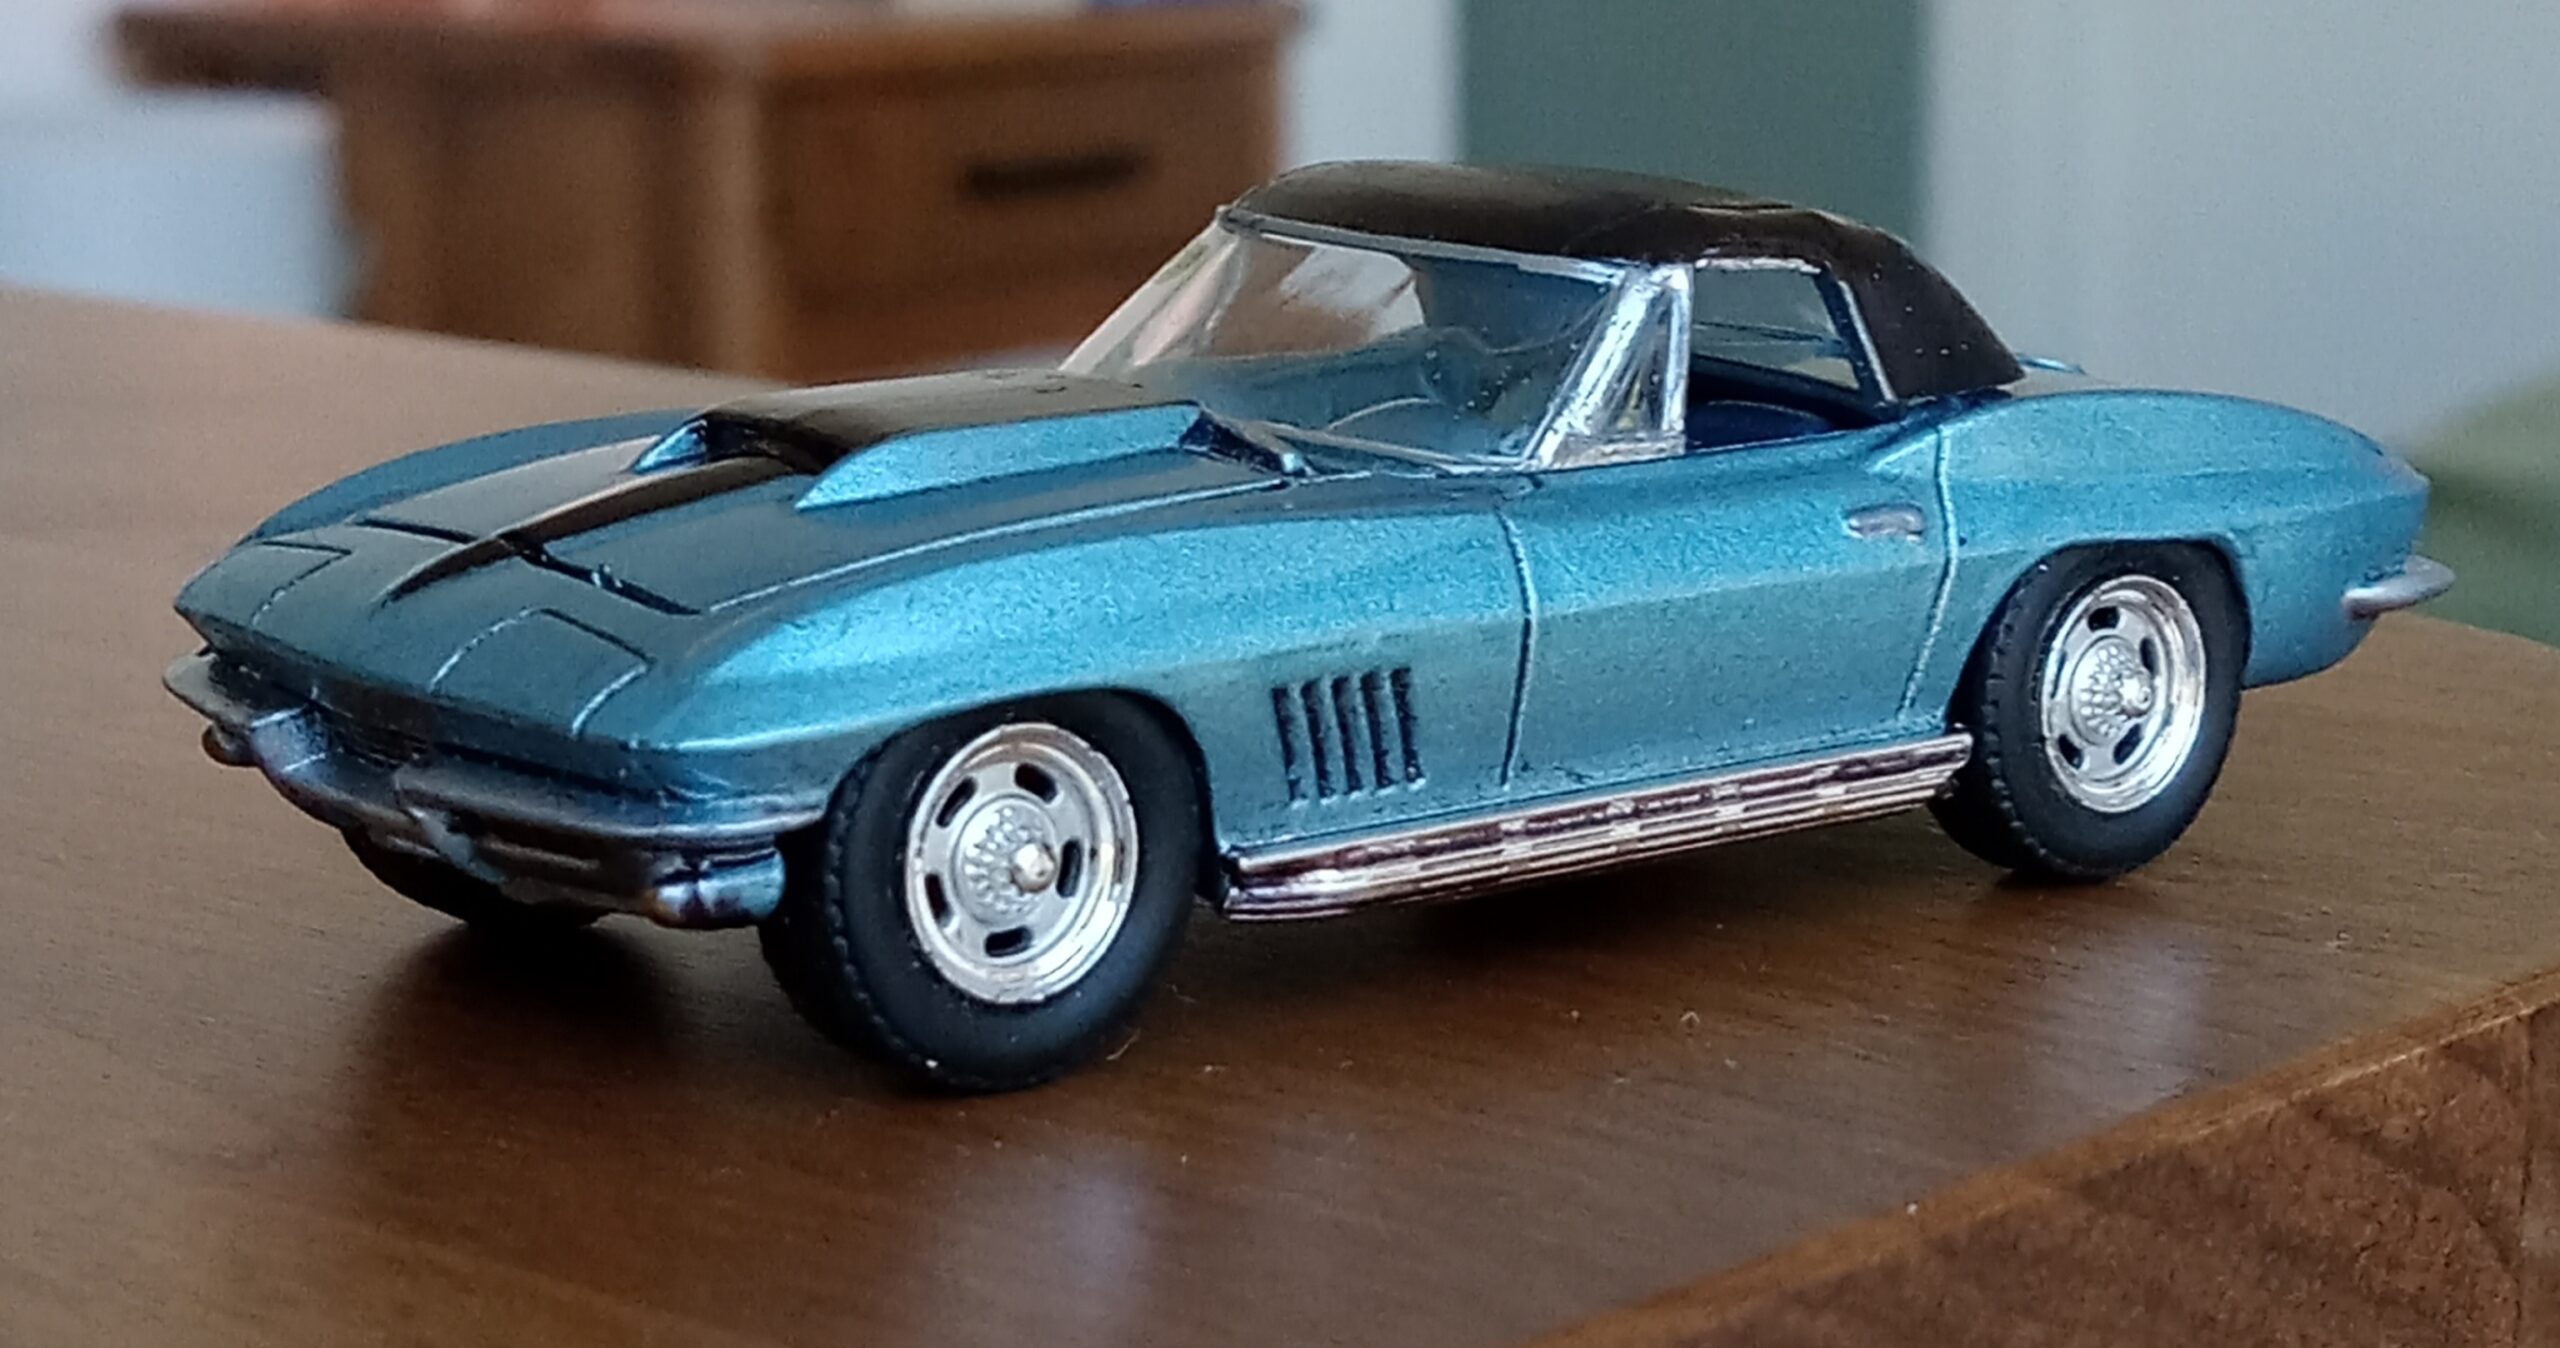
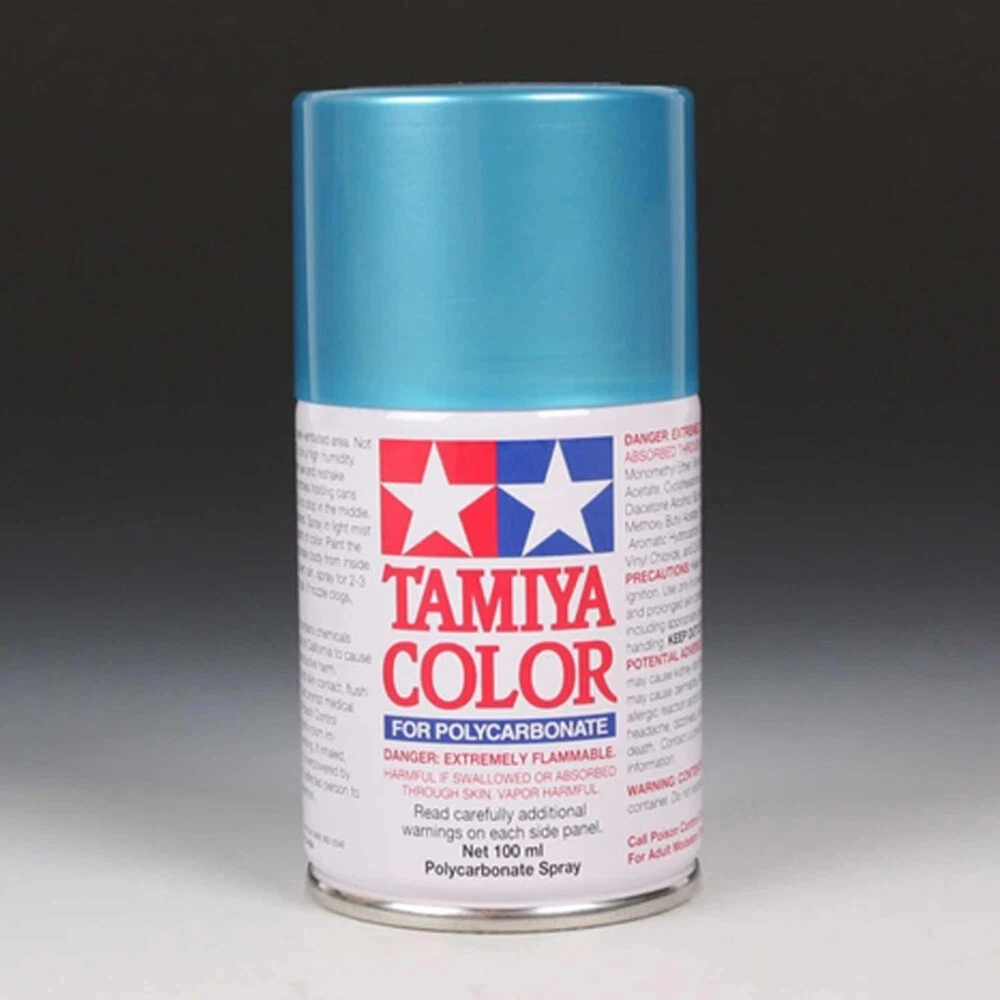
4:ライトブルー・メタリック、同色ハードトップ付き版
(グリーンライトの’67青メタ・ボディー+グリーンライトの’67レーシングバージョンのハードトップ+ジョニーライトニング社製の’67青メタクーペのホイールとレッド・レタータイヤ移植)
 色んなサイトやお店を回って、
とうとうグリーン・ライト社のコルベットの外装色そっくりな、
ライトブルーのスプレーカラーを見つけました!
(田宮の、ポリカーボネイト専用スプレーペイントの『PS-49=スカイブルー』です。)
【改造風景】
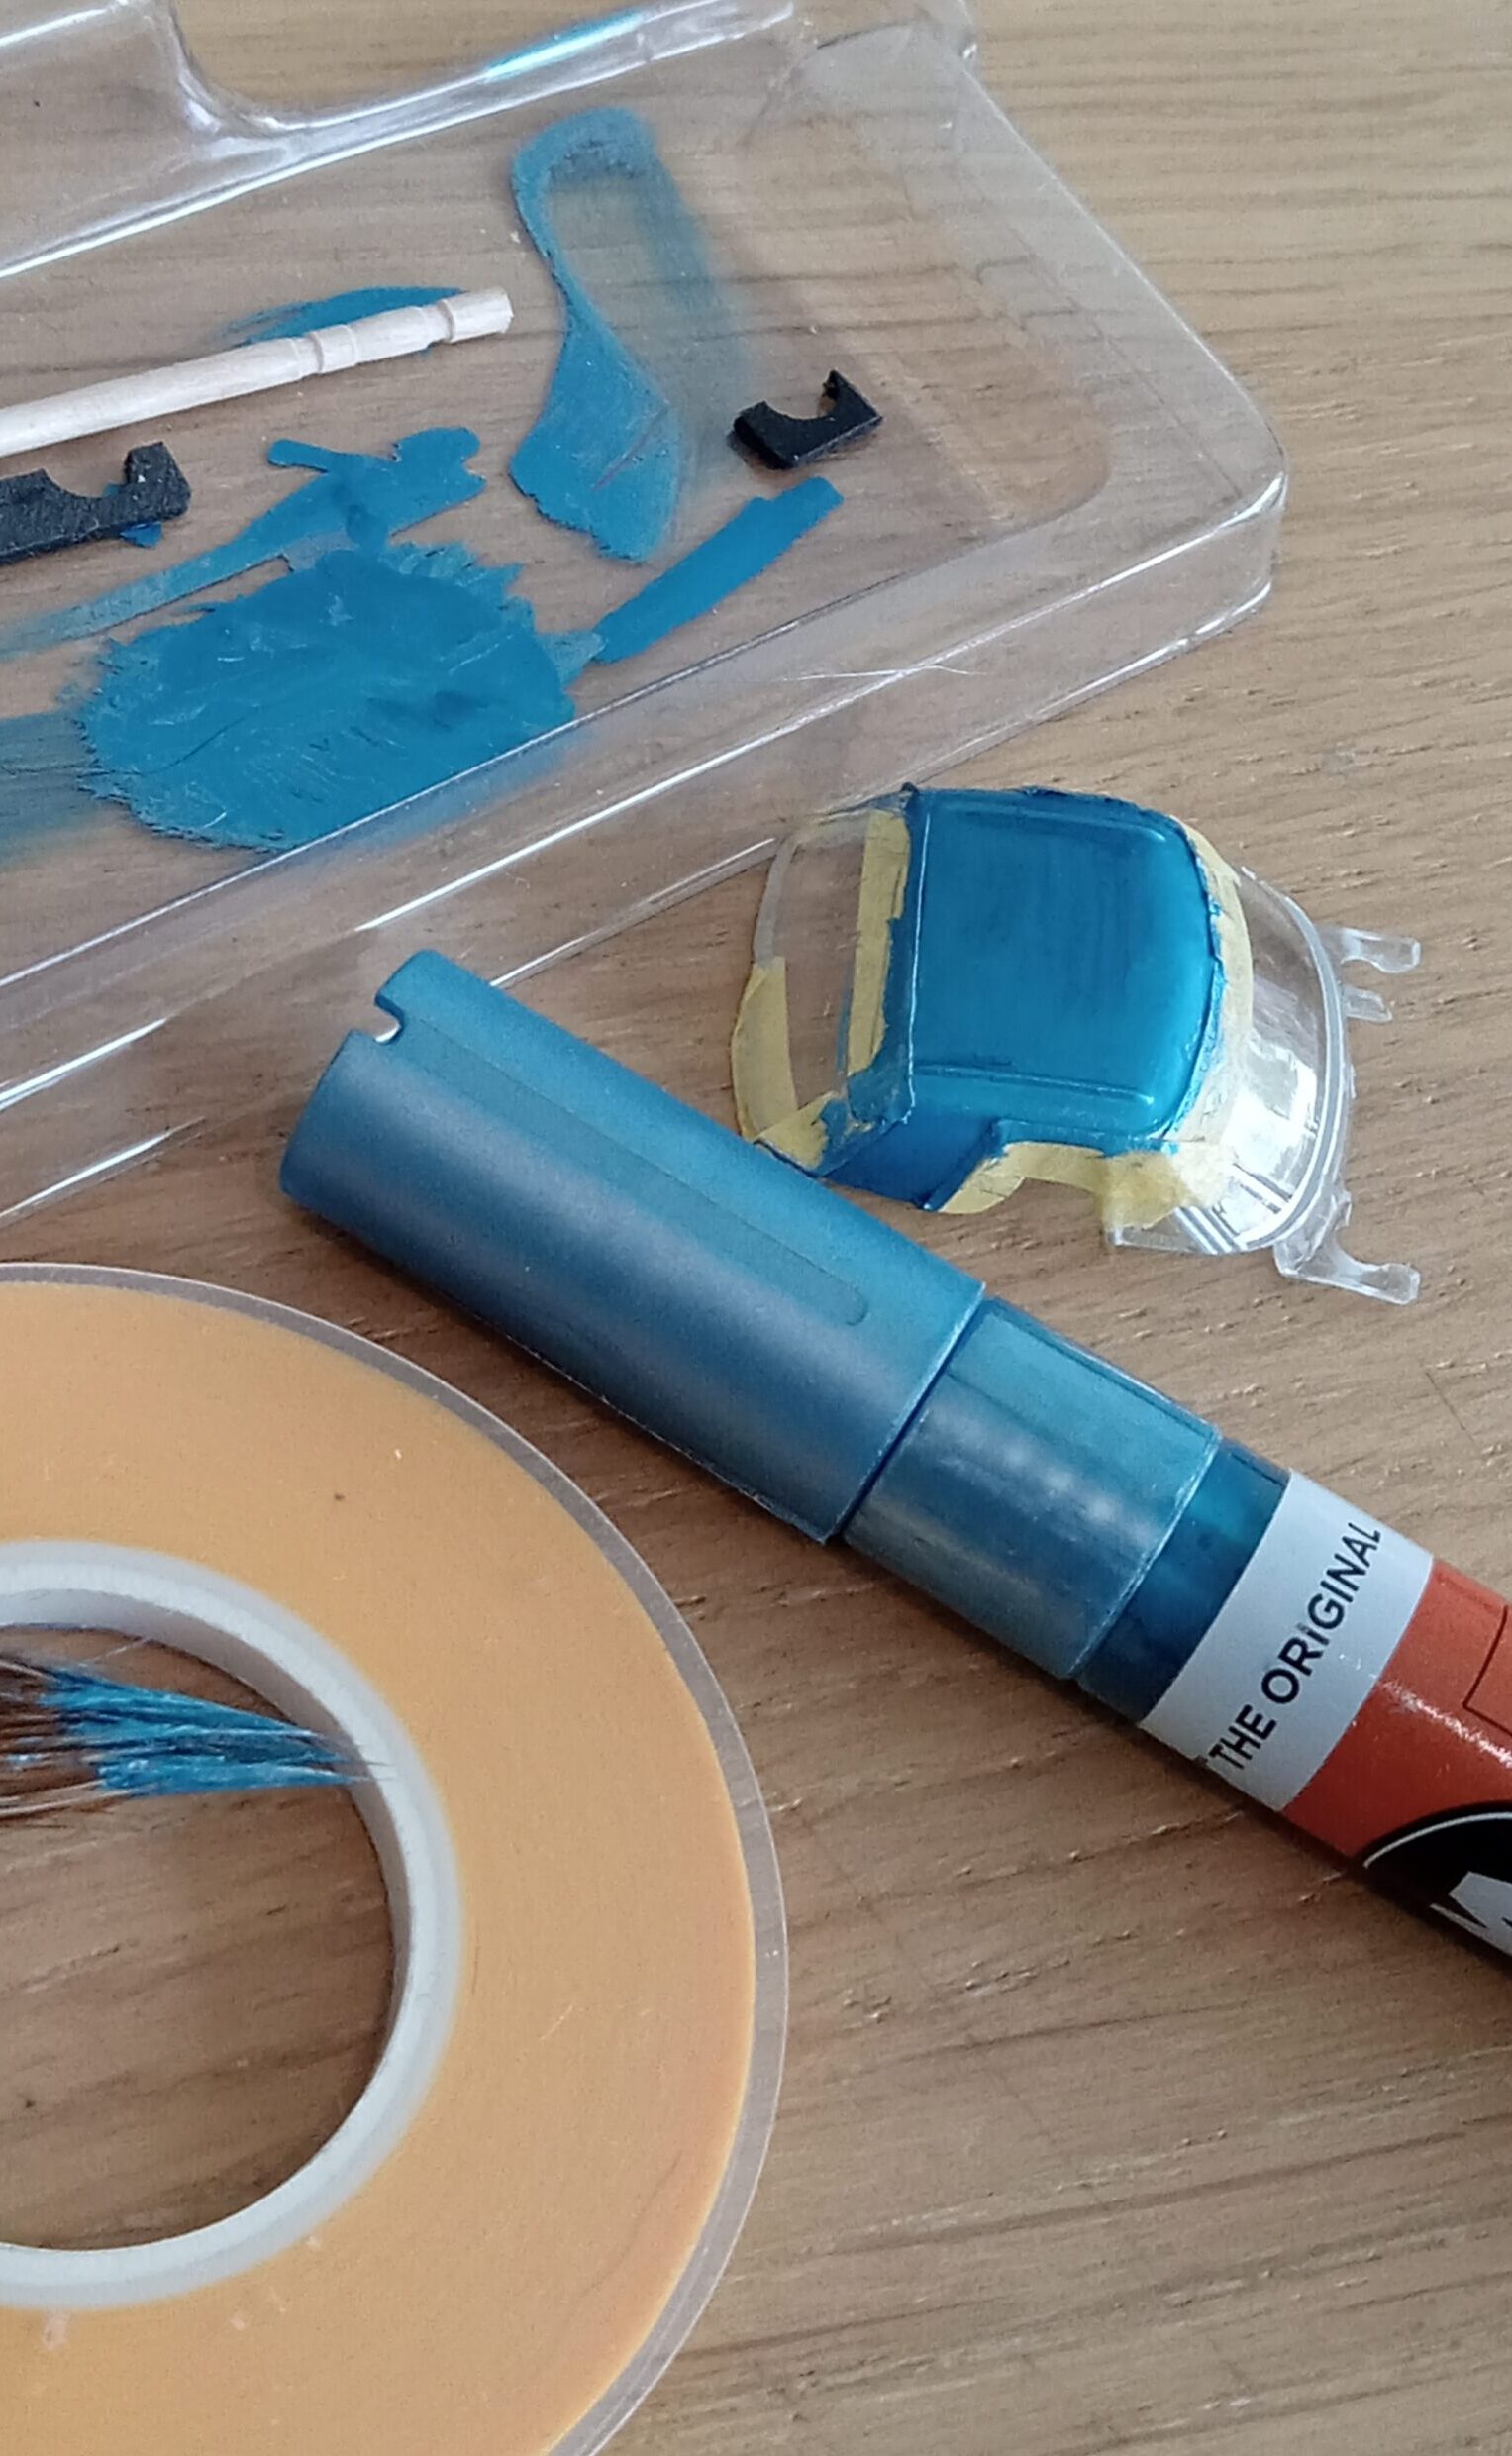
(窓枠をマスキングなし・ありと臨機応変に、クローム・メッキ塗装しました。はみ出したところは薄め液をティッシュなどに付けて修正)
改造行程:
分解過程:&タイヤ・スタンス調整:
1~4:こちらはプロジェクト『1』の改造手順を参考にしてくださいね。
幌の高さ・フィッティング:
5:風防・ハードトップパーツのHT側の後半部下部をファイルにて削り、横から見た時幌が後ろに向かって5度ぐらい尻下がり気味に調整(一番の腕の見せ所・削りすぎに注意)
6:ハード・トップ部分をマスキングの後、タミヤ製ポリカーボネイト用のスカイブルーにて塗装&乾いたらマスキングを丁寧にはがす
ーーーーーー>今回は何とか無事完了!!
7:マーカーで消えた窓まらりのモール部分を、目分量で、、、メタル・シルバーマーカーにて塗装
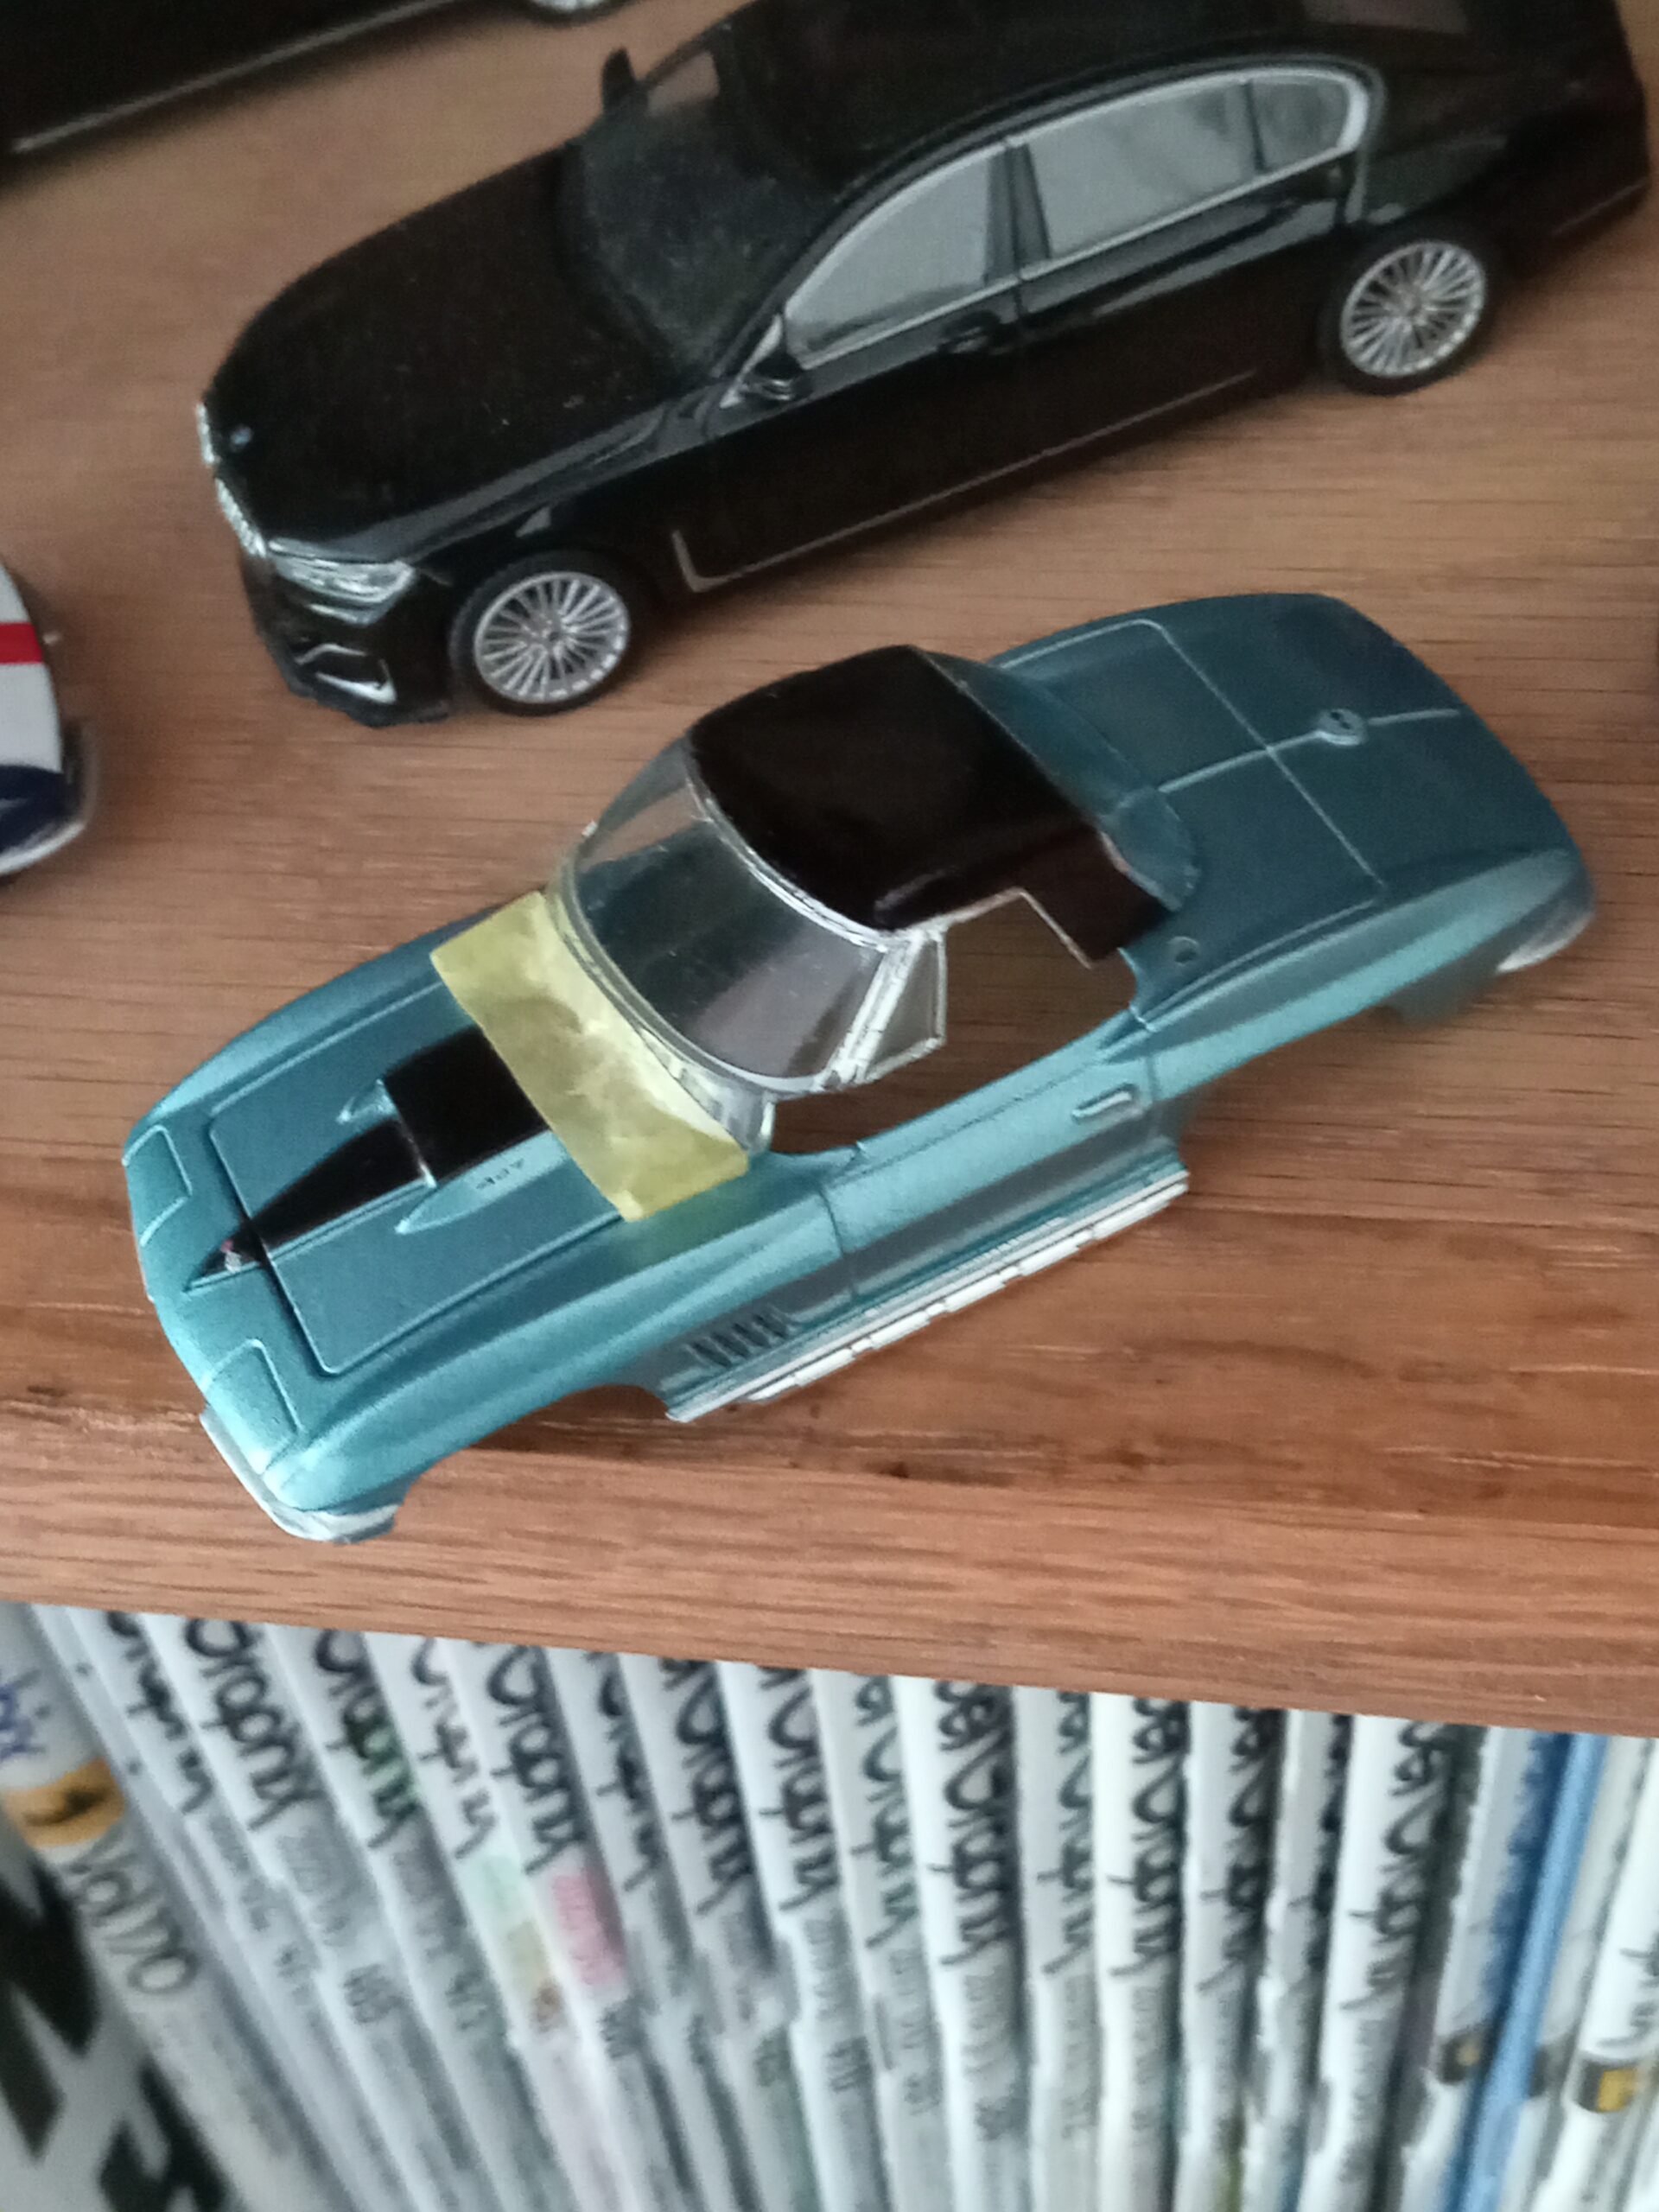
8:クロームシルバーの塗装部分が完全に乾いてから、慎重に風防ハードトプ部分を元通りの位置にはめ込み、
9:今回の最重要部分:
やっとこ又はペンチにて、リアデッキ部分をハンカチなどでしっかり覆ったうえ、上向きに3度ほど曲げることで、
ーーーーー>尻下がりの後端部分を『ヒップ・アップ!!』
ーーーー>再度組み立てたら、出来上がりです。
【完成品ギャラリー】
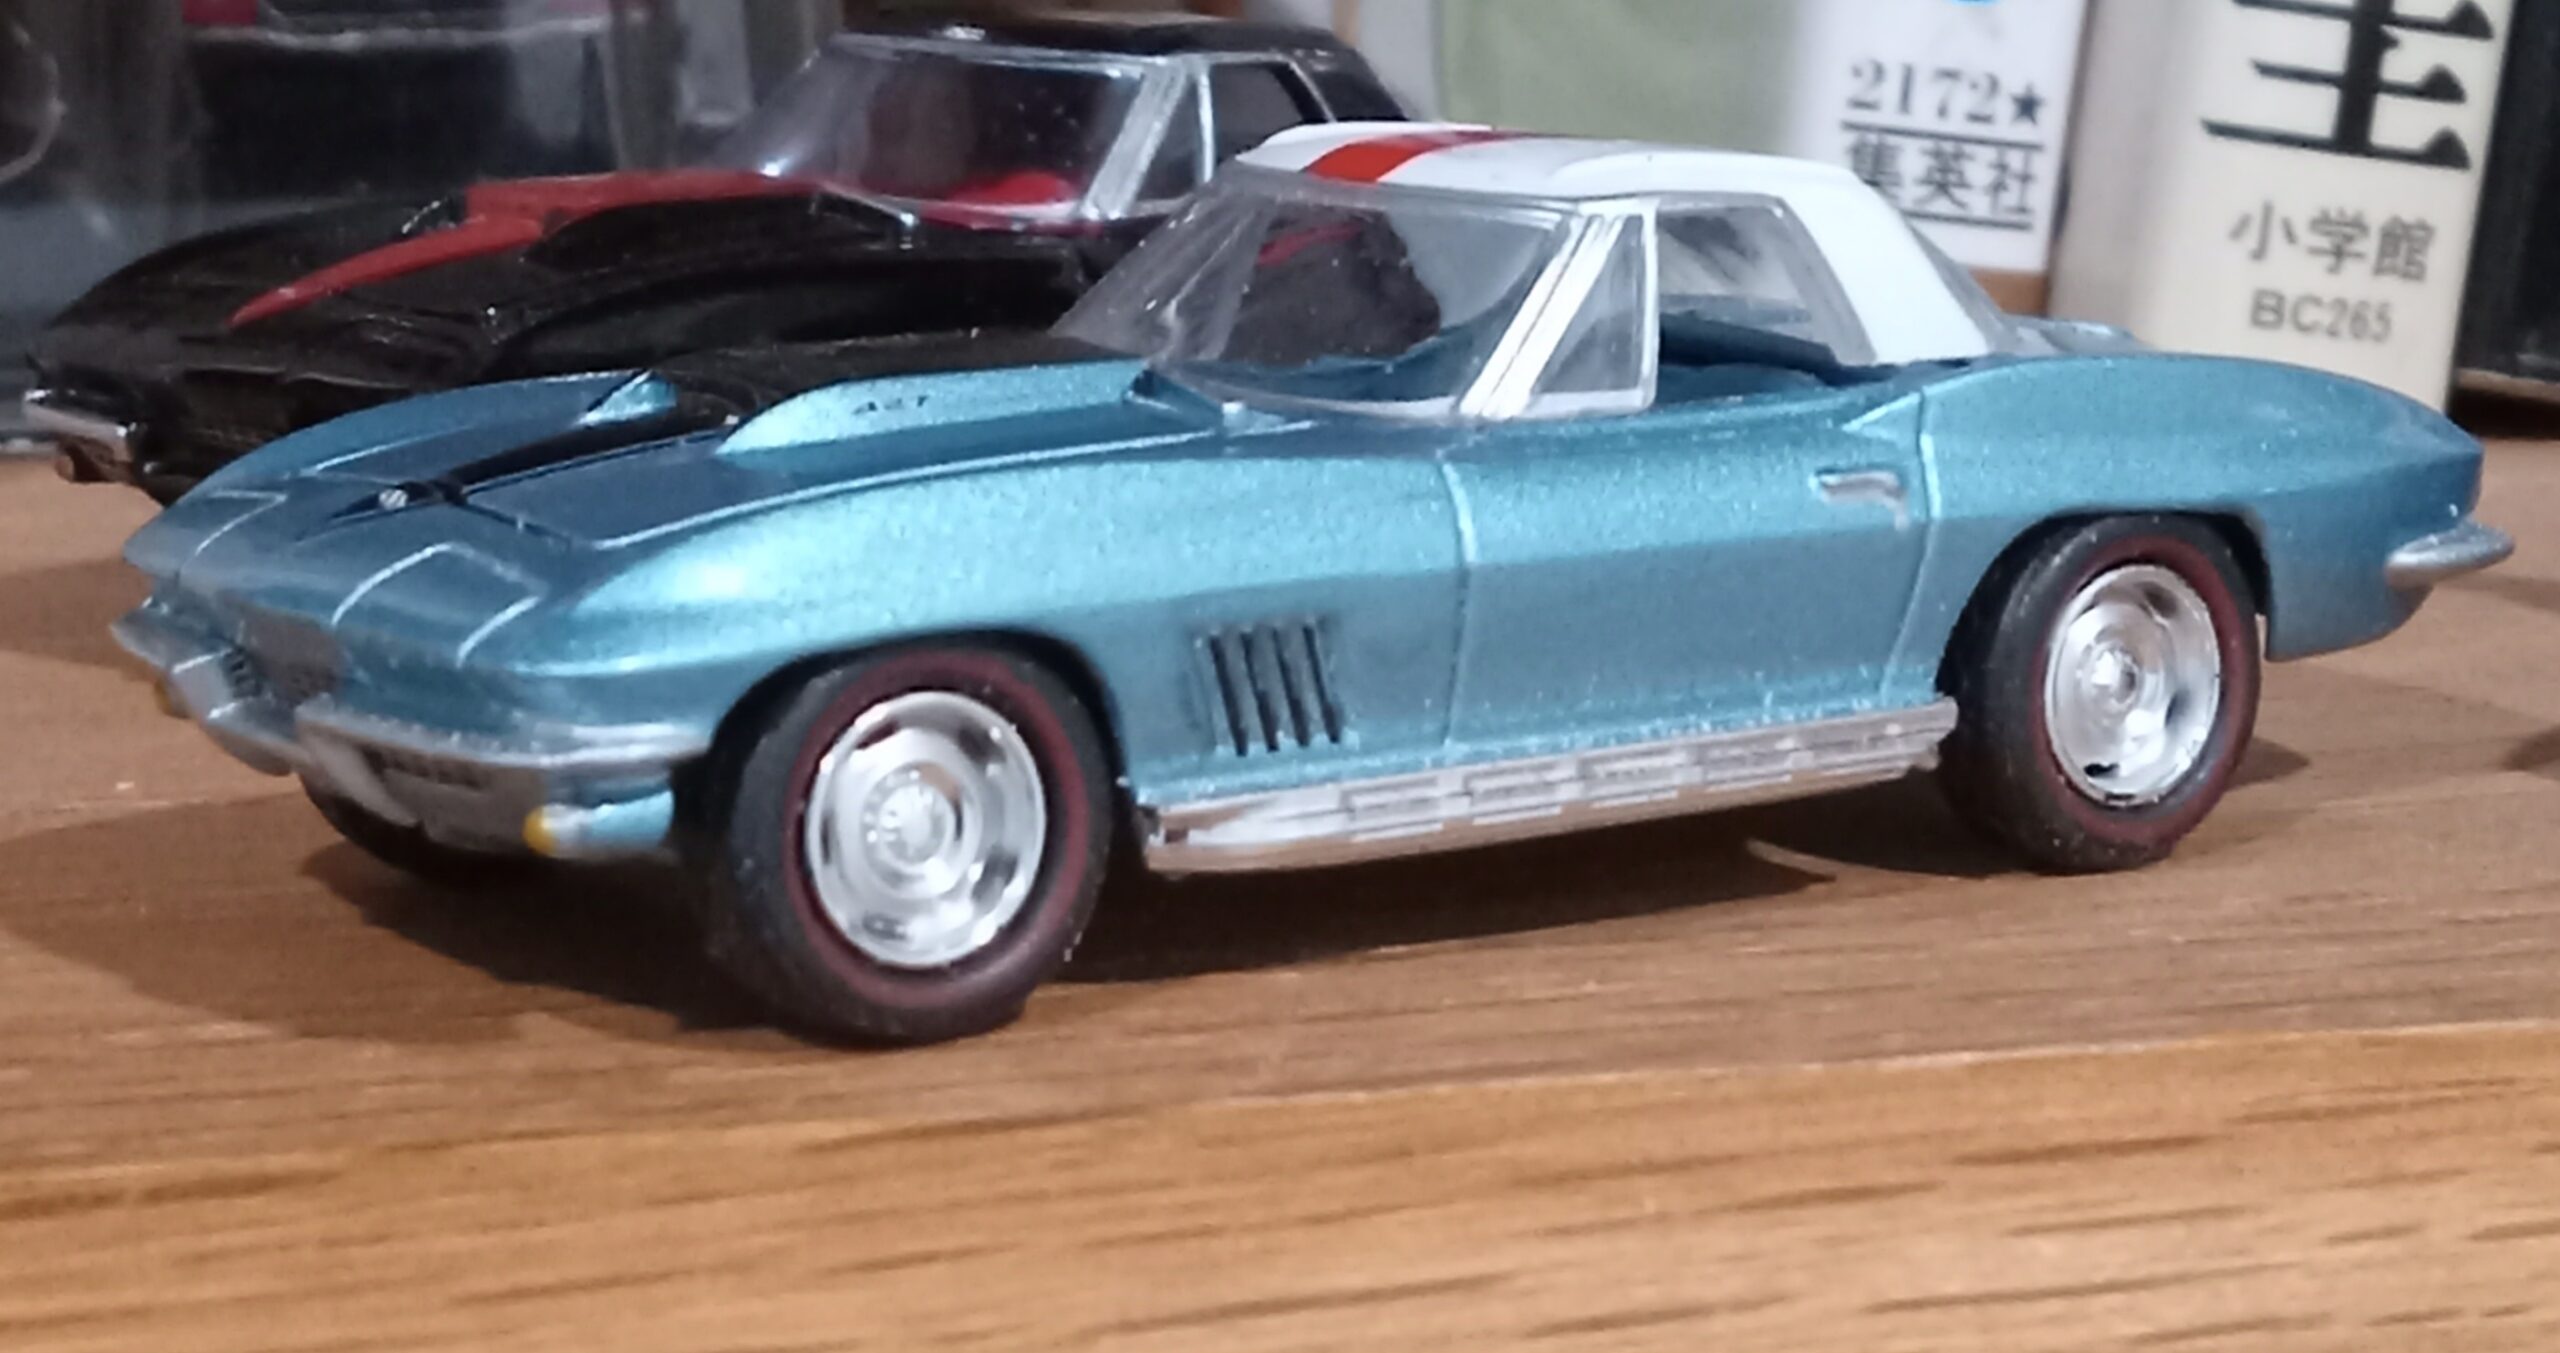
4’:ライトブルー・メタリック、同色ハードトップ、ブルー・レタータイヤ付き版
(グリーンライトの’67青メタ・ボディー+グリーンライトの’67レーシングバージョンのハードトップ+ジョニーライトニング社製のディスプレイケース封入版’67青メタ・クーペのホイールとブルーレター・タイヤ移植)

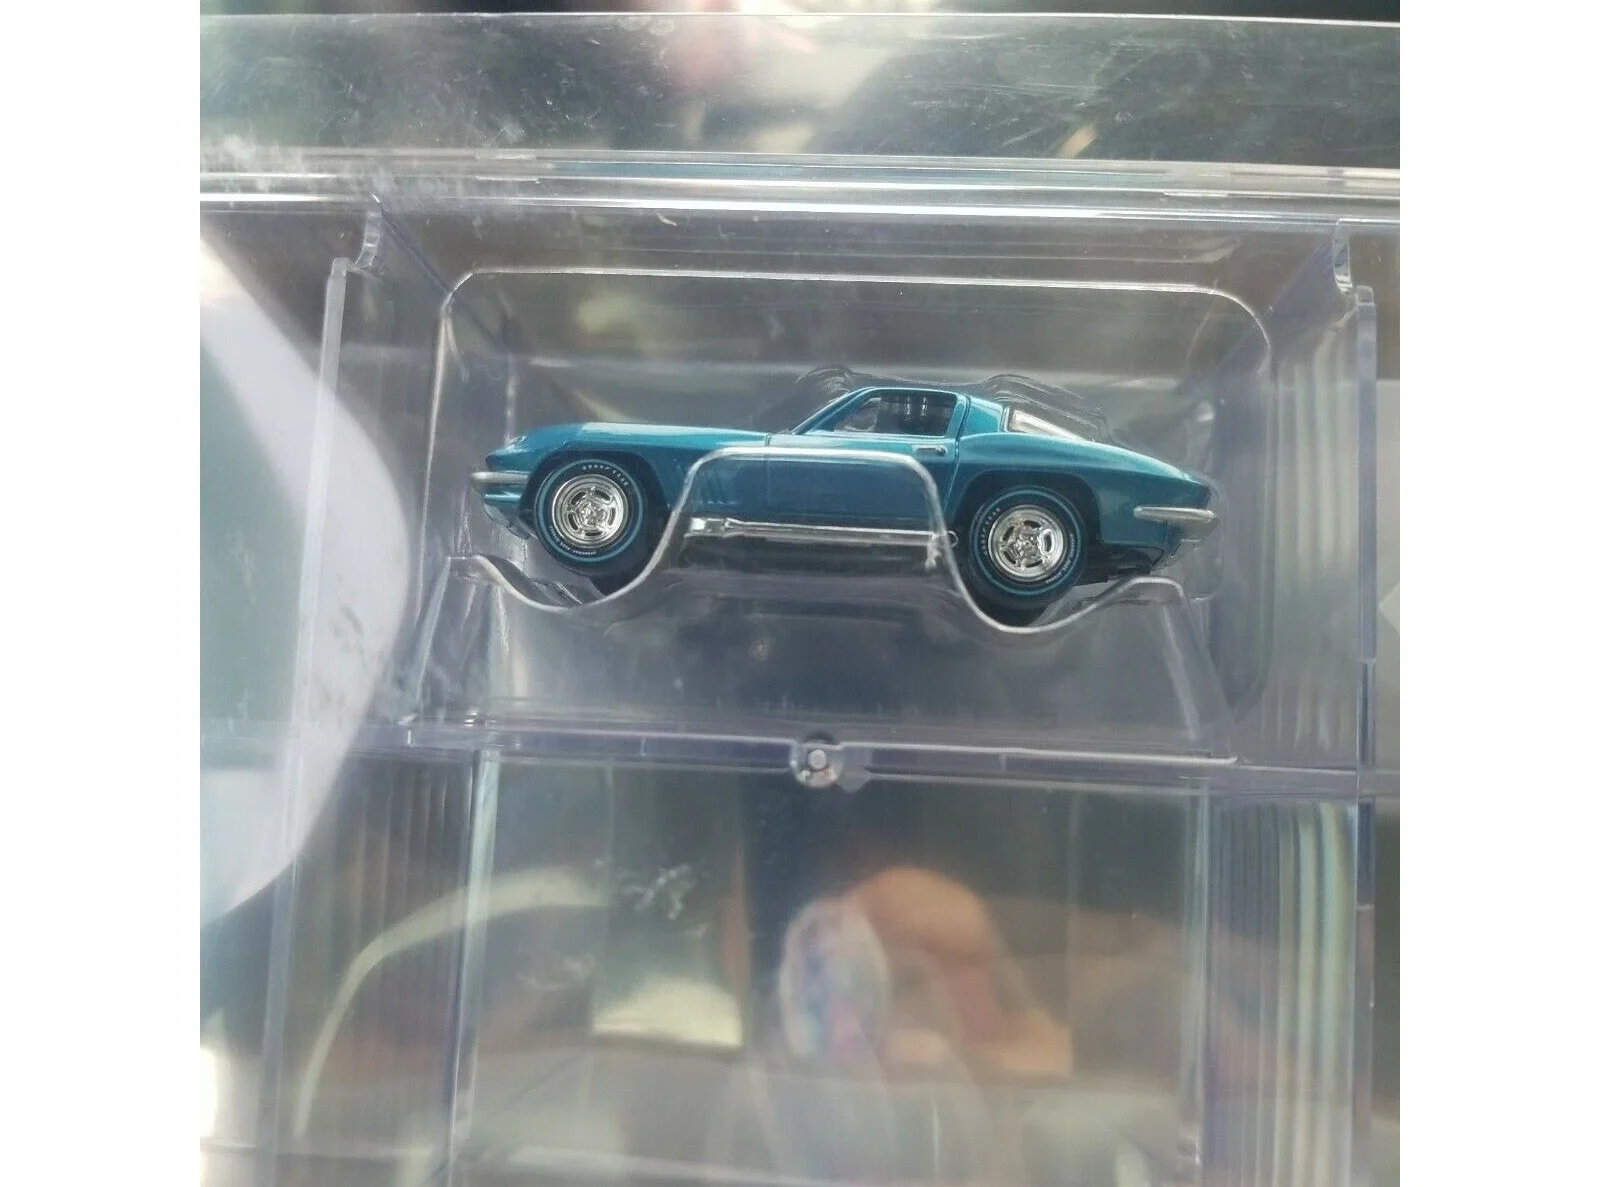
(こちらが本改造の主人公、Auto World 1:64 Interlocking Gallery Showcase w/ Exclusive 1967 / 427 Corvette となります、このコルベットにだけ、ブルーレタータイヤ付きのホイールが付属しています。)
【改造行程】


(大変貴重なタイヤ付きの67コルベットをイーベイで偶然ルース品として入手できたので、急遽このバージョンも加えました。)
【改造行程】
1:タイヤの供給先の、67年型のクーペのカシメ止めをドリルで外し、
車軸位置とトレッドを微調整しながら、すでに出来上がっていた「改造作例#4」のタイヤ・ホイールセットと交換します。
【完成品ギャラリー】
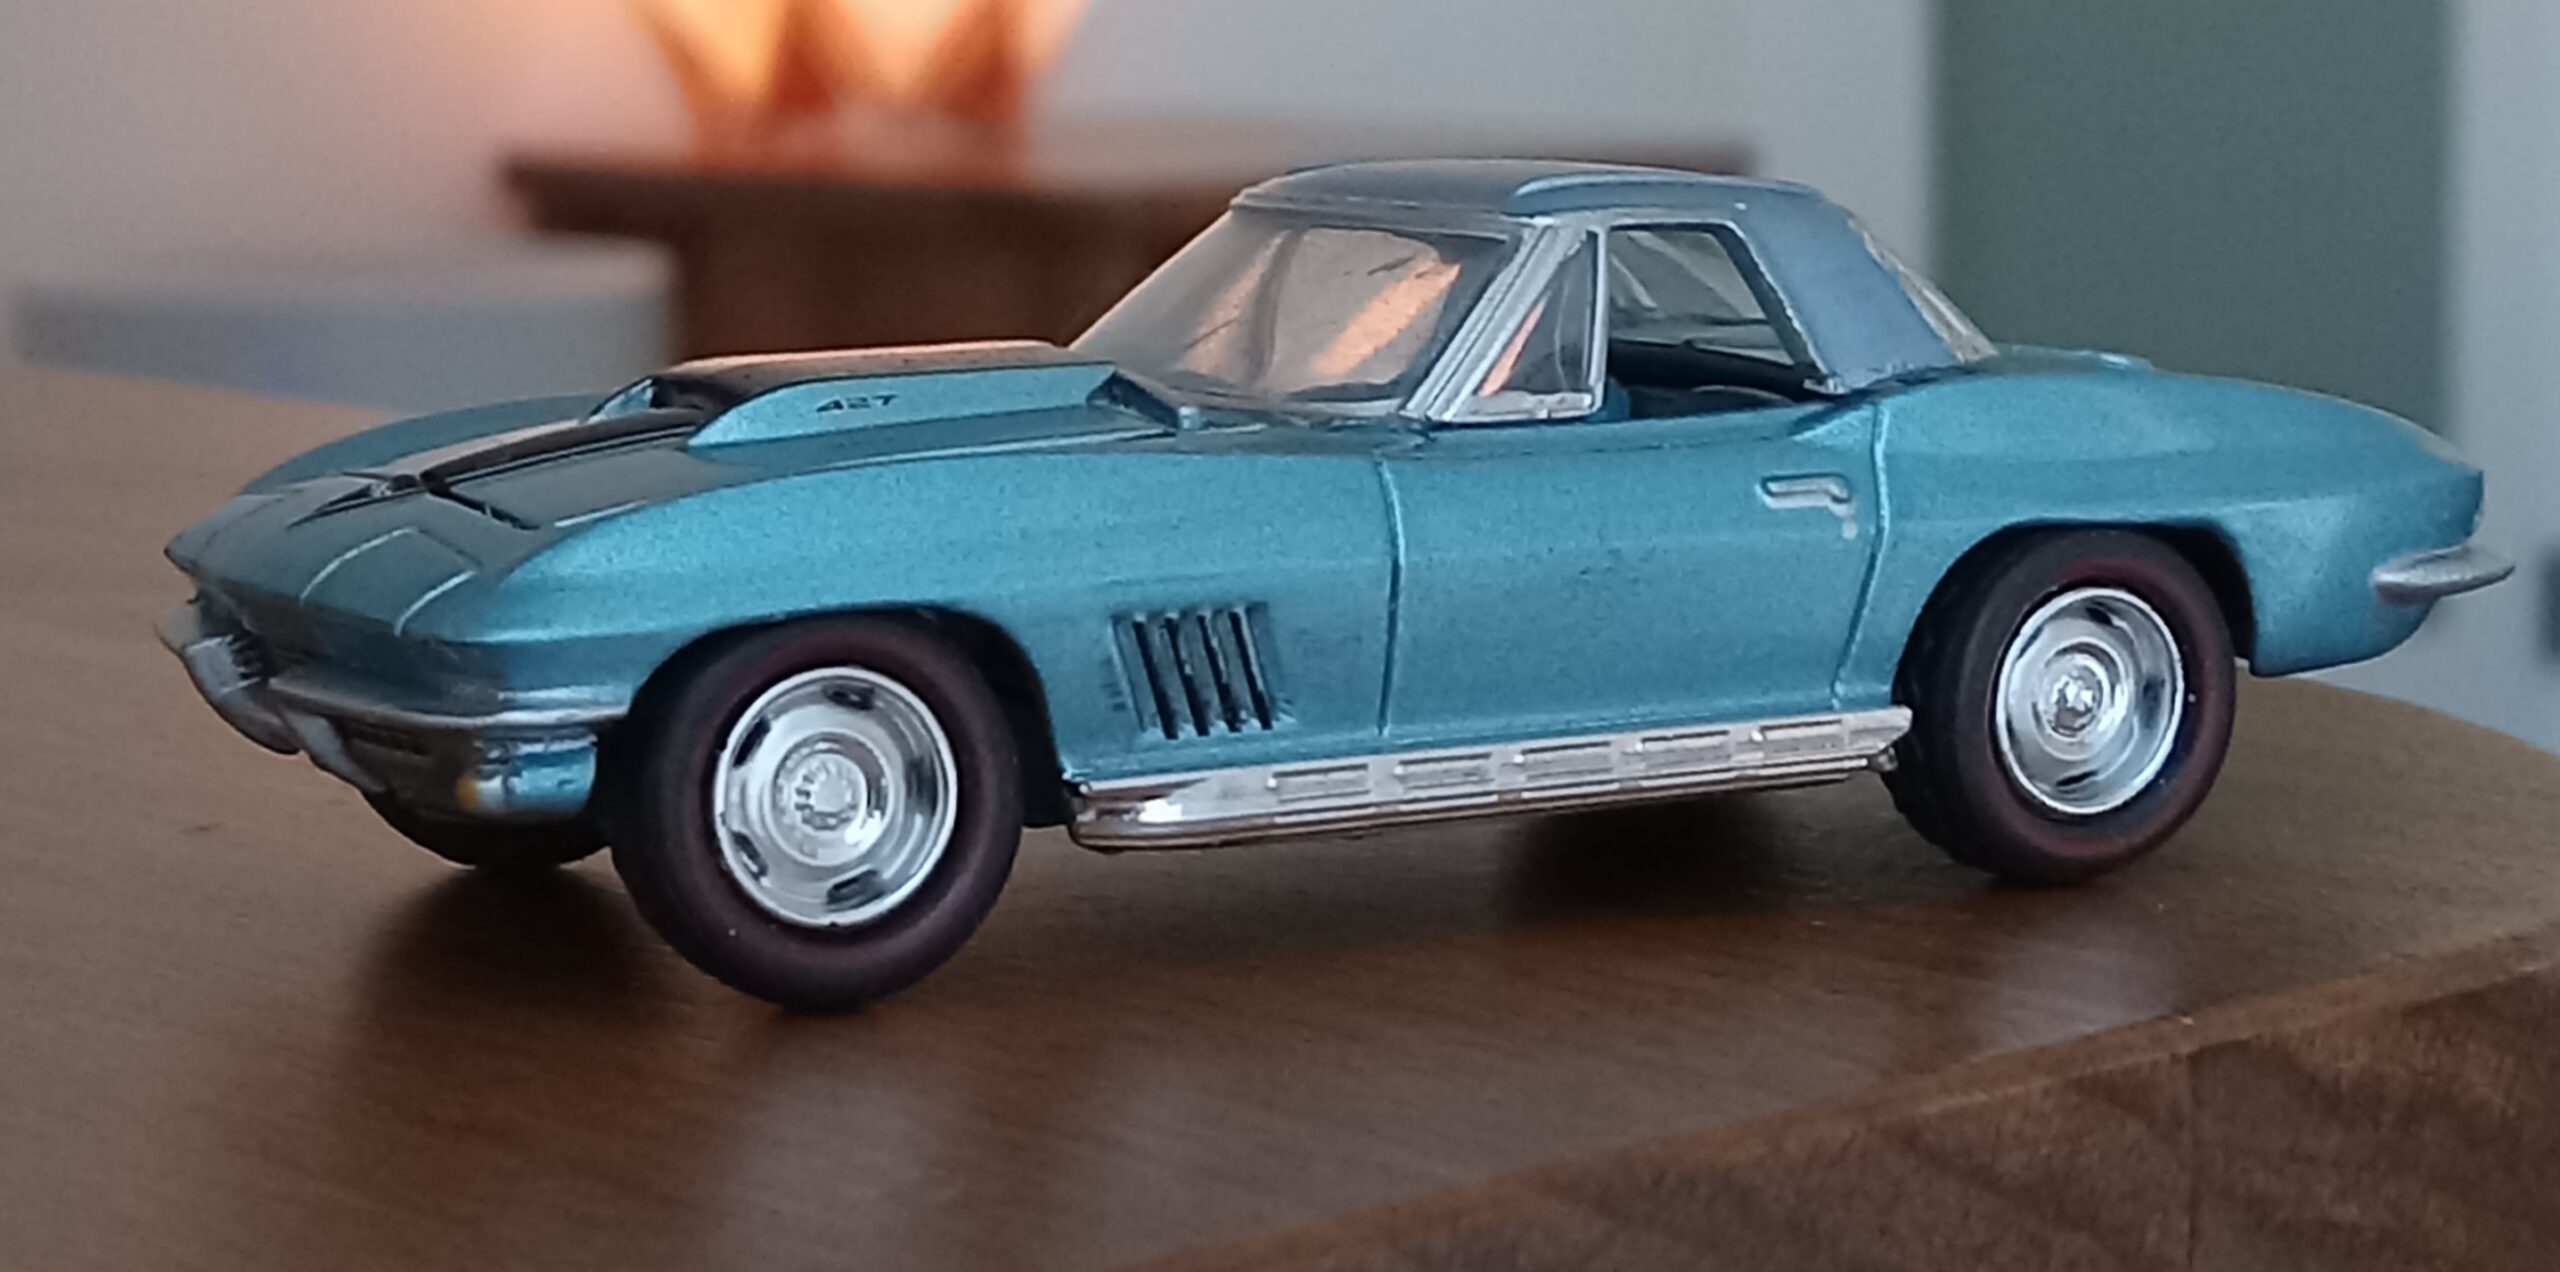
5:タキシードブラック、黒のハードトップ付き版
(グリーンライトの’67タキシード・ブラック版のボディーとタイヤ+グリーンライトの’67レーシングバージョンのハードトップ〔スカイブルーに塗装済み〕)
ーーーーーーー>結局この感じが『黒豹』的で気に入りました!(ホイールが14インチなので、違和感はありますが、、、、、、我慢がまん))
ーーーーーーー>『私の好みのデザイン』版の記事ではこちらの『黒豹版』の写真中心で行ってみたいです!!
【使用したミニカー】
 (グリーンライト社の細心の67年型コルベットなので、ホイール・サイズ&タイヤ幅の見直し、塗装クオリティーのアップ、タンポ印刷の精度向上など細かい改修箇所がみられ、今の時点のベストチョイスとなっております。ーーーー>供給量が多かったのか、プレミア価格になって言何野で、非常にお買い得です!!)
【改造行程】
先の改造記事にありますように、
*カシメ止めを外し、
*慎重にダッシュボードと風防部分を外し、
*改造作例【#3】で使用した黒いハードトップと交換します。
*車軸とトレッドを微調整したら、
*ボディーとシャーシを再度接着したら完成です。
【完成作品ギャラリー】
*大変でしたが、、、、グリーンライト社の67年型コルベット・ロードスターは決して忘れません!!
(こちらは同じく今回沢山使わせていただきました、オートワールド社製の67年型クーペです。--→こちらの商品、傘下のジョニーライトニング社から出ているものと同じ金型で、最新型トイこともあり、非常にいい感じに「デッサン」されていまして、無改造でも写真映えしまくりです。ーーーーーー>窓枠をクロームメッキのマーカーで丁寧に縁取ってあげれば更に完璧に、、、、)
今回はこのグリーンライト社の66,67年型コルベット・ロードスターに大変お世話になりました、かれこれ10台以上を入手し、8台を改造に使いました。
今後もこれに懲りず、
またどうしてもかっこよく仕上げたいミニカーがあれば、
今回のように徹底的に改造して、
自分で納得できる立体造形を
手元に置いてみたいです。
告知:
近い将来、
この辺を徹底工作予定です。
お楽しみに、、、
本ブログと記事内容につきまして:
ブログ記事を書くにあたり私の目標は、立体造形(料理も含めて)とのかかわりを通じて、私個人の特徴的(ネジ曲がり方も含めて)な評価軸を解明することで、「美しさ・美味しさ」に対する好奇心や、探求心を、どのように満足・充足させてきたのかを明記しておくことです。
従いまして、記事の中に出てくる、数字や年号、微細なデータなどには細心の注意を払っておりますが、時に大きな間違いや勘違いを犯していることも考えられます。特に自動車記事における主要諸元や、年号などには紛らわしいものも多く、あくまで参考程度に考えていただければ幸いです。
私としては、記事の中で個人的な外観デザインや味覚の評価、そこから広がる後半部分につなげるための、『流れ』を作るための客観的材料として年号やデータを挿入している感じです。あくまで重視したいのは、私個人の頭の中で起こる、記憶の錯そう的混沌から生まれる新たな『見方』や『情報の予想外のつながり』です。その勢いを作り出す、『流れ』の一環として、諸データが副次的に必要となるわけです。
話がそれますが、大好きな落語の世界に「三題噺」という、その場て会場から募った3つのお題を使って1つのお話に仕立てるといったお遊びがございますが、私はそれに近いことを立体造形の特徴や(料理のお味)をお題にして行っている感じがします。その中で頭の中に去来する数々の着想が、全く予想外で楽しく、次回からの記事内容を大幅に変えたり、新展開につながっています。
当ブロブの仕組み:
『好奇心の点と線 x 気まぐれ脳内回路=予想外の新展開』
こんな自分勝手なブログですが、今後ともよろしくお願いいたします。
追記:上記の『流れ』を作る為に必要な写真はできる限り、個人所有のミニカー・自前の料理などを使い撮影しておりますが、その他の必要最小限の図版や写真を他のブログ主様の記事や諸会社ホームページなどからお借りしております。(記事内容に合うよう加工させていただき、使用時は最小の解像度で載せております。)問題がある場合、ご連絡いただければ直ちに降ろさせていただきます。
追記2:当ブログ記事に掲載のミニカー写真等(個人撮影)は許可なしで、どのようにお使いいただいても結構です。私個人の創造性はこの世のもの、と言う認識の上で記事を製作しています。
!!!!!!!!!!!!!!!!!!!!!!!!!!!!!!!!!!! Translated in English !!!!!!!!!!!!!!!!!!!!!!!!!!!!!!!!!!!
*Part 3: Greenlight 1/64 Scale Corvette Stingray (Convertible) C2, 1967 [Tire & Wheel Replacement, Additional Modifications to the Hardtop]

For the third installment of the 3D Modification Project,
we’re working on the
“1967 Corvette Roadster with Hardtop,” but
this modification process
has turned into an incredibly difficult project.
Tears/Smiles
First, aiming for a quick fix (around March 10),
I tried to get by simply swapping the top and tires/wheels on Grain Light’s latest Light Blue Metallic Roadster, but the result was underwhelming…
As a result, as of May 13,
* I gathered 1966 and 1967 C2 Corvette models released by various manufacturers,
* disassembled their bodies, chassis, tires, wheels, hardtops, and other parts,
* and after trying countless combinations,
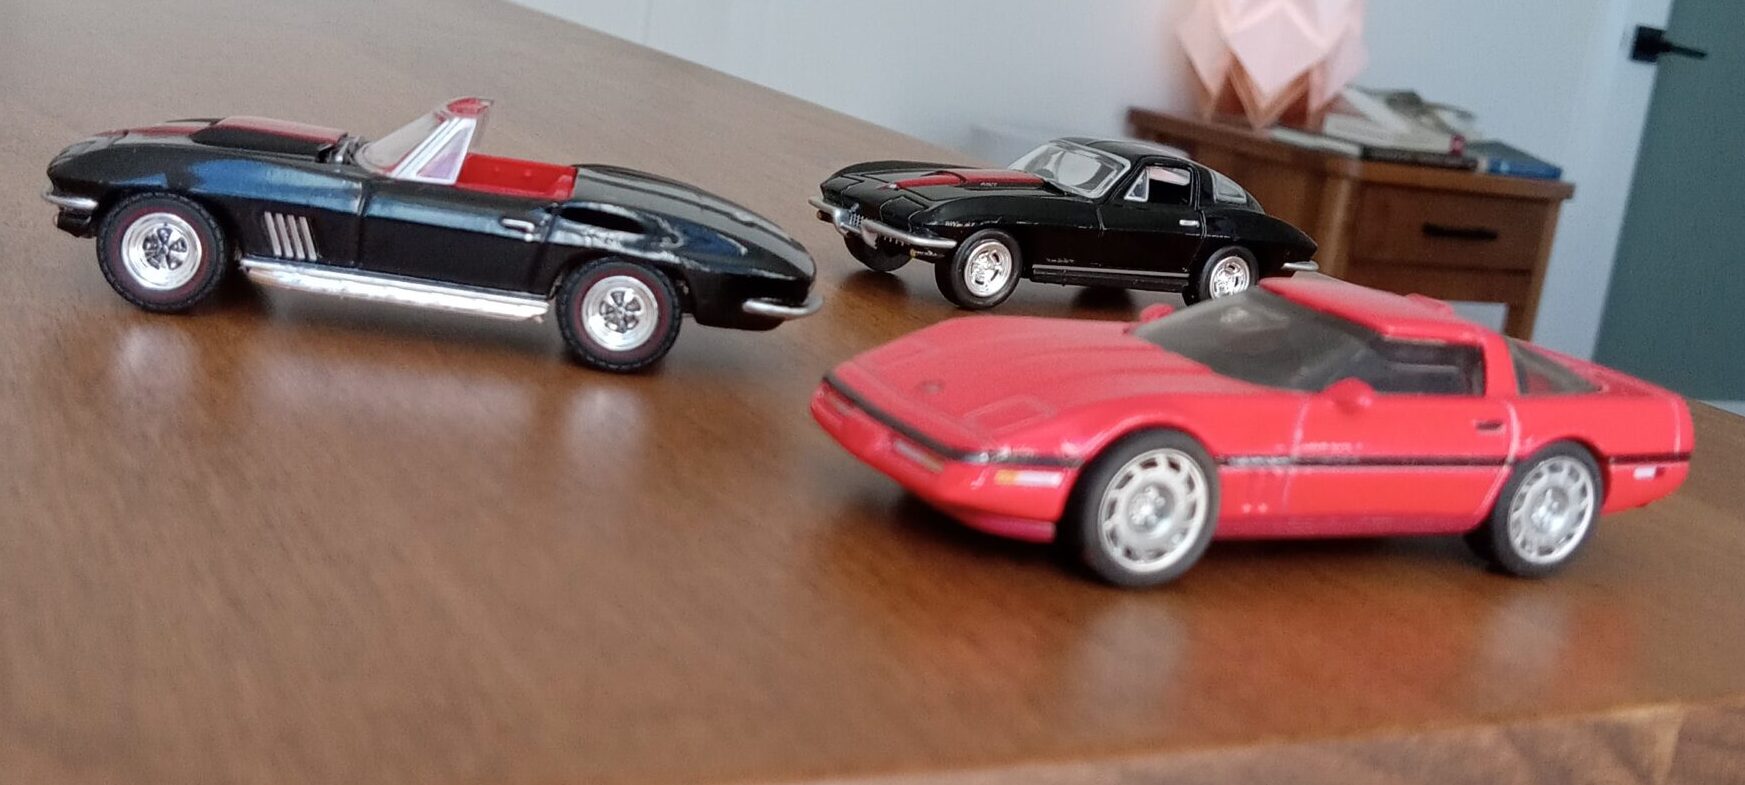
–> I arrived at two finished versions of the ’67 Stingray with a hardtop. Yay
So, in total,
I’ve built five versions of the roadster. (lol)
1: Light Blue Metallic, with black soft top
(Greenlight ’67 light blue metallic body + M2 blue-gray ’67 wheels and tires transplanted)
ーーーーーーーー>Looks slightly tail-down
2: Burgundy Metallic, with matching hardtop
(Greenlight ’66 Stingray with burgundy hardtop + AUTOWORLD ’67 coupe wheels and AUTOWORLD ’75 Cadillac Eldorado whitewall tires)
ーーーーーーー>Is burgundy a bit too subdued for a Corvette?
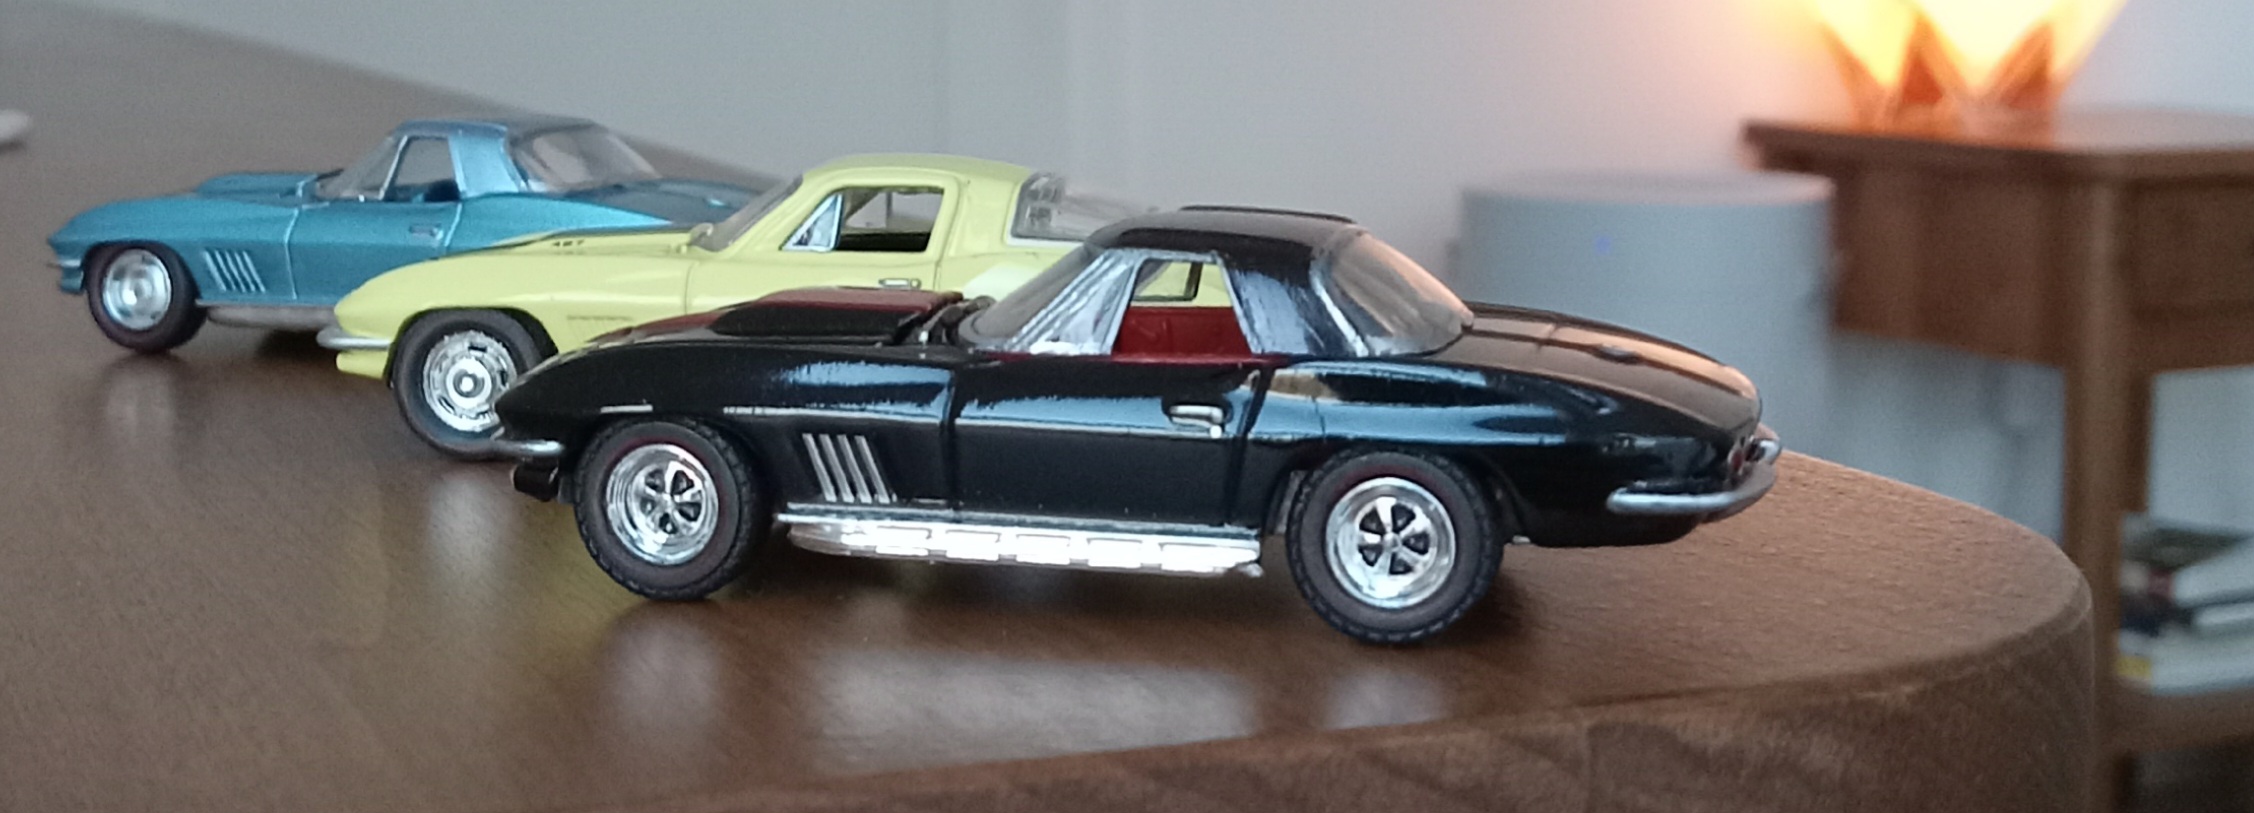
3: Light Blue Metallic, with black hardtop
(Same as above: Greenlight ’67 light blue metallic body + Greenlight ’67 racing version hardtop + AUTOWORLD ’67 coupe wheels and AUTOWORLD ’75 Cadillac Eldorado white-letter tires)
ーーーーーーーーーー>This one also looks a bit saggy in the rear, and the color isn’t quite right…
4: Light Blue Metallic, Version with Matching Hardtop
(Greenlight ’67 light blue metallic body + Greenlight ’67 racing version hardtop + wheels and tires transplanted from a Johnny Lightning ’67 light blue metallic coupe)
ーーーーーーーー>It looks nicely put together, but lacks impact?
4’: Light Blue Metallic, with matching hardtop and blue-letter tires
(Greenlight ’67 Light Blue Metallic body + Greenlight ’67 Racing Version hardtop + wheels and blue-letter tires transplanted from Johnny Lightning’s display case edition ’67 Light Blue Metallic Coupe)
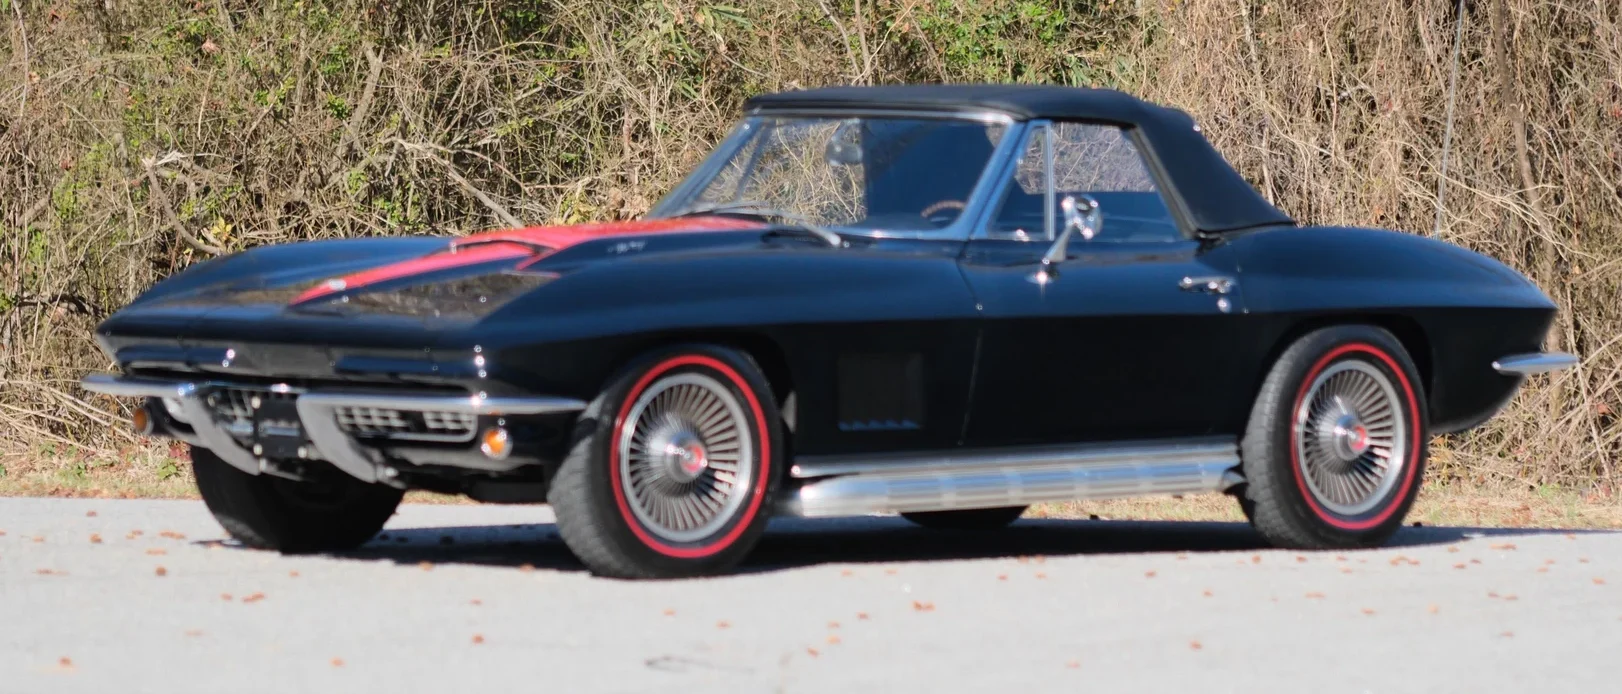
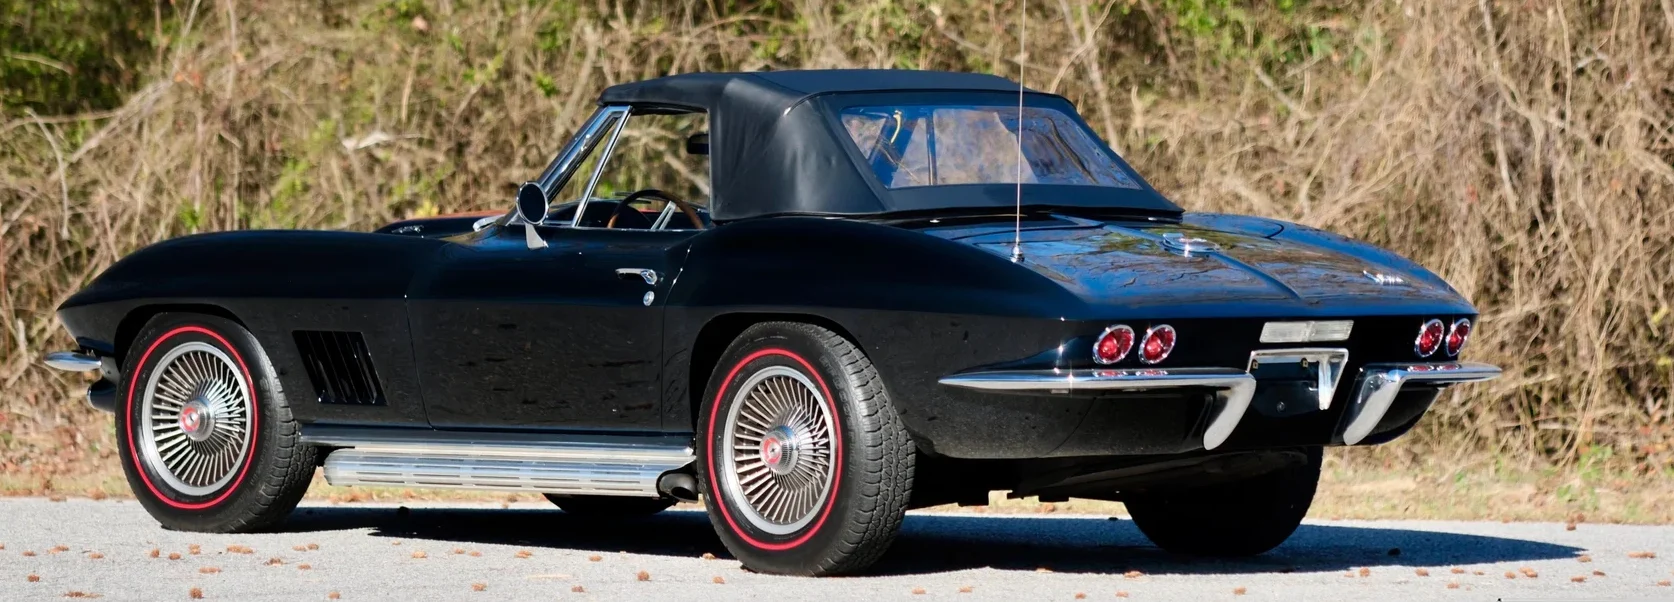
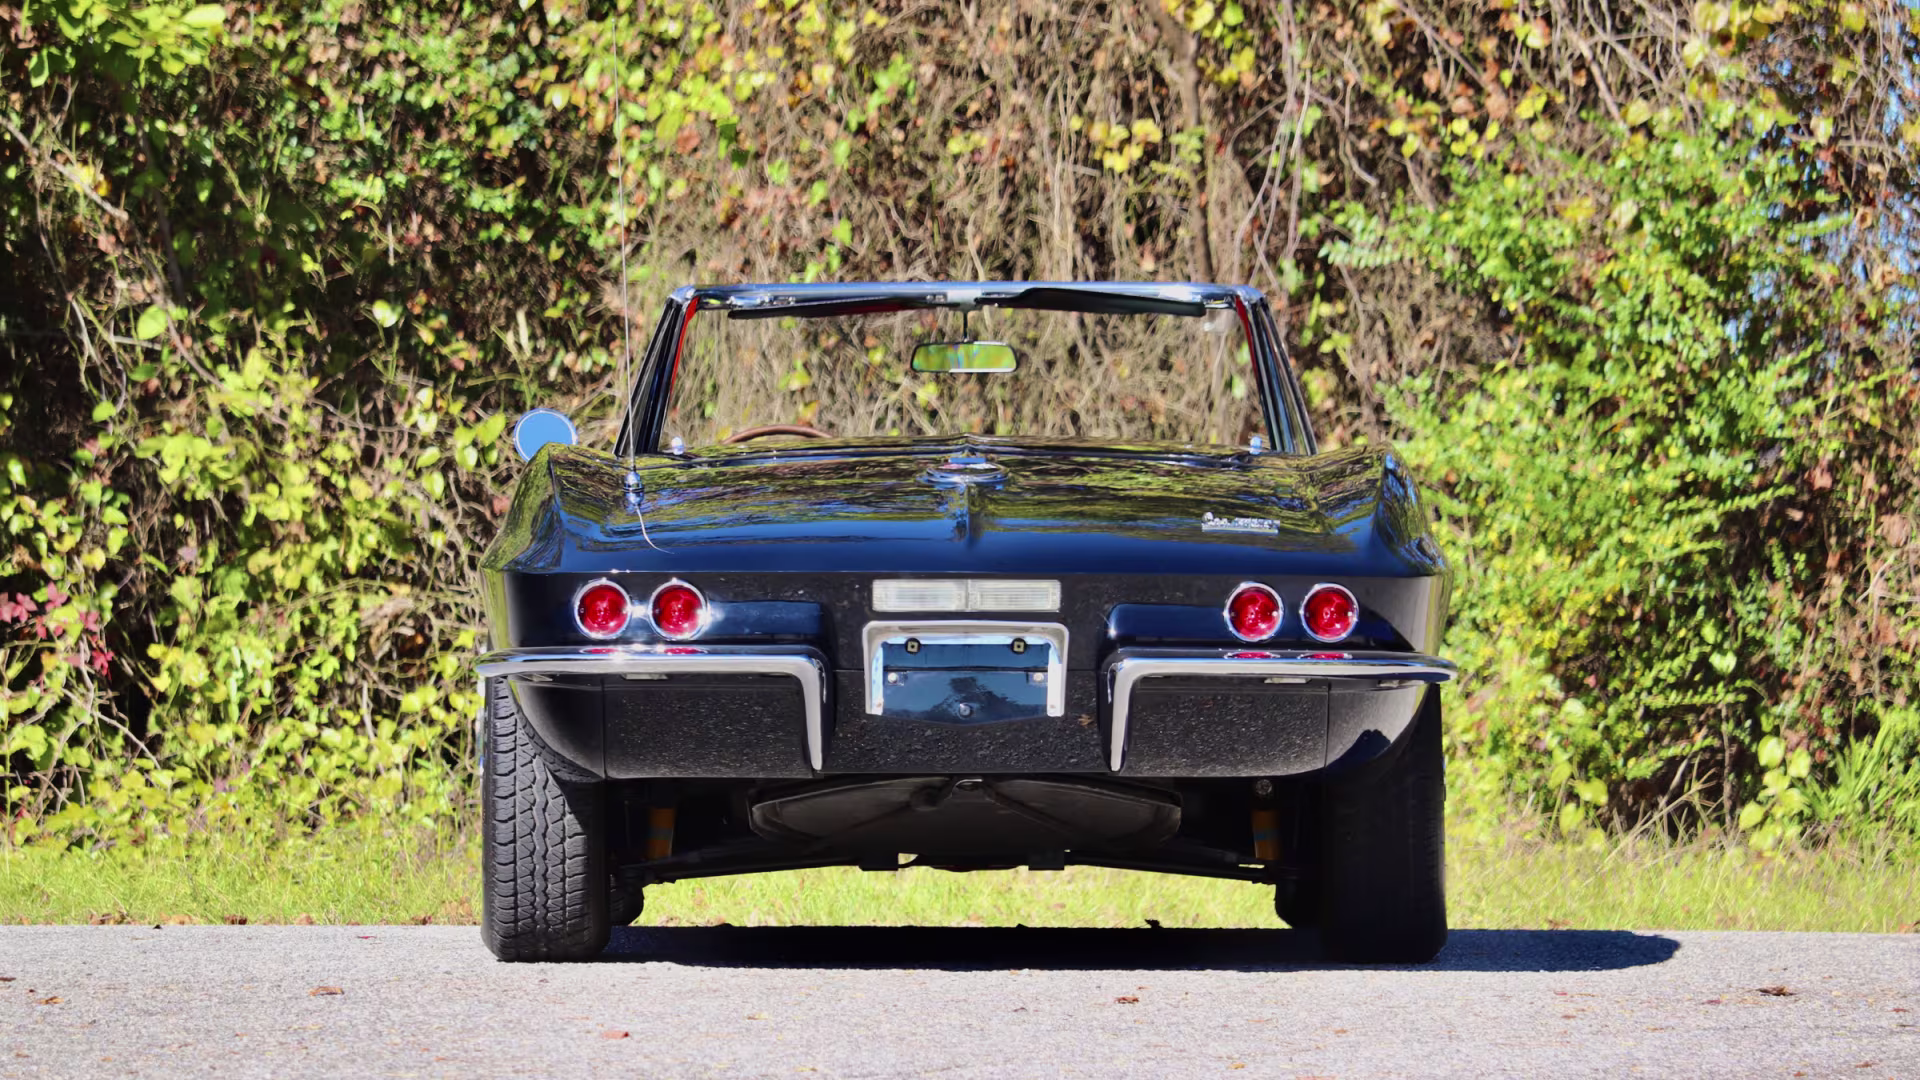
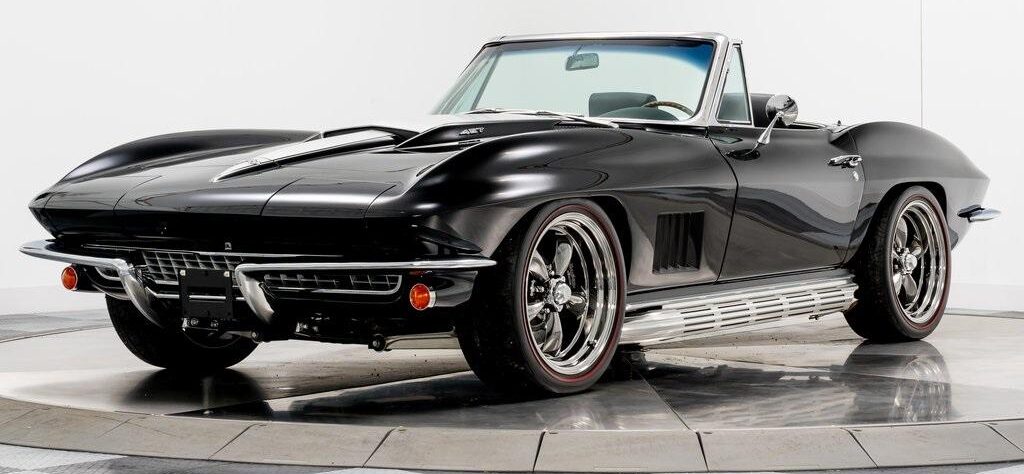
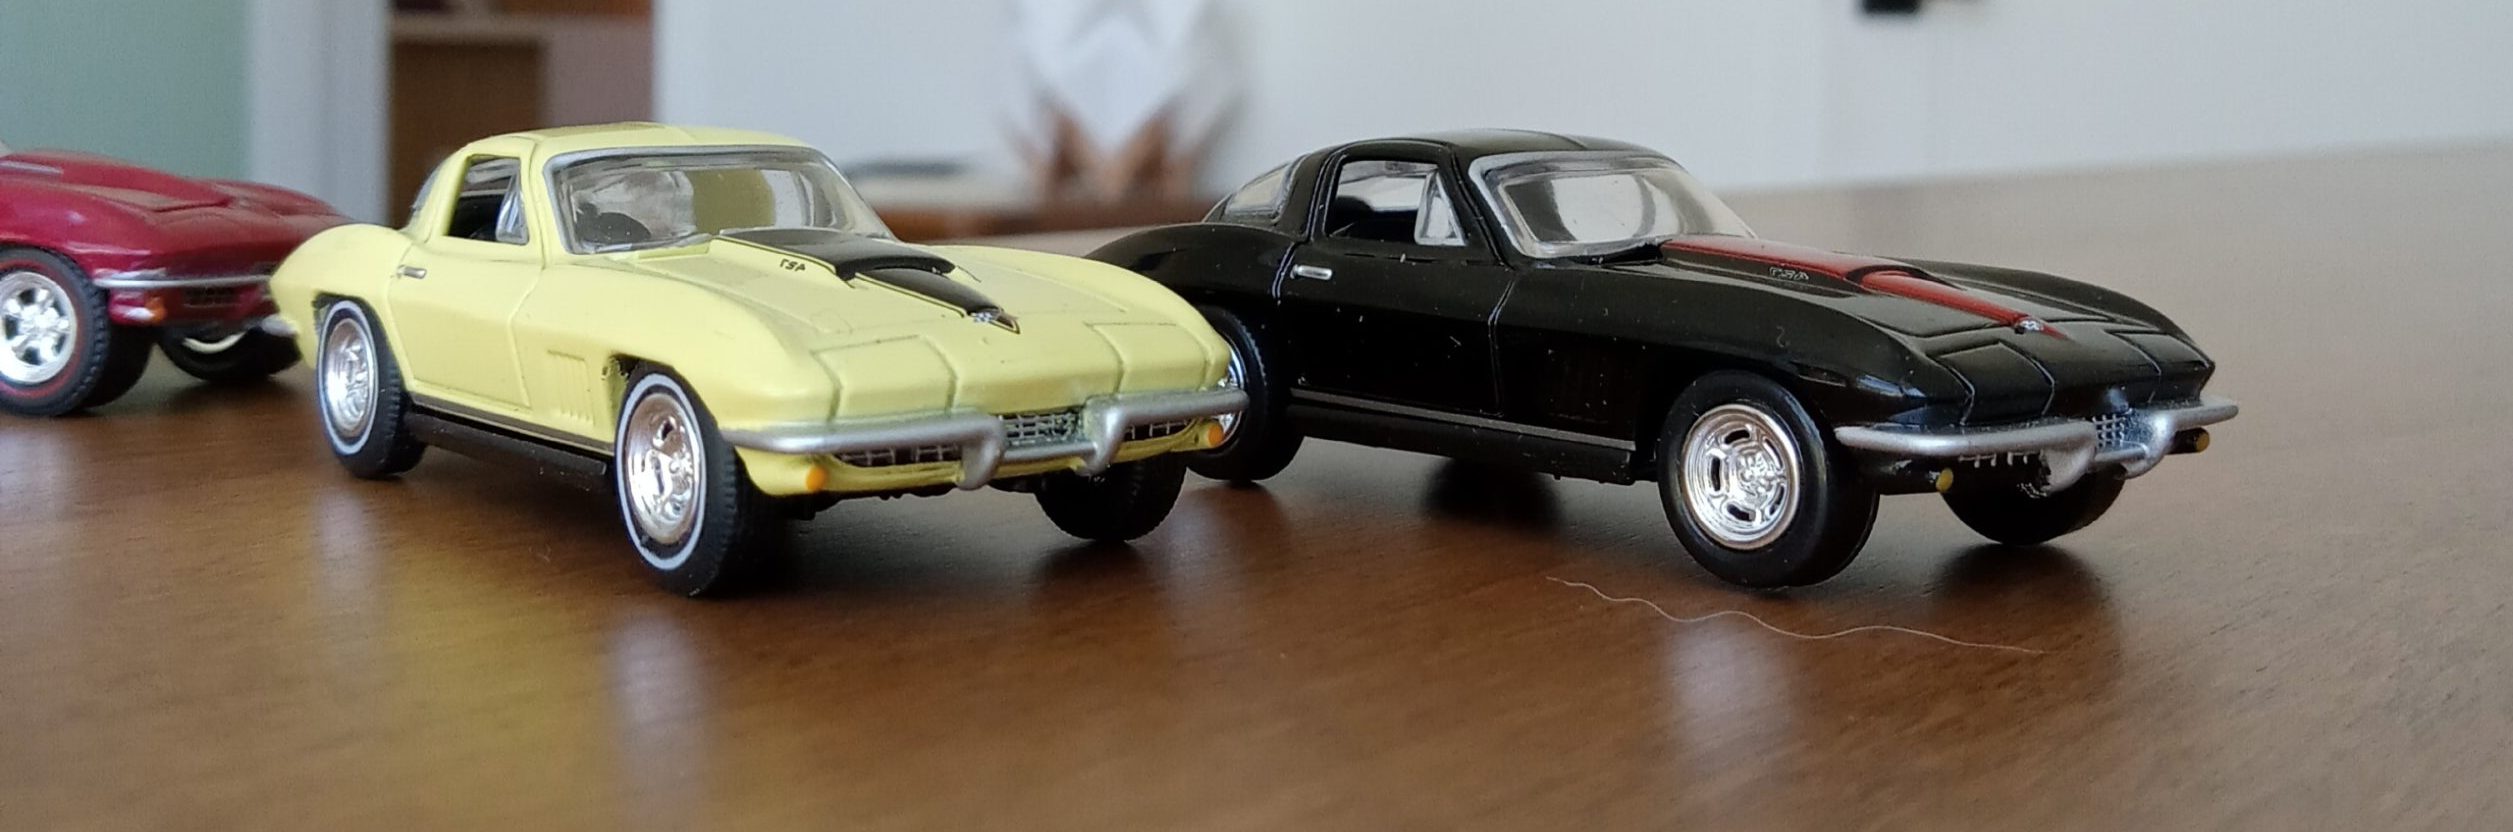
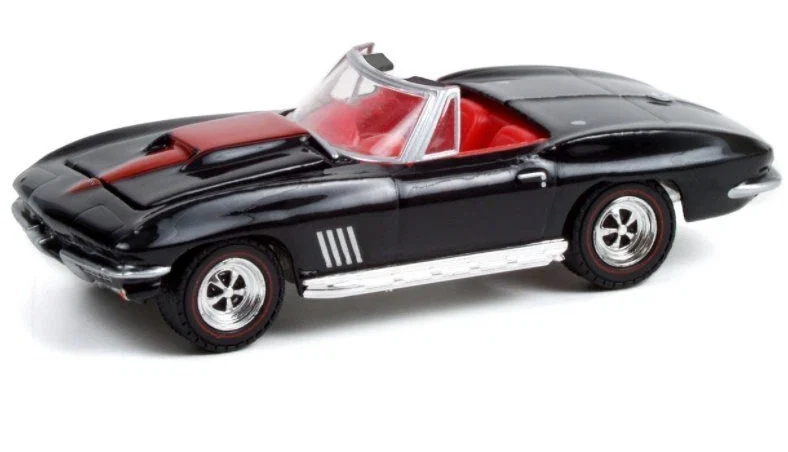
5: Tuxedo Black, version with black hardtop
(Greenlight ’67 Tuxedo Black body and tires + Greenlight ’67 Racing Version hardtop)
ーーーーーーー>In the end, I really liked this “Black Panther” vibe! (The wheels are 14 inches, so it feels a bit off, but… I’ll just have to put up with it.)
ーーーーーーーー>I had also prepared a “Yellow Version” for the end, but I ran out of steam.)
#For this hardtop modification,
these [Kaname] products were absolutely essential. (I used a total of 3 units.)
(This is a close-up photo of the hardtop section of Greenlight’s ’67 Stingray Roadster Racing Version.)
0: First, the prototype I modified was
ーーーーー>this race car-spec Roadster with the hardtop installed.
Now then,
let’s take a look at it like this.
*Reference Materials: Photo Collection
*Review of Greenlight’s 1/64 Scale ’67 Corvette Roadster:
*Modification Project for 4 Cars:
*Impressions: “I had a blast!”
*Reference Materials: Real Car Photo Collection—(By Color)
#Light Metallic:
(The hardtop is tilted
quite far back!)
#Burgundy:
(Those Rally wheels look cool!)
#Tuxedo Black:
(I couldn’t find these aluminum wheels anywhere. T_T)
*Model Review: Greenlight, 1/64 Scale 1967 Corvette Roadster Review
Now, moving on to
the modifications I made to these four Corvettes,
I’d like to share my personal review
of the Greenlight
Metallic Blue Roadster,
which I used for all of them.
(I managed to find two on eBay.
They’re the blue soft-top versions.)
This is a derivative model using the mold released by Greenlight in 2007,
and it appears to be an accurate representation of a real car that fetched a high price at a “Mecum” auction,
released in 2010.
#Pros and Cons:
Pros:
* Body sculpting that subtly emphasizes the muscular fender area of the real car
* As the latest release for a 1967 convertible model, the molding, interior, panel lines, and tampo printing are superb down to the finest details
* Accurate reproduction of the rare color choice
Weaknesses:
* The tires are slightly oversized, giving the overall look a somewhat toy-like appearance
* The paint quality is rough, lacking gloss, and there are areas where dust has accumulated
* The rear end of the body looks slightly “droopy”
* Modification Project: Live Coverage of 4 Cars!!
So then,
it has expanded to cover 4 cars (x6 versions)
Let’s dive into the modification articles!!
1: Light Blue Metallic, Black Soft Top Version
(Green Light ’67 light blue metallic body + M2-made light blue-gray ’67 wheels and tires transplanted)
(The main modifications involve adjusting the tire size,
shrinking the soft top,
and painting it black.)
#Modification Steps:
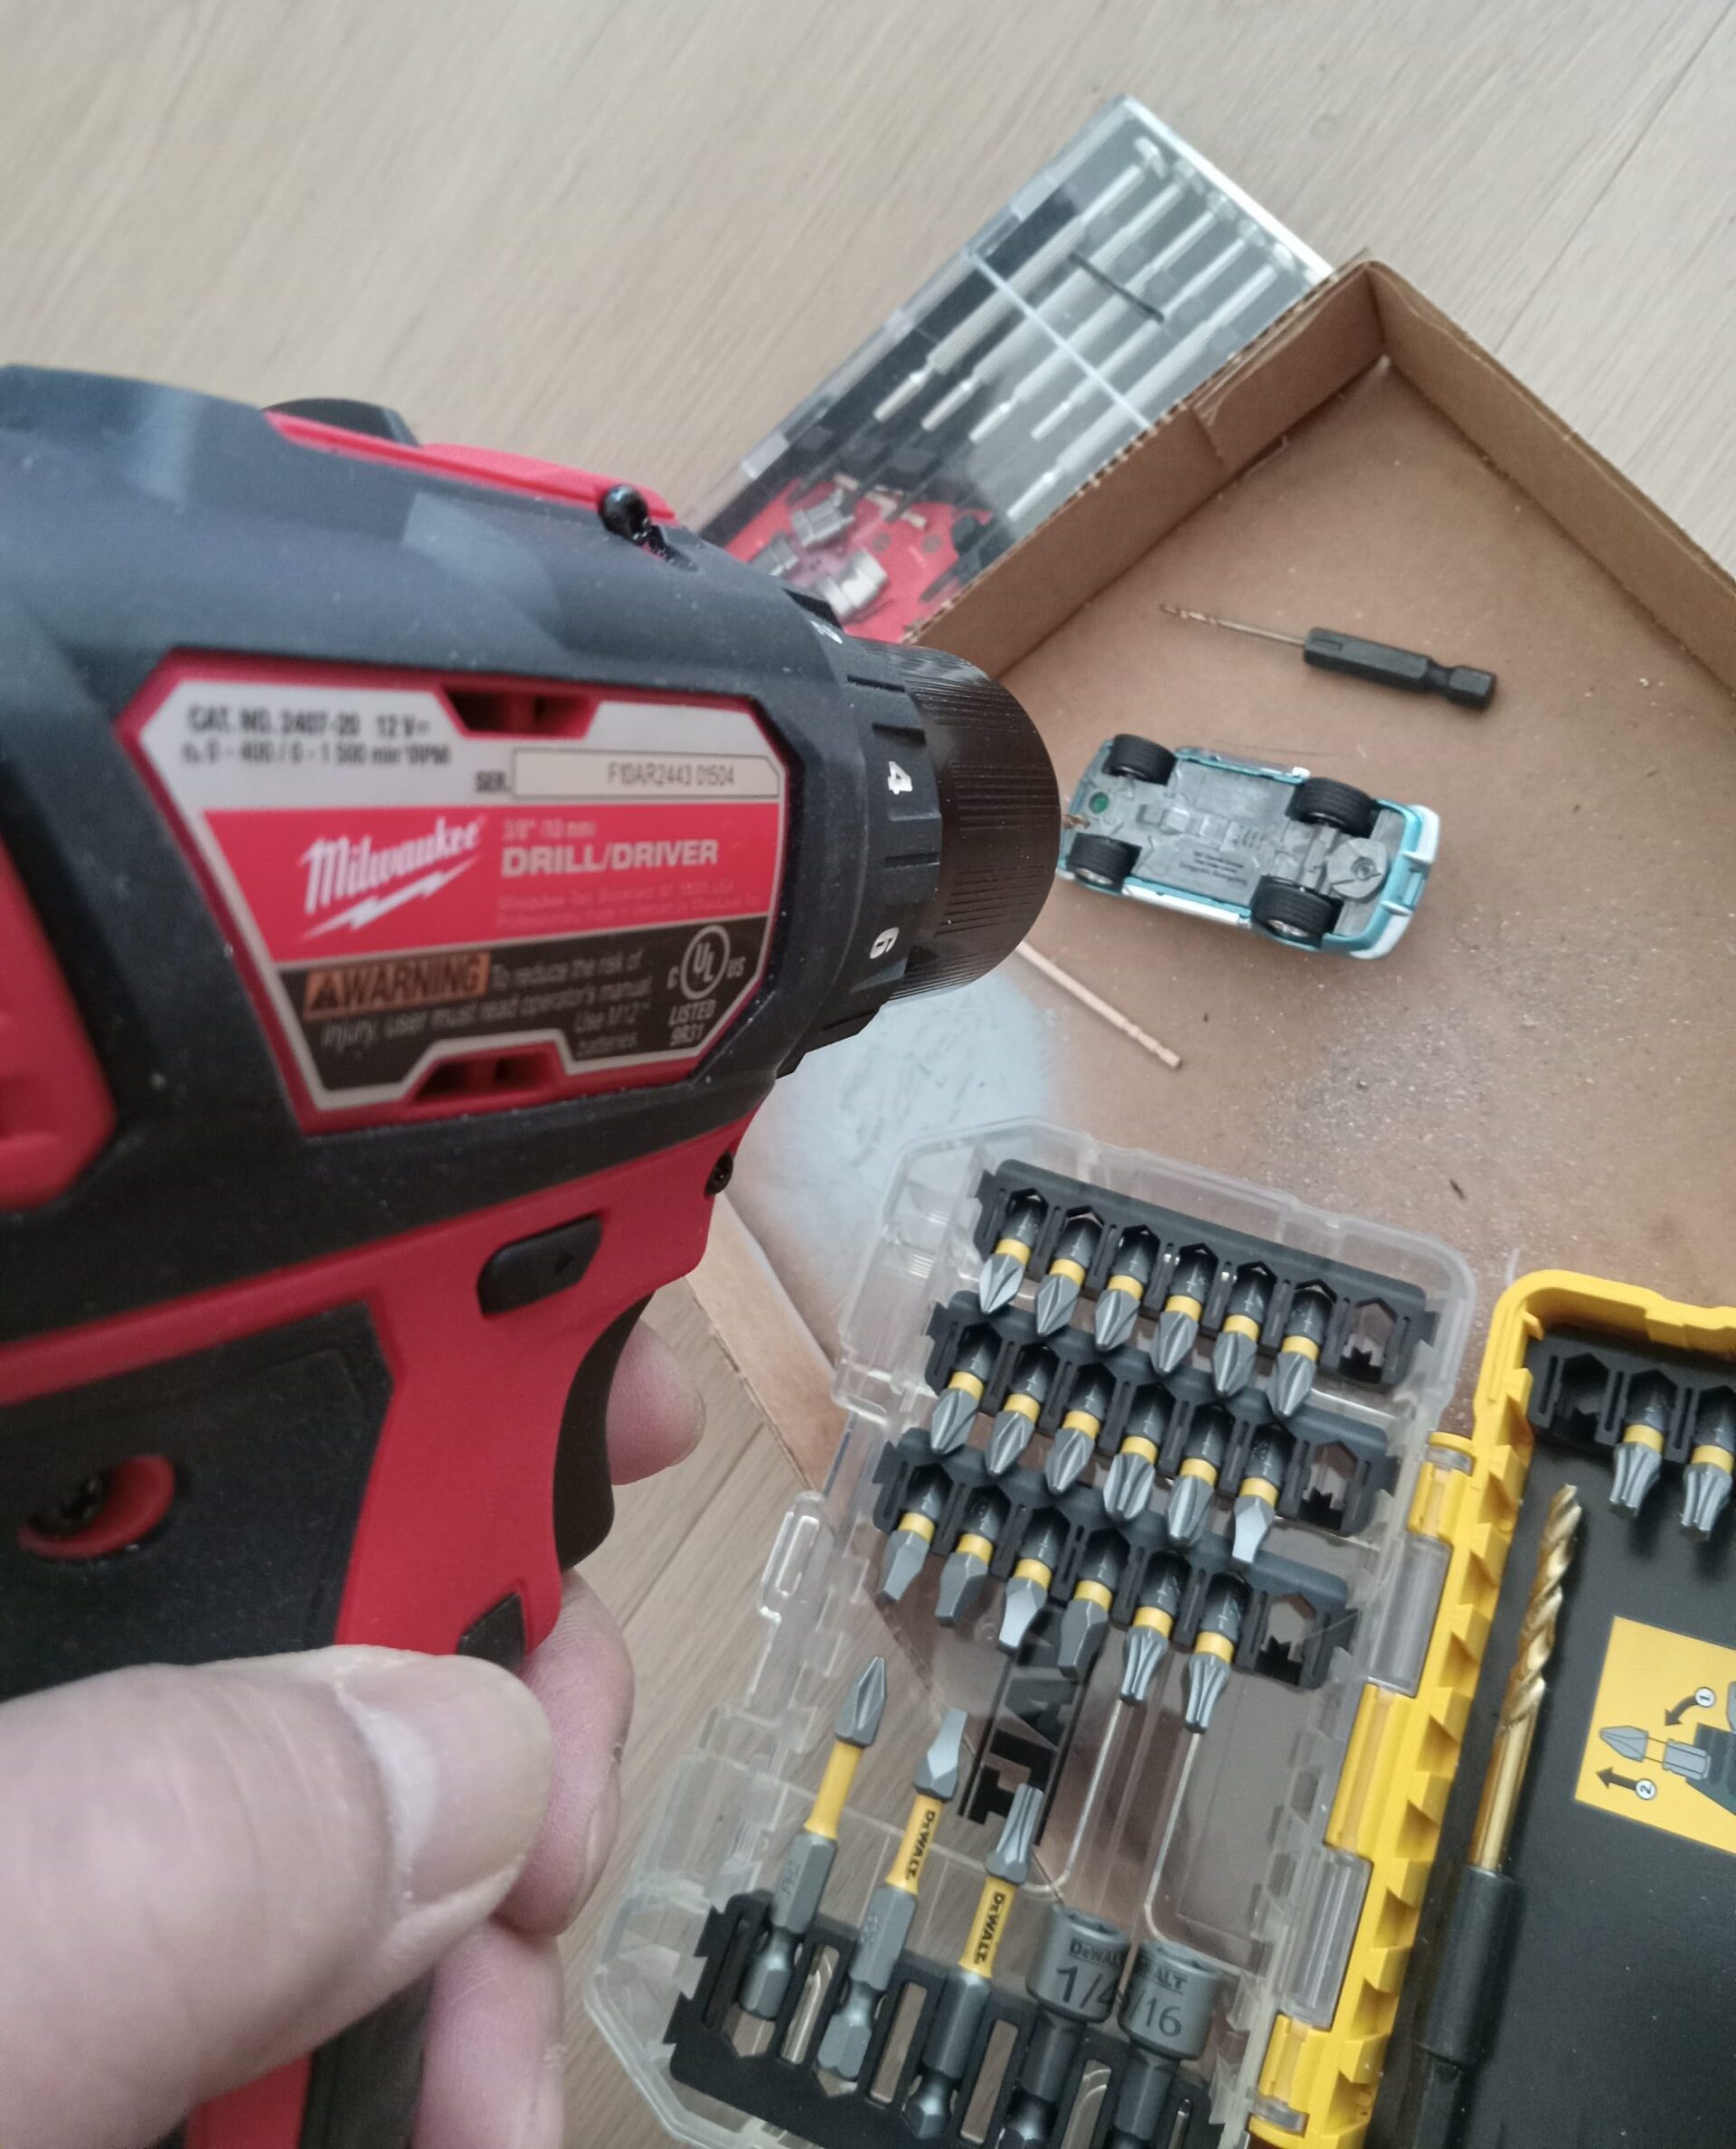
Disassembly Process:
1: Use an electric drill to remove the rivets on the chassis, separate the body, then pry off the tires and wheels with pliers.
2: Remove the interior parts, windshield, and soft top parts by removing the two rivets, taking care not to damage them.
Tire Stance Adjustment:
3: Cut the tires to two-thirds of their original width with a knife, then reattach them to the shaft to adjust the track width.
4: Enlarge the axle bearing holes on the chassis with a drill. Repeat the process of “threading the shaft through and attaching the tires for a test fit” multiple times to adjust the ride height and stance.
Top Height and Fitting:
5: Use a file to shave down the rear half of the canopy side of the windshield and canopy parts, adjusting the canopy so that, when viewed from the side, it slopes downward toward the rear at an angle of about 5 degrees (this is where your skill really shines—be careful not to file too much).
6: Paint the canopy section black with a marker, and once dry, use sandpaper to give it a matte finish.
7: Carefully paint the window trim areas that were covered by the marker with metallic silver.
Finishing Process:
8: Apply hand-painted shading and washing with a 50% warm-toned gray to the panel lines, around the hood scoop, the front grille, headlight covers, taillight areas, and other shaded lower body sections. Before it dries, wipe with thinner while leaving a bit of gray in the shadowed areas to add a “weathered” look.
ーーーー> Once reassembled, it’s complete.
[Finished Model Gallery]
2: Burgundy Metallic, version with matching hardtop (Greenlight ’67 Stingray with Burgundy hardtop + Johnny Lightning ’67 Corvette Stingray Coupe wheels and tires)
[Models Used]
(This is a fairly rare 1966 Roadster model with a hardtop.)
(I’ve used about three of these models as well.)
[Finished State]
[Modification Process]
Modification Procedure:
* After disassembling the hardtop section, adjust the height so that it slopes downward toward the rear, then reattach
* Transplanted M2-brand 1967 Stingray wheels and tires while making minor adjustments to the axle position
(* Mounted white-letter tires from Auto World’s ’75 Eldorado on Auto World’s Stingray Coupe wheels with bolt-on axles)
* Removed the hood once to sand down the underside, minimizing the protrusion of the hood bulge
(C2-type die-cast models with hardtops are quite rare; the Greenlight model used here is excellent. Other than that, I could only find a very old Johnny Lightning model (the blue metallic one in the photo).)
[Completed Model Gallery]
3: Light Blue Metallic, Version with Black Hardtop
(Greenlight ’67 blue metallic body + Greenlight ’67 racing version hardtop + AUTOWORLD ’67 coupe wheels and AUTOWORLD ’75 Cadillac Eldorado white-letter tires)
(The whitewall tires were transplanted from this die-cast model.)
[Modification Process]
Disassembly Process & Tire/Stance Adjustment:
1–4: Please refer to the modification steps for Project “1” here.
Soft Top Height & Fitting:
5: Use a file to shave down the lower rear section of the windshield/hardtop assembly on the hardtop side, adjusting the soft top so it slopes downward by about 5 degrees toward the rear when viewed from the side (this is where your skill really counts—be careful not to sand too much)
6: After masking the hardtop section, paint it with a light blue acrylic marker. Once dry, carefully peel off the masking tape.
ーーーーーー>The acrylic marker wouldn’t adhere—total failure!!
In the end, I painted it completely black with the marker and managed to be satisfied with the result.
7: I repainted the window trim areas that had been covered by the marker with metallic silver paint, working by eye…
Finishing Process:
8: For panel lines, the area around the hood scoop, the front grille, headlight covers, taillight surrounds, and other shaded areas on the underside of the body, apply hand-painted shading and washing with a 50% warm-toned gray. Before it dries, wipe with thinner while leaving a bit of gray in the shadowed areas to create a “worn-in” look.
ーーーー>Reassemble, and it’s done.
[Finished Model Gallery]
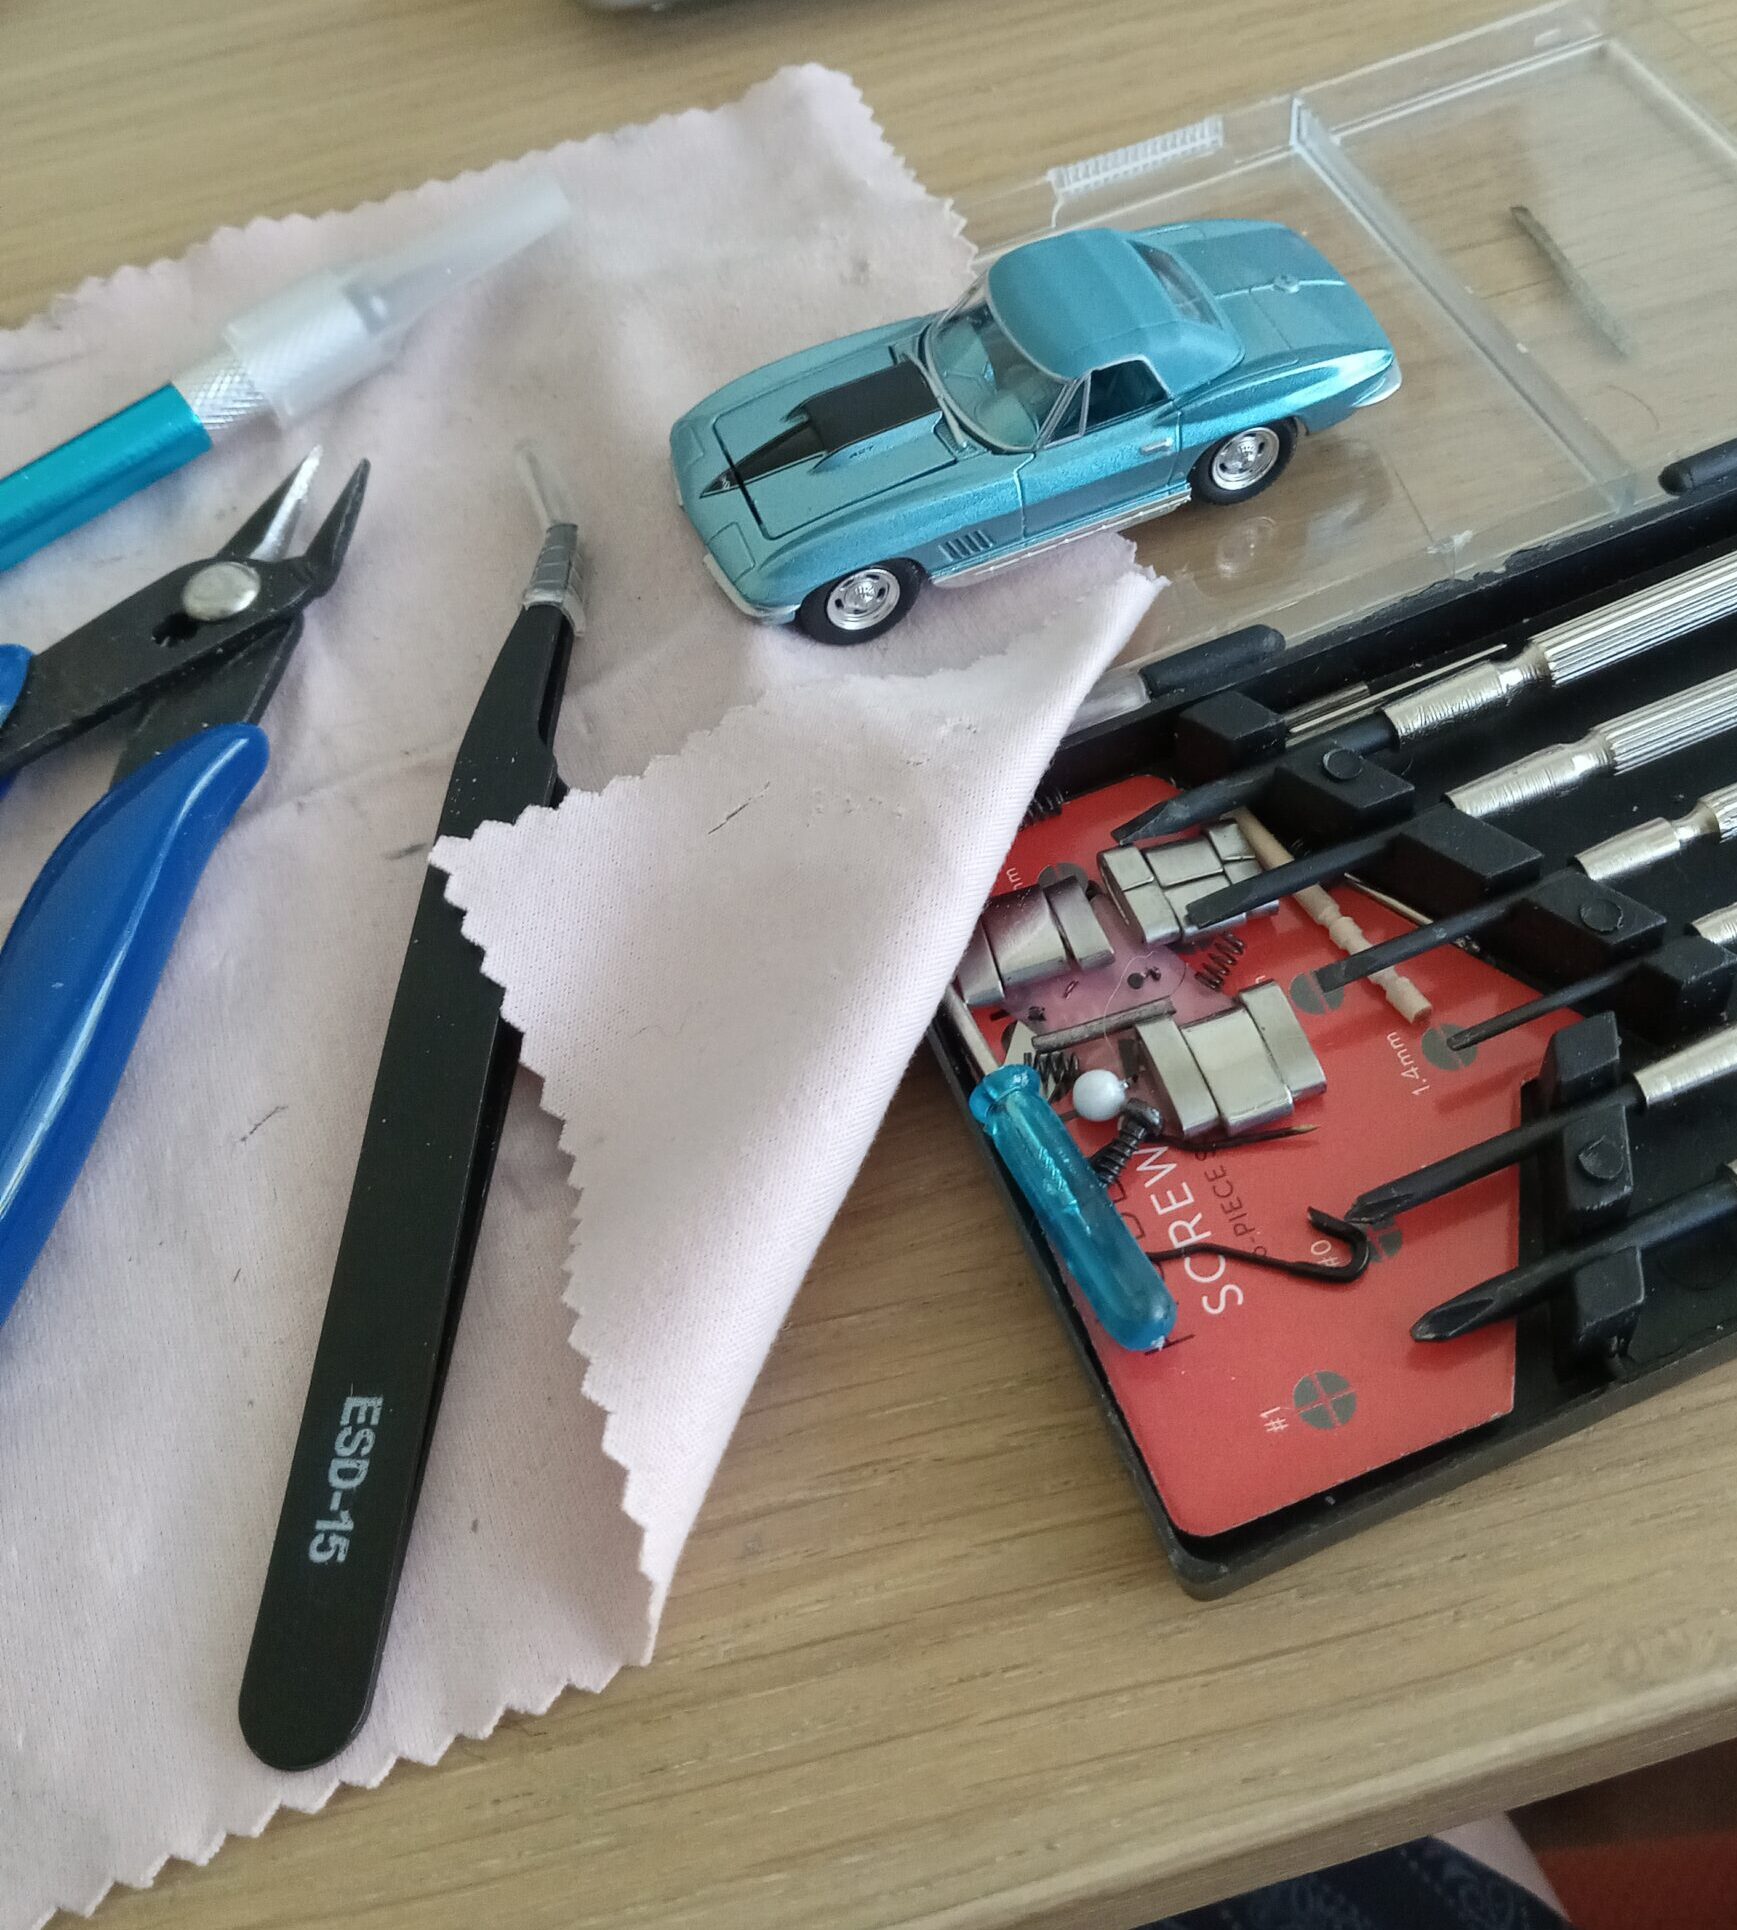
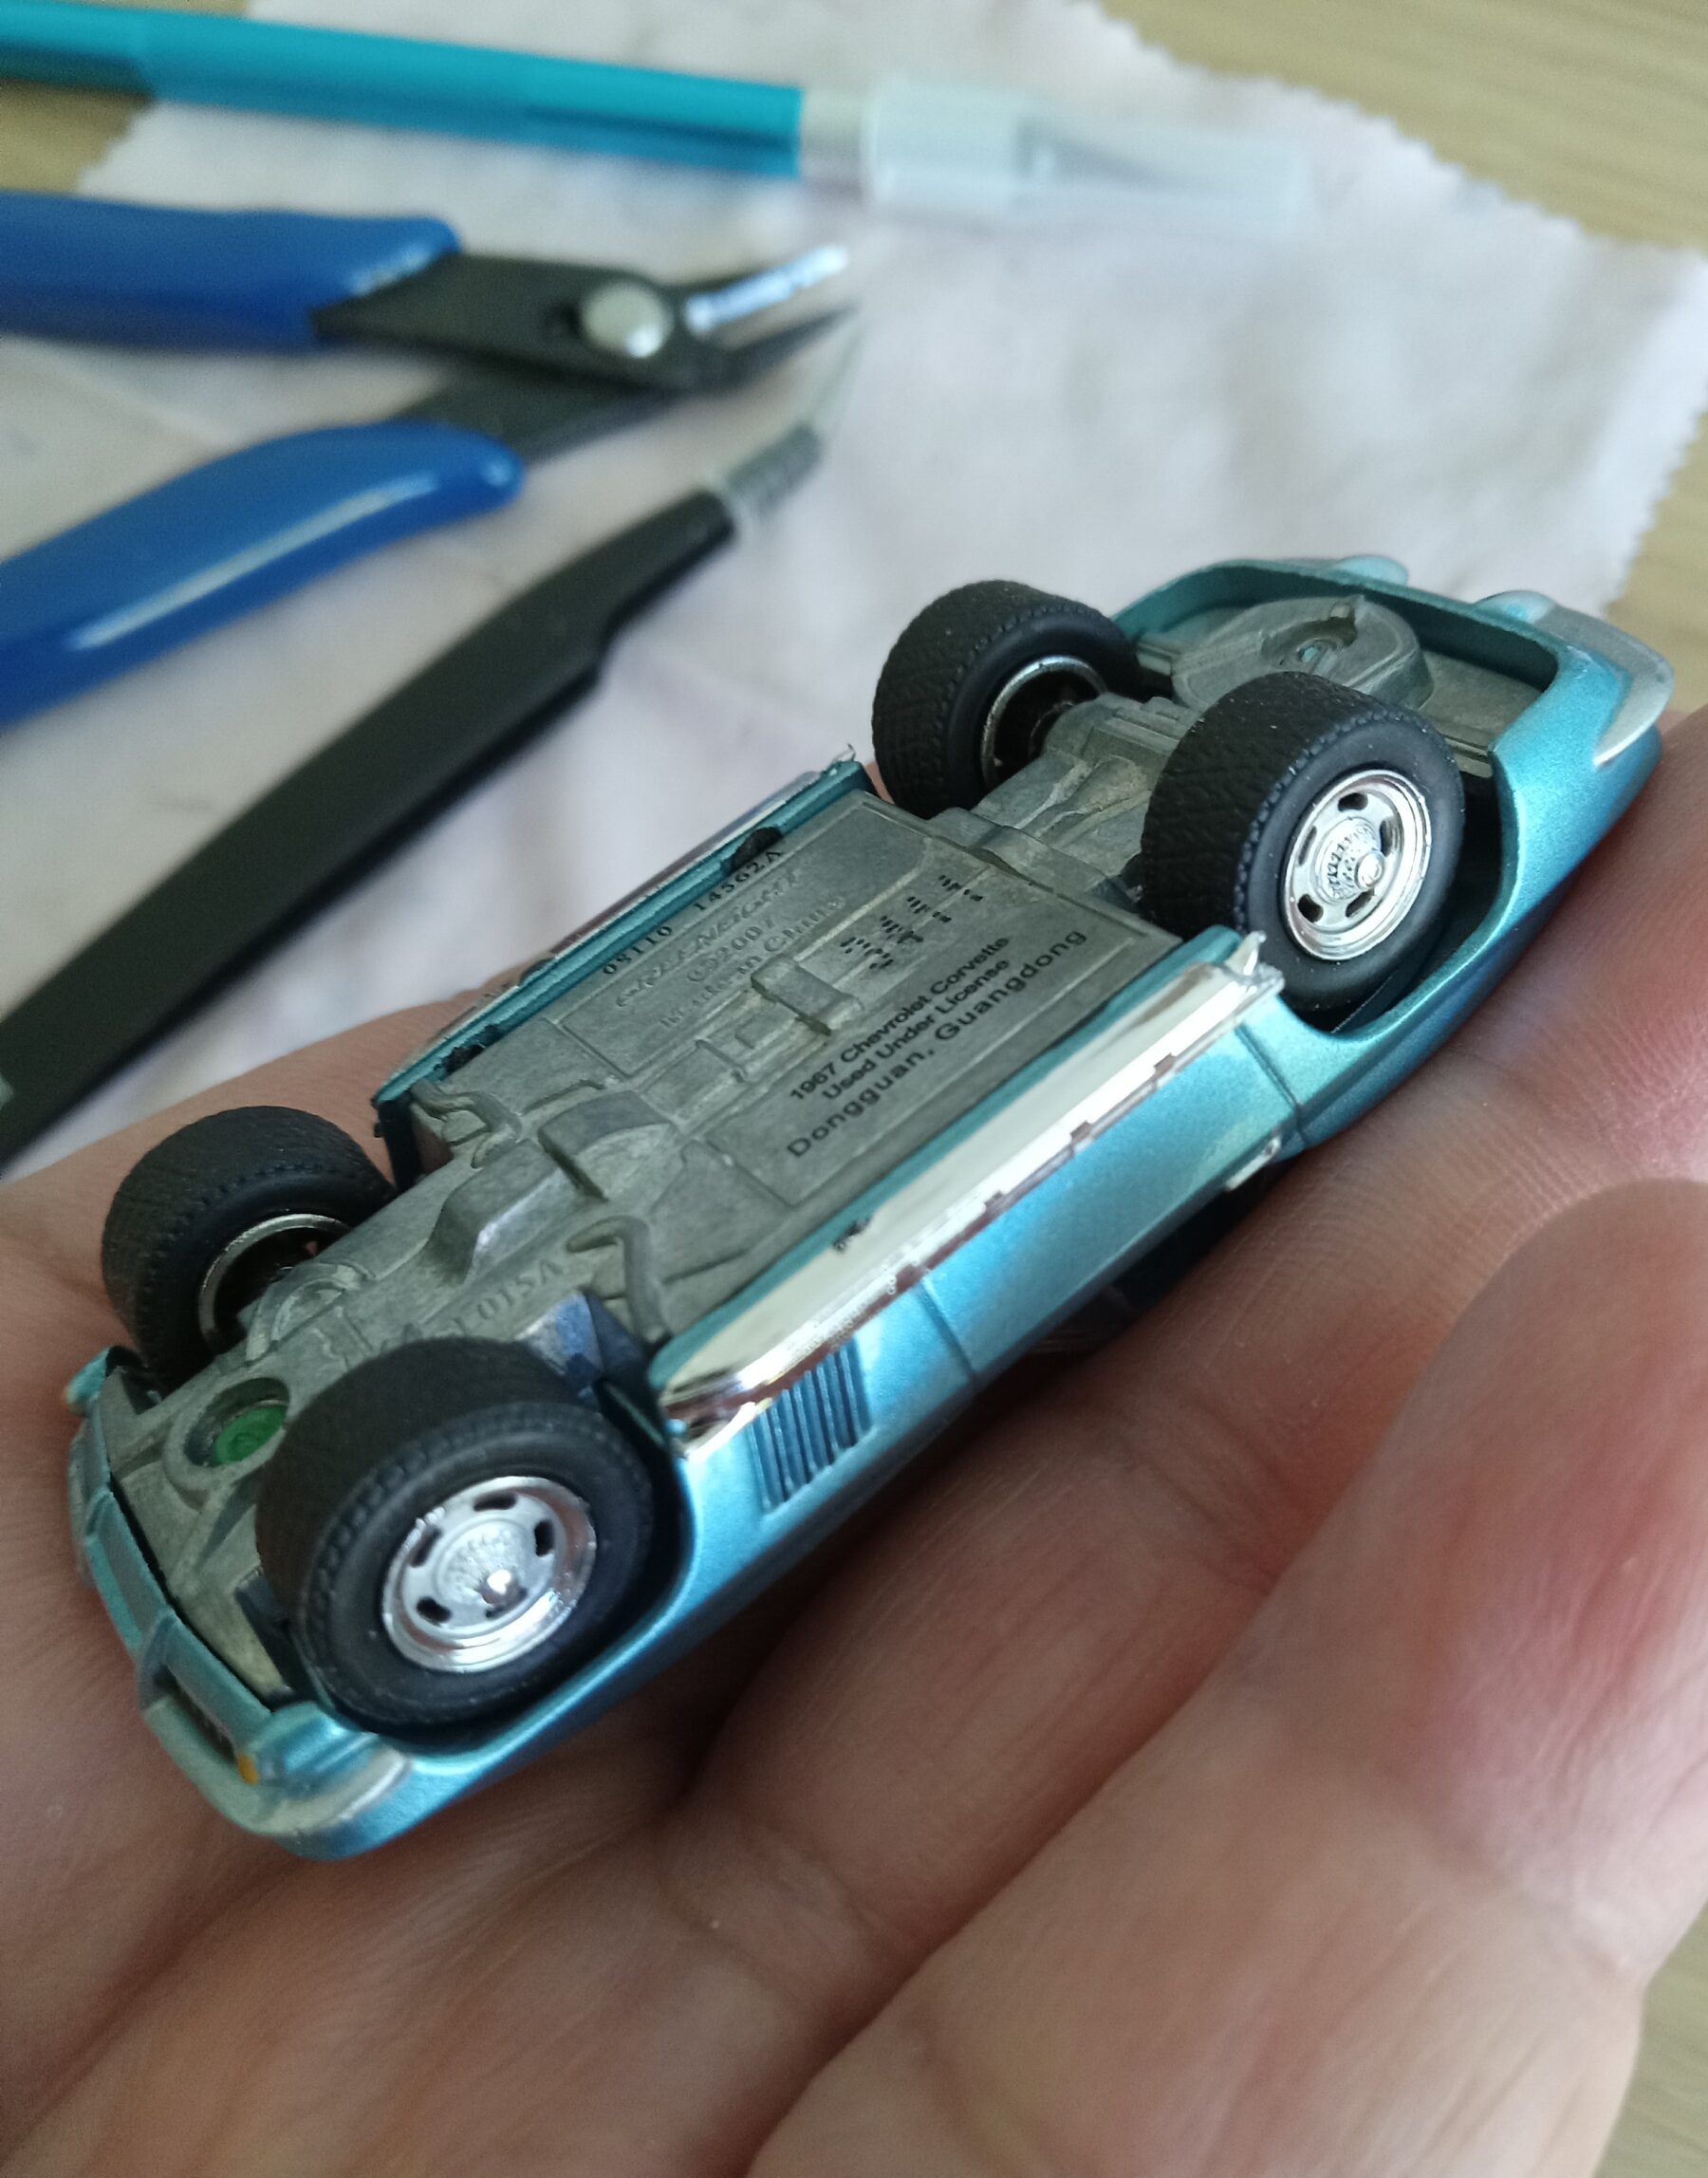
4: Light Blue Metallic, Version with Matching Hardtop
(Greenlight ’67 Blue Metallic body + Greenlight ’67 Racing Version hardtop + Johnny Lightning ’67 Blue Metallic Coupe wheels and red-letter tires transplanted)
After scouring various websites and stores,
I finally found a light blue spray paint
that matches the exterior color of Green Light’s Corvette perfectly!
(It’s Tamiya’s “PS-49 = Sky Blue,” a spray paint specifically for polycarbonate.)
[Modification Process]
(I applied chrome plating to the window frames, sometimes masking them and sometimes not, depending on the situation. I corrected any overspray by dabbing a tissue with thinner.)
Modification Process:
Disassembly Process & Tire/Stance Adjustment:
1–4: Please refer to the modification steps for Project “1” here.
Top Height & Fitting:
5: Use a file to shave down the lower rear section of the windshield and hardtop parts on the HT side. Adjust so that, when viewed from the side, the top slopes downward toward the rear by about 5 degrees (this is where your skill really shows—be careful not to sand too much).
6: After masking the hardtop section, paint it with Tamiya Sky Blue for polycarbonate. Once dry, carefully peel off the masking tape.
ーーーーーー>Managed to finish this one successfully!!
7: Using a metal silver marker, paint the window trim areas that were erased by the marker, eyeballing the details…
8: Once the chrome silver paint is completely dry, carefully snap the windshield and hardtop sections back into their original positions,
9: The most critical part of this project:
Using pliers or a similar tool, while securely covering the rear deck with a handkerchief or similar material, bend it upward about three times to
ーーーーー> Give the sagging rear end a ‘Hip-Up!!’
ーーーー> Once reassembled, it’s finished.
【Finished Model Gallery】
4’: Light Blue Metallic, matching hardtop, with blue-letter tires
(Greenlight ’67 Light Blue Metallic body + Greenlight ’67 Racing Version hardtop + wheels and blue-letter tires transplanted from Johnny Lightning’s display case edition ’67 Light Blue Metallic Coupe)
(This is the star of this build: the Auto World 1:64 Interlocking Gallery Showcase w/ Exclusive 1967 / 427 Corvette. This Corvette is the only one that comes with wheels featuring blue-letter tires.)
[Modification Process]
(I happened to come across a very rare 1967 Corvette with tires listed as a loose part on eBay, so I decided to add this version to the project on short notice.)
[Modification Process]
1: Using a drill, remove the rivets from the 1967 coupe body (the tire donor),
and while making fine adjustments to the axle position and tread, swap them out for the tire and wheel set from the previously completed “Modification Example #4.”
[Finished Product Gallery]
5: Tuxedo Black, with Black Hardtop
(Greenlight ’67 Tuxedo Black body and tires + Greenlight ’67 Racing Version hardtop [already painted sky blue])
ーーーーーーー>In the end, I really liked this “Black Panther” look! (The wheels are 14 inches, so it feels a bit off, but… I’ll just have to put up with it.)
ーーーーーーー>In the “My Favorite Design” edition of the article, I’d like to focus mainly on photos of this “Black Panther” version!!
【Miniature Cars Used】
(Since this is Greenlight’s meticulously crafted ’67 Corvette, it features detailed improvements such as revised wheel size and tire width, enhanced paint quality, and more precise tampo printing, making it the best choice available right now. ーーーー>Perhaps because there was a large supply, it’s now available at a bargain price—a real steal!!)
【Modification Process】
As mentioned in the previous modification article,
* Remove the rivets,
* Carefully detach the dashboard and windshield sections,
* Replace them with the black hardtop used in Modification Example [#3].
* After making minor adjustments to the axles and track width,
* Reattach the body to the chassis, and it’s complete.
【Completed Model Gallery】
* It was a lot of work, but… I’ll never forget Greenlight’s 1967 Corvette Roadster!!
(This is the 1967 Coupe from Auto World, which I also used extensively this time. ——> This product uses the same mold as the one released by their subsidiary, Johnny Lightning. Since it’s a newer model, the “design” is exceptionally well-executed, and it looks fantastic in photos even without any modifications. ———> If you carefully outline the window frames with a chrome marker, it becomes even more perfect…)
I relied heavily on these 1966 and 1967 Corvette Roadsters from Greenlight this time. I acquired over 10 of them and used 8 for modifications.
I won’t let this deter me,
and if there’s another die-cast car I absolutely want to make look cool,
I’d like to thoroughly modify it just like this time,
and keep a three-dimensional model
that I’m truly satisfied with right here.
Announcement:
In the near future,
I plan to thoroughly work on this area.
Stay tuned…
Regarding this blog and its content:
My goal in writing these blog posts is to document how I have satisfied and fulfilled my curiosity and desire to explore “beauty and deliciousness” by elucidating my personal, distinctive criteria for evaluation (including my own quirks) through my involvement with three-dimensional modeling (including cooking).
Consequently, while I pay the utmost attention to the numbers, dates, and detailed data that appear in my articles, it is possible that I may occasionally make significant errors or misunderstandings. In particular, key specifications and dates in automotive articles can often be confusing, so I would appreciate it if you would consider them merely as a reference.
For my part, I feel that I insert dates and data into the articles as objective material to create a “flow” that connects my personal evaluations of exterior design and taste to the broader themes explored in the latter half. What I ultimately prioritize are the new “perspectives” and “unexpected connections between information” that emerge from the chaotic jumble of memories in my own mind. The various data points are needed secondarily as part of that “flow” to generate that momentum.
As a slight digression, in the world of rakugo—a form of storytelling I love—there is a playful tradition called “sandaibana,” where a performer weaves a single story using three topics solicited from the audience on the spot. I feel like I’m doing something similar here, using the characteristics of three-dimensional forms and (the taste of food) as my prompts. The countless ideas that flit through my mind during this process are completely unexpected and delightful, often leading me to drastically change the content of future articles or sparking new developments.
How this blog works:
“Spots and lines of curiosity x whimsical mental circuits = unexpected new developments”
This blog may be a bit self-indulgent, but I hope you’ll continue to follow along.
Note: To create the “flow” described above, I use my own miniature cars and home-cooked meals for photos whenever possible. However, I do borrow the absolute minimum necessary illustrations and photos from other bloggers’ articles and company websites. (I edit them to fit the article’s content and post them at the lowest possible resolution.) If there are any issues, please contact me and I will remove them immediately.
Update 2: You are free to use the photos of die-cast cars and other images (taken by me) featured in this blog’s posts in any way you like without permission. I create these posts with the understanding that my personal creativity belongs to me alone.
Translated with DeepL.com
これはCTAサンプルです。
内容を編集するか削除してください。